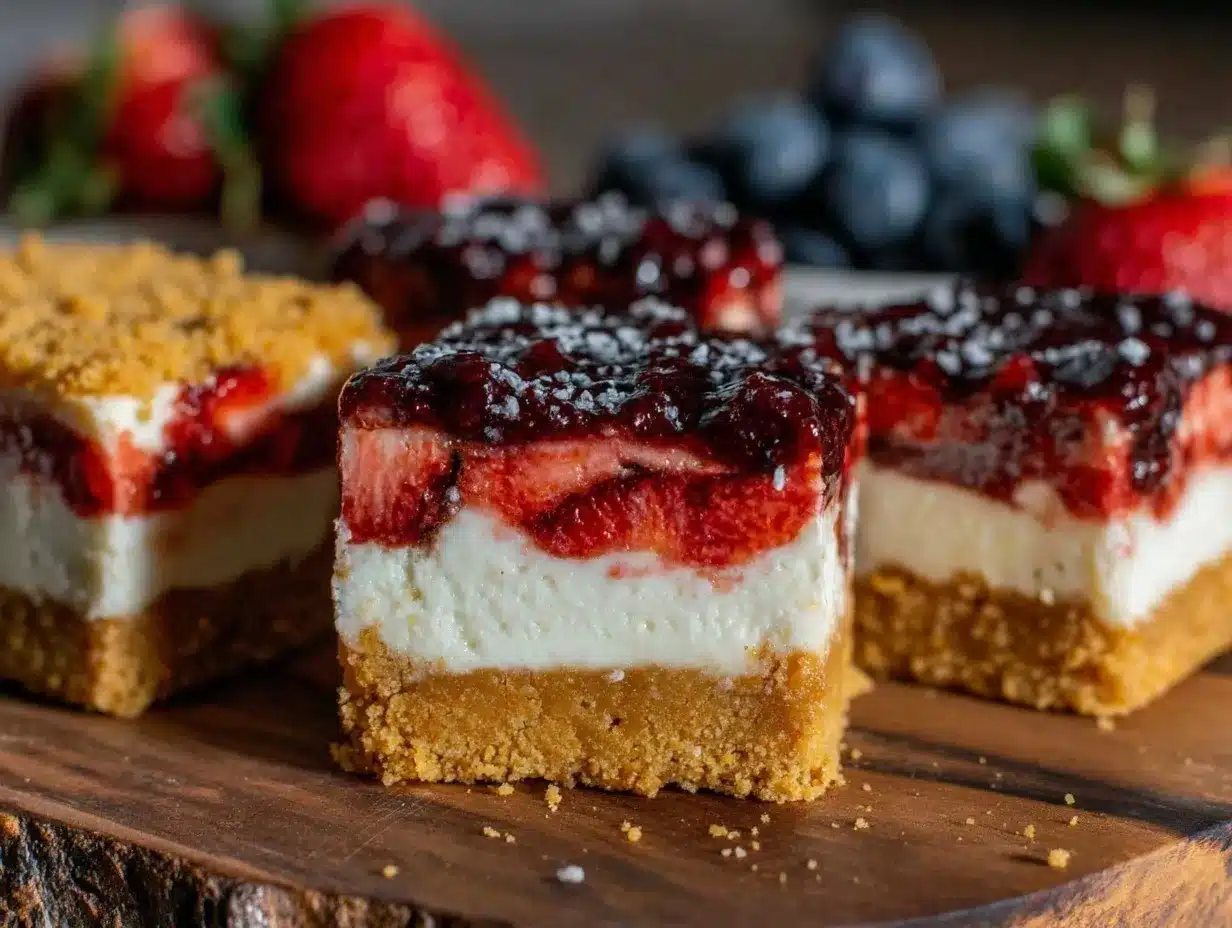
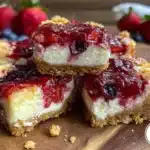
“Are you really making those red, white, and blue cheesecake bars again?” my neighbor joked as she spotted me hauling the baking tray out onto the porch. Honestly, I can’t blame her—once summer hits, these bars become my go-to dessert for every barbecue and casual get-together. The truth is, they started out as a bit of an experiment. I wanted something that captured that classic patriotic vibe without fussing over a complicated dessert. So, I grabbed a box of graham crackers, some cream cheese, and a handful of berries, thinking it’d be a quick throw-together thing. But, man, those first bites surprised me—tangy, creamy, with just the right crunch from the graham crust. It was one of those happy kitchen accidents that you don’t mind repeating.
Now, these Flavorful Red White and Blue Cheesecake Bars with Graham Crust are more than just a festive treat; they’re a little slice of summer nostalgia I keep coming back to. I love how the fresh berries pop against that smooth cheesecake layer, and the crust has a buttery snap that makes every bite satisfying. Plus, they’re easy enough to whip up even when you’re juggling a million things at once—like when the kids are running around or you’re trying to finish prepping for a last-minute picnic. It’s funny how a dessert so simple can feel like a small celebration all on its own, you know?
What keeps me coming back is the way these bars balance flavor and ease without feeling like you’re settling for less. And if you’re thinking this is just another cheesecake recipe, I promise it’s got enough personality—and, well, that graham crust—that it stands out. Somehow it’s become my quiet secret for making any summer gathering feel a bit more special.
Why You’ll Love This Recipe
Let me tell you why these Flavorful Red White and Blue Cheesecake Bars have earned a permanent spot in my recipe box:
- Quick & Easy: From start to finish, these bars take about 45 minutes plus chilling time. Perfect for busy days when you want dessert without the hassle.
- Simple Ingredients: No need to make a special trip to the store—graham crackers, cream cheese, and fresh or frozen berries are usually hanging out in the pantry or fridge.
- Perfect for Patriotic Occasions: Whether it’s the Fourth of July, Memorial Day, or just a summer BBQ, these bars bring that festive red, white, and blue touch effortlessly.
- Crowd-Pleaser: I’ve yet to meet a kid or adult who didn’t ask for seconds (or thirds). The combination of creamy cheesecake with a crunchy crust is just irresistible.
- Unbelievably Delicious: The graham crust adds a buttery, slightly salty crunch that pairs beautifully with the smooth, tangy cheesecake and fresh berries.
What really sets this recipe apart is the balance of textures and colors that make it feel festive without being over the top. I like to blend cottage cheese into the filling sometimes for an ultra-smooth texture that’s not too sweet. It’s a subtle trick I picked up from testing different versions. Also, the berry layers are lightly sweetened just enough to let their natural flavors shine through. This isn’t just a red, white, and blue dessert—it’s one that makes you close your eyes and savor that creamy, fruity goodness.
If you want to pair this with something savory, these bars are just as at home next to a plate of loaded nachos supreme or even a bowl of creamy beer cheese pretzel dip. It’s a dessert that fits right in with the casual, festive vibe of summer entertaining.
What Ingredients You Will Need
This recipe uses simple, wholesome ingredients that come together easily but deliver bold flavors and satisfying textures without fuss. Most of these are pantry staples or fresh produce you can find year-round.
- For the Graham Crust:
- 1 ½ cups graham cracker crumbs (about 10 full sheets, crushed finely)
- ⅓ cup unsalted butter, melted (adds richness and helps the crust hold together)
- 2 tablespoons granulated sugar (balances the buttery flavor)
- For the Cheesecake Filling:
- 16 oz (450g) cream cheese, softened (use full-fat for best creaminess)
- ½ cup granulated sugar
- 1 teaspoon vanilla extract (I prefer Nielsen-Massey for pure flavor)
- 2 large eggs, room temperature
- ¼ cup sour cream (adds tang and smooth texture)
- For the Berry Topping:
- 1 cup fresh strawberries, sliced (or frozen, thawed – fresh is best for texture)
- 1 cup fresh blueberries
- 1 tablespoon granulated sugar (optional, depending on berry sweetness)
Ingredient Selection Tips: When picking graham crackers, I usually go with a brand that’s not too sweet and has a nice honey flavor—it makes a difference. For the berries, if you’re making these outside of peak summer, frozen berries work fine but be sure to drain excess liquid to avoid sogginess. You can also substitute sour cream with plain Greek yogurt if you want a lighter option, though it changes the texture slightly.
For a gluten-free crust, crushed gluten-free graham crackers or almond flour are good swaps. And if you want to turn these bars into a dairy-free version, cream cheese alternatives made from cashews or coconut work, but results may vary.
Equipment Needed
- 9×9-inch (23×23 cm) square baking pan – This size works perfectly for bars that serve about 9 people.
- Mixing bowls – One large bowl for the crust and another for the filling.
- Electric mixer or stand mixer – Makes blending the cream cheese filling smooth and easy.
- Spatula – Essential for scraping down bowl sides and smoothing the cheesecake layer.
- Measuring cups and spoons – For accurate ingredient amounts (precision really helps cheesecake texture).
- Food processor or rolling pin – To crush graham crackers finely (I tend to use a rolling pin in a zip-top bag for less cleanup).
If you don’t have a square pan, a round 9-inch (23 cm) springform pan can work, but bars will be thicker and baking time might change slightly. I’ve also made these in disposable aluminum pans for easy transport to potlucks.
Cleaning tip: I always line my pan with parchment paper, leaving some overhang for easy removal. It saves a lot of hassle and keeps the bars intact.
Preparation Method
- Prepare the Crust (10 minutes): Preheat your oven to 325°F (163°C). Start by crushing the graham crackers until fine crumbs form—about 1 ½ cups. Mix the crumbs with melted butter and sugar until the mixture looks like wet sand.
- Press the Crust: Transfer the crumb mixture into your 9×9-inch pan. Use the bottom of a glass or your fingers to press the crumbs evenly and firmly into the pan’s bottom. This helps the crust hold together after baking.
- Bake the Crust: Pop the crust into the oven and bake for 10-12 minutes. You want it lightly golden—don’t skip this step, or the crust might turn soggy later. After baking, set it aside to cool slightly while you prepare the filling.
- Make the Cheesecake Filling (10-15 minutes): In a large bowl, beat the softened cream cheese with sugar and vanilla until silky and lump-free. It’s normal to have a few lumps at first—keep mixing until smooth.
- Add Eggs and Sour Cream: Crack in the eggs one at a time, mixing gently after each. Stir in the sour cream and mix just until combined. Overmixing can cause cracks during baking.
- Pour Filling Over Crust: Carefully pour the cheesecake batter over the warm crust, smoothing the top with a spatula.
- Add the Berry Topping: Distribute the sliced strawberries and blueberries evenly over the cheesecake layer. You can gently press some berries into the batter, but don’t stir them in.
- Bake the Bars: Bake at 325°F (163°C) for 35-40 minutes. The edges should be set and slightly puffed, while the center still jiggles a little when you shake the pan.
- Cool and Chill: Let the bars cool completely on the counter for about an hour, then refrigerate for at least 3 hours or overnight. This chilling step is crucial for cheesecake bars to firm up properly.
- Cut and Serve: Use the parchment paper overhang to lift the bars out of the pan. Slice into squares with a sharp knife, wiping it clean between cuts for neat edges.
Troubleshooting tips: If your crust feels crumbly after baking, press it more firmly before baking next time. If the cheesecake cracks, it might have been overmixed or baked at too high a temperature. Low and slow is the key! Also, letting the cream cheese soften fully before mixing makes a huge difference to the texture.
Cooking Tips & Techniques
One thing I learned the hard way is that the texture of the cheesecake filling depends heavily on how you handle the cream cheese. Always let it soften to room temperature before starting. Cold cream cheese leads to lumpy batter, and nobody wants that.
When mixing the eggs in, beat gently and don’t overdo it. Overmixing incorporates too much air, which can cause cracks or holes in the finished bars. I usually mix at medium speed just until combined.
Another tip is to bake the crust first. Skipping this step means the crust gets soggy from the filling and berries, which ruins the texture. Also, giving the crust a little time to cool before pouring in the filling prevents it from mixing or crumbling.
For the berries, if you’re using frozen, drain them well and pat dry with paper towels. Too much moisture can make the bars watery and mushy. I learned that the first time I tried the recipe with frozen fruit straight out of the bag—lesson learned, for sure!
When slicing the bars after chilling, run your knife under hot water and dry it before cutting. It helps get clean slices without tearing the crust or cheesecake.
Lastly, multitasking tip: While the crust bakes, you can soften the cream cheese and prep the berries. It makes the whole process feel smoother, especially when you’re juggling kitchen time with other things, like stirring a pot of spring vegetable fettuccine alfredo simmering away for dinner.
Variations & Adaptations
This recipe is pretty flexible, and I’ve tried a few tasty twists over time:
- Berry Swaps: Instead of strawberries and blueberries, try raspberries and blackberries for a different flavor combo. Or make it tropical with mango and kiwi slices (though that steers away from the red-white-blue theme!).
- Gluten-Free Crust: Use almond flour mixed with a bit of coconut oil instead of graham crackers for a grain-free, nutty base. It’s a bit softer but still delicious.
- Flavor Boost: Add a teaspoon of lemon zest to the cheesecake filling for a bright, fresh note that complements the berries beautifully.
- Dairy-Free Version: Swap cream cheese for a plant-based alternative like cashew cream cheese and use vegan butter in the crust. Results can vary, but it’s a nice option for dairy intolerances.
- Swirled Cheesecake: Before baking, swirl a spoonful of pureed berries through the cheesecake batter for a marbled effect. It looks impressive and tastes great, too.
Personally, I once tried layering the filling with a thin raspberry jam layer between the crust and cheesecake. It added a nice tartness but made the bars a little more fragile, so I prefer keeping the berries on top now.
Serving & Storage Suggestions
These cheesecake bars are best served chilled, straight from the fridge. The firm texture and cool temperature make each bite refreshing, especially on a hot summer day. For presentation, I like to dust them lightly with powdered sugar or garnish a couple of fresh mint leaves on top.
They pair wonderfully with a cup of iced tea or a sparkling lemonade for a festive vibe. If you’re serving at a party, placing them alongside some savory options—like crispy Nashville hot chicken tenders or a big bowl of loaded nachos—creates a balanced spread that keeps everyone happy.
For storage, keep the bars in an airtight container in the refrigerator. They last well for up to 4 days, though honestly, they rarely last that long in my house. You can also freeze them: wrap individual bars tightly in plastic wrap and place in a freezer-safe container for up to 2 months. Thaw overnight in the fridge before serving.
Reheating cheesecake bars isn’t really recommended since it affects texture, but if you want to take the chill off, leave them out at room temperature for 10-15 minutes before eating. The flavors mellow and the texture softens just right.
Nutritional Information & Benefits
These cheesecake bars offer a delightful treat with an estimated 250-300 calories per serving (depending on portion size). They provide a good source of protein thanks to the cream cheese and eggs, and the berries add a hit of antioxidants and vitamin C.
The graham cracker crust adds some carbs and a touch of fiber if you choose whole grain crackers. For those watching sugar intake, you can reduce the sugar slightly or use natural sweeteners like maple syrup, though the texture may vary.
This recipe is naturally gluten-containing unless you swap the crust as noted. It’s vegetarian-friendly but not vegan without adaptations.
From a wellness perspective, I appreciate that this dessert feels indulgent but uses real, straightforward ingredients. The fresh berries bring a natural sweetness without relying solely on added sugars, which makes it a little easier to enjoy guilt-free.
Conclusion
If you’re looking for a dessert that brings a pop of color, a creamy texture, and the nostalgic flavor of summer all in one, these Flavorful Red White and Blue Cheesecake Bars with Graham Crust are a no-fail choice. They’re easy enough for a last-minute dessert but special enough to make any get-together feel festive.
Feel free to tweak the berries or crust to suit your taste or dietary needs—after all, the best recipes are the ones that adapt to you. I keep coming back to this recipe because it hits that sweet spot of comfort and celebration without extra fuss, and I have a feeling you’ll appreciate that too.
When you make these bars, I’d love to hear how they turned out! Did you try any variations or pair them with your favorite dishes? Drop a comment and share your story—I’m always curious to see how readers make a recipe their own.
Here’s to simple, flavorful desserts that bring a little joy to the table.
FAQs
Can I make these cheesecake bars ahead of time?
Absolutely! They actually taste better after chilling overnight, which helps the flavors meld and the bars firm up perfectly.
What’s the best way to store leftover bars?
Keep them in an airtight container in the fridge for up to 4 days or freeze individually wrapped bars for up to 2 months.
Can I use frozen berries instead of fresh?
Yes, but make sure to thaw and drain them well to avoid excess moisture, which can make the bars soggy.
How do I prevent cracks in the cheesecake layer?
Don’t overmix the batter, especially after adding eggs, and bake at a moderate temperature (325°F/163°C). Avoid sudden temperature changes when cooling.
Is there a dairy-free version of this recipe?
You can try using plant-based cream cheese and butter substitutes, but the texture and taste will differ slightly. Experiment with brands that work well for baking.
Pin This Recipe!
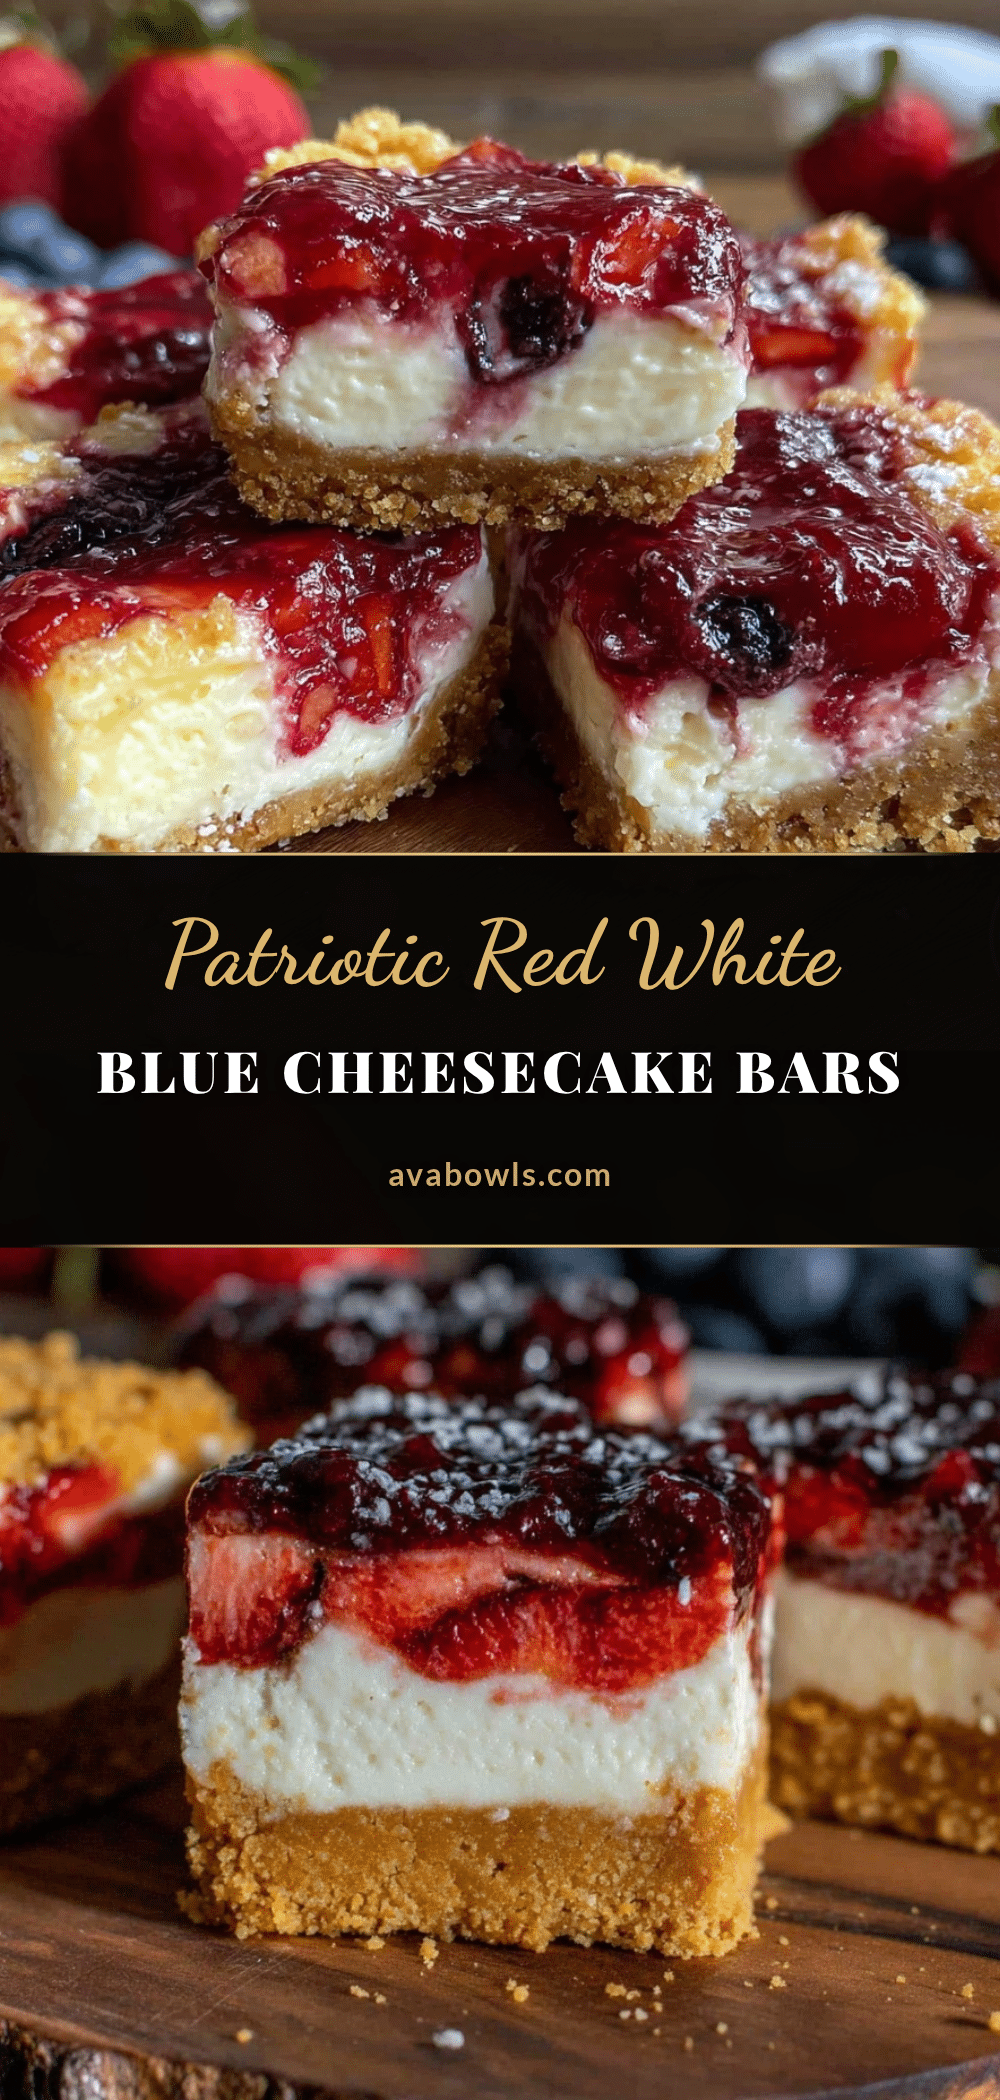
Flavorful Red White and Blue Cheesecake Bars
These easy patriotic cheesecake bars feature a buttery graham cracker crust, creamy cheesecake filling, and fresh red and blue berries for a festive summer dessert.
- Prep Time: 15 minutes
- Cook Time: 45 minutes
- Total Time: 4 hours (including chilling time)
- Yield: 9 servings 1x
- Category: Dessert
- Cuisine: American
Ingredients
- 1 ½ cups graham cracker crumbs (about 10 full sheets, crushed finely)
- ⅓ cup unsalted butter, melted
- 2 tablespoons granulated sugar
- 16 oz (450g) cream cheese, softened
- ½ cup granulated sugar
- 1 teaspoon vanilla extract
- 2 large eggs, room temperature
- ¼ cup sour cream
- 1 cup fresh strawberries, sliced
- 1 cup fresh blueberries
- 1 tablespoon granulated sugar (optional)
Instructions
- Preheat oven to 325°F (163°C). Crush graham crackers into fine crumbs (about 1 ½ cups). Mix crumbs with melted butter and 2 tablespoons sugar until mixture resembles wet sand.
- Press crumb mixture evenly and firmly into the bottom of a 9×9-inch baking pan.
- Bake crust for 10-12 minutes until lightly golden. Let cool slightly.
- In a large bowl, beat softened cream cheese with ½ cup sugar and vanilla extract until smooth and lump-free.
- Add eggs one at a time, mixing gently after each. Stir in sour cream until just combined.
- Pour cheesecake filling over the warm crust and smooth the top.
- Evenly distribute sliced strawberries and blueberries over the cheesecake layer. Optionally, sprinkle 1 tablespoon sugar over berries.
- Bake at 325°F (163°C) for 35-40 minutes until edges are set and center jiggles slightly.
- Cool bars completely on counter for about 1 hour, then refrigerate for at least 3 hours or overnight.
- Use parchment paper overhang to lift bars from pan. Slice into squares with a sharp knife, wiping clean between cuts.
Notes
Let cream cheese soften to room temperature before mixing to avoid lumps. Do not overmix after adding eggs to prevent cracks. Bake crust first to avoid sogginess. Drain frozen berries well to prevent watery bars. Chill bars overnight for best texture. Run knife under hot water before slicing for clean cuts.
Nutrition
- Serving Size: 1 bar (1/9 of the pa
- Calories: 275
- Sugar: 15
- Sodium: 210
- Fat: 18
- Saturated Fat: 10
- Carbohydrates: 22
- Fiber: 1
- Protein: 5
Keywords: cheesecake bars, patriotic dessert, red white and blue dessert, graham cracker crust, summer dessert, easy cheesecake bars