The butternut squash sat on my counter for a full week, looking more like a decorative gourd than something I was actually going to cook. I’d bought it with grand intentions—maybe a soup, maybe a roast—but every time I walked past, I’d grab a handful of baby carrots instead. Then Tuesday happened. I had a friend coming over in an hour, a fridge full of odds and ends, and a sudden, desperate craving for something crispy. Not salad-crispy. Fry-crispy.
I looked at that squash, then at the block of Parmesan staring back at me from the cheese drawer. And I thought—why not? I mean, we sweet potato fry all the time. Why can’t butternut squash get the same treatment? So I peeled it (which, honestly, is the hardest part of this whole recipe), sliced it into fry-shaped sticks, and tossed it with oil, garlic powder, and a mountain of finely grated Parmesan. Twenty-five minutes later, I had a baking sheet full of golden, crispy, salty-sweet sticks that made my friend ask for the recipe before she even sat down.
That’s the thing about these crispy Parmesan butternut squash fries. They feel like a cheat code—like you’re getting away with something, because they taste like indulgent restaurant appetizers but are made from a vegetable that usually gets relegated to fall centerpieces. The Parmesan gets all lacy and crisp around the edges, the squash turns tender on the inside, and the whole thing comes together with ingredients you probably already have. Honestly, this recipe stuck because it solved a real problem: how to make a vegetable the star of snack time without anyone complaining. And that’s a win I’ll take any day.
Why You’ll Love This Recipe
These aren’t your average veggie fries. I’ve tested this recipe about six times to get the texture just right—because nobody wants soggy squash sticks. Here’s why this version actually works.
- Quick & Easy: From counter to table in under 35 minutes. No soaking, no complicated steps. Just slice, toss, and bake.
- Simple Ingredients: You need one butternut squash, some Parmesan, olive oil, and basic pantry spices. That’s it. No trips to specialty stores.
- Perfect for Snacking or Sides: These work as an appetizer for game day, a side for burgers, or a healthier alternative to traditional fries alongside a spicy steak bowl.
- Crowd-Pleaser: I’ve served these to kids, picky eaters, and vegetable skeptics. They disappear every single time. The Parmesan crust does all the convincing.
- Unbelievably Delicious: The contrast between the crispy, cheesy exterior and the soft, sweet interior is genuinely next-level. You’ll catch yourself eating them straight off the baking sheet.
What makes this recipe different from every other squash fry out there? It’s the technique. I grate the Parmesan super fine—almost powdery—so it melts into a thin, crispy shell rather than clumping. And I bake at a higher temperature than most recipes suggest, which gives you that golden-brown crust without drying out the squash. This isn’t just another version of roasted squash. It’s the version that actually delivers on the “fry” promise.
There’s something about that first bite—the crunch, then the sweetness, then the salty Parmesan finish—that makes you close your eyes for a second. It’s comfort food reimagined. Healthier, faster, but with the same soul-soothing satisfaction. And honestly, that’s exactly what we all need more of.
What Ingredients You Will Need
This recipe relies on simple, wholesome ingredients that work together to create big flavor without any fuss. Most of these are pantry staples, which makes these fries perfect for those “I need something good right now” moments.
- Butternut Squash (1 medium, about 2-3 lbs): The star of the show. Look for a squash that feels heavy for its size with firm, unblemished skin. The neck portion is ideal for fries because it’s straight and has fewer seeds. (Pro tip: save the bulbous end for soup—try this creamy butternut squash soup with the leftovers.)
- Parmesan Cheese (½ cup, finely grated): Use the real stuff from a block, not the green can. The pre-shredded stuff has anti-caking agents that prevent proper melting. I prefer Parmigiano-Reggiano for its nutty flavor, but a good domestic Parmesan works too. Grate it on the smallest holes of your box grater until it looks almost like powder.
- Olive Oil (2 tablespoons): Helps the seasoning stick and promotes browning. Extra virgin gives more flavor, but regular olive oil works fine. You can also use avocado oil for a higher smoke point.
- Garlic Powder (1 teaspoon): Adds savory depth without the moisture of fresh garlic. Don’t skip this—it balances the squash’s sweetness perfectly.
- Paprika (½ teaspoon): I use smoked paprika for a subtle warmth, but sweet paprika works too. This is optional but recommended for color and flavor.
- Salt (½ teaspoon): Use fine sea salt for even distribution. The Parmesan adds saltiness too, so don’t overdo it.
- Black Pepper (¼ teaspoon, freshly ground): A little goes a long way. Freshly ground gives more aromatic punch.
- Optional: Cayenne Pepper (⅛ teaspoon): For a tiny kick of heat. Completely optional, but I love the contrast with the sweet squash.
For the best results, use room-temperature ingredients if possible. Cold squash straight from the fridge takes longer to cook evenly. And please, please invest in a good vegetable peeler—it makes the peeling process so much less frustrating. I use a Y-peeler for butternut squash because it handles the curves better than a straight one.
If you want to switch things up, you can substitute the Parmesan with Pecorino Romano for a saltier, more pungent flavor, or use a dairy-free nutritional yeast blend for a vegan version. Just note that the texture will be slightly different without real cheese.
Equipment Needed
You don’t need fancy gadgets for this recipe, which is exactly how I like it. Here’s what you’ll need:
- Baking Sheet (1 large, rimmed): A half-sheet pan (18×13 inches) is ideal. Rimmed is important because the squash releases some moisture as it bakes. Line it with parchment paper for easy cleanup—trust me on this one.
- Sharp Chef’s Knife: Butternut squash is dense and unforgiving. A dull knife is dangerous here. I use an 8-inch chef’s knife, and I make sure it’s sharpened before starting.
- Vegetable Peeler: A Y-peeler makes quick work of the tough skin. I’ve tried straight peelers, and they just don’t handle the curves as well.
- Box Grater or Microplane: For grating the Parmesan into that fine, powdery texture. A microplane gives you the finest result, but the smallest holes on a box grater work too.
- Large Mixing Bowl: For tossing the squash sticks with oil and seasonings. Give yourself room to toss without spilling.
- Cutting Board: A sturdy, non-slip board is essential. I prefer wood because it’s gentler on knife edges.
- Measuring Spoons: For accuracy. Eyeballing garlic powder can lead to sad, bland fries.
If you don’t have a baking sheet, a cast-iron skillet works in a pinch—just watch the cooking time, as cast iron retains heat differently. And if you’re using a convection oven, reduce the temperature by 25°F and check for doneness a few minutes early. I learned that one the hard way after a batch of charcoal-colored fries.
Preparation Method
- Preheat your oven to 425°F (220°C). Line a large baking sheet with parchment paper. Getting the oven hot is crucial—this high heat is what creates that crispy exterior without turning the squash to mush.
- Prepare the butternut squash: Using a sharp chef’s knife, cut off both ends of the squash (about ½ inch from each tip). Stand the squash upright on the flat cut end and slice down the middle to separate the neck from the bulbous bottom. Peel both sections with a vegetable peeler, making sure to remove all the tough skin and the pale green layer just beneath it. Cut the neck into ½-inch thick planks, then slice into ½-inch wide sticks about 3-4 inches long. For the bulb section, cut it in half, scoop out the seeds with a spoon, then slice into similar-sized sticks. (Don’t toss those seeds—roast them like pumpkin seeds for a snack!)
- Grate the Parmesan: While the squash is being prepped, grate ½ cup of Parmesan cheese using the finest side of your box grater or a microplane. The finer the grate, the better it adheres and melts into that crispy shell. Set aside.
- Season the squash: In a large mixing bowl, combine the squash sticks with 2 tablespoons olive oil, 1 teaspoon garlic powder, ½ teaspoon paprika, ½ teaspoon salt, ¼ teaspoon black pepper, and optional ⅛ teaspoon cayenne. Toss well with your hands until every stick is evenly coated. This takes about a minute of gentle tossing—don’t rush it.
- Add the Parmesan: Sprinkle the grated Parmesan over the seasoned squash sticks and toss again gently. The cheese should stick to the oil-coated squash. Don’t worry if some falls off during tossing—you’ll press it on during the next step.
- Arrange on the baking sheet: Spread the squash sticks in a single layer on the prepared baking sheet. Make sure they’re not touching—crowding causes steaming instead of crisping. If some Parmesan falls off, just sprinkle it over the tops. Leave a little space between each fry for air circulation.
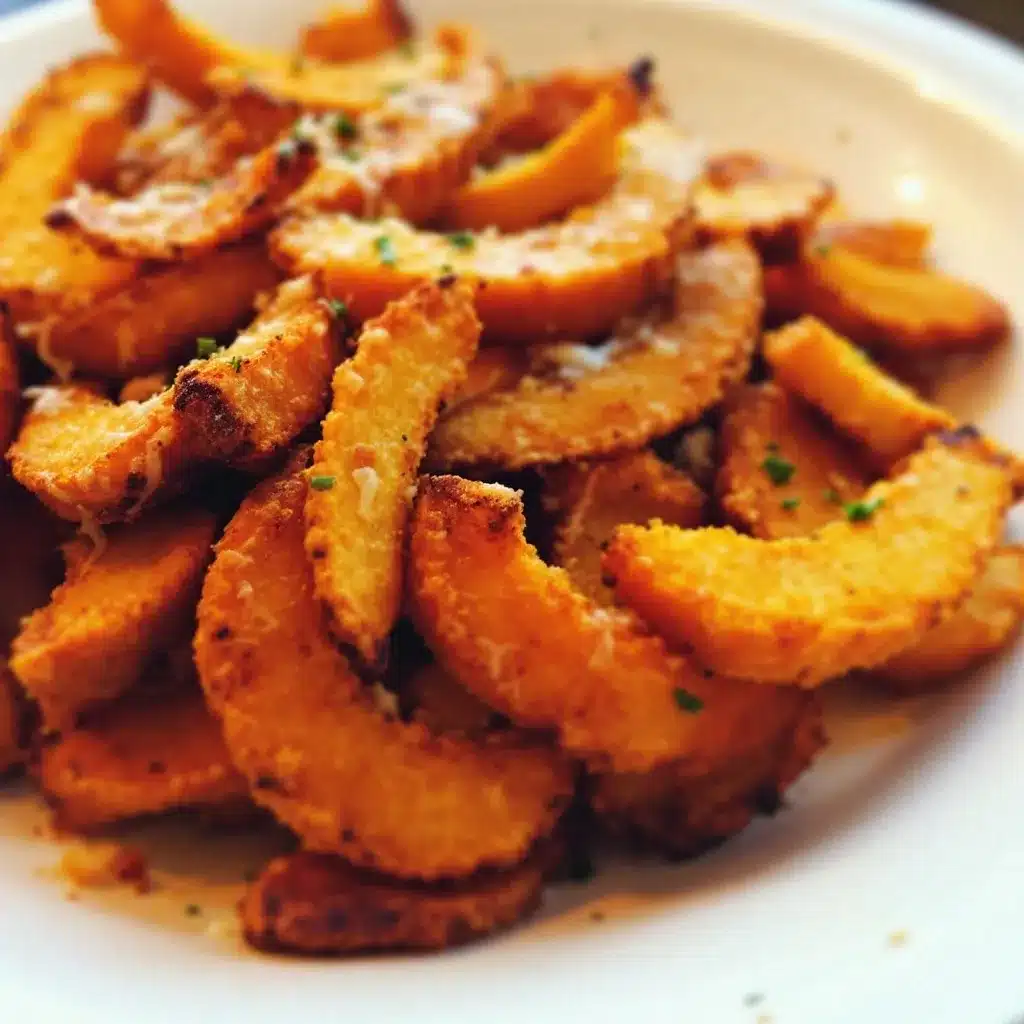
- Bake for 20-25 minutes: Place the sheet on the middle rack and bake for 10 minutes. Remove the sheet, flip each fry carefully using tongs or a spatula, and return to the oven for another 10-15 minutes. The fries are done when they’re golden brown, crispy on the edges, and tender when pierced with a fork. The Parmesan should look lacy and slightly darker in spots—that’s where the flavor lives.
- Cool slightly before serving: Let the fries rest on the baking sheet for 2-3 minutes. This allows the Parmesan crust to set and become extra crispy. Transfer to a serving platter and sprinkle with a tiny pinch of flaky sea salt if desired. Serve immediately while they’re at peak crispiness.
Sensory cues to watch for: At the 10-minute mark, the kitchen should smell nutty and toasty. When flipping, the bottoms should be light golden. At the 20-minute mark, the edges should be dark golden and the cheese should look bubbly and set. A fork inserted into a thicker fry should meet slight resistance but slide through easily.
Common troubleshooting: If your fries are soggy, the oven wasn’t hot enough, or the squash was crowded on the sheet. Next time, use two baking sheets if needed. If the Parmesan is burning before the squash is tender, your grate was too coarse—large cheese bits burn faster. And if the fries are sticking to the parchment, let them cool an extra minute before attempting to flip or remove.
Cooking Tips & Techniques
After making these fries more times than I care to admit, I’ve picked up a few tricks that make a real difference. First, the size of your cuts matters more than you think. Aim for uniform ½-inch sticks. Too thin and they burn before the center cooks; too thick and they’re more like roasted squash chunks than fries. I use the width of my pinky finger as a rough guide—it’s surprisingly accurate.
One mistake I made early on was skipping the flipping step. I thought, “It’s fine, the top will get crispy anyway.” Nope. The bottom stays pale and soft if you don’t flip. Set a timer for 10 minutes and commit to that flip. It’s worth the extra minute.
Another lesson learned the hard way: don’t overcrowd the pan. I tried to cram an entire large squash onto one sheet once, and I ended up with steamed squash sticks that had a vague cheese flavor. Not good. Use two sheets if you need to, and rotate them halfway through baking for even cooking.
For the crispiest results, pat the squash sticks dry with a paper towel after cutting. Squash naturally holds moisture, and too much of it will steam the fries instead of roasting them. This step takes 30 seconds and makes a noticeable difference.
If you’re making these for a party, you can prep the squash sticks up to 24 hours in advance and store them in the fridge in an airtight container. Toss with oil and seasonings just before baking. The Parmesan should be added right before baking too—if it sits too long, it gets clumpy and doesn’t adhere as well.
And here’s a pro tip from my third batch disaster: if you’re doubling the recipe, don’t double the oil. The squash releases water as it bakes, and too much oil makes the coating slide off. Stick to 1.5 tablespoons per squash if you’re making a double batch.
Variations & Adaptations
One of the best things about this recipe is how flexible it is. I’ve tried several variations, and they all bring something different to the table.
- Spicy Chipotle Version: Replace the paprika with 1 teaspoon chipotle powder and add a squeeze of lime juice before serving. The smoky heat pairs beautifully with the sweet squash. I made this version for a game day gathering, and it was gone before the buffalo wings.
- Herb and Garlic Version: Add 1 tablespoon dried rosemary or thyme to the seasoning mix. Fresh herbs work too—just chop them finely and use 2 tablespoons. This version is amazing alongside a hearty Tuscan white bean soup for a cozy winter meal.
- Vegan Parmesan Version: Use ⅓ cup nutritional yeast mixed with 2 tablespoons almond flour and ½ teaspoon salt. It won’t get as crispy, but it’s still delicious. I tested this for a friend with dairy allergies, and she asked for the recipe twice.
- Air Fryer Adaptation: Cook at 375°F for 12-15 minutes, shaking the basket halfway through. No need to flip individually—the air circulation does the work. This is faster and uses less oil, but the texture is slightly less crispy than the oven version.
- Sweet and Savory Version: Add 1 tablespoon maple syrup to the oil before tossing, and reduce the salt to ¼ teaspoon. The maple caramelizes beautifully, creating a sweet-and-salty coating that’s dangerously addictive. I accidentally discovered this when I grabbed the wrong bottle—best mistake ever.
For those with dietary restrictions, these fries are naturally gluten-free and nut-free (if you skip the vegan variation). Just double-check your Parmesan brand for celiac safety, as some aged cheeses can have trace gluten from processing.
Serving & Storage Suggestions
These fries are best served immediately, straight from the oven while the Parmesan is still audibly crispy. But I get it—sometimes you need to make them ahead or deal with leftovers.
Serving temperature: Hot and fresh is ideal. If they cool down, the Parmesan loses its crunch. Serve on a warm platter if possible (just pop it in the oven for a minute while the fries rest).
Dipping sauces: These fries pair beautifully with a creamy Greek yogurt veggie dip with herbs, a simple aioli, or even warm marinara sauce. I’m partial to a honey-mustard dip made with equal parts Dijon and honey. The sweetness plays off the Parmesan beautifully.
What to serve alongside: These fries are versatile enough to accompany almost anything. Try them with a crispy baked buffalo cauliflower bites for a vegetable-forward appetizer spread. Or serve them alongside a simple protein like grilled chicken or salmon for a complete meal.
Storage: Leftover fries can be stored in an airtight container in the refrigerator for up to 3 days. But fair warning—they will lose their crispiness. To reheat, spread them on a baking sheet and pop them in a 400°F oven for 5-7 minutes. The microwave will turn them into sad, soggy squash pieces. Don’t do it. I’ve made that mistake so you don’t have to.
Freezer instructions: You can freeze the baked fries on a sheet pan until solid, then transfer to a freezer bag for up to 2 months. Reheat directly from frozen at 400°F for 10-12 minutes. The texture won’t be quite as good as fresh, but it’s a solid option for meal prep.
Flavor development: Honestly, these don’t improve with time. The magic is in that fresh-from-the-oven crunch. Make only what you’ll eat in one sitting, or be prepared for slightly sad leftovers.
Nutritional Information & Benefits
These fries are a sneaky way to eat more vegetables while feeling like you’re having a treat. Here’s the rough nutritional breakdown per serving (about ¼ of the recipe):
- Calories: ~180
- Total Fat: 10g
- Saturated Fat: 3g
- Carbohydrates: 20g
- Fiber: 4g
- Sugar: 6g (natural, from the squash)
- Protein: 7g
- Sodium: 380mg
- Vitamin A: 290% of the Daily Value
- Vitamin C: 35% of the Daily Value
Butternut squash is a nutritional powerhouse. It’s packed with beta-carotene (which your body converts to vitamin A), fiber for digestive health, and antioxidants that support immune function. The Parmesan adds calcium and protein, making this a more balanced snack than traditional fries.
This recipe is naturally gluten-free and can be made vegetarian or vegan with the substitutions mentioned earlier. It’s also lower in carbs than potato fries, making it a good option for those watching their carbohydrate intake. Just be mindful of portion sizes if you’re tracking—they’re easy to eat in large quantities because they’re so good.
From a wellness perspective, I love that these fries let me enjoy a crispy, satisfying snack without the guilt. They’re proof that eating vegetables doesn’t have to feel like a chore. Sometimes it feels like a celebration.
Conclusion
These crispy Parmesan butternut squash fries have become a staple in my kitchen for good reason. They’re simple enough for a Tuesday night snack but impressive enough for guests. The combination of sweet squash, savory Parmesan, and that irresistible crunch hits every note you could want from a fry—without the deep-frying or the guilt.
I love that this recipe is forgiving. You can tweak the seasonings, swap the cheese, or adjust the cooking method based on what you have. It’s the kind of recipe that encourages experimentation, which is exactly how great cooking happens. Don’t be afraid to make it your own.
If you try these fries, I’d love to hear how they turned out. Did you add a special spice blend? Discover a new dipping sauce? Burn a batch and learn something? Share your experience in the comments below—your tweaks might inspire someone else’s dinner tonight. And if you loved them, pass the recipe along to a friend who needs more vegetables in their life (but in the most delicious way possible).
Here’s to crispy edges, messy fingers, and the joy of realizing that healthy food can be genuinely, unapologetically delicious. Happy cooking!
Frequently Asked Questions
Can I use frozen butternut squash for this recipe?
I wouldn’t recommend it. Frozen squash releases a lot of water as it thaws, which makes it impossible to get that crispy exterior. Fresh squash is really the way to go here. If you’re short on time, many grocery stores sell pre-cut fresh butternut squash in the produce section—just look for pieces that are uniform in size.
Why are my fries not getting crispy?
This usually happens for one of three reasons: the oven wasn’t hot enough (make sure it’s fully preheated to 425°F), the fries were overcrowded on the baking sheet (they need space to breathe), or the squash wasn’t dried properly before seasoning. Pat those sticks dry with a paper towel, and don’t skip the flipping step.
Can I make these in an air fryer instead?
Absolutely! Air fryer instructions are in the variations section above. The air fryer actually does a fantastic job with these because the circulating air creates even crispiness. Just work in batches to avoid overcrowding the basket.
How do I prevent the Parmesan from burning?
Use finely grated Parmesan (not shredded) and keep an eye on the oven during the last 5 minutes of baking. If the cheese is browning too quickly, tent the baking sheet loosely with foil for the remaining time. Also, make sure your Parmesan isn’t too coarse—large bits burn before the squash is done.
Can I prepare these ahead of time for a party?
You can prep the squash sticks up to 24 hours in advance and store them in the fridge. Toss with oil and seasonings just before baking, and add the Parmesan right before they go in the oven. For the best texture, bake them fresh and serve immediately. If you need to reheat, use the oven, not the microwave.
Pin This Recipe!
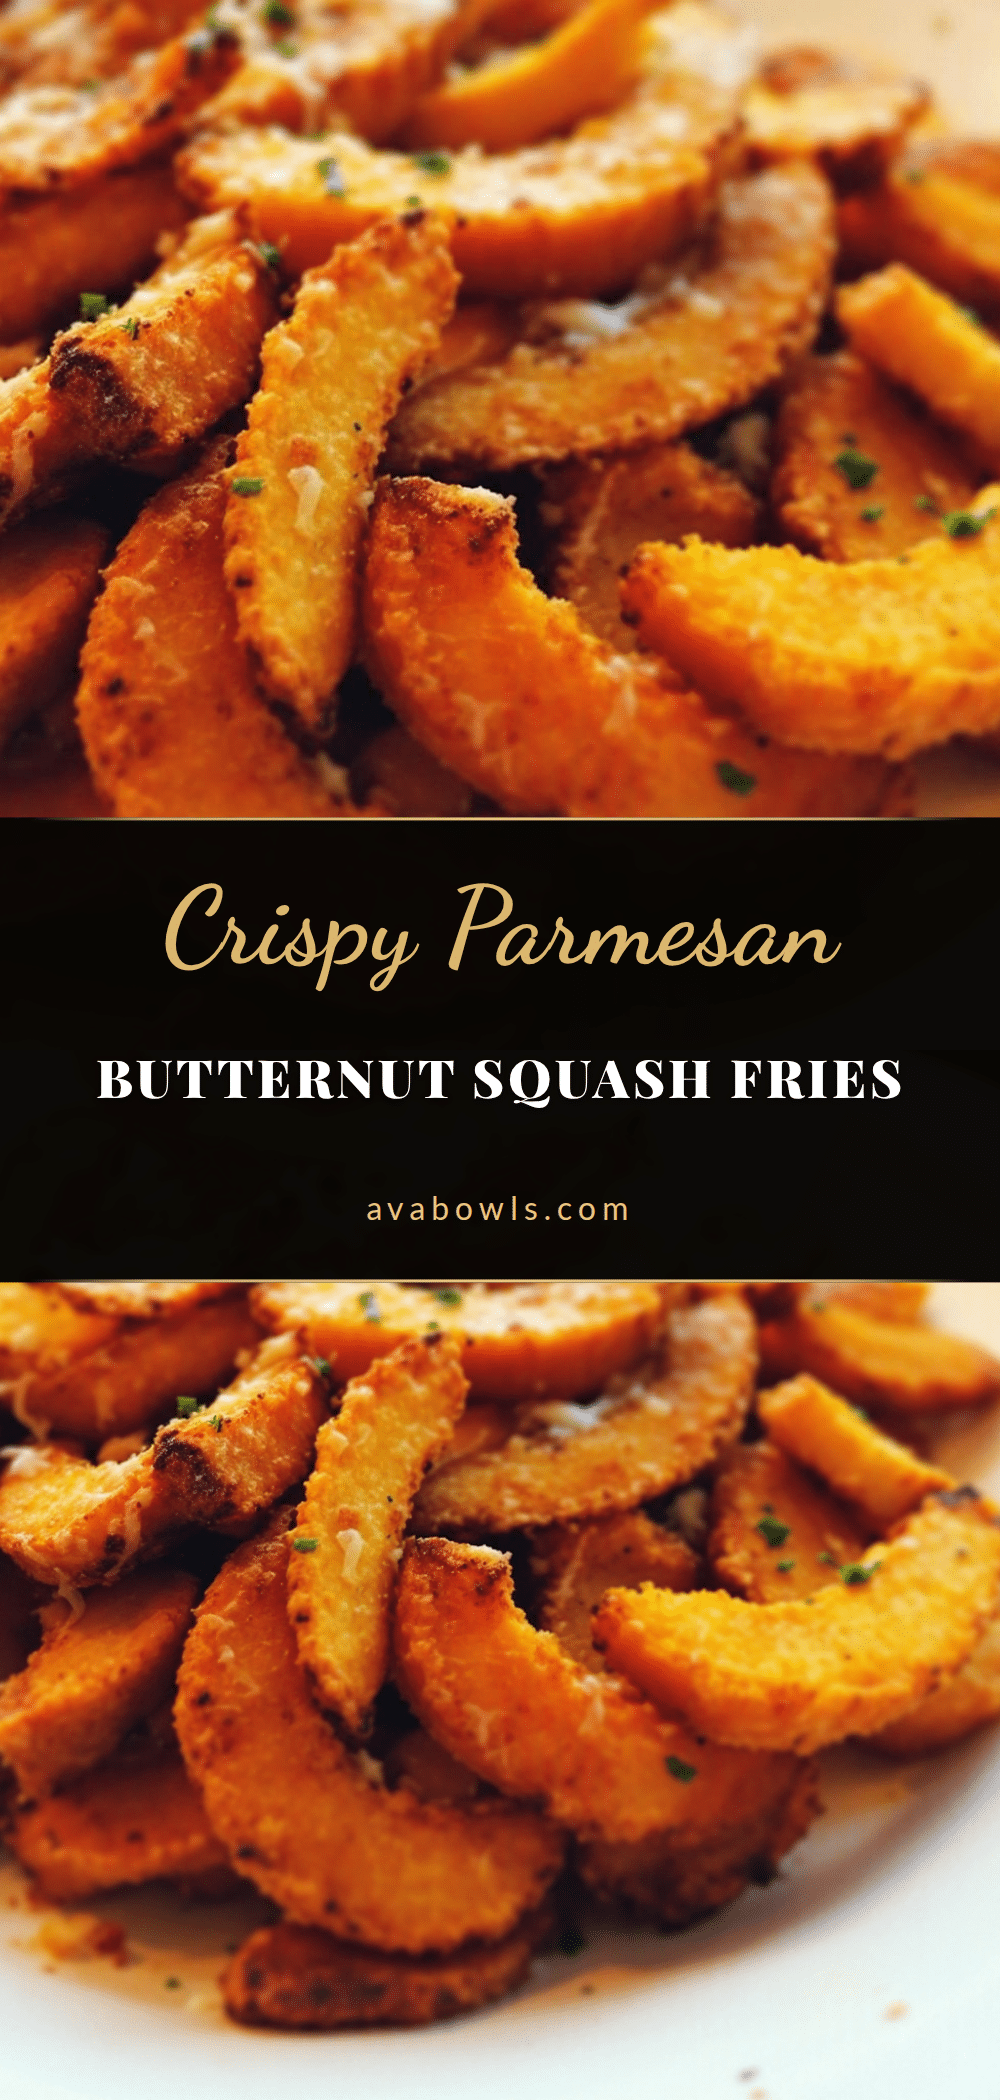
Easy Crispy Parmesan Butternut Squash Fries Recipe
These crispy Parmesan butternut squash fries are a quick and easy snack or side dish, featuring a crunchy, cheesy exterior and tender, sweet interior. Ready in under 35 minutes, they’re a healthier alternative to traditional fries that everyone will love.
- Prep Time: 10 minutes
- Cook Time: 25 minutes
- Total Time: 35 minutes
- Yield: 4 servings 1x
- Category: Side Dish
- Cuisine: American
Ingredients
- 1 medium butternut squash (about 2–3 lbs)
- ½ cup finely grated Parmesan cheese
- 2 tablespoons olive oil
- 1 teaspoon garlic powder
- ½ teaspoon paprika (smoked or sweet)
- ½ teaspoon fine sea salt
- ¼ teaspoon freshly ground black pepper
- ⅛ teaspoon cayenne pepper (optional)
Instructions
- Preheat your oven to 425°F (220°C). Line a large baking sheet with parchment paper.
- Prepare the butternut squash: Cut off both ends, stand upright, and slice down the middle to separate the neck from the bulb. Peel both sections with a vegetable peeler. Cut the neck into ½-inch thick planks, then into ½-inch wide sticks about 3-4 inches long. For the bulb, cut in half, scoop out seeds, and slice into similar-sized sticks.
- Grate the Parmesan cheese using the finest side of a box grater or a microplane until you have ½ cup.
- In a large mixing bowl, combine the squash sticks with olive oil, garlic powder, paprika, salt, black pepper, and optional cayenne. Toss well with your hands until evenly coated.
- Sprinkle the grated Parmesan over the seasoned squash sticks and toss gently to coat.
- Arrange the squash sticks in a single layer on the prepared baking sheet, making sure they are not touching.
- Bake for 20-25 minutes, flipping each fry carefully after 10 minutes. The fries are done when golden brown, crispy on the edges, and tender when pierced with a fork.
- Let the fries rest on the baking sheet for 2-3 minutes before serving. Sprinkle with flaky sea salt if desired and serve immediately.
Notes
For the crispiest results, pat the squash sticks dry with a paper towel after cutting. Use finely grated Parmesan (not pre-shredded) for best melting. Do not overcrowd the baking sheet; use two sheets if needed. Leftovers can be stored in an airtight container in the refrigerator for up to 3 days and reheated in a 400°F oven for 5-7 minutes.
Nutrition
- Serving Size: 1/4 of recipe
- Calories: 180
- Sugar: 6
- Sodium: 380
- Fat: 10
- Saturated Fat: 3
- Carbohydrates: 20
- Fiber: 4
- Protein: 7
Keywords: butternut squash fries, crispy Parmesan fries, healthy fries, baked fries, vegetable fries, easy snack, gluten-free


