The plate was empty before I could even grab a napkin. That was the third time that week, honestly. My niece had just finished her third “Vampire Bite,” wiped a smear of red velvet crumbs from her chin, and looked at me with those wide, hopeful eyes. She didn’t ask for another one. She just waited, knowing I’d make more. It’s a strange feeling, being the family chef who is suddenly expected to provide themed snacks on demand.
I remember the first time I made these. I was trying to recreate the flavor of a classic red velvet cake but in a bite-sized format that wouldn’t make a mess. You know how it goes with cake balls; they can be dry if you overbake the base or too sweet if you overload the frosting. I wanted something that felt special, like a party treat, but was actually easy enough for a Tuesday night.
The result was unexpected. The rich cocoa and buttermilk flavor of the cake base, combined with the tangy cream cheese coating, created this perfect balance. It’s not just sweet. It’s complex. And those little white “fang” decorations? They turned out to be the best part. They added a playful touch that made kids and adults alike reach for just one more.
I didn’t plan for them to become a staple. I just wanted to save some leftover cake. But when you see people enjoying your food, really enjoying it, you know you’ve struck gold. These Vampire Bite Red Velvet Cake Balls are now in my regular rotation. They are festive, they are delicious, and they disappear fast. Let’s face it, if you have red food coloring and a box of cake mix, you already have half the battle won. The rest is just mixing and rolling. It’s that simple.
Why You’ll Love This Recipe
I’ve tested a lot of cake ball recipes over the years. Some are too heavy, relying on too much frosting. Others fall apart the second you try to roll them. This version is different because it strikes a perfect balance. The cake base is moist but firm enough to hold its shape, and the coating is smooth and creamy without being overly sweet. It’s the kind of recipe that feels like a cheat code for baking.
Here is why these Vampire Bite Red Velvet Cake Balls stand out:
- Quick & Easy: You can have these done in under an hour if you start with a boxed mix. It’s perfect for busy weeknights or last-minute cravings when you need something sweet but don’t want to bake a whole cake.
- Simple Ingredients: No fancy grocery trips needed. You likely already have cake mix, cream cheese, and butter in your kitchen. If you don’t, they are pantry staples.
- Perfect for Parties: Whether it’s Halloween, a Valentine’s Day party, or just a random Friday night, these are great for potlucks. They are finger food, which means no plates or forks required.
- Crowd-Pleaser: Always gets rave reviews from kids and adults alike. The “vampire” theme is fun for kids, but the actual flavor is sophisticated enough for adults.
- Unbelievably Delicious: The texture and flavor combo is next-level comfort food. The tang of the cream cheese cuts through the sweetness of the red velvet, making each bite addictive.
What makes this recipe different from the rest is the technique. I’ve found that mixing the cake crumbs with just enough frosting to bind them, rather than drowning them, keeps the flavor intense. It’s not just a mouthful of sugar; it’s a mouthful of red velvet cake. It’s comfort food reimagined—fun, fast, but with the same soul-soothing satisfaction as a slice of cake. It’s perfect for impressing guests without stress, or turning a simple meal into something memorable.
What Ingredients You Will Need
This recipe uses simple, wholesome ingredients to deliver bold flavor and satisfying texture without the fuss. The beauty of cake balls is that they rely on a few key components to create a rich, decadent treat. You don’t need exotic spices or hard-to-find items.
- Red Velvet Cake Mix (15.25 oz): I recommend using a standard box like Betty Crocker or Duncan Hines for consistency. It provides the base flavor and color. If you want to go from scratch, a homemade red velvet batter works too, but the box mix saves time.
- Vegetable Oil (1/3 cup): This keeps the cake moist. Canola oil works as well if you prefer a neutral taste.
- Water (1/3 cup): Standard hydration for the cake mix. Some people use milk for extra richness, which is a good swap.
- Eggs (2 large): These bind the cake together. Room temperature eggs are best for even mixing.
- Unsalted Butter (1/2 cup, softened): Essential for the frosting. Using high-quality butter makes a huge difference in taste.
- Cream Cheese (8 oz, brick style, softened): This is the star of the coating. Use full-fat cream cheese for the best texture. Light cream cheese can make the coating too soft.
- Powdered Sugar (2 cups): Sifted to avoid lumps in your frosting. This adds sweetness and structure.
- Vanilla Extract (1 tsp): Enhances the flavor profile. Pure vanilla is worth the extra cost.
- Red Food Coloring (Gel preferred): To keep the vibrant red color in the coating. Gel coloring is more potent and doesn’t add extra liquid.
- White Chocolate Chips or Candy Melts (1 cup): For the “fangs.” White chocolate chips work, but candy melts are easier to dip and set quickly.
- Mini Marshmallows (Optional): Some people use these for fangs, but I prefer the texture of white chocolate.
You can substitute vegetable oil with melted coconut oil for a slightly different flavor. If you need a gluten-free option, use a certified gluten-free cake mix. For a dairy-free version, use vegan butter and cream cheese alternatives, though the texture might be slightly different.
Equipment Needed
You don’t need a fancy kitchen to make these. A few basic tools will get the job done.
- Bundt Pan or Standard Cake Pan: I prefer a Bundt pan because it bakes evenly and is easy to remove. A standard 9×13 pan works too, just let it cool completely before crumbling.
- Stand Mixer or Hand Mixer: Essential for whipping the cream cheese and butter together. Doing this by hand is possible but tiring.
- Baking Sheet: Line it with parchment paper to prevent sticking.
- Cookie Scoop or Ice Cream Scoop: This helps you roll uniform balls. Uniformity ensures they look professional and eat evenly.
- Small Saucepan or Microwave-Safe Bowl: For melting the white chocolate or candy melts for the fangs.
- Piping Bag or Ziploc Bag: Optional, but helpful if you want to pipe details onto the cake balls.
If you don’t have a stand mixer, a strong whisk and a bit of elbow grease will work. For melting chocolate, a microwave in 30-second intervals works best to prevent burning. A simple Ziploc bag with a corner cut off is a great budget-friendly alternative to a piping bag.
Preparation Method
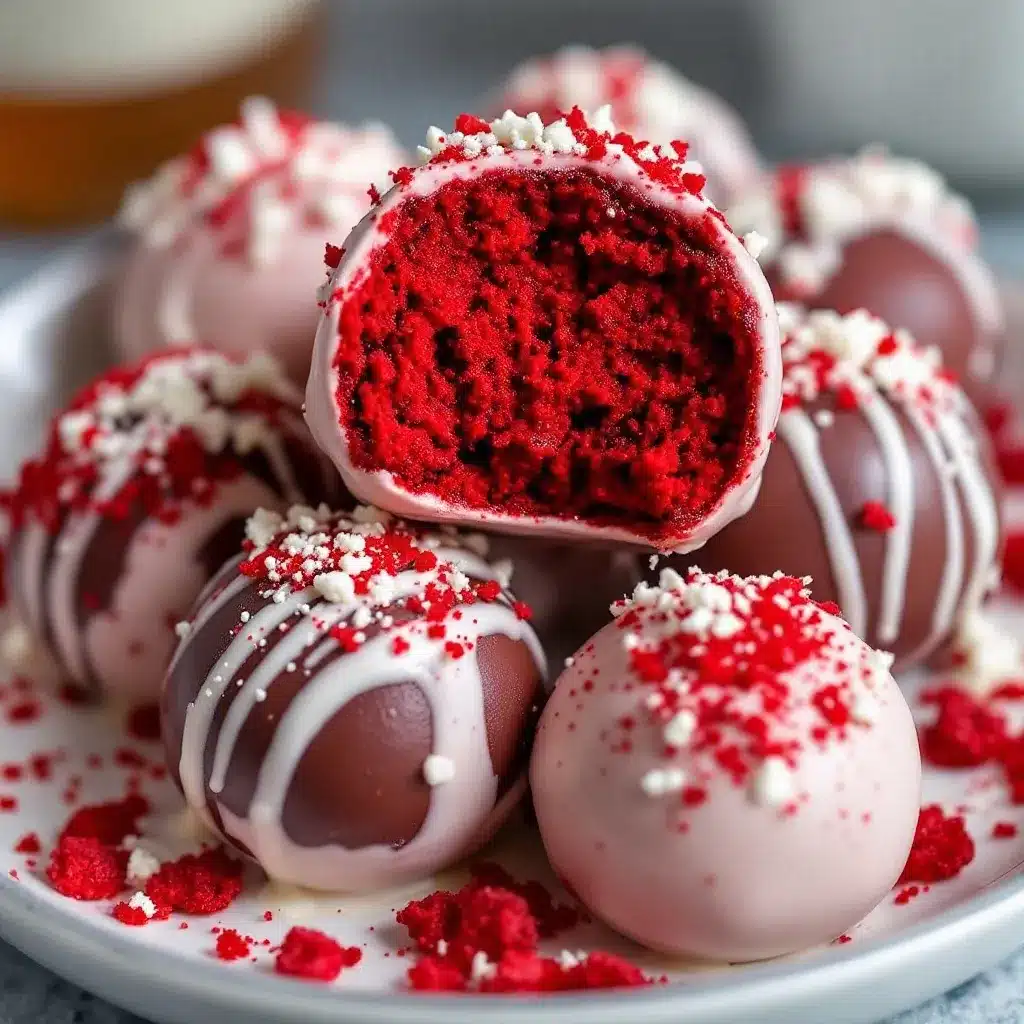
Let’s get into the nitty-gritty. Making these Vampire Bite Red Velvet Cake Balls is straightforward, but attention to detail matters.
- Bake the Cake: Preheat your oven to 350°F (175°C). Grease and flour your Bundt pan or line your 9×13 pan with parchment paper. Mix the cake mix, oil, water, and eggs according to the box instructions. Pour the batter into the pan. Bake for 25-30 minutes, or until a toothpick comes out clean. Let it cool completely. This is crucial. Warm cake will turn your frosting into a mess.
- Crumble the Cake: Once the cake is cool, crumble it into a large bowl. If using a Bundt pan, use your hands or a fork to break it into fine crumbs. You want a consistent texture, like wet sand. Aim for about 3-4 cups of crumbs.
- Make the Frosting: In a stand mixer, beat the softened butter and cream cheese together on medium speed until smooth. This should take about 2-3 minutes. Add the powdered sugar and vanilla extract. Beat on low until combined, then increase speed to medium-high. Beat for another 2-3 minutes until fluffy. If the mixture is too thick, add a teaspoon of milk. If it’s too thin, add more powdered sugar.
- Combine Cake and Frosting: Add the cake crumbs to the frosting. Start with half and mix. Add more as needed. You want the mixture to hold together when pressed but not be soupy. It should feel like playdough. If it’s too dry, add more frosting. If too wet, add more cake crumbs.
- Roll the Balls: Use a cookie scoop or your hands to roll the mixture into 1-inch balls. Place them on a parchment-lined baking sheet. If the mixture is sticky, wet your hands slightly with water. Roll them tightly. You should get about 24-30 balls.
- Chill: Place the baking sheet in the refrigerator for at least 30 minutes, or the freezer for 15 minutes. This firms up the balls, making them easier to coat.
- Melt the Chocolate: Melt the white chocolate chips or candy melts according to package directions. Thin with a teaspoon of coconut oil if needed for easier dipping.
- Coat and Decorate: Dip each ball into the melted white chocolate. Use a fork to lift it out, letting excess drip off. Place back on the parchment paper. While the chocolate is still wet, attach two small pieces of white chocolate or candy melts to the top of each ball to create “fangs.” You can use a toothpick to help position them.
- Set: Let the cake balls set at room temperature or in the fridge until the chocolate is hard. This takes about 20-30 minutes.
Cooking Tips & Techniques
I’ve made my fair share of mistakes with cake balls, so you don’t have to. Here are some professional tips to ensure success.
- Cool Completely: I can’t stress this enough. If your cake is even slightly warm, the frosting will melt. Let it cool on a wire rack for at least an hour.
- Don’t Overmix: When combining the cake crumbs and frosting, mix just until combined. Overmixing can make the balls dense.
- Wet Hands: Cake ball mixture can be sticky. Keep a small bowl of water nearby and wet your hands before rolling. This prevents sticking.
- Chill Before Dipping: Cold balls hold their shape better when dipped in chocolate. Don’t skip this step.
- Thin the Chocolate: If your chocolate is too thick, it will clump on the cake balls. Add a teaspoon of oil or shortening to make it smoother.
- Work Quickly: Chocolate sets fast. Have your “fangs” ready to go before you dip each ball.
A common mistake is using too much frosting. Start with less and add more. It’s easier to add than to remove. Another tip is to use gel food coloring in the frosting if you want a deeper red color. Liquid coloring can make the frosting too runny.
Variations & Adaptations
These cake balls are versatile. Here are a few ways to tweak them.
- Gluten-Free: Use a gluten-free red velvet cake mix. Ensure your cream cheese and chocolate are also gluten-free.
- Dairy-Free: Use vegan butter and vegan cream cheese. Use dairy-free white chocolate chips. The texture might be slightly less creamy, but the flavor will still be great.
- Chocolate Version: Skip the white chocolate coating and use dark chocolate instead. Dip the balls in dark chocolate and add a white chocolate drizzle for contrast.
- Mini Version: Roll the balls smaller, about 1/2 inch. These are perfect for parties where people want to try multiple flavors.
- Strawberry Twist: Add a teaspoon of strawberry extract to the frosting for a fruity twist.
I once tried making these with a chocolate cake base and red velvet frosting. It was interesting, but the classic red velvet base with cream cheese frosting is unbeatable. For a healthier option, you can reduce the powdered sugar in the frosting by half and use Greek yogurt, but the texture will be tangier and softer.
Serving & Storage Suggestions
These Vampire Bite Red Velvet Cake Balls are best served chilled. They hold their shape better and the flavors are more pronounced.
- Storage: Store in an airtight container in the refrigerator for up to 5 days. They can also be frozen for up to 3 months. Freeze them on a baking sheet first, then transfer to a freezer bag. Thaw in the fridge before serving.
- Serving: Arrange them on a platter with a Halloween or Valentine’s Day theme. They pair well with coffee or milk.
- Reheating: No need to reheat. Eat them cold or at room temperature.
- Flavors Over Time: The flavors meld together after a day in the fridge, making them even more delicious.
Avoid storing them near strong-smelling foods, as they can absorb odors. If you freeze them, make sure they are well-wrapped to prevent freezer burn.
Nutritional Information & Benefits
These cake balls are a treat, so enjoy them in moderation. Each ball contains approximately 150-200 calories, depending on size. They are rich in carbohydrates from the cake and sugar, and fats from the butter and cream cheese.
- Calories: ~180 per ball
- Carbs: ~25g
- Fat: ~8g
- Protein: ~3g
The cream cheese adds a bit of protein and calcium. While not a health food, they are a fun way to satisfy a sweet tooth. For a lower-sugar option, use a sugar-free cake mix and sugar-free frosting alternatives. They are not suitable for vegans unless modified.
Conclusion
These Vampire Bite Red Velvet Cake Balls are a fun, easy, and delicious treat that is sure to be a hit at any party. They are simple to make, requiring only basic ingredients and tools. The combination of red velvet cake and cream cheese frosting is classic, and the vampire theme adds a playful touch.
I love making these because they bring people together. There’s something special about sharing homemade treats with friends and family. Whether you are making them for Halloween, Valentine’s Day, or just because, they are a great choice.
Try them out and let me know how they turn out. I’d love to see your creations! Feel free to customize them with your own twists. Happy baking!
FAQs
Can I make these cake balls ahead of time?
Yes, you can make them up to 5 days in advance and store them in the refrigerator. They can also be frozen for up to 3 months.
Do I need to use a Bundt pan?
No, you can use any cake pan. A 9×13 pan works well. Just ensure the cake is cooled completely before crumbling.
Can I use homemade red velvet cake?
Absolutely. Use about 2-3 cups of crumbled homemade red velvet cake in place of the box mix.
Why are my cake balls too dry?
If the mixture is too dry, add more frosting gradually until it holds together. If it’s too wet, add more cake crumbs.
Can I use white chocolate chips for the fangs?
Yes, white chocolate chips work well. You can also use candy melts for easier dipping and setting.
Pin This Recipe!
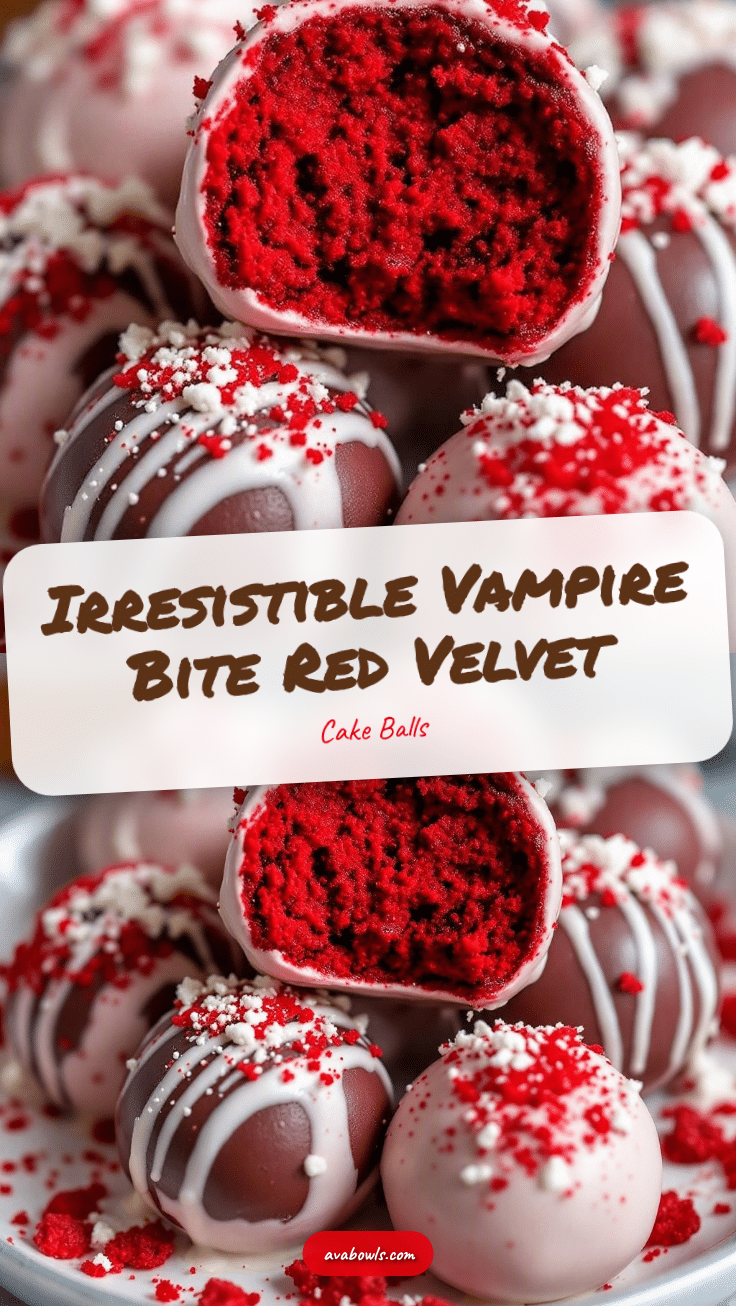
Vampire Bite Red Velvet Cake Balls: Easy & Perfect

These festive Vampire Bite Red Velvet Cake Balls combine moist red velvet cake crumbs with tangy cream cheese frosting, dipped in white chocolate and decorated with ‘fangs’ for a fun, bite-sized treat perfect for parties.
- Prep Time: 30 minutes
- Cook Time: 30 minutes
- Total Time: 1 hour 30 minutes
- Yield: 24-30 servings 1x
- Category: Dessert
- Cuisine: American
Ingredients
- 15.25 oz Red Velvet Cake Mix
- 1/3 cup Vegetable Oil
- 1/3 cup Water
- 2 large Eggs
- 1/2 cup Unsalted Butter, softened
- 8 oz Cream Cheese, brick style, softened
- 2 cups Powdered Sugar, sifted
- 1 tsp Vanilla Extract
- Red Food Coloring (Gel preferred)
- 1 cup White Chocolate Chips or Candy Melts
- Mini Marshmallows (Optional, for fangs)
Instructions
- Preheat oven to 350°F (175°C). Grease and flour a Bundt pan or line a 9×13 pan with parchment paper.
- Mix cake mix, oil, water, and eggs according to box instructions. Pour into pan and bake for 25-30 minutes until a toothpick comes out clean.
- Let the cake cool completely on a wire rack. This is crucial to prevent the frosting from melting.
- Crumble the cooled cake into a large bowl until it resembles fine crumbs (about 3-4 cups).
- In a stand mixer, beat softened butter and cream cheese on medium speed until smooth (2-3 minutes).
- Add powdered sugar and vanilla extract. Beat on low until combined, then increase to medium-high and beat for 2-3 minutes until fluffy.
- Add cake crumbs to the frosting. Start with half and mix, adding more as needed until the mixture holds together like playdough but is not soupy.
- Roll the mixture into 1-inch balls using a cookie scoop or hands. Place on a parchment-lined baking sheet.
- Chill the balls in the refrigerator for at least 30 minutes or freezer for 15 minutes to firm up.
- Melt white chocolate chips or candy melts according to package directions. Thin with a teaspoon of coconut oil if needed.
- Dip each chilled ball into the melted chocolate, letting excess drip off. Place back on parchment paper.
- While the chocolate is still wet, attach two small pieces of white chocolate or candy melts to the top of each ball to create ‘fangs’.
- Let the cake balls set at room temperature or in the fridge until the chocolate is hard (20-30 minutes).
Notes
Ensure the cake is completely cool before crumbling to prevent the frosting from becoming runny. If the mixture is too sticky, wet your hands slightly with water before rolling. For a gluten-free option, use a certified gluten-free cake mix. For dairy-free, use vegan butter and cream cheese alternatives.
Nutrition
- Serving Size: 1 cake ball
- Calories: 180
- Sugar: 18
- Sodium: 150
- Fat: 8
- Saturated Fat: 5
- Carbohydrates: 25
- Fiber: 1
- Protein: 3
Keywords: red velvet cake balls, vampire treats, halloween dessert, easy cake balls, cream cheese frosting, white chocolate dipped, party snacks, bite-sized dessert


