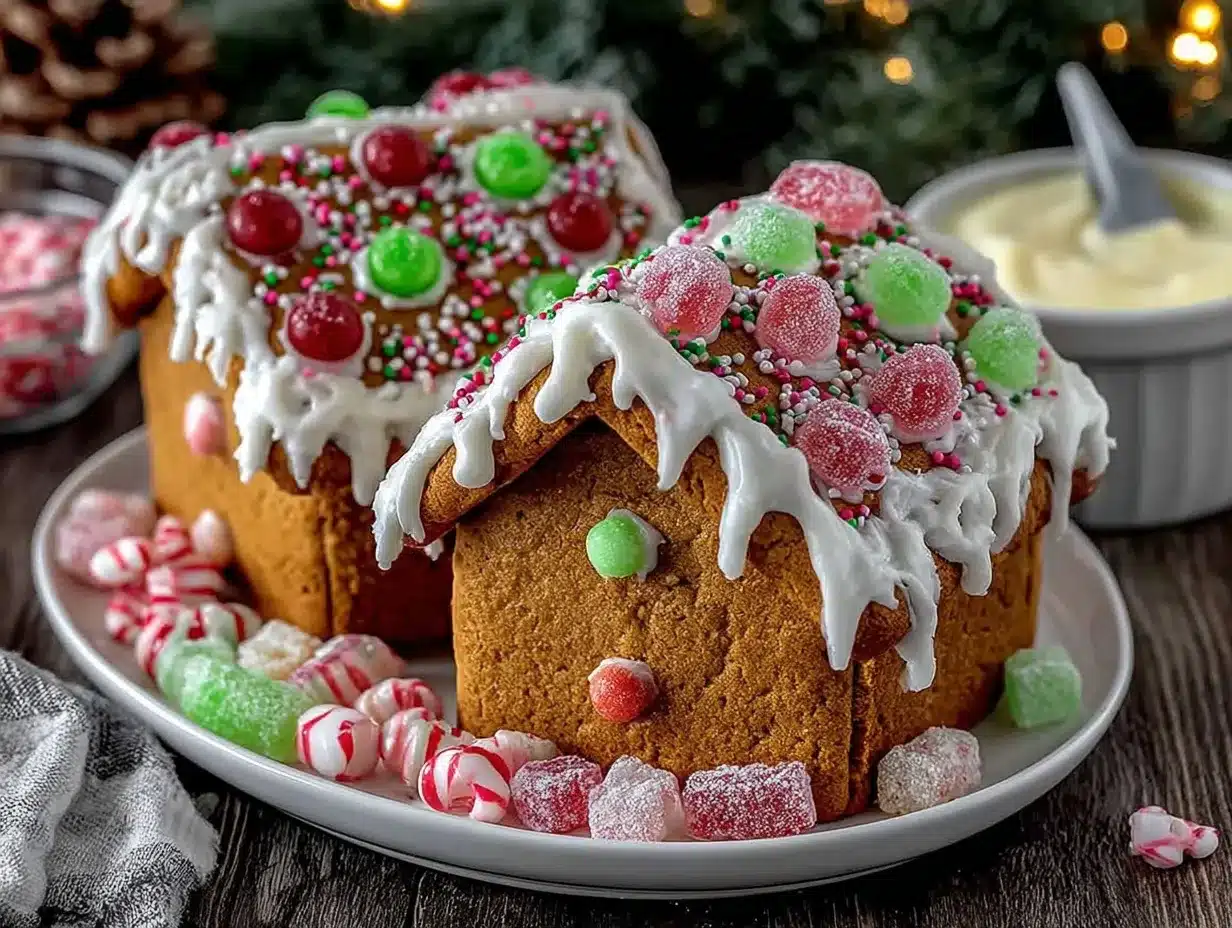
“Can you believe I almost gave up on making a gingerbread house this year?” my friend texted me last December, in the middle of a chaotic evening filled with holiday prep and last-minute errands. Honestly, I get it. Between juggling work, family, and festive expectations, the thought of assembling a gingerbread house from a kit—or worse, from scratch—can feel overwhelming. But here’s the thing: the Perfect Gingerbread House Cookie Decorating Kit from Scratch I developed wasn’t born out of a Pinterest-perfect moment. Nope, it happened because of a total baking mishap that turned into a sweet (literally) surprise.
It started when a rushed batch of gingerbread dough didn’t quite firm up as expected. Instead of tossing it, curiosity took over. I tweaked the recipe, tried again, and ended up with a dough that rolled out smooth, baked crisp, and held its shape like a charm. That accidentally perfected dough became the heart of this homemade decorating kit, which has since become something I turn to every holiday season. It’s fun, approachable, and honestly, a little bit magical.
What stuck with me most is how this project—starting from scratch, with simple pantry ingredients—turned a frazzled evening into a cozy tradition. The scent of ginger and cinnamon filling the kitchen, the laughter over frosting mishaps, and the pride of building a little edible masterpiece made all the difference. This recipe isn’t about being fancy; it’s about that warm, satisfying feeling when you create something together, even if it’s a bit messy.
So, whether you’re a seasoned gingerbread architect or a “not really a baker” type, this kit feels like a friendly invitation to make the holidays a little sweeter and a lot more fun. And that’s why it’s stuck around in my recipe box—because it’s real, doable, and a joy to share.
Why You’ll Love This Recipe
After testing countless versions of gingerbread dough and frosting, I can honestly say this kit hits the sweet spot between ease and festive flair. Here’s why you’ll find it a winner in your kitchen:
- Quick & Easy: The dough comes together in under 20 minutes and bakes fast, perfect for last-minute holiday crafting or a weekend project with the kids.
- Simple Ingredients: No need for specialty stores—most of these are pantry staples, like molasses, cinnamon, and ground ginger.
- Perfect for Family Fun: It’s a hands-on activity that sparks creativity and teamwork, ideal for cozy winter afternoons or holiday parties.
- Crowd-Pleaser: This kit never fails to impress guests, from kids marveling at the decorating possibilities to adults sneaking bites of the crisp cookies.
- Unbelievably Delicious: The balance of warm spices and the buttery crunch of the cookies make this gingerbread house as tasty as it is charming.
This isn’t just another gingerbread house recipe—it’s the one that blends a sturdy, flavorful dough with a decorating kit designed for fun, not fuss. The royal icing is smooth but firm, holding your candy creations firmly in place without that chalky taste you sometimes get. I also love that the cookie shapes are perfectly sized and easy to assemble, so you spend less time wrestling with walls and more time showing off your design skills.
Honestly, this recipe has become my go-to when I want a project that’s festive and forgiving. It’s like having a little holiday magic tucked in every bite, bringing together flavor, fun, and tradition in one sweet package.
What Ingredients You Will Need
This gingerbread house cookie decorating kit relies on straightforward, wholesome ingredients that create a classic gingerbread flavor and sturdy texture. Most are pantry staples, and substitutions are easy if you want to tweak things.
For the Gingerbread Dough:
- All-purpose flour (about 3 1/2 cups / 440 grams) – the base that gives the dough structure
- Baking soda (1 teaspoon) – helps the dough rise slightly and stay tender
- Ground ginger (2 teaspoons) – the signature spicy warmth
- Ground cinnamon (1 1/2 teaspoons) – adds cozy depth
- Ground cloves (1/2 teaspoon) – a pinch to round out the spice profile
- Salt (1/2 teaspoon) – balances sweetness and spices
- Unsalted butter, softened (3/4 cup / 170 grams) – for richness and tenderness
- Brown sugar, packed (3/4 cup / 150 grams) – adds moisture and caramel notes
- Egg (1 large, room temperature) – binds everything together
- Molasses (1/2 cup / 120 ml) – the heart of gingerbread flavor, dark and robust (I recommend Grandma’s brand for best flavor)
For the Royal Icing (Decorating Glue):
- Powdered sugar (4 cups / 480 grams) – for smooth sweetness
- Egg whites (3 large) or pasteurized egg white powder mixed with water (for safety)
- Lemon juice (1 teaspoon) – adds brightness and helps the icing set
- Vanilla extract (optional, 1 teaspoon) – for subtle flavor
For Decorating:
- Assorted candies – think gumdrops, candy canes, mini chocolate chips, and colored sprinkles
- Food coloring – to tint your royal icing for extra fun
Feel free to swap all-purpose flour with a gluten-free blend if needed. For a dairy-free option, use coconut oil or vegan butter instead of unsalted butter. I’ve found that firm molasses works best—lighter syrups can make the dough too soft.
Equipment Needed
Gathering the right tools makes this gingerbread house decorating kit way less stressful. Here’s what you’ll want on hand:
- Mixing bowls: At least two—one for dough, one for icing. Glass or stainless steel works great.
- Electric mixer: A handheld or stand mixer speeds things up, especially for the royal icing, but you can whisk by hand if you’re feeling ambitious.
- Rolling pin: To roll out the dough evenly. If you don’t have one, a clean wine bottle can work in a pinch.
- Cookie cutters or templates: For the gingerbread house pieces. I recommend printing templates on paper, placing them under parchment paper, and cutting around them with a sharp knife for precision.
- Baking sheets: Non-stick or lined with parchment paper for easy cookie removal.
- Piping bags and tips: Essential for detailed decorating. Zip-top bags with the corner snipped can be a budget-friendly alternative.
- Cooling racks: To cool cookies evenly and keep them crisp.
From experience, I recommend investing in a good-quality piping bag set if decorating is going to become a holiday staple. Keeping your tools clean and dry between uses is key to avoiding clogged tips or soggy dough. No need for fancy gadgets—just the basics and a sprinkle of patience.
Preparation Method
- Mix dry ingredients: In a large bowl, whisk together 3 1/2 cups (440 g) all-purpose flour, 1 teaspoon baking soda, 2 teaspoons ground ginger, 1 1/2 teaspoons ground cinnamon, 1/2 teaspoon ground cloves, and 1/2 teaspoon salt. Set aside. (This blend creates the warm, spicy foundation for your gingerbread.) Time: 5 minutes.
- Cream butter and sugar: In a separate bowl, use an electric mixer to beat 3/4 cup (170 g) softened unsalted butter and 3/4 cup (150 g) packed brown sugar until light and fluffy, about 3-4 minutes. This step ensures a tender dough with a rich flavor.
- Add egg and molasses: Beat in 1 large egg (room temperature) followed by 1/2 cup (120 ml) molasses. The molasses gives the dough its characteristic deep color and spice. Scrape down the bowl as needed. Time: 2-3 minutes.
- Combine wet and dry: Gradually add the dry ingredients to the wet mixture, mixing on low speed until just combined. The dough should be firm but pliable. If too sticky, sprinkle a bit more flour. Avoid overmixing to keep the cookies tender. Time: 3-4 minutes.
- Chill dough: Wrap the dough tightly in plastic wrap and refrigerate for at least 1 hour (or overnight). This step is crucial to firm the dough for easier rolling and cleaner shapes.
- Preheat oven: Set your oven to 350°F (175°C). Line baking sheets with parchment paper.
- Roll and cut: On a lightly floured surface, roll the dough to about 1/4 inch (0.6 cm) thickness. Use your gingerbread house templates to cut out walls, roof panels, doors, and windows with a sharp knife or cookie cutters. Transfer carefully to baking sheets.
- Bake cookies: Bake for 10-12 minutes until edges are firm and the surface is matte. Avoid overbaking to keep cookies from becoming too brittle. Let cool completely on wire racks before decorating.
- Prepare royal icing: Beat 4 cups (480 g) powdered sugar with 3 large egg whites (or equivalent pasteurized powder mix), 1 teaspoon lemon juice, and 1 teaspoon vanilla extract until stiff peaks form—about 7-10 minutes. The icing should be glossy and hold shape.
- Decorate and assemble: Divide icing into bowls to add food coloring if desired. Use piping bags to outline and fill the gingerbread pieces, attach walls with icing “glue,” and embellish with candies. Allow the structure to dry for several hours or overnight for best stability.
Pro tip: If the icing feels too runny, add a bit more powdered sugar. Too stiff? A few drops of water will loosen it. Look for a consistency that holds peaks but pipes smoothly. And remember, patience is your best friend here—let each section dry enough before adding the next to avoid collapse.
Cooking Tips & Techniques
Making the perfect gingerbread house decorating kit takes more than just following a recipe; it’s about mastering a few tricks to keep things stress-free and fun.
- Don’t skip chilling: The dough needs that chill time to firm up, which makes rolling and cutting easier and prevents spreading in the oven. Trust me, I once tried skipping this step and ended up with misshapen, floppy walls.
- Roll evenly: Uneven dough thickness is a common culprit behind uneven baking. Using guides or rolling pin rings can help keep the thickness consistent, so your pieces fit perfectly.
- Sharp edges matter: When cutting shapes, use a sharp knife and press firmly for clean lines. This helps the pieces align snugly when assembling.
- Royal icing consistency: I’ve learned the hard way that too thin icing won’t hold your house together, while too thick icing is tough to pipe. Aim for stiff peaks but still pipeable icing—practice on parchment paper first.
- Work in sections: Assemble your house step by step, allowing icing to set between walls and roof panels. A little patience here saves a lot of frustration later.
- Multitask wisely: While your cookies chill or bake, prepare your icing and candies. This keeps the momentum and makes decorating day feel smooth.
- Keep candies small: Large candies can weigh down the structure or make decorating tricky. I prefer mini gumdrops and tiny chocolate chips for balance.
Remember, it’s a craft as much as a recipe. Expect a few frosting smudges and crooked walls—that’s part of the charm and the fun. If you want to see a festive dip to serve alongside your gingerbread fun, you might enjoy the creamy beer cheese pretzel dip I shared last fall—it’s been a party hit every time!
Variations & Adaptations
The beauty of this gingerbread house cookie decorating kit is how easy it is to personalize. Here are a few ways I’ve adapted it over the years:
- Gluten-Free Version: Swap all-purpose flour with a 1-to-1 gluten-free baking flour blend. I suggest adding a teaspoon of xanthan gum if your blend doesn’t include it, to help with dough elasticity.
- Vegan Modification: Use coconut oil or vegan butter instead of unsalted butter, and replace egg with a flaxseed “egg” (1 tablespoon flaxseed meal mixed with 3 tablespoons water). For royal icing, use a powdered sugar and aquafaba (chickpea water) mixture instead of egg whites.
- Flavor Twists: Add a teaspoon of orange zest to the dough for a citrusy note, or swap ground cloves with cardamom for a slightly different spice profile.
- Alternative Decorating: Instead of royal icing, try melted white chocolate for a creamy, rich adhesive. It sets more slowly but tastes amazing.
- Mini Gingerbread Houses: Scale down the templates to make little houses as party favors or edible place cards.
One of my favorite adaptations is coloring the royal icing in vibrant shades for a playful look, especially when decorating with kids. It’s a simple way to turn a classic into something uniquely yours. If you’re interested in other cozy, creamy comfort foods to enjoy during decorating breaks, the creamy lemon ricotta pasta is a fresh, light option that complements the hearty gingerbread sweetness.
Serving & Storage Suggestions
The best part about the gingerbread house is that it’s both a display and a delicious treat. Serve your masterpiece at room temperature where everyone can admire it before nibbling away.
For presentation, I like to place the gingerbread house on a sturdy board lined with parchment or a festive platter. Surround it with extra candies or even a sprinkle of powdered sugar “snow” to add charm.
If you’re not eating the gingerbread right away, store the cookies and icing separately in airtight containers at room temperature. Assembling the house a day in advance is ideal to let the royal icing fully harden.
Leftover decorated cookies or house pieces keep well in an airtight container for up to a week. If you want to break down the house and save it for later, wrap pieces tightly in plastic wrap and freeze for up to 3 months. Thaw at room temperature before serving.
Reheating isn’t recommended for decorated pieces, but if you want to refresh plain gingerbread cookies, a few seconds in a warm oven (about 300°F / 150°C) can bring back some crispness.
Over time, the flavors mellow and the spices deepen, making gingerbread an even more comforting bite days after baking. Paired with a hot drink or a creamy snack, like the creamy spring vegetable fettuccine alfredo, it’s a lovely way to enjoy the season’s warmth.
Nutritional Information & Benefits
Each gingerbread cookie (approximate serving size of one house piece) contains roughly:
| Calories | Carbs | Fat | Protein | Sugar |
|---|---|---|---|---|
| 120 kcal | 20 g | 4 g | 2 g | 10 g |
The key ingredients, like ginger and cinnamon, bring more than just flavor—they’re known for anti-inflammatory and digestive benefits, which is a nice bonus when indulging in sweet treats. Molasses adds iron and calcium, giving a slight nutritional boost compared to plain sugar cookies.
This recipe is naturally free of nuts, but always check candy toppings for allergens. Gluten-free and vegan adaptations make it accessible for different dietary needs.
From my perspective, making this kit from scratch offers a more wholesome, less processed alternative to store-bought kits, with control over ingredient quality and freshness. That hands-on approach, combined with simple, real ingredients, makes it a feel-good treat for the whole family.
Conclusion
The Perfect Gingerbread House Cookie Decorating Kit from Scratch is more than just a holiday recipe—it’s a chance to slow down, get a little messy, and create something deliciously festive together. Whether it’s your first time building or you’re a gingerbread veteran, this kit makes the process manageable and genuinely fun.
I love this recipe because it strikes the right balance between sturdy, spicy cookies and a smooth, reliable royal icing that holds up to all my decorating dreams. Plus, it’s flexible enough to suit all kinds of dietary needs and creative tweaks. It’s become a holiday staple in my kitchen, and I hope it brings you the same cozy joy.
If you give it a try, I’d love to hear how your gingerbread house turned out or what decorations you came up with. Sharing your stories makes this tradition even sweeter. Happy baking and building!
FAQs
Can I prepare the gingerbread dough in advance?
Yes! The dough can be made up to 3 days ahead and stored tightly wrapped in the fridge. Just let it warm slightly before rolling out.
What if my royal icing is too runny or too stiff?
If it’s runny, add more powdered sugar a tablespoon at a time. If it’s too stiff, add a few drops of water gradually until it reaches the right piping consistency.
How do I keep my gingerbread house from collapsing?
Patience is key! Let the walls dry and set firmly before adding the roof. Use enough royal icing as “glue” and assemble on a sturdy base.
Can I use store-bought royal icing instead?
Absolutely! Store-bought works fine for convenience, but homemade royal icing tends to taste fresher and sets more reliably for decorating.
What’s the best way to store leftover decorated gingerbread cookies?
Keep them in an airtight container at room temperature for up to one week. Avoid the fridge, which can make cookies soft.
Pin This Recipe!

Perfect Gingerbread House Cookie Decorating Kit Easy Homemade Tutorial for Beginners
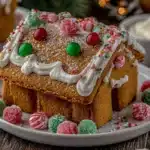
This recipe provides a sturdy, flavorful gingerbread dough and a smooth royal icing perfect for creating and decorating gingerbread houses. It’s approachable for beginners and fun for family holiday activities.
- Prep Time: 20 minutes
- Cook Time: 12 minutes
- Total Time: 1 hour 32 minutes
- Yield: Makes enough pieces for one gingerbread house (serves multiple as a decorative treat)
- Category: Dessert
- Cuisine: American
Ingredients
- 3 1/2 cups (440 grams) all-purpose flour
- 1 teaspoon baking soda
- 2 teaspoons ground ginger
- 1 1/2 teaspoons ground cinnamon
- 1/2 teaspoon ground cloves
- 1/2 teaspoon salt
- 3/4 cup (170 grams) unsalted butter, softened
- 3/4 cup (150 grams) packed brown sugar
- 1 large egg, room temperature
- 1/2 cup (120 ml) molasses
- 4 cups (480 grams) powdered sugar
- 3 large egg whites or equivalent pasteurized egg white powder mixed with water
- 1 teaspoon lemon juice
- 1 teaspoon vanilla extract (optional)
- Assorted candies (gumdrops, candy canes, mini chocolate chips, colored sprinkles)
- Food coloring (optional)
Instructions
- In a large bowl, whisk together flour, baking soda, ground ginger, ground cinnamon, ground cloves, and salt. Set aside.
- In a separate bowl, beat softened butter and brown sugar with an electric mixer until light and fluffy, about 3-4 minutes.
- Beat in the egg followed by molasses, scraping down the bowl as needed.
- Gradually add the dry ingredients to the wet mixture, mixing on low speed until just combined. If dough is too sticky, sprinkle a bit more flour.
- Wrap dough tightly in plastic wrap and refrigerate for at least 1 hour or overnight.
- Preheat oven to 350°F (175°C). Line baking sheets with parchment paper.
- Roll dough on a lightly floured surface to about 1/4 inch (0.6 cm) thickness. Cut out gingerbread house pieces using templates or cookie cutters.
- Transfer pieces to baking sheets and bake for 10-12 minutes until edges are firm and surface is matte. Cool completely on wire racks.
- Prepare royal icing by beating powdered sugar, egg whites, lemon juice, and vanilla extract until stiff peaks form, about 7-10 minutes.
- Divide icing into bowls and add food coloring if desired. Use piping bags to decorate and assemble the gingerbread house, attaching pieces with icing.
- Allow the assembled house to dry for several hours or overnight for best stability.
Notes
Chill dough for at least 1 hour to firm up for easier rolling and cutting. Use stiff but pipeable royal icing for best assembly results. Work in sections and allow icing to dry between steps to prevent collapse. Use small candies for decorating to avoid weighing down the structure. Dough and royal icing can be prepared in advance. Store cookies and icing separately in airtight containers at room temperature. Leftover decorated cookies keep up to one week; freeze unassembled pieces up to 3 months.
Nutrition
- Serving Size: One gingerbread hous
- Calories: 120
- Sugar: 10
- Fat: 4
- Carbohydrates: 20
- Protein: 2
Keywords: gingerbread house, gingerbread cookies, holiday baking, cookie decorating kit, royal icing, festive dessert, family activity, homemade gingerbread