My husband looked up from the couch, fork mid-air, and said, “Wait, you made these this morning?” I nodded, still wiping a stray bit of peanut butter off the counter. He had already eaten three of the no-bake peanut butter oat snack bars I’d thrown together maybe twelve minutes earlier, and he genuinely thought I’d bought them. That moment—the one where someone assumes your ten-minute kitchen scramble was actually a store-bought purchase—is the exact reason I keep making these.
I wasn’t trying to be impressive. Honestly, I was just tired of watching him grab granola bars that tasted like cardboard and sugar. I had a half-empty jar of peanut butter, some oats that were about to expire, and a vague memory of a recipe my friend texted me years ago. I figured, what’s the worst that could happen? If they flopped, the dog would eat them. But they didn’t flop. They disappeared before lunch.
These bars have become my secret weapon for busy weeks when meal prep feels like a chore and hangry energy takes over. They aren’t fancy, they aren’t complicated, and they definitely aren’t pretty in a photogenic way. But they are the kind of snack that makes you close the pantry door and feel like you’ve got your life together, even when you absolutely do not. That’s the real magic here.
Why You’ll Love This Recipe
Let me tell you why these no-bake peanut butter oat snack bars have earned a permanent spot in my kitchen rotation. I’ve tested this recipe at least a dozen times, tweaking the ratios, trying different mix-ins, and even accidentally leaving the honey out once (don’t do that). What I landed on is genuinely foolproof.
- Ready in 10 Minutes: No oven, no stovetop, no complicated steps. Just mix, press, and chill. You can make these while waiting for your coffee to brew.
- Pantry Staples Only: You probably have everything already. Peanut butter, oats, honey, maybe some chocolate chips. No special trips to the store required.
- Perfect for Meal Prep: These hold up beautifully in the fridge for over a week, and they freeze like a dream. Grab one on your way out the door.
- Kid-Approved and Adult-Friendly: My niece calls them “cookie bars” and has no idea they’re actually pretty decent for you. The peanut butter and oats keep everyone full without the sugar crash.
- Customizable to the Max: Don’t like peanuts? Use almond butter. Want more crunch? Toss in some seeds or chopped nuts. This recipe bends to whatever you have on hand.
What makes these different from the other recipes out there? It’s the texture. So many no-bake bars turn out either rock-hard or crumbly messes. I spent time figuring out the exact ratio of wet to dry ingredients so these bars hold together beautifully without being tough. They’re chewy, slightly soft, and just sweet enough to feel like a treat without overdoing it. Plus, they don’t require boiling sugar or any finicky techniques. Mix, press, chill, done. That’s it.
These are the bars I make when I want to feel like I’ve got snacks under control without actually spending time on snacks. They’re the reason I stopped buying packaged granola bars altogether.
What Ingredients You Will Need
This recipe uses simple, wholesome ingredients to deliver bold flavor and satisfying texture without the fuss. Most of these are pantry staples you probably already have sitting in your kitchen right now.
- Peanut Butter (1 cup, creamy): Use a natural, no-stir peanut butter for best results. I prefer the kind with just peanuts and salt listed on the label. The oil separation in natural peanut butter can sometimes make the bars greasy, so stir it really well before measuring. If you only have processed peanut butter like Skippy or Jif, that works too—just know the bars will be slightly sweeter and a bit firmer.
- Honey (½ cup): Honey is the glue that holds everything together. It adds sweetness and helps the bars set properly. Maple syrup works as a substitute, but the bars will be a touch softer and have a slightly different flavor. I’ve used agave nectar in a pinch too, and it worked fine.
- Rolled Oats (1 ½ cups): Old-fashioned rolled oats give the best texture. Quick oats work in a pinch but create a softer, less chewy bar. Steel-cut oats are too hard and won’t soften enough—skip those unless you want a jaw workout. I’ve made these with gluten-free oats for friends with sensitivities and they turned out perfectly.
- Dark Chocolate Chips (½ cup): These add little pockets of melty goodness throughout the bars. I use semi-sweet or dark chocolate chips because they balance the sweetness of the honey. Milk chocolate works if you prefer a sweeter bar, or you can leave the chocolate out entirely for a simpler version.
- Flaxseed Meal (2 tablespoons, optional): This is my secret ingredient. It adds fiber, omega-3s, and helps bind the bars together without changing the flavor. You can skip it or substitute with chia seeds if you prefer.
- Vanilla Extract (1 teaspoon): A little vanilla rounds out the flavors and makes everything taste more, well, baked. Don’t skip this—it makes a surprising difference.
- Salt (¼ teaspoon): Salt enhances the peanut butter flavor and balances the sweetness. If your peanut butter is already salted, you can reduce this to a pinch or omit it entirely.
I recommend using a brand like Crazy Richard’s or Smucker’s Natural for the peanut butter—they have the right consistency without added sugar or palm oil. For the oats, Bob’s Red Mill old-fashioned rolled oats are my go-to because they hold their shape well.
Equipment Needed
You don’t need fancy kitchen gadgets for these no-bake peanut butter oat snack bars. Here’s what you’ll actually use:
- 8×8-inch Baking Dish: This is the sweet spot for thickness. A 9×9-inch dish works too, but your bars will be slightly thinner. Line it with parchment paper for easy removal—trust me on this one.
- Mixing Bowl: Any medium-sized bowl works. I use a glass bowl because it’s easy to scrape clean.
- Spatula or Wooden Spoon: For mixing everything together. A silicone spatula makes scraping the bowl much easier.
- Measuring Cups and Spoons: Accurate measurements matter here since the texture depends on the ratio of wet to dry ingredients.
- Parchment Paper: This is non-negotiable unless you enjoy prying bars out of a dish with a butter knife. Leave an overhang on two sides for easy lifting.
- Refrigerator: The bars need at least 30 minutes to set. A freezer works too if you’re in a hurry—just check them after 15 minutes.
If you don’t have an 8×8 dish, you can use a loaf pan and make thicker bars, or press the mixture into a small rimmed baking sheet for thinner, snack-sized pieces. I’ve even used a pie plate in a pinch—it works, the bars just look a little funny.
Preparation Method
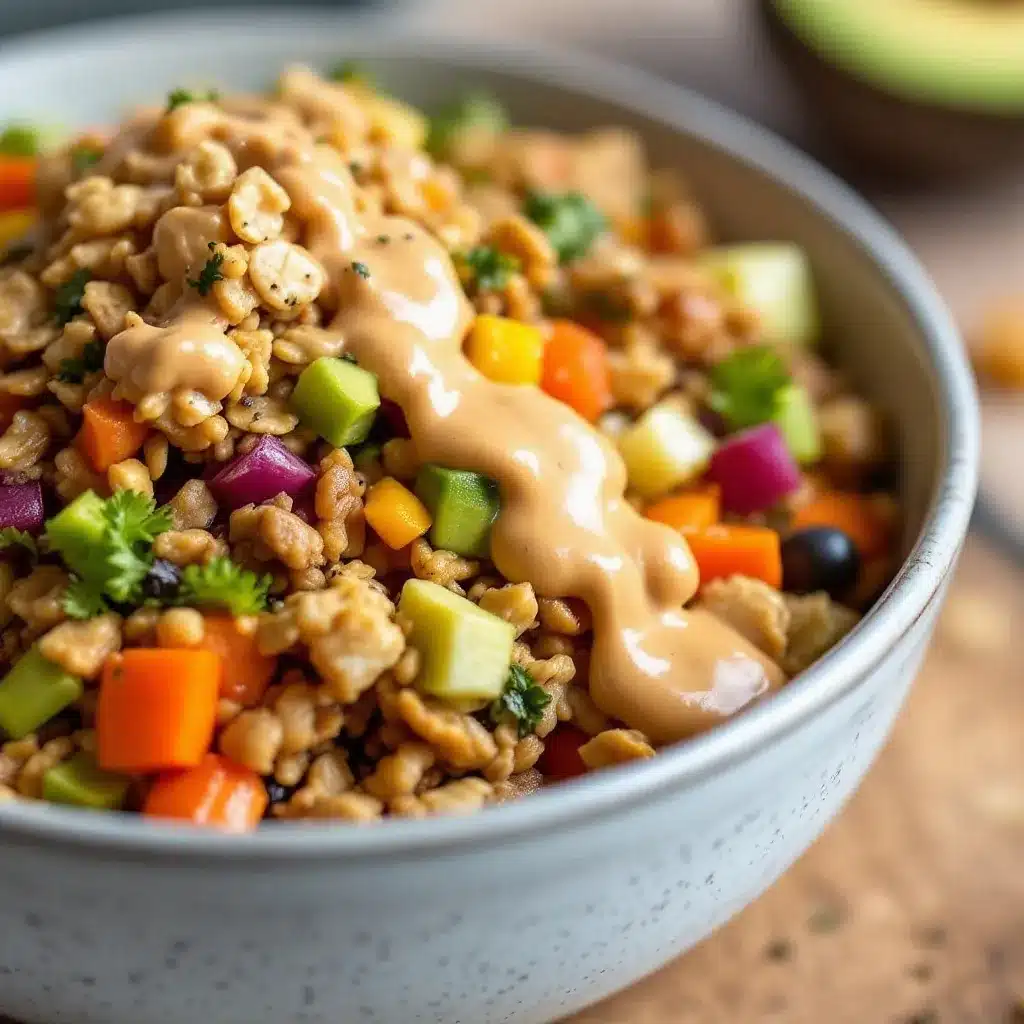
- Line your baking dish. Cut a piece of parchment paper large enough to cover the bottom and come up two opposite sides of your 8×8-inch dish. Press it in firmly so it stays put. This overhang is your handle for lifting the bars out later. I learned this the hard way after spending ten minutes trying to dig out bars that had cemented themselves to the dish.
- Warm the peanut butter and honey. In a microwave-safe bowl, combine 1 cup of peanut butter and ½ cup of honey. Microwave in 20-second intervals, stirring between each, until the mixture is smooth and pourable. This usually takes about 40-60 seconds total. Don’t overheat it—you just want it warm enough to mix easily, not hot. If you don’t have a microwave, you can do this in a small saucepan over low heat, stirring constantly.
- Add the vanilla and salt. Stir in 1 teaspoon of vanilla extract and ¼ teaspoon of salt. The mixture should look glossy and smell amazing at this point. Give it a taste—it should be sweet but not cloying, with a good peanut butter punch.
- Mix in the dry ingredients. Add 1 ½ cups of rolled oats and 2 tablespoons of flaxseed meal (if using) to the wet mixture. Stir until everything is evenly coated. The mixture will look thick and slightly sticky. If it seems too dry, add a tablespoon more honey. If it seems too wet, add a tablespoon more oats. The texture should hold together when you press a bit between your fingers.
- Fold in the chocolate chips. Gently stir in ½ cup of dark chocolate chips. Don’t overmix here—you want the chips to stay intact so you get distinct pockets of chocolate in each bite. If the mixture is still warm, the chips might start to melt slightly, which is actually fine because it creates little chocolate streaks throughout the bars.
- Press the mixture into the dish. Transfer everything to your lined baking dish. Here’s the trick: use a second piece of parchment paper or lightly wet your hands to press the mixture down firmly and evenly. Press hard—this is what keeps the bars from falling apart later. I use the bottom of a measuring cup to really compact it down. The surface should be flat and smooth when you’re done.
- Chill until firm. Place the dish in the refrigerator for at least 30 minutes. If you’re in a rush, 20 minutes in the freezer works too. The bars should feel solid to the touch and hold their shape when you lift the parchment paper. Don’t rush this step—soft bars will crumble when you try to cut them.
- Cut and serve. Lift the entire block out using the parchment overhang. Place it on a cutting board and use a sharp knife to cut into squares or rectangles. I usually get 12 bars from an 8×8 dish, but you can make them bigger or smaller depending on your preference. Wipe the knife clean between cuts for neater edges.
Sensory cue: At step 4, the mixture should feel like slightly damp sand—cohesive but not sticky. When you press it into the dish at step 6, you should hear a slight squish sound as the oats settle into the peanut butter mixture. That’s how you know the texture is right.
Cooking Tips & Techniques
After making these no-bake peanut butter oat snack bars more times than I can count, I’ve collected a few hard-won lessons that will save you from my early mistakes.
The biggest mistake people make is not pressing hard enough. I know it sounds simple, but I cannot stress this enough. The first time I made these, I gently patted the mixture down and thought, “Looks good!” Then I tried to cut them an hour later and ended up with a pile of oat crumbs. You need to really compact the mixture. Use a flat-bottomed glass or measuring cup and apply serious pressure. The bars should feel dense and solid before they even go in the fridge.
Temperature matters more than you think. If your kitchen is hot and humid, the bars might stay a bit soft even after chilling. On humid days, I add an extra tablespoon of oats to compensate. If your kitchen is cold, the bars will set faster but might be harder to cut. Let them sit at room temperature for a minute or two before slicing if they feel too firm.
Use room temperature peanut butter. Cold peanut butter straight from the fridge is a nightmare to mix. Let it sit out for 15 minutes before you start, or warm it gently in the microwave. The honey also mixes better when it’s at room temperature. I’ve made the mistake of using cold ingredients and ended up with lumps that never fully incorporated.
Line your dish properly. I cannot tell you how many times I thought I could skip the parchment paper and just grease the dish. Every single time, I regretted it. The bars stick, they break, and you end up eating the evidence directly from the dish with a spoon. Just use parchment. Your future self will thank you.
For perfectly even bars, use a ruler. Okay, this sounds extra, but hear me out. After pressing the mixture down, I use a small offset spatula or the back of a spoon to square off the edges. Then I mentally divide the block into rows and columns before cutting. It takes an extra 30 seconds and makes the bars look like they came from a bakery.
Variations & Adaptations
These no-bake peanut butter oat snack bars are incredibly forgiving, which is why I love them. Here are some variations I’ve tried and loved:
Peanut-Free Version: Substitute the peanut butter with sunflower seed butter or almond butter. Sunflower seed butter works particularly well because it has a similar texture. Just note that sunflower seed butter can react with baking soda (not an issue here since there’s no baking soda) and sometimes turns a weird green color—it’s totally safe, just visually surprising.
Crunchy Texture Version: Add ¼ cup of chopped peanuts, 2 tablespoons of chia seeds, and 2 tablespoons of unsweetened shredded coconut. This gives the bars a satisfying crunch and makes them feel more like a trail mix bar. I made this version for a hiking trip and they held up perfectly in my backpack.
Lower Sugar Option: Reduce the honey to ⅓ cup and add 2 tablespoons of unsweetened applesauce to maintain moisture. The bars will be less sweet but still plenty flavorful from the peanut butter and chocolate. If you use sugar-free chocolate chips, you can bring the sugar content down even further.
Protein Boost: Add 2 scoops of vanilla or chocolate protein powder. You’ll need to increase the honey by 1-2 tablespoons to compensate for the dryness of the powder. I’ve used both whey and plant-based protein powders successfully, though plant-based ones tend to make the bars a bit crumblier.
Seasonal Twist: In the fall, I swap the chocolate chips for dried cranberries and add ½ teaspoon of cinnamon. In the summer, I use white chocolate chips and add ¼ cup of freeze-dried strawberries crushed into pieces. Both versions are delicious and feel festive without any extra effort.
My personal favorite variation is the salted dark chocolate version. I press half the mixture into the dish, sprinkle a generous layer of flaky sea salt and extra chocolate chips, then press the remaining mixture on top. The salt crystals add little bursts of savory goodness that make the bars absolutely irresistible.
Serving & Storage Suggestions
These no-bake peanut butter oat snack bars are best served chilled or at room temperature. I actually prefer them straight from the fridge because they’re firmer and chewier, but my husband likes them softer at room temperature. Try both and see which camp you fall into.
For serving: Arrange the bars on a plate and, if you’re feeling fancy, drizzle a little melted chocolate over the top. They pair beautifully with a glass of cold milk, a hot cup of coffee, or even a creamy matcha latte for an afternoon pick-me-up. If you’re packing them for lunch, wrap each bar individually in parchment paper or place them in a reusable container with wax paper between layers to prevent sticking.
Storage in the refrigerator: Place the bars in an airtight container with parchment paper between layers. They’ll stay fresh for up to 10 days, though I’ve never had them last that long. The texture actually improves after a day or two as the flavors meld together.
Freezer storage: These bars freeze beautifully. Wrap each bar individually in plastic wrap, then place them in a freezer-safe bag or container. They’ll keep for up to 3 months. To thaw, just leave them at room temperature for 10-15 minutes, or eat them frozen—they’re surprisingly good straight from the freezer, like a chewy, cold treat.
Reheating tip: If you prefer a softer bar, microwave one for 10-15 seconds. The chocolate chips will get slightly melty, and the texture becomes almost like a warm cookie. Just don’t overdo it or the bars will fall apart. I do this on cold mornings when I want something comforting but don’t have time to make actual breakfast.
Nutritional Information & Benefits
Here’s the approximate nutritional breakdown for one bar (based on 12 bars per batch):
- Calories: 215
- Protein: 7g
- Fat: 12g
- Carbohydrates: 24g
- Fiber: 4g
- Sugar: 12g
These bars are a great source of plant-based protein from the peanut butter and oats. The oats provide slow-release energy and are rich in beta-glucan, a type of soluble fiber that supports heart health. Peanut butter offers healthy monounsaturated fats and vitamin E, which is great for skin health. The dark chocolate chips add antioxidants, specifically flavonoids, which can help reduce inflammation.
If you use gluten-free oats, these bars are naturally gluten-free. They’re also dairy-free as long as you use dairy-free chocolate chips. For those watching their sugar intake, the honey can be reduced or substituted with a sugar-free alternative like monk fruit syrup.
I love that these bars give me sustained energy without the crash you get from processed snacks. They’re my go-to for long work days, afternoon hikes, or just keeping the hangry monster at bay between meals.
Conclusion
These no-bake peanut butter oat snack bars have genuinely changed how I approach snacks in my house. They’re the kind of recipe that makes you feel like you’ve got your act together, even when you’re just winging it. No oven, no fuss, no complicated ingredients—just good, honest food that tastes like a treat but fuels you like a proper meal.
I love that you can make them your own. Add what you like, leave out what you don’t, and never worry about them turning out wrong. The recipe is forgiving enough for beginners and flexible enough for seasoned cooks who want to experiment. Whether you pack them for lunch, keep them in the fridge for after-school snacks, or bring them to a potluck, these bars deliver every single time.
I’d love to hear how yours turn out. Did you add something unexpected? Did your family devour them in record time? Drop a comment below and let me know—I read every single one and I always appreciate hearing about your kitchen adventures. And if you’re looking for another easy, no-fuss snack idea, you might enjoy these healthy energy balls with dates and dark chocolate for another quick grab-and-go option.
Happy snacking, friends. You’ve got this.
Frequently Asked Questions
Can I use quick oats instead of rolled oats?
Yes, but the texture will be different. Quick oats are more finely chopped, so they absorb moisture faster and create a softer, less chewy bar. If you only have quick oats, reduce the honey by about a tablespoon to compensate. The bars will still taste great, just with a different mouthfeel.
How do I keep the bars from falling apart?
The two biggest factors are pressing the mixture firmly enough and chilling the bars for at least 30 minutes. If your bars are still crumbly, try adding an extra tablespoon of honey or peanut butter to help bind everything together. Also, make sure your peanut butter isn’t too oily—stir it well before measuring.
Can I make these without honey?
Absolutely. Maple syrup is the best substitute because it has a similar consistency. Agave nectar or brown rice syrup also work. For a sugar-free option, use monk fruit syrup or a sugar-free maple syrup. The texture might be slightly different, but the bars will still hold together.
How long do these bars last at room temperature?
They can sit out for a few hours without issues, making them great for parties or picnics. For longer storage, keep them in the refrigerator. If you leave them out overnight, they’ll soften significantly and might lose their shape. I always recommend refrigerating them for the best texture and longevity.
Can I add protein powder to this recipe?
Yes, but you’ll need to adjust the liquid. Add 1-2 scoops of protein powder and increase the honey by 1-2 tablespoons. The mixture should still feel cohesive and slightly sticky. If it’s too dry, add a splash of milk or extra honey. Whey protein works better than plant-based protein for texture in this recipe.
Pin This Recipe!
Easy No-Bake Peanut Butter Oat Snack Bars: Best 10-Minute Recipe
These no-bake peanut butter oat snack bars are ready in 10 minutes with simple pantry staples. They’re chewy, satisfying, and perfect for meal prep—no oven required.
- Prep Time: 10 minutes
- Cook Time: 0 minutes
- Total Time: 40 minutes (includes chilling)
- Yield: 12 bars 1x
- Category: Snack
- Cuisine: American
Ingredients
- 1 cup creamy peanut butter
- ½ cup honey
- 1 ½ cups rolled oats
- ½ cup dark chocolate chips
- 2 tablespoons flaxseed meal (optional)
- 1 teaspoon vanilla extract
- ¼ teaspoon salt
Instructions
- Line an 8×8-inch baking dish with parchment paper, leaving an overhang on two sides.
- In a microwave-safe bowl, combine 1 cup peanut butter and ½ cup honey. Microwave in 20-second intervals, stirring between each, until smooth and pourable (about 40-60 seconds total).
- Stir in 1 teaspoon vanilla extract and ¼ teaspoon salt until glossy.
- Add 1 ½ cups rolled oats and 2 tablespoons flaxseed meal (if using). Stir until evenly coated. The mixture should be thick and slightly sticky.
- Gently fold in ½ cup dark chocolate chips until just combined.
- Transfer the mixture to the lined dish. Use a second piece of parchment paper or lightly wet hands to press the mixture down firmly and evenly. Compact it well using the bottom of a measuring cup.
- Refrigerate for at least 30 minutes (or 20 minutes in the freezer) until firm.
- Lift the block out using the parchment overhang, place on a cutting board, and cut into 12 bars with a sharp knife.
Notes
Press the mixture firmly to prevent crumbling. For best texture, chill at least 30 minutes. Use room temperature peanut butter for easier mixing. On humid days, add an extra tablespoon of oats. For perfectly even bars, use a ruler to guide cuts.
Nutrition
- Serving Size: 1 bar
- Calories: 215
- Sugar: 12
- Sodium: 120
- Fat: 12
- Saturated Fat: 3
- Carbohydrates: 24
- Fiber: 4
- Protein: 7
Keywords: no-bake, peanut butter, oat bars, snack bars, 10-minute recipe, healthy snack, gluten-free, dairy-free


