Introduction
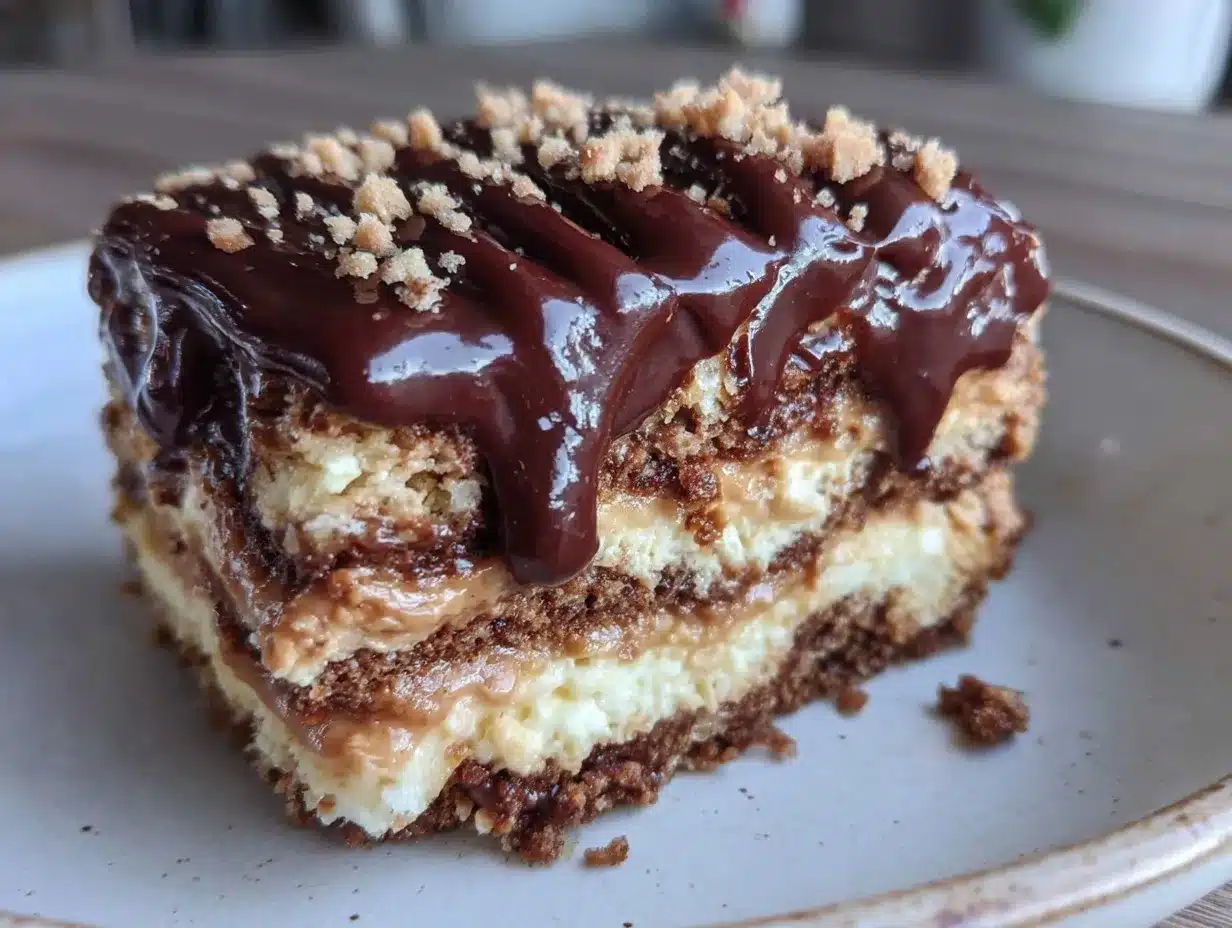
“You really have to try this cake,” my friend whispered one sticky summer afternoon, sliding a tiny plate across the picnic blanket. I was skeptical — no-bake desserts often made me wary, you know? But as soon as I took a bite of that Easy No-Bake Chocolate Peanut Butter Icebox Cake, the creamy layers melted together in a way that felt like a little secret between us. It was rich without being heavy, and honestly, it didn’t require a single oven minute. That day, I realized sometimes the best recipes come from casual moments, not hours of planning.
Since then, this icebox cake has become my go-to treat when the heat is on, and the last thing I want is to wrestle with the stove. It’s a recipe that feels indulgent but is surprisingly simple, making it perfect for both unplanned guests and those evenings when you just want to chill with something sweet. I’ve made it so often that I can almost whip it up blindfolded — the layers, the flavors, even the exact moment when the peanut butter blends just right with the chocolate. If you’ve ever been tempted by the idea of a no-bake dessert that’s both decadent and fuss-free, this one’s for you.
What’s quietly magical about this cake is how it turns a handful of everyday ingredients into something that feels like a celebration — no fancy equipment, no complicated steps, just honest, comforting flavors that remind you desserts don’t have to be complicated to be unforgettable.
Why You’ll Love This Recipe
From someone who’s tested countless dessert recipes in a kitchen that’s often too hot or too busy, this Easy No-Bake Chocolate Peanut Butter Icebox Cake stands out for so many reasons:
- Quick & Easy: Ready in under 20 minutes, this cake is a lifesaver on busy weeknights or when you need a last-minute dessert fix.
- Simple Ingredients: No obscure pantry items here — just chocolate, peanut butter, cream, and graham crackers or cookies you probably already have.
- Perfect for Any Occasion: Whether it’s potluck season, a casual get-together, or a cozy night in, this cake fits right in.
- Crowd-Pleaser: I’ve brought this to family dinners and it’s always the first to disappear — kids and adults alike can’t get enough.
- Unbelievably Delicious: The silky peanut butter layers paired with chocolate create a texture and flavor combo that feels like a gentle hug after a long day.
What makes this recipe different? It’s the way the peanut butter is whipped smooth into the cream, giving the cake a luscious, airy texture instead of a dense spread. Plus, layering it with crunchy graham crackers (or cookies — I sometimes swap in chocolate wafers for fun) creates this beautiful contrast that’s honestly addictive. It’s not just another no-bake cake; it’s a recipe that’s been fine-tuned until every bite feels just right. If you enjoy indulgent treats like the creamy strawberry cream cheese stuffed French toast, this will definitely hit your sweet spot.
What Ingredients You Will Need
This recipe uses simple, wholesome ingredients to deliver bold flavor and satisfying texture without the fuss. Most of these are pantry staples, so you can whip it up anytime the craving strikes.
- Peanut Butter: Creamy, unsweetened or lightly salted works best — I usually reach for Skippy or Jif for that perfect smoothness.
- Heavy Whipping Cream: Chilled, to whip into fluffy peaks that hold the peanut butter beautifully.
- Powdered Sugar: Just enough to add sweetness and stabilize the cream.
- Vanilla Extract: A teaspoon adds a lovely depth and warmth to the peanut butter cream.
- Chocolate: Semi-sweet or dark chocolate chips or chunks — melting some into the cream or sprinkling on top adds that rich chocolate kick.
- Graham Crackers or Chocolate Wafers: For layering — graham crackers give a classic texture, but chocolate wafers add an extra chocolate boost.
- Butter: Melted, for brushing on the cracker layers if you want a richer mouthfeel (optional).
- Salt: Just a pinch to balance the sweetness (especially if your peanut butter is unsalted).
For substitutions: If you need a gluten-free option, use gluten-free graham crackers or your favorite gluten-free cookies. Dairy-free coconut cream can replace heavy cream if you want to try a dairy-free version, though the texture shifts slightly. For a lower-sugar version, swap powdered sugar with a sugar substitute like erythritol, but be sure to taste as you go.
Equipment Needed
You really don’t need much for this Easy No-Bake Chocolate Peanut Butter Icebox Cake. Here’s what I use:
- Mixing Bowls: At least two — one for whipping cream, another for mixing peanut butter and sugar.
- Hand Mixer or Stand Mixer: Whipping the cream by hand is possible but takes time and muscle. I prefer a handheld mixer for quick, fluffy results.
- Spatula: For folding the whipped cream into the peanut butter gently.
- Baking Dish or Loaf Pan: A 9×5 inch loaf pan works great, but a small square dish or trifle bowl is fine too.
- Plastic Wrap: To cover the cake while it chills in the fridge.
If you don’t have a mixer, a whisk and some patience can do the trick, but your arm may feel it the next day! For a budget-friendly option, any basic hand mixer will do just fine — no need for fancy kitchen gadgets here. I’ve also used glass dishes and ceramic pans with equal success, so use whatever you’ve got handy.
Preparation Method
- Whip the Cream: Pour 1 ½ cups (360 ml) of chilled heavy whipping cream into a large bowl. Beat on medium-high speed until soft peaks form — this usually takes about 3-5 minutes. The cream should be fluffy but still hold its shape when you lift the beaters. Avoid overwhipping or it can turn grainy.
- Mix Peanut Butter and Sugar: In a separate bowl, combine 1 cup (250 g) creamy peanut butter, ¾ cup (90 g) powdered sugar, and 1 teaspoon vanilla extract. Stir until smooth and creamy. If your peanut butter is thick, warming it slightly in the microwave for 10 seconds helps it blend better.
- Fold Together: Gently fold about half of the whipped cream into the peanut butter mixture using a spatula. This lightens the texture. Then fold in the remaining whipped cream carefully, keeping it airy — this is key to that melt-in-your-mouth texture.
- Prepare the Layers: Line your loaf pan or dish with a layer of graham crackers or chocolate wafers. If you want, brush a thin layer of melted butter on the crackers for extra richness.
- Spread Peanut Butter Cream: Spoon and spread about one-third of the peanut butter cream mixture evenly over the cracker layer.
- Add Chocolate: Sprinkle a handful (about ½ cup/90 g) of chocolate chips or finely chopped chocolate over the cream layer. This adds a delightful surprise in every bite.
- Repeat Layers: Add another cracker layer, peanut butter cream, and chocolate sprinkle. Finish with a final cracker layer and spread the remaining cream on top. Smooth it out as best you can.
- Chill: Cover the cake tightly with plastic wrap and refrigerate for at least 4 hours, ideally overnight. The crackers soften, absorbing the creamy layers and flavors meld together beautifully.
- Serve: Slice with a sharp knife (wipe it between cuts for cleaner slices). Serve chilled for that perfect cool and creamy bite.
Pro tip: If your peanut butter cream feels too thick, a splash of milk can loosen it slightly — just don’t add too much or it won’t set well. When layering, be gentle to avoid breaking the crackers, but don’t be too worried if some crumble; it adds texture. I remember one time I skipped the chocolate chips, and the cake was good but missed that little pop of extra chocolate goodness that keeps everyone coming back.
Cooking Tips & Techniques
One trick I learned the hard way is to whip the cream just right — not too soft, not too stiff. Soft peaks help the cream fold smoothly, while stiff peaks hold the structure. Either way, overwhipping is a no-go since it turns buttery and loses that lightness.
Another tip: when folding the peanut butter into the cream, be gentle. Stirring too vigorously deflates the mixture and makes the cake dense. Using a rubber spatula and folding motion keeps the air in, which is why this cake feels so fluffy.
Timing matters, too. While it’s tempting to dig in immediately, letting the cake chill for at least 4 hours is crucial. The crackers soak up moisture and soften, transforming the texture from crumbly to cake-like. I once skipped the chilling step in a rush, and the layers stayed dry and separate — a lesson learned.
Multitasking while the cake chills is a lifesaver — maybe throw together a quick dinner like creamy spring vegetable fettuccine Alfredo or prep a batch of the creamy beer cheese pretzel dip for your next gathering. That way, dessert is ready and you’re not scrambling in the kitchen.
Variations & Adaptations
This recipe is flexible, so feel free to get creative:
- Nut-Free Version: Swap peanut butter for sunflower seed butter or tahini for a similar creamy effect without nuts.
- Chocolate Lover’s Dream: Mix melted chocolate directly into the whipped cream for an all-over chocolate flavor instead of layering chips.
- Seasonal Twist: In warmer months, add sliced bananas or strawberries between layers for a fresh, fruity contrast.
- Vegan Adaptation: Use coconut cream whipped with powdered sugar and a plant-based peanut butter, plus vegan cookies or crackers.
- Crunch Factor: Toss chopped roasted peanuts between layers for extra texture.
Personally, I once tried a version with salted caramel drizzle on top — it was a messy experiment but surprisingly delicious! This cake also pairs well with a simple coffee or espresso, enhancing the chocolate-peanut butter combo.
Serving & Storage Suggestions
This icebox cake is best served chilled, straight from the fridge. The creamy layers hold their shape better, and the chocolate and peanut butter flavors are more pronounced when cool. Slice it into small squares or rectangles — it’s rich, so a little goes a long way.
For presentation, a sprinkle of cocoa powder or chopped peanuts on top adds a nice touch. It also pairs beautifully with a scoop of vanilla ice cream or a dollop of whipped cream, especially if you want to serve it during a cozy night in.
Store leftovers covered tightly in the refrigerator for up to 4 days. The flavors develop and intensify over time, so it tastes even better the next day. If you want to freeze it, wrap well and thaw overnight in the fridge before serving.
Reheating isn’t recommended since it’s a no-bake chilled dessert, but letting it sit a few minutes at room temperature can soften the texture slightly if it’s too firm straight out of the fridge.
Nutritional Information & Benefits
This Easy No-Bake Chocolate Peanut Butter Icebox Cake offers a delightful balance of indulgence and nutrition. A typical serving (about 1/12 of the cake) contains approximately:
| Calories | 320 |
|---|---|
| Fat | 22 g |
| Protein | 6 g |
| Carbohydrates | 22 g |
| Sugar | 15 g |
Key ingredients like peanut butter provide healthy fats and protein, while the whipped cream contributes to the smooth texture without overpowering sweetness. If you choose gluten-free crackers, the recipe becomes gluten-free, and swapping in dairy-free cream options can make it suitable for lactose intolerance.
While this cake is definitely a treat, it contains wholesome components that keep the flavors grounded — a reminder that desserts can sometimes be both satisfying and nourishing in their own way.
Conclusion
This Easy No-Bake Chocolate Peanut Butter Icebox Cake is the kind of dessert that sticks with you, not because it’s flashy, but because it offers that perfect balance of creamy, crunchy, and chocolatey goodness without any hassle. Whether you’re feeding a crowd or just treating yourself, it’s a recipe that feels special and approachable all at once.
Feel free to tweak it — add your favorite mix-ins, swap ingredients, or layer in fresh fruit. I love how forgiving it is, which makes it a staple in my dessert repertoire. After all, the best recipes are the ones you make your own.
If you try this cake, I’d love to hear how you made it your own or what unexpected twist you added. Sharing these little kitchen stories makes the experience sweeter, just like the cake itself.
Give it a go, and you might just find your next favorite no-bake dessert.
Frequently Asked Questions
Can I use crunchy peanut butter instead of creamy?
You can, but the texture will be different. Crunchy peanut butter adds a nutty crunch that some people love, but it might make the cream less smooth. If you prefer crunchy, just fold it in gently to keep some texture.
What’s the best way to store this cake?
Keep it tightly wrapped in the fridge for up to 4 days. The flavors meld nicely over time, and the crackers stay soft. Freezing is possible but may affect texture slightly.
Can I make this cake ahead of time?
Absolutely. In fact, it’s better after chilling overnight. This allows the layers to set and flavors to deepen, making it even more delicious.
Is there a dairy-free option for the whipped cream?
Yes, coconut cream whipped with a bit of powdered sugar works well. Just chill the coconut cream overnight and whip it like heavy cream. The flavor will be slightly different but still tasty.
Can I substitute the graham crackers with something else?
Definitely. Chocolate wafers, digestive biscuits, or gluten-free cookies all work great. Just choose something that will soften nicely when chilled but still hold up in layers.
Pin This Recipe!
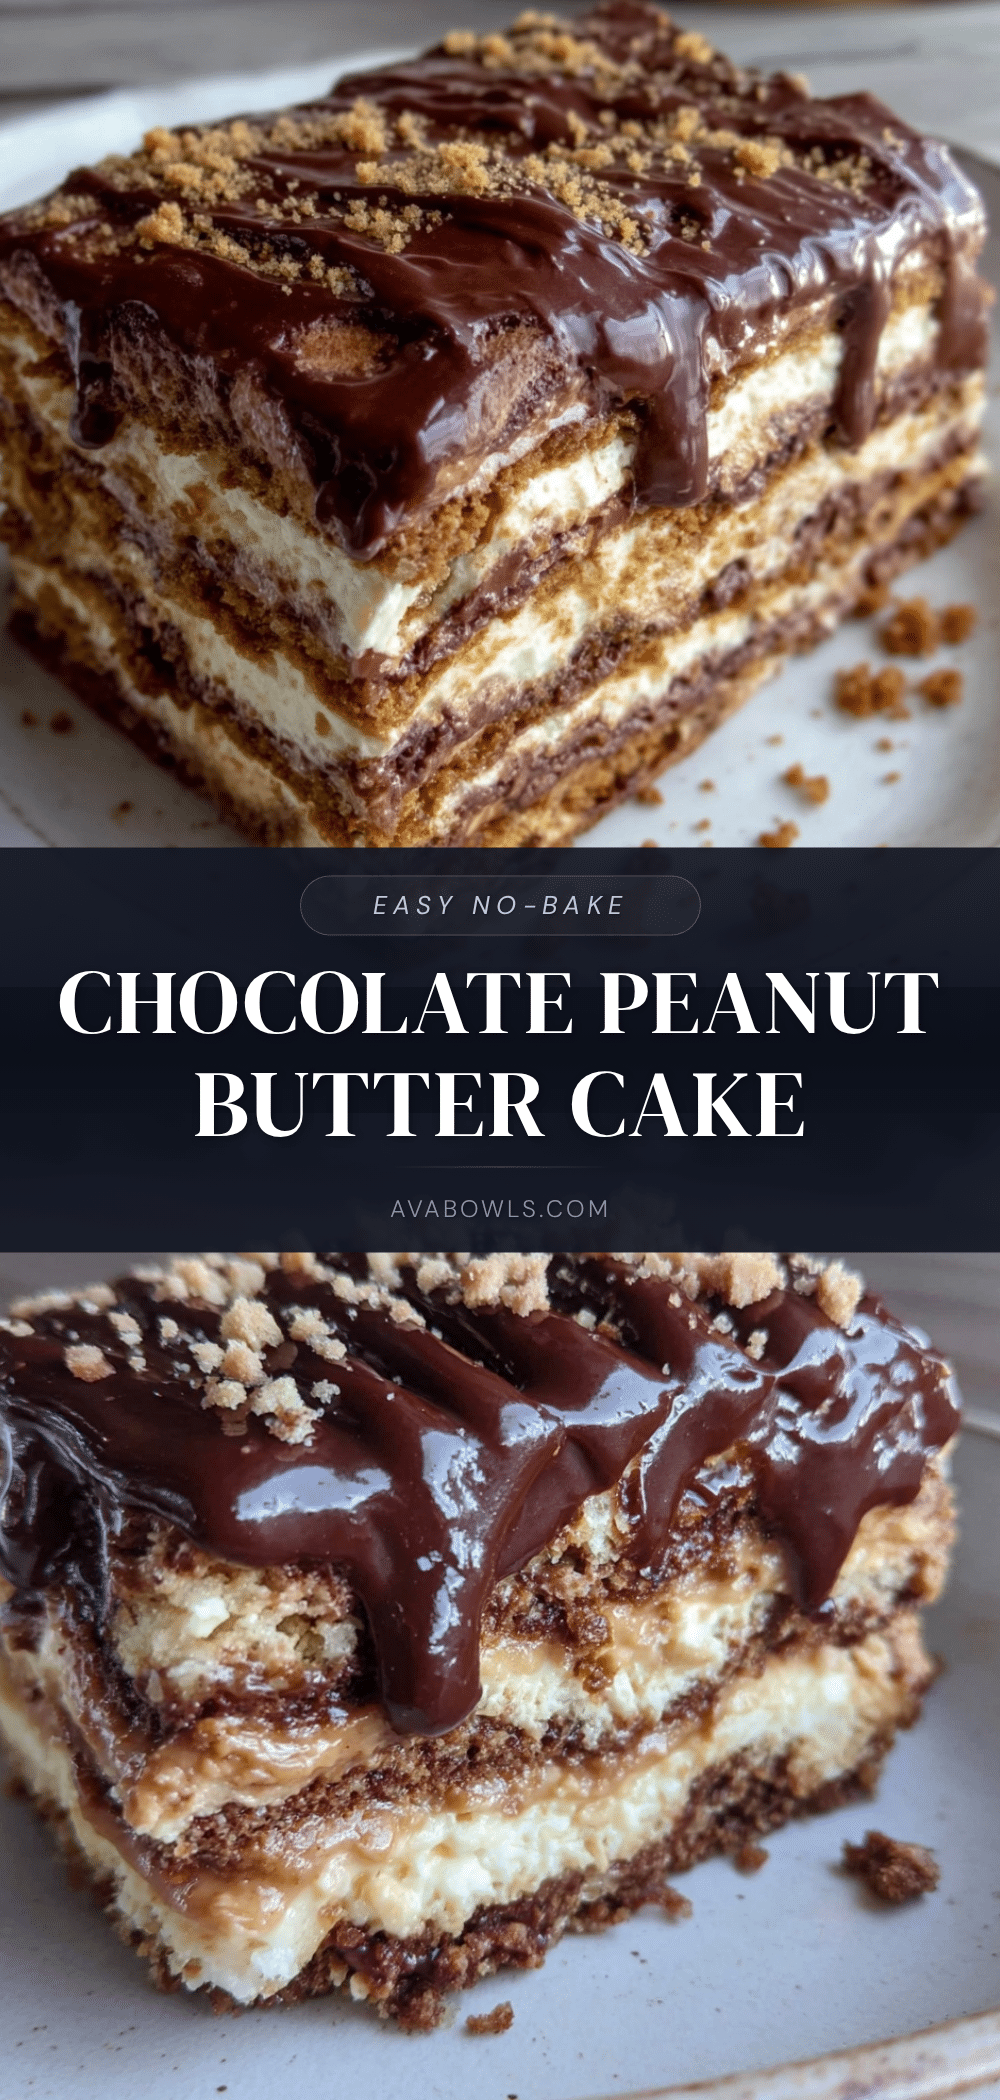
Easy No-Bake Chocolate Peanut Butter Icebox Cake
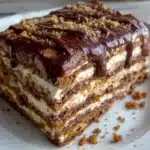
A rich and creamy no-bake dessert featuring layers of whipped peanut butter cream, chocolate, and graham crackers or cookies. Perfect for hot days and quick to prepare, this cake offers indulgent flavors without any oven time.
- Prep Time: 15 minutes
- Cook Time: 0 minutes
- Total Time: 4 hours 15 minutes
- Yield: 12 servings 1x
- Category: Dessert
- Cuisine: American
Ingredients
- 1 cup creamy peanut butter (unsweetened or lightly salted)
- 1 ½ cups (360 ml) heavy whipping cream, chilled
- ¾ cup (90 g) powdered sugar
- 1 teaspoon vanilla extract
- ½ cup (90 g) semi-sweet or dark chocolate chips or chunks
- Graham crackers or chocolate wafers for layering
- Optional: 2 tablespoons melted butter for brushing crackers
- Pinch of salt
Instructions
- Pour 1 ½ cups (360 ml) of chilled heavy whipping cream into a large bowl. Beat on medium-high speed until soft peaks form, about 3-5 minutes. Avoid overwhipping.
- In a separate bowl, combine 1 cup (250 g) creamy peanut butter, ¾ cup (90 g) powdered sugar, and 1 teaspoon vanilla extract. Stir until smooth and creamy. Warm peanut butter slightly if thick.
- Gently fold about half of the whipped cream into the peanut butter mixture using a spatula to lighten the texture. Then fold in the remaining whipped cream carefully to keep it airy.
- Line a 9×5 inch loaf pan or similar dish with a layer of graham crackers or chocolate wafers. Optionally, brush a thin layer of melted butter on the crackers for extra richness.
- Spread about one-third of the peanut butter cream mixture evenly over the cracker layer.
- Sprinkle about ½ cup (90 g) of chocolate chips or finely chopped chocolate over the cream layer.
- Repeat layering with crackers, peanut butter cream, and chocolate sprinkle. Finish with a final cracker layer and spread the remaining cream on top. Smooth the surface.
- Cover the cake tightly with plastic wrap and refrigerate for at least 4 hours, ideally overnight, to allow crackers to soften and flavors to meld.
- Slice with a sharp knife (wipe between cuts for clean slices) and serve chilled.
Notes
Whip the cream to soft peaks to avoid grainy texture. Fold peanut butter mixture gently to keep the cake airy. Chill at least 4 hours or overnight for best texture. Optional melted butter brushed on crackers adds richness. Use gluten-free crackers and dairy-free cream for dietary adaptations.
Nutrition
- Serving Size: About 1/12 of the ca
- Calories: 320
- Sugar: 15
- Fat: 22
- Carbohydrates: 22
- Protein: 6
Keywords: no-bake cake, chocolate peanut butter cake, icebox cake, easy dessert, no oven dessert, peanut butter cream, chocolate dessert