For a while, I just accepted that homemade pickles wouldn’t taste like the crisp, garlicky jarred ones you find in delis or farmers markets. I mean, sure, I could toss cucumbers in vinegar and salt, but the flavor was always a bit flat or overly sharp. There was this quiet craving for pickles that had that perfect bite of fresh garlic, a hint of dill’s brightness, and a subtle tang that wasn’t screaming “store-bought.” It wasn’t about fancy techniques or long wait times—just something straightforward but with that authentic punch.
I remember one afternoon, slicing cucumbers thinly while the kitchen filled with the sharp aroma of crushed garlic and fresh dill. The brine was simmering gently on the stove, and I realized I was onto something that filled the gap I’d been ignoring. These quick garlic dill refrigerator pickles weren’t flashy or complicated, but they had a neat balance of flavors that made me pause. Honestly, it was the kind of small, satisfying kitchen win that sticks with you—something you come back to because it fits easily into busy days and tastes just right.
What made these pickles linger in my mind was their simplicity combined with that unmistakable homemade flavor. It’s not about perfection or fuss, but the quiet confidence of a recipe you trust to deliver crisp, garlicky, dill-infused goodness every time. And that’s why I keep coming back to this method—because it fills that pickle-shaped hole I didn’t realize was there.
Why You’ll Love This Recipe
After testing various quick pickle recipes, this one stood out for reasons beyond just its flavor. It’s a recipe I trust when I want something fast but still crave that real homemade punch. Here’s why it’s a keeper:
- Quick & Easy: Ready in just about 10 minutes of prep and a few hours in the fridge, perfect for last-minute pickle cravings or when you want a fresh condiment fast.
- Simple Ingredients: Uses pantry staples and fresh produce you probably already have—no need for specialty items or weird preservatives.
- Perfect for Snacking and Meal Prep: Whether you’re topping sandwiches, adding crunch to salads, or just grabbing a quick tangy bite, these pickles fit right in.
- Crowd-Pleaser: I’ve brought these to potlucks and family dinners, and they vanish fast. Kids, adults, everyone seems to appreciate that crisp texture and bright garlic hit.
- Unbelievably Delicious: The combination of fresh dill, crushed garlic, and just the right vinegar-sugar balance makes this pickling brine special. It’s not just sour—it’s flavorful and lively.
This recipe differs from others because it hits a sweet spot between speed and flavor depth. The brine is carefully balanced so the garlic doesn’t overpower but gently infuses, and the dill stays fresh without turning bitter. Plus, slicing the cucumbers thinly helps the flavors soak in faster, which is a neat trick I picked up after a few trial runs.
Honestly, these pickles aren’t just an add-on; they’re the kind of quick homemade flavor that turns a simple sandwich or salad into something memorable. I find myself reaching for this recipe when I want to add that fresh, tangy crunch without a lot of wait or effort.
What Ingredients You Will Need
This recipe calls for straightforward ingredients that work together to create an easy, bright pickle brine with that classic garlic dill flavor. Most are pantry staples, and a few fresh touches bring the whole thing home.
- Fresh cucumbers: About 4-5 small to medium pickling cucumbers (roughly 1 pound / 450 grams). I prefer firm, crisp cucumbers with minimal seeds for the best crunch.
- Garlic cloves: 4-5 large cloves, crushed or thinly sliced (fresh garlic is a must here for that punch).
- Fresh dill: A good handful of sprigs (about 1/4 cup loosely packed). If fresh dill isn’t available, dried dill weed works but fresh is best for that vibrant flavor.
- White vinegar: 1 cup (240 ml). It provides the sharp acidity without muddling flavors—distilled white vinegar is standard, but you can substitute apple cider vinegar for a milder tang.
- Water: 1 cup (240 ml), to dilute the vinegar so the acidity isn’t too intense.
- Granulated sugar: 1 tablespoon, to balance the vinegar’s sharpness just right (optional but recommended).
- Kosher salt or pickling salt: 1 tablespoon (use pickling salt if you want the clearest brine). Avoid iodized table salt as it can cloud the brine and add off-flavors.
- Black peppercorns: 1 teaspoon whole, for subtle spice.
- Red pepper flakes: 1/4 teaspoon (optional, if you like a little heat).
A quick note on ingredients: I’ve tested this recipe with both fresh garden cucumbers and store-bought ones, and while homegrown offers a crisp edge, the store-bought variety works just fine if you slice them thin. For best results, look for firm cucumbers with no soft spots.
If you’re aiming for a low-sodium version, reduce the salt but keep in mind it might affect the preservation and flavor depth. And if you want a gluten-free pickle, this recipe is naturally safe since it doesn’t include any additives.
For a more herbaceous twist, I’ve occasionally tossed in a few sprigs of fresh thyme or tarragon, but dill remains the starring herb here, giving that classic pickle aroma and flavor.
Equipment Needed
You don’t need fancy gear for these quick garlic dill refrigerator pickles, which is part of their charm. Here’s what I use:
- Sharp knife and cutting board: For slicing cucumbers and crushing garlic. A mandoline slicer works great if you want uniform thin slices quickly, but be careful—slicers can be tricky if you’re not used to them.
- Measuring cups and spoons: To get the brine proportions just right.
- Medium saucepan: For heating the brine mixture gently and dissolving the sugar and salt.
- Glass jars or containers with lids: I prefer pint-sized mason jars or any airtight glass container. Plastic containers can sometimes absorb flavors or odors over time.
- Mixing bowl: Optional, if you want to toss cucumbers with salt before pickling to draw out moisture (a small step I sometimes do for extra crunch).
If you don’t have mason jars, any clean glass container with a tightly fitting lid will do. Just avoid metal lids that might react with the vinegar over time. I’ve also found that using a non-reactive pot like stainless steel for the brine keeps flavors clean.
Maintenance tip: Keep your knives razor-sharp—slicing cucumbers thinly is way easier that way, and it prevents bruising the vegetables which helps keep them crisp.
Preparation Method
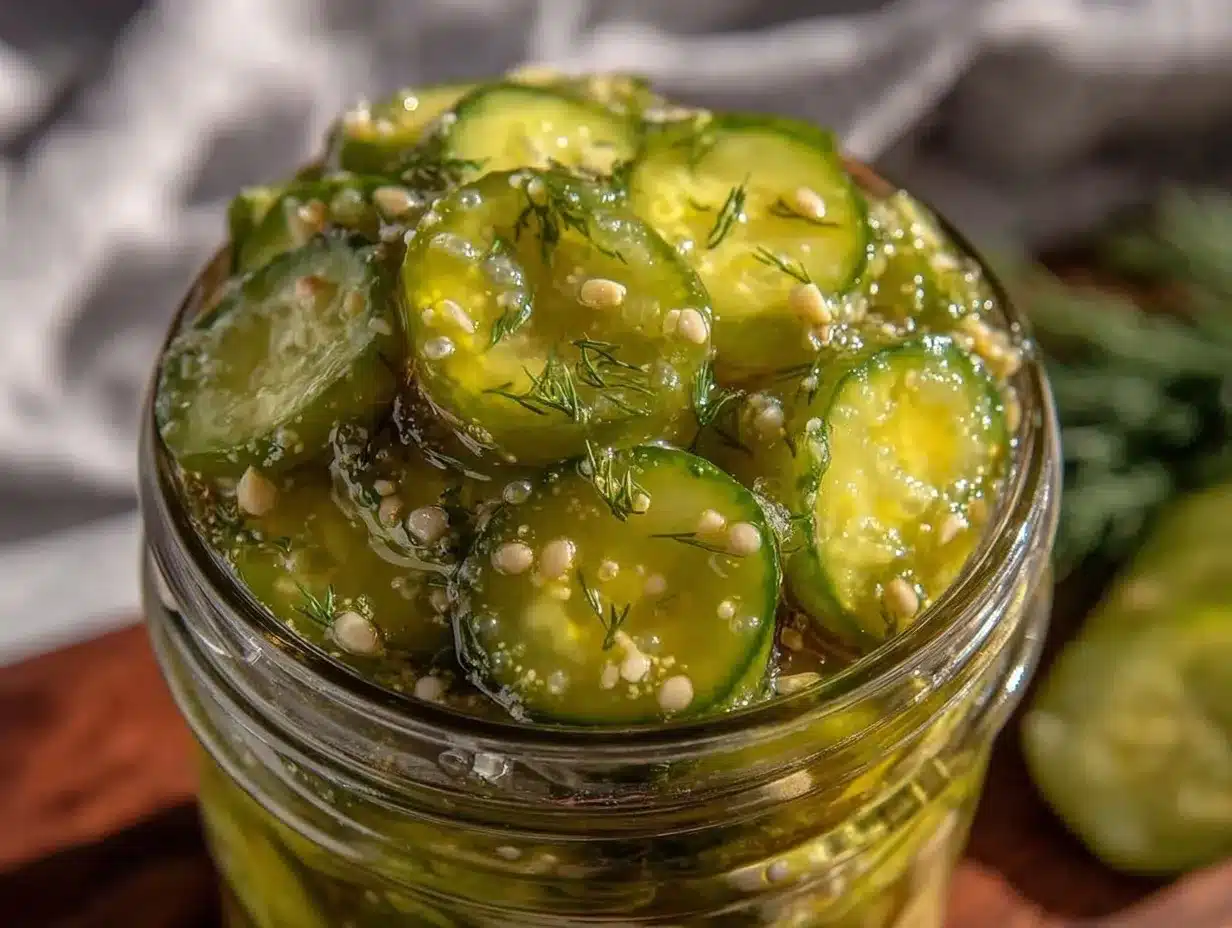
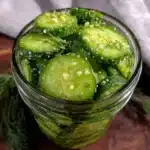
- Wash and slice the cucumbers: Rinse about 4-5 small pickling cucumbers under cold water. Slice them into thin rounds, roughly 1/8-inch (3 mm) thick. Thin slices absorb the brine faster, giving you tasty pickles sooner. (Tip: If you have a mandoline, use it carefully for even slices.)
- Prepare the garlic and dill: Peel and crush or thinly slice 4-5 garlic cloves. Rinse fresh dill sprigs and pat dry. Reserve about 1/4 cup of loosely packed dill for each jar you plan to fill.
- Make the brine: In a medium saucepan, combine 1 cup (240 ml) white vinegar, 1 cup (240 ml) water, 1 tablespoon granulated sugar, 1 tablespoon kosher salt, 1 teaspoon black peppercorns, and optional 1/4 teaspoon red pepper flakes. Warm over medium heat, stirring occasionally until sugar and salt dissolve completely – about 5 minutes. Remove from heat and let cool slightly (warm but not hot is best for pouring).
- Pack the jars: Into clean glass jars, layer the cucumber slices, crushed garlic, and dill sprigs. Pack fairly tightly, but don’t crush the cucumbers. You can add extra peppercorns or a few mustard seeds if you want a more complex spice profile.
- Pour the brine over: Carefully pour the warm brine over the cucumbers, filling the jar and covering the slices completely. Leave about 1/2 inch (1.2 cm) of headspace at the top.
- Seal and chill: Screw on the lids tightly and let the jars cool to room temperature. Then transfer to the fridge. The pickles will be ready to enjoy after about 4 hours, but taste best after 24 hours when the flavors have melded fully.
- Enjoy: These fridge pickles can stay fresh and crunchy in the refrigerator for up to 2 weeks. Always use a clean fork or tongs to remove pickles to keep them fresh longer.
If you want extra crunch, a quick trick I learned is salting the cucumber slices lightly before packing them in jars. Just toss slices with 1 teaspoon salt in a bowl, let sit for 30 minutes, then rinse and pat dry before pickling. It draws out moisture and helps keep the texture crisp.
Cooking Tips & Techniques
Making quick garlic dill refrigerator pickles is pretty straightforward, but a few insider details make the difference between meh and mouthwatering.
- Don’t skip the sugar: Even a small amount balances the sharpness of vinegar and garlic, rounding out flavors beautifully without making the pickles sweet.
- Use fresh garlic: I’ve tried pre-minced or jarred garlic, but it just can’t match the bright punch of freshly crushed cloves.
- Slice thin for speed: Thinner slices soak up brine faster, so you get tasty results quickly. Thicker slices take longer and can be mushy if left too long.
- Keep jars airtight: Since these are refrigerator pickles, they don’t go through a canning process. Always keep lids tight to avoid flavor contamination from other fridge odors.
- Chill promptly: Don’t leave pickles at room temperature for more than a couple hours after preparing. The vinegar helps preserve, but refrigeration is key to crispness and safety.
- Experiment with spices: Black peppercorns and red pepper flakes are classic, but a few mustard seeds or coriander seeds add a layer of flavor I’ve come to like.
- Patience pays off: If you can wait 24 hours before digging in, the flavors deepen nicely. But hey, if hunger strikes sooner, they’re still quite tasty after just a few hours.
One mistake I made early on was overfilling jars with cucumbers, leaving little brine to cover them. That led to uneven pickling. So always make sure the slices are fully submerged.
Also, don’t be tempted to skip rinsing if you salt the cucumbers first—the excess salt can make pickles too salty otherwise.
Variations & Adaptations
This quick garlic dill refrigerator pickle recipe is flexible and lends itself well to tweaks depending on your mood or pantry.
- Spicy kick: Add more red pepper flakes or a sliced fresh chili to the jar for a fiery version that works wonders on tacos or burgers.
- Herb twist: Swap dill for fresh tarragon or thyme for a different herbal note. I’ve made thyme pickles that pair beautifully with roasted meats.
- Low-sodium option: Cut salt in half and increase garlic and herbs to keep flavor vibrant without the extra sodium.
- Vinegar swap: Use apple cider vinegar instead of white vinegar for a milder, fruitier tang. It changes the profile nicely for those who find white vinegar too sharp.
- Pickle spears: Instead of slices, cut cucumbers lengthwise into spears for a chunkier, classic deli-style pickle experience.
Personally, I once added a teaspoon of whole mustard seeds and a few coriander seeds with the garlic and dill for a somewhat Indian-inspired flavor that went surprisingly well with grilled chicken.
If you want to try a related quick pickle, I recommend pairing these with a creamy dip like the fresh Greek yogurt veggie dip—the combo is a simple party winner.
Serving & Storage Suggestions
These pickles are best served cold straight from the fridge, where their crisp texture and tangy flavor really shine. They make a fantastic side for sandwiches, burgers, or a crunchy snack on their own.
Try them alongside creamy dishes like the creamy spring vegetable fettuccine alfredo—the acidity cuts through richness and brightens the plate.
To store, keep pickles refrigerated in an airtight jar or container. They’ll stay fresh and flavorful for up to two weeks, but I find they’re best within the first week for maximum crunch.
When reheating dishes that include these pickles, add them after warming to maintain their texture and brightness. The vinegar can mellow over time, so if you notice flavors softening, a quick sprinkle of fresh dill or a splash of vinegar can revive them.
Nutritional Information & Benefits
These garlic dill refrigerator pickles are low-calorie and packed with flavor without added fat, making them a smart condiment choice. Per serving (about 3-4 slices), you can expect approximately 10-15 calories, minimal carbs, and 150 mg sodium depending on salt adjustment.
The vinegar offers potential digestive benefits, and the fresh garlic contributes antioxidants. Dill adds vitamins A and C along with a fresh herbal boost.
Since the recipe is naturally gluten-free, vegan, and low in sugar, it fits many dietary needs. Just watch salt levels if you’re monitoring sodium intake.
From a wellness standpoint, having a jar of these pickles on hand encourages snacking on something flavorful and crisp rather than processed options.
Conclusion
This quick garlic dill refrigerator pickle recipe is a simple, reliable way to get that satisfying homemade pickle flavor without fuss or long wait times. It’s the kind of recipe that quietly becomes a staple, whether you’re topping sandwiches, jazzing up salads, or just grabbing a crunchy snack out of the fridge.
What I love most is how easy it is to make and how well it balances fresh garlic’s punch with dill’s brightness and just enough tang. It’s adaptable, approachable, and honestly, it’s the pickle recipe I reach for again and again because it just works.
If you try it, feel free to tweak the herbs or heat level to suit your taste—there’s something comforting about making it your own. And if you’re curious about easy homemade flavors, you might enjoy the creamy beer cheese pretzel dip—another quick recipe with bold flavor ready in minutes.
Thanks for stopping by, and here’s to plenty of crunchy, garlicky pickles ahead!
FAQs
How long do quick garlic dill refrigerator pickles last in the fridge?
They stay fresh and crunchy for up to two weeks when stored in an airtight container in the refrigerator.
Can I use regular cucumbers instead of pickling cucumbers?
Yes, but pickling cucumbers tend to be firmer and have fewer seeds, which helps keep the pickles crisp for longer.
Do I have to cook the brine for this recipe?
Heating the brine helps dissolve the salt and sugar and releases flavors from spices, but you can also mix everything cold. The flavor might take a bit longer to develop.
Can I make these pickles spicy?
Absolutely! Add extra red pepper flakes, fresh sliced chilies, or even a dash of hot sauce to the brine for a spicy kick.
Why are my refrigerator pickles sometimes mushy?
Mushy pickles usually result from using overripe cucumbers, slicing too thickly, or not keeping them fully submerged in brine. Salting cucumbers before pickling can help maintain crispness.
Pin This Recipe!
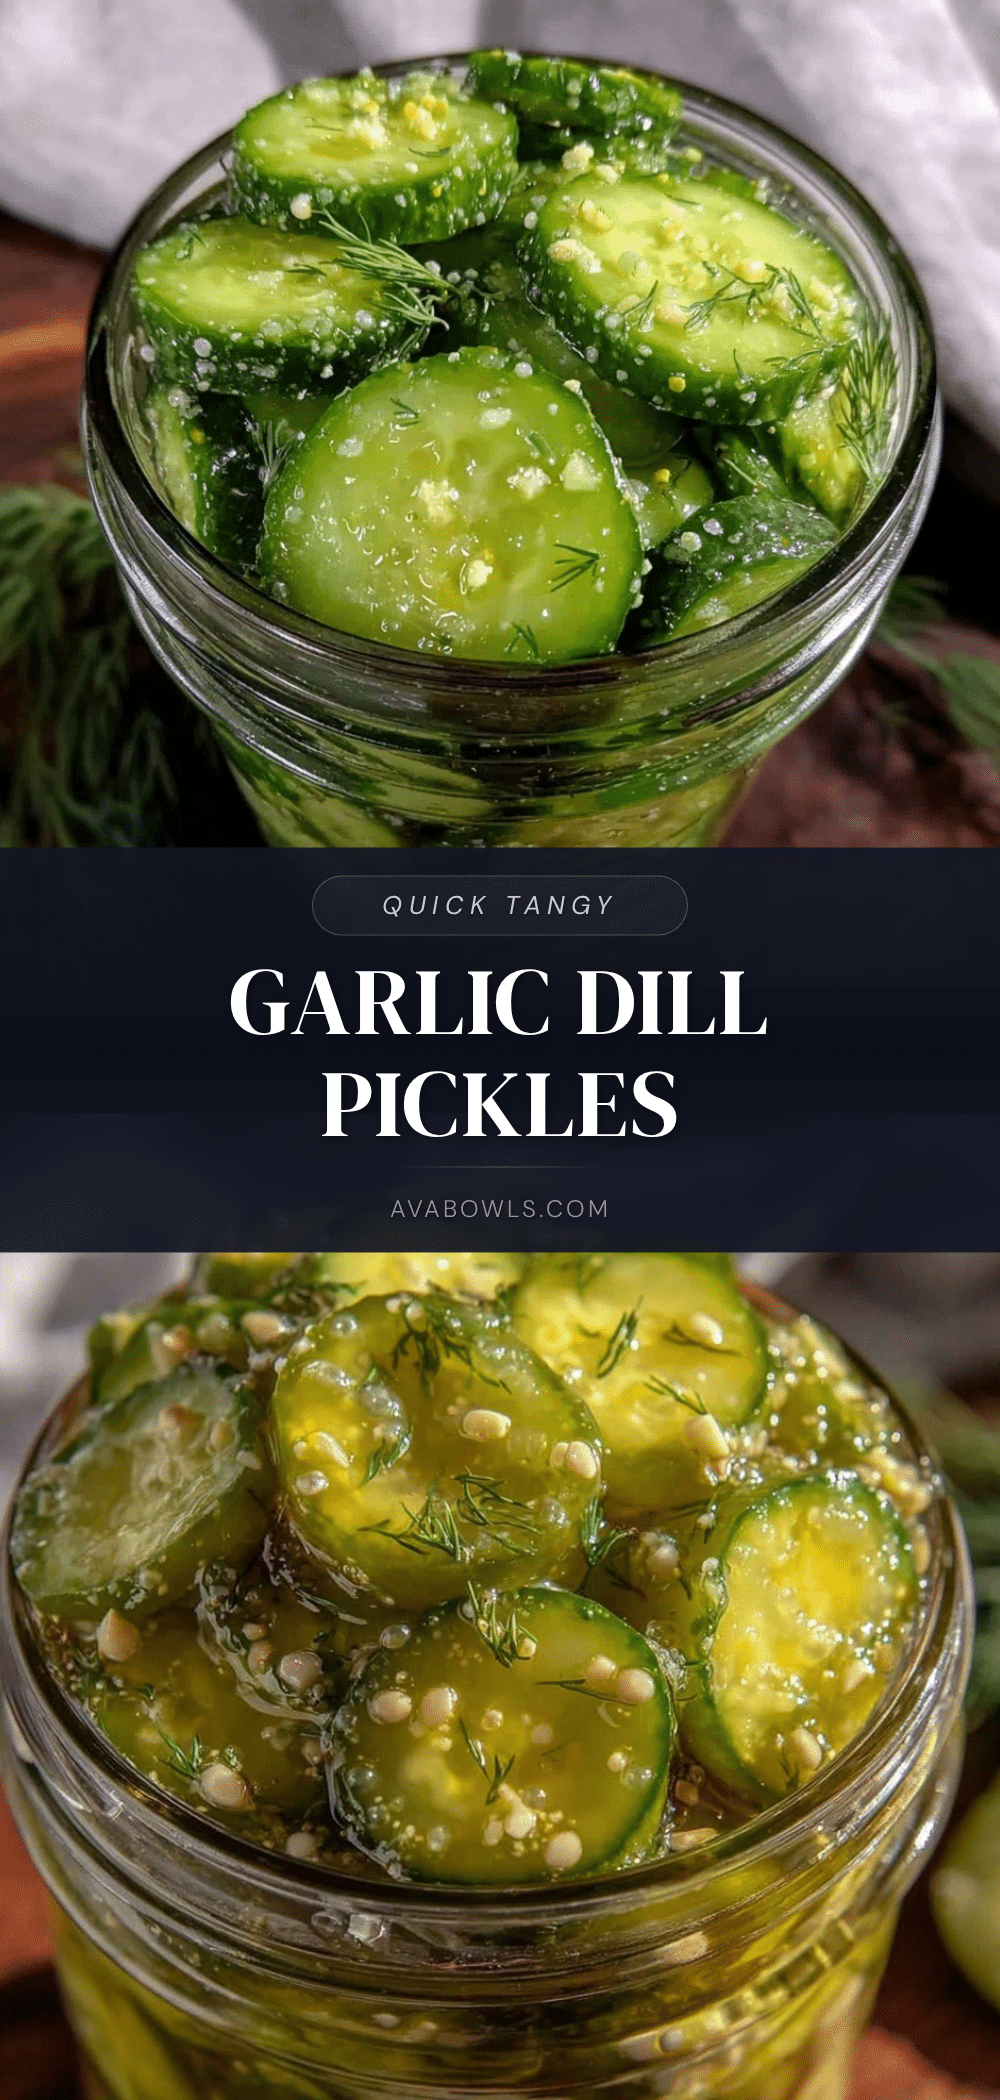
Quick Garlic Dill Refrigerator Pickles
A simple and fast recipe for crisp, garlicky, dill-infused refrigerator pickles with a perfect balance of flavors. Ready in about 10 minutes prep and a few hours chilling.
- Prep Time: 10 minutes
- Cook Time: 5 minutes
- Total Time: 4 hours 15 minutes
- Yield: 4 servings 1x
- Category: Condiment
- Cuisine: American
Ingredients
- 4–5 small to medium pickling cucumbers (about 1 pound / 450 grams)
- 4–5 large garlic cloves, crushed or thinly sliced
- 1/4 cup loosely packed fresh dill sprigs
- 1 cup (240 ml) white vinegar (or apple cider vinegar as a substitute)
- 1 cup (240 ml) water
- 1 tablespoon granulated sugar (optional but recommended)
- 1 tablespoon kosher salt or pickling salt
- 1 teaspoon whole black peppercorns
- 1/4 teaspoon red pepper flakes (optional)
Instructions
- Wash and slice the cucumbers into thin rounds about 1/8-inch (3 mm) thick.
- Peel and crush or thinly slice the garlic cloves. Rinse and pat dry the fresh dill sprigs.
- In a medium saucepan, combine vinegar, water, sugar, salt, black peppercorns, and red pepper flakes if using. Warm over medium heat, stirring occasionally until sugar and salt dissolve, about 5 minutes. Remove from heat and let cool slightly.
- Layer cucumber slices, crushed garlic, and dill sprigs into clean glass jars, packing tightly but without crushing cucumbers.
- Pour the warm brine over the cucumbers, covering completely and leaving about 1/2 inch headspace.
- Seal jars tightly and let cool to room temperature, then refrigerate.
- Pickles are ready to eat after about 4 hours but taste best after 24 hours. Keep refrigerated and consume within 2 weeks.
Notes
For extra crunch, salt cucumber slices for 30 minutes, rinse and pat dry before pickling. Use fresh garlic for best flavor. Keep jars airtight and refrigerate promptly. Flavors deepen after 24 hours. Avoid iodized salt to prevent cloudy brine.
Nutrition
- Serving Size: About 3-4 pickle sli
- Calories: 1015
- Sugar: 1
- Sodium: 150
- Carbohydrates: 3
- Fiber: 0.5
- Protein: 0.3
Keywords: quick pickles, garlic dill pickles, refrigerator pickles, easy homemade pickles, quick pickle recipe, dill pickles, garlic pickles