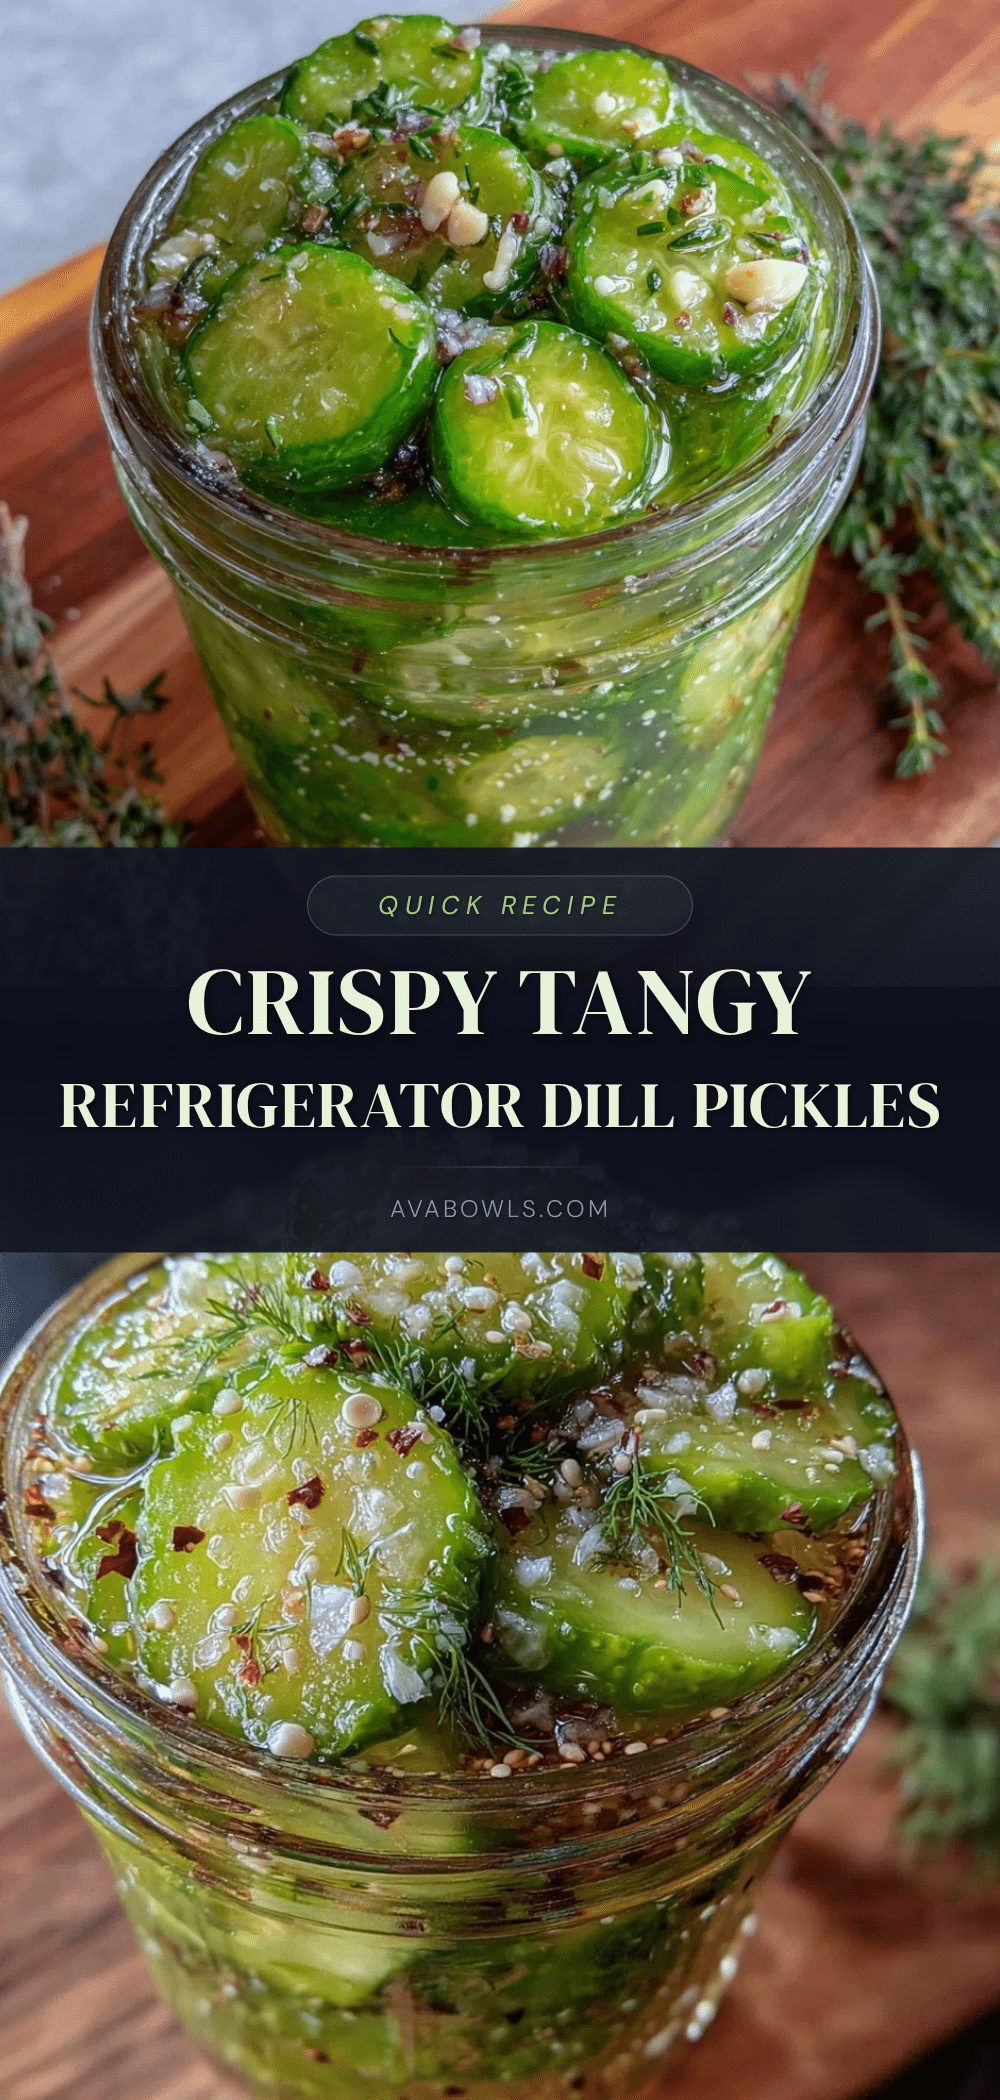
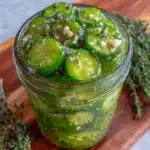
Late one evening, after a long day of juggling work emails and dinner chaos, I found myself staring at a lonely cucumber in the fridge. Honestly, I wasn’t in the mood for a big cooking project—just something quick and satisfying. So, I grabbed a few pantry staples, tossed them together somewhat on a whim, and left the jar to do its thing overnight. The next day? Well, those quick crispy tangy refrigerator dill pickles were nothing short of a revelation. Crunchy, zesty, and way better than I expected from such a simple mix.
At first, I was skeptical about skipping the whole canning ordeal. I mean, can refrigerator pickles really match the snap and tang of traditional ones? But after that first bite, I found myself sneaking more than a few slices while prepping dinner. It became clear this was my new go-to when I needed a quick pickle fix without the fuss. Over the next week, I made them several times, sometimes tweaking the garlic or dill levels, but the core tangy crispness remained a constant win.
These pickles have stuck around in my kitchen because they hit that sweet spot between speedy prep and satisfying crunch. Plus—let’s be honest—they bring a little zing to everything from sandwiches to salads, even that creamy spring vegetable fettuccine alfredo recipe I recently shared. I guess the quiet truth is, they make me feel like I’m crafting something special without the usual pickle-making drama.
So if you find yourself with a cucumber and a few minutes to spare, this recipe might just become your favorite quick crunchy companion, too.
Why You’ll Love This Quick Crispy Tangy Refrigerator Dill Pickles Recipe
Having tested this recipe multiple times, I can confidently say it balances simplicity and flavor in a way that’s hard to beat. Here’s what makes these refrigerator dill pickles stand out:
- Quick & Easy: Ready to enjoy in just 24 hours, perfect for busy weeknights or last-minute snack cravings.
- Simple Ingredients: Uses basic pantry staples like vinegar, garlic, and dill—no weird additives or hard-to-find spices.
- Perfect for Snacking and More: These pickles brighten up sandwiches, burgers, or even a fresh cucumber sushi roll with cream cheese and salmon for a fun twist.
- Crowd-Pleaser: My friends always ask for the recipe after trying these—kids love the crunch, adults appreciate the tang.
- Unbelievably Delicious: The crisp snap combined with balanced tanginess keeps you coming back for just one more slice.
What really sets this recipe apart is the quick refrigerator method that locks in that classic dill flavor without waiting weeks. I’ve found using fresh dill and a pinch of crushed red pepper adds a subtle complexity that you won’t find in many store-bought versions. Honestly, these pickles have become my secret weapon for elevating simple meals, similar to how adding a creamy beer cheese pretzel dip can turn any snack time into a party.
They offer that nostalgic comfort food vibe but with a fresh, homemade twist that feels right at home in an easy weeknight routine. And the best part? You don’t need fancy equipment or hours of waiting to enjoy them.
What Ingredients You Will Need for Quick Crispy Tangy Refrigerator Dill Pickles
This recipe uses simple, wholesome ingredients to deliver bold flavor and satisfying texture without the fuss. Most are pantry staples, so you likely have them handy already. Here’s a quick rundown:
- Fresh cucumbers: About 4-5 medium Kirby or Persian cucumbers, sliced into spears or rounds (Kirby cucumbers hold their crunch best).
- Fresh dill: 3-4 sprigs (or 2 tsp dried dill if fresh isn’t available; fresh adds more vibrant flavor).
- Garlic cloves: 2-3, peeled and smashed (adds that classic punch).
- White vinegar: 1 cup (240 ml), for sharp acidity and preserving crispness. You can swap with apple cider vinegar for a slightly sweeter tang.
- Water: 1 cup (240 ml), preferably filtered or distilled.
- Kosher salt: 1 tablespoon (use pickling or sea salt if kosher isn’t handy; avoid iodized salt).
- Granulated sugar: 1 teaspoon (balances acidity just right).
- Black peppercorns: 1 teaspoon, whole (adds subtle heat).
- Red pepper flakes: 1/4 teaspoon (optional, for a gentle kick).
- Mustard seeds: 1/2 teaspoon (optional, gives a little aromatic zing).
I recommend picking firm, small-curd cucumbers since they tend to stay crunchy longer. When I’m in a pinch, Persian cucumbers work well because they’re thin-skinned and less watery. For the dill, fresh is king here—store-bought dried dill can sometimes taste flat or stale, so if you have a garden or farmer’s market nearby, grab fresh sprigs.
If you want a dairy-free or vegan snack idea to pair with these pickles, try serving them alongside a creamy lemon ricotta pasta recipe with fresh peas and mint for a light, refreshing meal. The tang of the pickles complements the smooth pasta beautifully.
Equipment Needed
- Quart-sized glass jar or airtight container: Perfect for holding the pickles and brine. I’ve used Mason jars and simple glass containers—both work great as long as they seal well.
- Measuring cups and spoons: For precise vinegar, salt, and sugar amounts—accuracy helps keep that perfect tang.
- Knife and cutting board: To slice your cucumbers evenly. A sharp knife helps keep the slices clean and crisp.
- Small saucepan: For heating the brine ingredients just enough to dissolve salt and sugar.
- Tongs or fork: Handy for packing the cucumbers into the jar without bruising.
While you don’t need anything fancy, I’ve found that using glass over plastic containers keeps flavors clearer and prevents any off-tastes. If you’re on a budget, repurposed glass jars from store-bought pickles or jams work just fine once cleaned thoroughly. Just be sure to avoid metal lids that might react with the vinegar.
Preparation Method
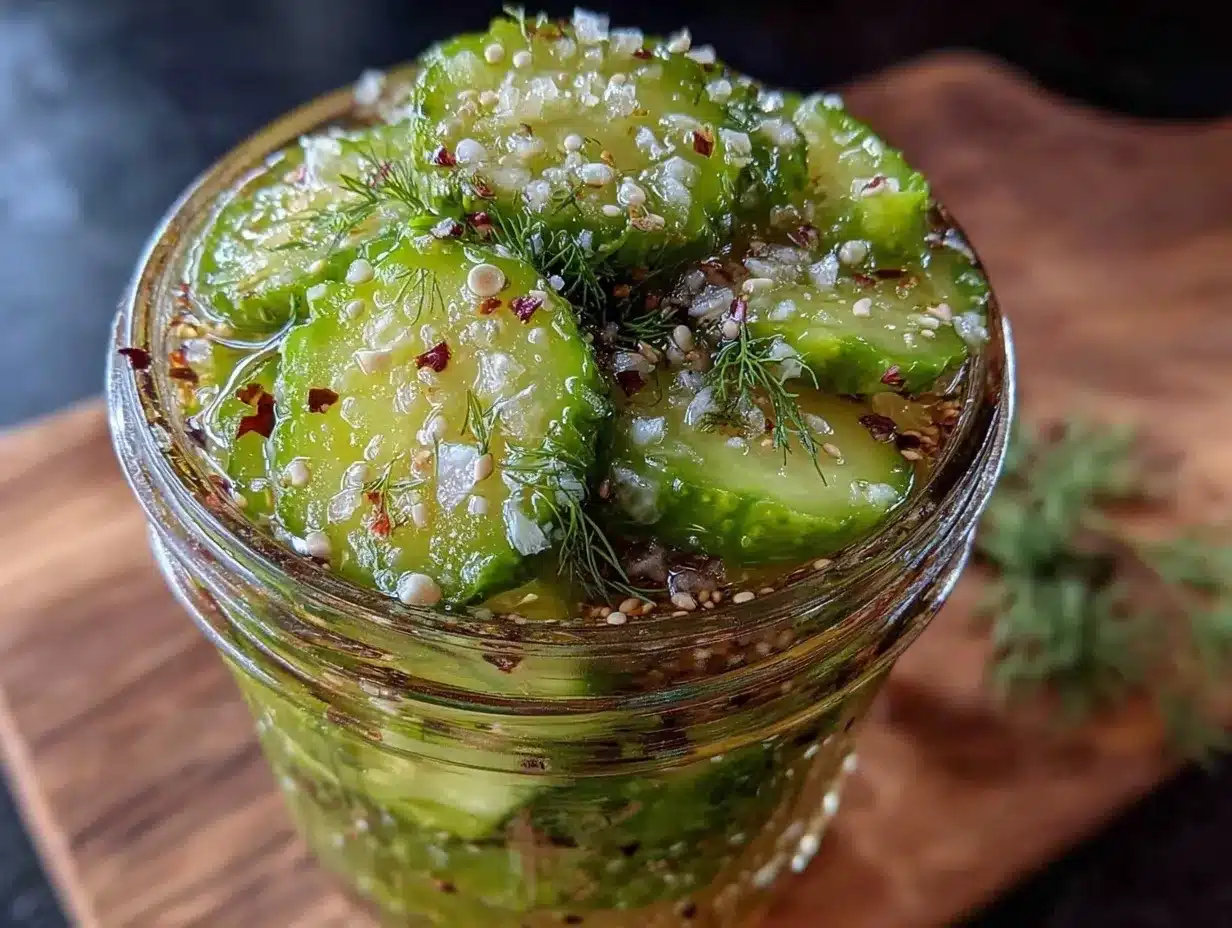
- Prepare the cucumbers: Rinse 4-5 medium Kirby cucumbers under cold water. Trim the ends, then slice into spears about 3-4 inches long or into 1/4-inch thick rounds depending on your preference. Pat dry with a clean towel to remove excess moisture. (About 10 minutes)
- Pack the jar: Place 3-4 sprigs of fresh dill at the bottom of a clean quart-sized glass jar. Add 2-3 smashed garlic cloves, 1 teaspoon black peppercorns, 1/4 teaspoon crushed red pepper flakes, and 1/2 teaspoon mustard seeds if using. Pack the cucumber slices tightly but gently into the jar. (5 minutes)
- Make the brine: In a small saucepan, combine 1 cup (240 ml) white vinegar, 1 cup (240 ml) water, 1 tablespoon kosher salt, and 1 teaspoon granulated sugar. Warm over medium heat, stirring until salt and sugar fully dissolve. Remove from heat and let cool for 5 minutes. (10 minutes)
- Pour the brine: Carefully pour the cooled brine over the cucumbers until they’re fully submerged, leaving about 1/2 inch of headspace at the top of the jar. Tap the jar gently on the counter to release trapped air bubbles. Seal the jar tightly. (5 minutes)
- Refrigerate: Place the jar in the refrigerator and let it rest for at least 24 hours before tasting. The pickles will develop more flavor if left up to 3 days but remain crisp. (24+ hours)
- Check for crispness: When you open the jar, the pickles should have a firm snap and tangy flavor. If they feel soft, try packing them a little tighter next time or check the freshness of your cucumbers. (No extra time, just a sensory check)
One tip I’ve learned is to avoid boiling the brine vigorously; gentle warming is enough to dissolve the salt and sugar without cooking off the fresh dill aroma. Also, don’t rush the resting time—overnight really helps those flavors marry.
Cooking Tips & Techniques for Perfect Refrigerator Dill Pickles
Honestly, the trickiest part about refrigerator pickles is balancing flavor with crunch. Here’s what I’ve learned through trial and error:
- Use firm, fresh cucumbers: Older or soft cucumbers turn mushy quickly. I always pick ones that feel heavy for their size and have no wrinkled skin.
- Don’t skip the salt and sugar: Salt draws out moisture and keeps the texture crisp, while a touch of sugar balances the acidity and rounds out the flavor.
- Keep the brine cool before pouring: Hot brine can wilt the cucumbers slightly, so I let it cool for a few minutes to protect that crunch.
- Pack the cucumbers tightly: This helps keep them submerged and evenly flavored. I sometimes use a clean utensil to press them down gently.
- Give it time: I’ve found that 24 hours is the minimum, but 2-3 days really lets the tang deepen without sacrificing texture.
- Experiment with garlic and dill: Some batches get an extra clove or two, or a little more dill, depending on my mood. It’s a forgiving recipe that lets you tweak flavor easily.
One time, I accidentally left the jar uncovered in the fridge overnight (don’t ask). The pickles still turned out crisp and tasty, which is a testament to how straightforward and forgiving this recipe is, even if you’re not a pickle pro.
Variations & Adaptations
While this recipe nails the classic tangy dill pickle vibe, you can tweak it to suit your taste or dietary needs:
- Spicy Pickles: Add extra crushed red pepper flakes or a sliced jalapeño to the jar for a fiery kick.
- Garlic Lover’s Version: Double the garlic cloves and throw in some garlic powder for a robust punch.
- Low-Sodium Option: Reduce the salt by half and increase the vinegar slightly to keep flavor bright but with less sodium.
- Vegan-Friendly Sweetener: Swap granulated sugar with maple syrup or agave nectar for a natural touch.
- Different Veggies: Use the same brine for quick pickling other veggies like green beans, carrots, or even small pearl onions.
Personally, I once tried adding a pinch of turmeric for color and a subtle earthiness, which worked surprisingly well. For a fun twist, these pickles pair nicely alongside some loaded nachos supreme—imagine the crunchy tang cutting through all that melty cheese and toppings.
Serving & Storage Suggestions
These refrigerator dill pickles are best served cold straight from the fridge. They add a fantastic crunch to sandwiches, burgers, or as a zesty snack on their own. For a light lunch, I love pairing them with creamy lemon ricotta pasta for a fresh contrast that wakes up the palate.
Store the pickles in the sealed jar in your refrigerator for up to 3 weeks. The flavor will intensify over time, but the crispness is best enjoyed within the first 10 days. If you find the pickles soften a bit after a while, try transferring them into fresh brine or enjoy them chopped in salads.
When reheating dishes that include these pickles, I recommend adding them at the end or serving on the side to keep their crunch intact. They also make a fantastic garnish on creamy slow cooker queso blanco dip or alongside crispy Nashville hot chicken tenders to cut through the heat and richness.
Nutritional Information & Benefits
These quick crispy tangy refrigerator dill pickles are low in calories and carbs, making them a guilt-free snack or condiment. Each serving (about 3 spears) contains roughly:
| Calories | 10-15 |
|---|---|
| Carbohydrates | 2g |
| Fat | 0g |
| Protein | 0g |
| Sodium | 450mg (varies with salt amount) |
Cucumbers are hydrating and a good source of antioxidants, while vinegar may aid digestion and blood sugar regulation. Dill adds a fresh herbal note and contains vitamins A and C. If you’re watching sodium intake, adjusting the salt in the brine is easy without sacrificing much flavor.
Overall, these pickles are a crunchy, flavorful way to add more veggies to your diet in a convenient format.
Conclusion
This quick crispy tangy refrigerator dill pickles recipe has become a small but reliable pleasure in my kitchen. It’s proof that sometimes the simplest ideas—just cucumbers, dill, garlic, and a bit of vinegar—can deliver the most satisfying results.
Feel free to make this recipe your own by adjusting garlic, spice, or sweetness levels to match your cravings. I love how it pairs with a variety of dishes, from lighter pasta bowls to hearty dips and snacks.
Give it a try and see how these pickles can brighten your meals with minimal effort. I’d love to hear how you customize your batch or what dishes you serve them with—drop a comment or share your twist! Remember, sometimes the best recipes are the ones you come back to again and again because they just work.
Frequently Asked Questions about Quick Crispy Tangy Refrigerator Dill Pickles
How long do refrigerator dill pickles last?
They keep well in the fridge for up to 3 weeks. For best crunch, aim to eat them within 10 days.
Can I use regular cucumbers instead of Kirby cucumbers?
Yes, but Kirby cucumbers are preferred for their firmness and crisp texture. Regular cucumbers may become softer faster.
Do I need to boil the cucumbers before pickling?
Nope! This recipe uses raw cucumbers for that fresh snap. Just warm the brine to dissolve salt and sugar.
Can I make these pickles spicy?
Absolutely. Add crushed red pepper flakes, sliced jalapeños, or even a dash of hot sauce to the jar for heat.
Is it necessary to use fresh dill?
Fresh dill gives the best flavor, but dried dill works in a pinch. Just use about half the amount of dried compared to fresh.
Pin This Recipe!
Quick Crispy Tangy Refrigerator Dill Pickles
A simple and quick refrigerator pickle recipe that delivers crunchy, tangy dill pickles ready in 24 hours using fresh cucumbers and pantry staples.
- Prep Time: 15 minutes
- Cook Time: 10 minutes
- Total Time: 24 hours 25 minutes
- Yield: About 4 servings 1x
- Category: Condiment
- Cuisine: American
Ingredients
- 4–5 medium Kirby or Persian cucumbers, sliced into spears or rounds
- 3–4 sprigs fresh dill (or 2 tsp dried dill)
- 2–3 garlic cloves, peeled and smashed
- 1 cup (240 ml) white vinegar
- 1 cup (240 ml) water
- 1 tablespoon kosher salt
- 1 teaspoon granulated sugar
- 1 teaspoon whole black peppercorns
- 1/4 teaspoon crushed red pepper flakes (optional)
- 1/2 teaspoon mustard seeds (optional)
Instructions
- Rinse cucumbers under cold water, trim ends, and slice into spears about 3-4 inches long or 1/4-inch thick rounds. Pat dry with a clean towel. (About 10 minutes)
- Place 3-4 sprigs of fresh dill at the bottom of a clean quart-sized glass jar. Add 2-3 smashed garlic cloves, 1 teaspoon black peppercorns, 1/4 teaspoon crushed red pepper flakes, and 1/2 teaspoon mustard seeds if using. Pack cucumber slices tightly but gently into the jar. (5 minutes)
- In a small saucepan, combine white vinegar, water, kosher salt, and granulated sugar. Warm over medium heat, stirring until salt and sugar dissolve. Remove from heat and let cool for 5 minutes. (10 minutes)
- Pour the cooled brine over the cucumbers until fully submerged, leaving about 1/2 inch headspace. Tap jar gently to release air bubbles and seal tightly. (5 minutes)
- Refrigerate the jar for at least 24 hours before tasting. For deeper flavor, let rest up to 3 days. (24+ hours)
- Check for crispness when opening. If soft, pack cucumbers tighter next time or use fresher cucumbers.
Notes
Avoid boiling the brine vigorously; gentle warming is enough to dissolve salt and sugar without cooking off fresh dill aroma. Use firm, fresh cucumbers for best crunch. Let brine cool before pouring to prevent wilting cucumbers. Pack cucumbers tightly to keep submerged and evenly flavored. Flavor improves after 24 hours and up to 3 days. Adjust garlic, dill, and spice levels to taste.
Nutrition
- Serving Size: About 3 spears
- Calories: 1015
- Sodium: 450
- Carbohydrates: 2
Keywords: refrigerator pickles, dill pickles, quick pickles, homemade pickles, tangy pickles, crispy pickles, easy pickles