I figured the hardest part of Halloween baking would be making something look creepy. It took about ten minutes of wrapping pie dough strips around a pastry hand for that idea to fall apart completely. The dough kept sticking to my fingers, the “bandages” broke in the middle, and I had flour smeared across my cheek like I had lost a fight with a ghost. Honestly, it was a mess. But then I pulled the tray out of the oven, and those little mummy hand pies stared back at me with their beady candy eyes, and I just laughed. They looked ridiculous and wonderful all at once—exactly what a Halloween treat should be.
There’s a specific kind of joy in making food that looks like it crawled out of a tomb. These spooky mummy hand pies capture that feeling perfectly. They are buttery, flaky, and filled with a sweet and tart cherry filling that oozes out just a little, like a secret. The best part? The “mummy” look covers up any imperfections in your pastry work. A torn strip of dough just looks like an ancient bandage. A lumpy hand shape adds character. It is the most forgiving Halloween recipe I have ever made, and I think that is why it stuck with me.
These little pies are the kind of thing you make when you want to impress at a party without spending all day in the kitchen. They are simple enough for a weeknight baking session but spooky enough to steal the show. Trust me, once you see the look on someone’s face when they bite into a mummy hand, you will understand why this recipe became my go-to for October.
Why You’ll Love This Recipe
Let me tell you why these spooky mummy hand pies are about to become your new favorite Halloween tradition. I have tested this recipe at least five times to get the flaky texture and the perfect filling-to-crust ratio, and I can honestly say it is foolproof.
- Completely Beginner-Friendly : You do not need to be a pastry chef. If you can roll out dough and wrap strips around a shape, you can make these. The mummy look hides all mistakes.
- Simple Pantry Ingredients : No weird specialty items here. You likely have everything in your kitchen right now. Store-bought pie crust works perfectly, so there is no pressure to make dough from scratch.
- Perfect for Halloween Parties : These are the star of any spooky spread. Kids love them, adults sneak them, and everyone asks for the recipe. They are great for school parties, potlucks, or a cozy night in.
- Customizable Filling : I use cherry, but you can swap in apple, pumpkin, or even chocolate. The dough does not care what is inside, as long as it is delicious.
- Unbelievably Cute and Creepy : There is something so satisfying about biting into a hand. The flaky layers, the sweet filling, the little candy eyes staring up at you—it is comfort food with a spooky twist.
What makes this recipe different from the rest is the technique. Instead of fighting with the dough, you embrace the mess. The wrappings are meant to be uneven. The hands are meant to look a little lumpy. It is the only recipe where “imperfect” is the whole point. And honestly, that takes all the pressure off. You get to have fun with it.
This is the kind of treat that makes you close your eyes after the first bite. It is warm, buttery, and filled with that tangy-sweet cherry goodness that just feels like fall. Perfect for impressing guests without any stress, or turning a simple October evening into something memorable.
What Ingredients You Will Need
This recipe uses simple, wholesome ingredients to deliver that perfect flaky texture and bold fruit filling. Most of these are pantry staples, which makes these spooky mummy hand pies an easy last-minute Halloween project.
For the crust (or cheat with store-bought):
- 2 ½ cups all-purpose flour (plus more for dusting) – I use King Arthur Flour for consistent results, but any brand works fine.
- 1 cup cold unsalted butter, cut into small cubes – The butter must be very cold. This is what creates those flaky layers. I pop mine in the freezer for 10 minutes before using.
- 1 teaspoon salt – Balances the sweetness.
- 1 tablespoon granulated sugar – Just a touch for the crust.
- 6-8 tablespoons ice water – You might need a little more or less depending on your flour.
- 1 large egg, beaten (for egg wash) – Gives that golden, glossy finish.
For the cherry filling:
- 1 ½ cups cherry pie filling (canned or homemade) – I prefer the tart cherry variety for balance. If using homemade, make sure it is thickened with a little cornstarch.
- 1 teaspoon vanilla extract – Adds warmth and depth to the fruit.
- ½ teaspoon almond extract – This is my secret ingredient. It makes the cherry taste even fruitier. Trust me on this one.
- 1 tablespoon cornstarch (if using homemade filling) – Thickens the juices so they do not leak everywhere.
For the mummy decoration:
- 24 candy eyes (the little white and black ones from the baking aisle) – You can find these at any grocery store around Halloween.
- Coarse sanding sugar (optional) – Adds a little sparkle to the bandages.
Ingredient selection tip: Look for a cherry pie filling that is not too runny. If the filling is watery, it will soak through the dough and make the hands soggy. I have made that mistake, and it is not pretty. Also, if you want a gluten-free version, use a high-quality gluten-free pie crust blend. The filling stays the same.
Substitution note: You can swap the cherry filling for apple pie filling, pumpkin puree mixed with brown sugar and spices, or even Nutella for a chocolate version. The technique stays exactly the same.
Equipment Needed
You do not need a fancy kitchen to make these spooky mummy hand pies. Here is what you will need:
- Rolling pin – Any rolling pin works. If you do not have one, a clean wine bottle will do the trick. I have been there.
- Pizza cutter or sharp knife – For cutting the dough strips and shaping the hands.
- Baking sheet – Line it with parchment paper for easy cleanup.
- Pastry brush – For the egg wash. A silicone brush is my favorite because it does not shed bristles.
- Small bowl – For the egg wash.
- Ruler (optional) – If you want perfectly even strips. I usually eyeball it, and it works fine.
- Parchment paper – Non-negotiable. It prevents sticking and makes cleanup a breeze.
If you do not have a pastry brush, you can use a paper towel to dab on the egg wash. It is not as precise, but it gets the job done. I have also used my fingers in a pinch, and honestly, the mummies did not care.
Preparation Method
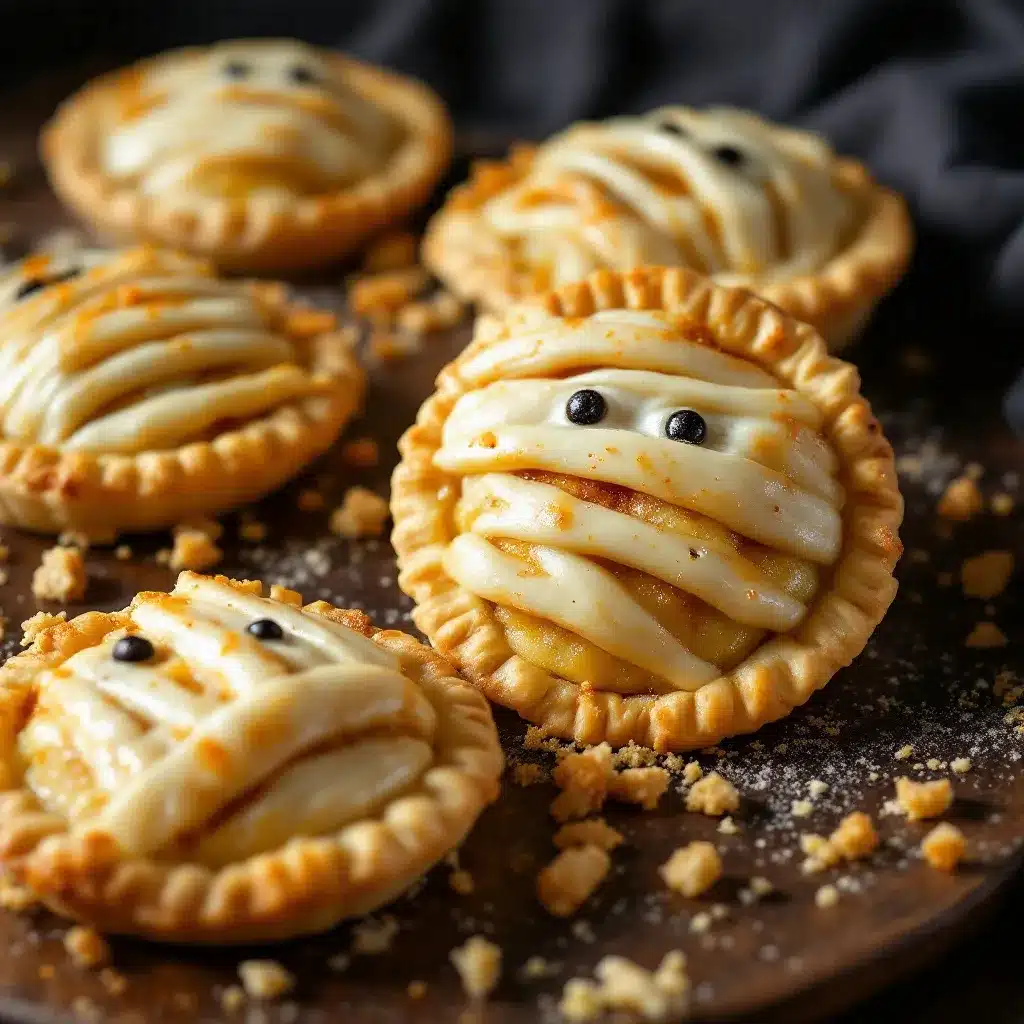
Let us get to the fun part. Here is how to make these spooky mummy hand pies step by step.
- Make the dough (or cheat) : If using homemade dough, whisk the flour, salt, and sugar together in a large bowl. Add the cold butter cubes and cut them into the flour using a pastry blender or your fingertips until the mixture looks like coarse meal with some pea-sized butter pieces. Drizzle in the ice water, one tablespoon at a time, and mix until the dough just comes together. Do not overwork it. Shape into a disc, wrap in plastic, and chill for at least 30 minutes. If using store-bought, just let it sit at room temperature for 10 minutes so it rolls out easier.
- Preheat the oven : Set your oven to 400°F (200°C). Line a baking sheet with parchment paper.
- Prepare the filling : In a small bowl, mix the cherry pie filling with the vanilla and almond extracts. If you are using homemade filling, stir in the cornstarch as well. Set aside.
- Roll out the dough : On a lightly floured surface, roll the dough out to about ⅛-inch thickness. You want it thin enough to be flaky but thick enough to hold the filling without tearing.
- Cut the hand shapes : Using a paring knife or a hand-shaped cookie cutter, cut out hand shapes from the dough. You will need two hands per pie. If you do not have a cookie cutter, just draw a rough hand shape on a piece of cardboard and use it as a template. I have done this, and it works perfectly. The hands do not need to be perfect—lumpy hands look more mummy-like anyway.
- Add the filling : Place about 1 ½ tablespoons of the cherry filling in the center of one hand shape, leaving a small border around the edges. Place another hand shape on top and press the edges to seal. You can use a fork to crimp the edges if you want, but I find that pressing with my fingers works just fine.
- Cut the strips : Use a pizza cutter or knife to cut thin strips of dough, about ½-inch wide. These will be the mummy bandages.
- Wrap the mummies : Take a strip of dough and wrap it around the hand, starting at the wrist and working your way up. Leave a small gap for the eyes. Do not worry about making it neat—messy wrappings look more authentic. Tuck the ends of the strips under the hand to secure them. Repeat for each hand.
- Add the eyes : Gently press two candy eyes into the exposed gap. Make sure they are secure so they do not fall off during baking.
- Egg wash and bake : Brush the entire hand with the beaten egg wash. This gives the pies that beautiful golden color. If you want a little sparkle, sprinkle coarse sanding sugar over the top. Bake for 18-22 minutes, or until the crust is golden brown and the filling is bubbly.
- Cool before serving : Let the pies cool on the baking sheet for at least 10 minutes. The filling will be extremely hot right out of the oven. Trust me, I have burned my tongue on cherry filling more times than I care to admit.
Sensory cue: When the pies are done, your kitchen will smell like buttery pastry and sweet cherries. The crust should be golden and flaky, and you might see a little red filling peeking out from the edges—that is a good sign.
Cooking Tips & Techniques
I have made these spooky mummy hand pies more times than I can count, and I have learned a few things the hard way. Here are my best tips.
Keep everything cold. Warm dough is sticky dough. If your dough starts to feel soft or greasy, pop it in the fridge for 10 minutes. This is especially important when you are cutting the strips. Cold dough cuts cleanly; warm dough just mushes together.
Do not overfill. It is tempting to stuff those hands full of cherry filling, but too much will cause the pies to burst open during baking. I learned this lesson when I had cherry juice all over my baking sheet. Stick to about 1 ½ tablespoons per hand.
Seal the edges well. If the edges are not sealed, the filling will leak out and burn on the pan. Press firmly with your fingers or a fork. I like to go around twice just to be safe.
Use a sharp cutter. A dull knife will drag the dough and create ragged edges. A sharp pizza cutter or knife makes clean cuts that bake up beautifully. If your strips are tearing, your knife might be too dull.
Work in batches. Do not try to wrap all the mummies at once. The dough will warm up and become harder to work with. Wrap two or three hands, pop the tray in the fridge for a few minutes, then wrap the next batch. It keeps the dough cold and the bandages crisp.
My biggest failure: The first time I made these, I forgot to add the eyes before baking. I tried to press them onto the hot pies after, and they just slid off. Now I always set out the candy eyes before I start wrapping so I do not forget.
Variations & Adaptations
One of the best things about these spooky mummy hand pies is how easy they are to customize. Here are some variations I have tried and loved.
Apple Cinnamon Mummies : Swap the cherry filling for apple pie filling mixed with a teaspoon of cinnamon and a pinch of nutmeg. The warm spice flavor pairs beautifully with the buttery crust. This is my favorite fall variation.
Chocolate Hazelnut Mummies : Use Nutella or any chocolate hazelnut spread as the filling. No need to add any extracts—just spread a tablespoon in the center of each hand. These are a huge hit with kids (and adults who are kids at heart).
Pumpkin Spice Mummies : Mix ½ cup pumpkin puree with 2 tablespoons brown sugar, 1 teaspoon pumpkin pie spice, and 1 tablespoon cream cheese. The creamy, spiced filling is perfect for a cozy Halloween night.
Savory Mummy Hand Pies : Yes, you can make these savory. Fill the hands with a mixture of cooked ground beef, cheese, and taco seasoning. Skip the candy eyes and use small pieces of black olive instead. These are great for a Halloween dinner.
Gluten-Free Option : Use a gluten-free pie crust mix. I have tried this with a few different brands, and they all work well. Just make sure the dough is cold enough to handle. The filling stays the same, so the flavor is still amazing.
I once tried a version with a lemon curd filling, and it was surprisingly good. The tartness cut through the buttery crust perfectly. It is not exactly Halloween-themed, but it was delicious.
Serving & Storage Suggestions
These spooky mummy hand pies are best served warm, about 10 minutes after they come out of the oven. The filling will still be a little gooey, and the crust will be perfectly flaky. I like to arrange them on a platter with a few extra candy eyes scattered around for effect.
They pair wonderfully with a glass of cold milk or a warm cup of apple cider. If you are serving them at a party, set them out with a bowl of vanilla ice cream or a dollop of whipped cream. The cold creaminess balances the warm, buttery pies perfectly.
For storage, let the pies cool completely before placing them in an airtight container. They will keep at room temperature for up to 2 days. If you need to store them longer, pop them in the fridge for up to 5 days. Just note that the crust will lose some of its flakiness over time.
To reheat, place the pies on a baking sheet in a 350°F (175°C) oven for 5-7 minutes. This brings back the crispness of the crust. I do not recommend microwaving them, as the crust will become soft and soggy. Trust me, I have tried it, and it is not the same.
These pies also freeze beautifully. After baking and cooling, place them in a single layer on a baking sheet and freeze until solid. Then transfer them to a freezer-safe bag or container. They will keep for up to 3 months. To serve, reheat directly from frozen in a 350°F oven for 10-12 minutes.
One thing I have noticed is that the flavors actually deepen after a day in the fridge. The cherry filling gets more intense, and the spices meld together beautifully. So do not be afraid to make these a day ahead.
Nutritional Information & Benefits
Here is the approximate nutritional breakdown for one spooky mummy hand pie (based on 12 servings):
- Calories: 285
- Fat: 16g
- Saturated Fat: 10g
- Carbohydrates: 32g
- Sugar: 14g
- Fiber: 1g
- Protein: 3g
- Sodium: 210mg
Cherries are the star ingredient here, and they come with some nice health benefits. They are packed with antioxidants, particularly anthocyanins, which give them that deep red color. These compounds help reduce inflammation and support heart health. Cherries also contain melatonin, which can help regulate sleep cycles—perfect for a cozy Halloween night.
The butter in the crust provides vitamin A, which is good for eye health. And while these pies are definitely a treat, they are made with simple, recognizable ingredients. No preservatives, no artificial flavors, just real food.
If you are watching your sugar intake, you can use a sugar-free pie filling or make your own with a sugar substitute. The crust can also be made with a whole wheat pastry flour for a little extra fiber. But honestly, Halloween is one day a year. I say enjoy the real thing.
Potential allergens: This recipe contains dairy (butter), gluten (flour), and eggs. The candy eyes may contain soy or other allergens, so check the package if you have concerns.
Conclusion
These spooky mummy hand pies are everything a Halloween treat should be—fun, delicious, and just a little bit creepy. They are the kind of recipe that brings people together, whether you are making them with your kids for a school party or serving them at a grown-up Halloween gathering. The best part is that they are so forgiving. You do not need to be a pastry expert to make them look amazing. In fact, the messier they are, the better they look.
I love this recipe because it reminds me that cooking does not have to be perfect to be wonderful. Those first lumpy, lopsided mummy hands I made taught me that sometimes the best things come from embracing the imperfections. So go ahead and get a little flour on your face. Let the cherry filling ooze out a bit. Wrap those bandages however you want. Your mummies will be beautiful because you made them.
I would love to see your spooky creations! Leave a comment below and tell me how your mummy hand pies turned out. Did you try a different filling? Did your kids help wrap the bandages? Share your photos and tag me on social media—I cannot wait to see what you come up with. Happy Halloween, and happy baking!
Frequently Asked Questions
Can I use store-bought pie crust for this recipe?
Absolutely. Store-bought pie crust works perfectly and saves a lot of time. Just let it sit at room temperature for about 10 minutes so it is easier to roll out. I have used Pillsbury and Trader Joe’s crusts, and both work great.
How do I keep the candy eyes from falling off during baking?
Make sure you press the eyes gently but firmly into the dough before baking. You can also use a tiny dab of egg wash as “glue” to hold them in place. If a few fall off, just press them back on after the pies come out of the oven while the crust is still warm.
Can I make these ahead of time for a party?
Yes! You can assemble the pies completely (including the eyes) and refrigerate them on the baking sheet for up to 24 hours before baking. You can also bake them fully and reheat in a 350°F oven for 5-7 minutes before serving.
What other fillings work well for these hand pies?
Pretty much any pie filling works. Apple, peach, blueberry, and pumpkin are all great options. For a savory version, try cooked sausage, cheese, or leftover chili. Just make sure the filling is not too watery, or it will make the crust soggy.
My dough keeps tearing when I wrap the mummies. What am I doing wrong?
This usually happens when the dough is too warm or too dry. If the dough is warm, pop it in the fridge for 10 minutes. If it is too dry, add a tiny splash of water and knead it gently. Also, make sure your work surface is well-floured so the dough does not stick.
Pin This Recipe!
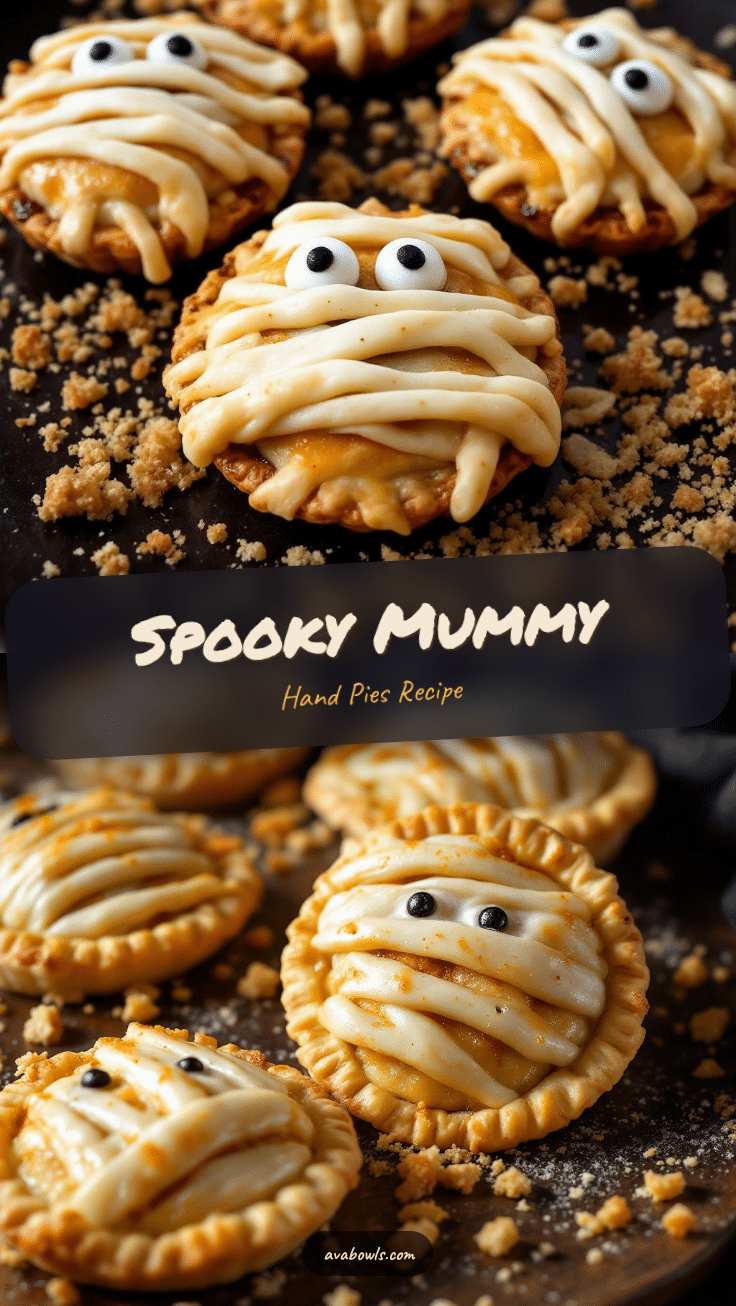
Spooky Mummy Hand Pies: Easy Halloween Recipe

These spooky mummy hand pies are buttery, flaky, and filled with a sweet and tart cherry filling. The mummy look covers up any imperfections in your pastry work, making it the most forgiving Halloween recipe.
- Prep Time: 30 minutes
- Cook Time: 20 minutes
- Total Time: 50 minutes
- Yield: 12 servings 1x
- Category: Dessert
- Cuisine: American
Ingredients
- 2 ½ cups all-purpose flour (plus more for dusting)
- 1 cup cold unsalted butter, cut into small cubes
- 1 teaspoon salt
- 1 tablespoon granulated sugar
- 6–8 tablespoons ice water
- 1 large egg, beaten (for egg wash)
- 1 ½ cups cherry pie filling (canned or homemade)
- 1 teaspoon vanilla extract
- ½ teaspoon almond extract
- 1 tablespoon cornstarch (if using homemade filling)
- 24 candy eyes
- Coarse sanding sugar (optional)
Instructions
- Make the dough (or cheat): If using homemade dough, whisk the flour, salt, and sugar together in a large bowl. Add the cold butter cubes and cut them into the flour using a pastry blender or your fingertips until the mixture looks like coarse meal with some pea-sized butter pieces. Drizzle in the ice water, one tablespoon at a time, and mix until the dough just comes together. Do not overwork it. Shape into a disc, wrap in plastic, and chill for at least 30 minutes. If using store-bought, just l…
- Preheat the oven: Set your oven to 400°F (200°C). Line a baking sheet with parchment paper.
- Prepare the filling: In a small bowl, mix the cherry pie filling with the vanilla and almond extracts. If you are using homemade filling, stir in the cornstarch as well. Set aside.
- Roll out the dough: On a lightly floured surface, roll the dough out to about ⅛-inch thickness. You want it thin enough to be flaky but thick enough to hold the filling without tearing.
- Cut the hand shapes: Using a paring knife or a hand-shaped cookie cutter, cut out hand shapes from the dough. You will need two hands per pie. If you do not have a cookie cutter, just draw a rough hand shape on a piece of cardboard and use it as a template.
- Add the filling: Place about 1 ½ tablespoons of the cherry filling in the center of one hand shape, leaving a small border around the edges. Place another hand shape on top and press the edges to seal. You can use a fork to crimp the edges if you want, but pressing with your fingers works fine.
- Cut the strips: Use a pizza cutter or knife to cut thin strips of dough, about ½-inch wide. These will be the mummy bandages.
- Wrap the mummies: Take a strip of dough and wrap it around the hand, starting at the wrist and working your way up. Leave a small gap for the eyes. Do not worry about making it neat—messy wrappings look more authentic. Tuck the ends of the strips under the hand to secure them. Repeat for each hand.
- Add the eyes: Gently press two candy eyes into the exposed gap. Make sure they are secure so they do not fall off during baking.
- Egg wash and bake: Brush the entire hand with the beaten egg wash. This gives the pies that beautiful golden color. If you want a little sparkle, sprinkle coarse sanding sugar over the top. Bake for 18-22 minutes, or until the crust is golden brown and the filling is bubbly.
- Cool before serving: Let the pies cool on the baking sheet for at least 10 minutes. The filling will be extremely hot right out of the oven.
Notes
Keep everything cold. Warm dough is sticky dough. If your dough starts to feel soft or greasy, pop it in the fridge for 10 minutes. Do not overfill. Stick to about 1 ½ tablespoons per hand. Seal the edges well to prevent leaking. Use a sharp cutter for clean cuts. Work in batches to keep the dough cold. Remember to add the eyes before baking.
Nutrition
- Serving Size: 1 hand pie
- Calories: 285
- Sugar: 14
- Sodium: 210
- Fat: 16
- Saturated Fat: 10
- Carbohydrates: 32
- Fiber: 1
- Protein: 3
Keywords: Halloween, mummy hand pies, cherry hand pies, spooky treats, easy Halloween recipe, hand pies, Halloween baking


