“Mom, can you put something good in my lunch this time?” My seven-year-old said this while staring into the abyss of our pantry, and honestly, I felt called out. Not because I don’t try—I do. But somewhere between the granola bar burnout and the sad baby carrots, I had lost the lunch-packing plot. That conversation stuck with me. I wanted something that felt like a treat but wasn’t a sugar bomb. Something she’d actually eat, not trade away.
I started messing around in the kitchen that weekend. I had a brown banana on the counter, a jar of peanut butter with about two tablespoons left, and a bag of oats that was gathering dust. I figured, why not just mash it all together and see what happens? That first batch was ugly—too sticky, unevenly mixed, and honestly, a little sad-looking. But the taste? That was the spark. So I tweaked. Added a pinch of salt. Swapped honey for maple syrup one time. Rolled them smaller. And somewhere around the third try, my daughter walked in, grabbed one off the plate, and said, “These are good. Can you make these for my lunch?”
That was it. No fanfare. Just a kid who wanted a homemade snack over a packaged one. And honestly, that’s the highest compliment I can get. These Quick Peanut Butter Banana Energy Bites for School Lunches were born from a real need—something fast, no-bake, and actually delicious. They’ve become our lunchbox staple, and I have a feeling they’ll become yours too.
Why You’ll Love This Recipe
Let me tell you why these little bites have earned a permanent spot in our weekly rotation. First off, they come together in under 15 minutes. No oven, no mixer, no complicated steps. You just mix, roll, and chill. That’s it. For anyone who’s ever stared at a clock while packing lunches at 7 AM, that kind of speed is a lifesaver.
Here’s what makes them stand out:
- Quick & Easy: From pantry to fridge in under 15 minutes. Perfect for those mornings when you’re running on coffee and sheer willpower.
- Simple Ingredients: You probably already have everything in your kitchen. No weird superfood powders or specialty items.
- Perfect for School Lunches: They’re nut-free friendly (if you use a seed butter), portable, and don’t get soggy by lunchtime.
- Crowd-Pleaser: My kids devour them, but I’ve also caught my husband sneaking a few. They’re that good.
- Unbelievably Delicious: The combination of creamy peanut butter, sweet banana, and chewy oats is pure comfort. It’s like eating a cookie that’s actually good for you.
What makes this version different from the rest? It’s the texture. I’ve tried dozens of energy ball recipes, and most are either too dry or fall apart in your lunchbox. This one holds together perfectly—thanks to the right ratio of banana to peanut butter—without being sticky or crumbly. It’s a Goldilocks situation, and I’ve tested it enough to know it works.
Honestly, this recipe isn’t just good—it’s the kind that makes you close your eyes after the first bite. It’s comfort food reimagined. Healthier, faster, but with the same soul-soothing satisfaction. Perfect for impressing your kids without stress, or turning a simple snack into something memorable.
What Ingredients You Will Need
This recipe uses simple, wholesome ingredients to deliver bold flavor and satisfying texture without any fuss. Most of these are pantry staples, which means you can make a batch anytime the craving hits.
- 1 cup rolled oats (not instant—they get too mushy; I prefer Bob’s Red Mill for consistent texture)
- 1/2 cup creamy peanut butter (natural works great, just stir it well; if you use a no-stir brand, the texture will be slightly firmer)
- 1 large ripe banana, mashed (the riper, the better—brown spots mean more sweetness and easier mashing)
- 2 tablespoons honey or maple syrup (honey gives a classic flavor, maple adds a subtle warmth; both work beautifully)
- 1/4 cup mini chocolate chips (optional but highly recommended—they make these feel like dessert)
- 1/4 cup ground flaxseed or chia seeds (adds fiber and helps bind everything together; I use flax for its neutral taste)
- 1/2 teaspoon vanilla extract (pure vanilla, not imitation—it makes a difference)
- Pinch of salt (balances the sweetness and brings out the peanut butter flavor)
For substitutions, here’s what I’ve tested: If you need a nut-free version for school, swap the peanut butter with sunflower seed butter or WowButter. The flavor changes slightly, but the texture holds up. For a gluten-free option, make sure your oats are certified gluten-free. And if you’re out of honey, maple syrup or agave work perfectly—just note that the bites will be slightly softer.
I always recommend using a ripe banana here. Not just spotty—really ripe. That’s where the natural sweetness comes from. If your banana is still a little green, the bites will be less sweet and might need an extra drizzle of honey. Trust me on this one.
Equipment Needed
You don’t need a fancy kitchen to pull these off. Here’s what you’ll need:
- Large mixing bowl (any bowl will do, but a wide one makes mixing easier)
- Fork or potato masher (for mashing the banana—I’ve used both, and a fork works just fine)
- Measuring cups and spoons (eyeballing is risky with these; accuracy helps the texture)
- Spatula or wooden spoon (for mixing everything together)
- Baking sheet or plate (lined with parchment paper for easy cleanup)
- Cookie scoop or tablespoon (for uniform balls—a cookie scoop is a game-changer for speed)
- Air-tight container (for storage; glass or plastic both work)
If you don’t have a cookie scoop, just wet your hands slightly before rolling—it keeps the mixture from sticking to your fingers. I learned that trick after my first batch looked more like blobs than balls. Also, a silicone spatula is worth its weight in gold here. It scrapes every last bit of the mixture out of the bowl, which means more bites for you.
Preparation Method
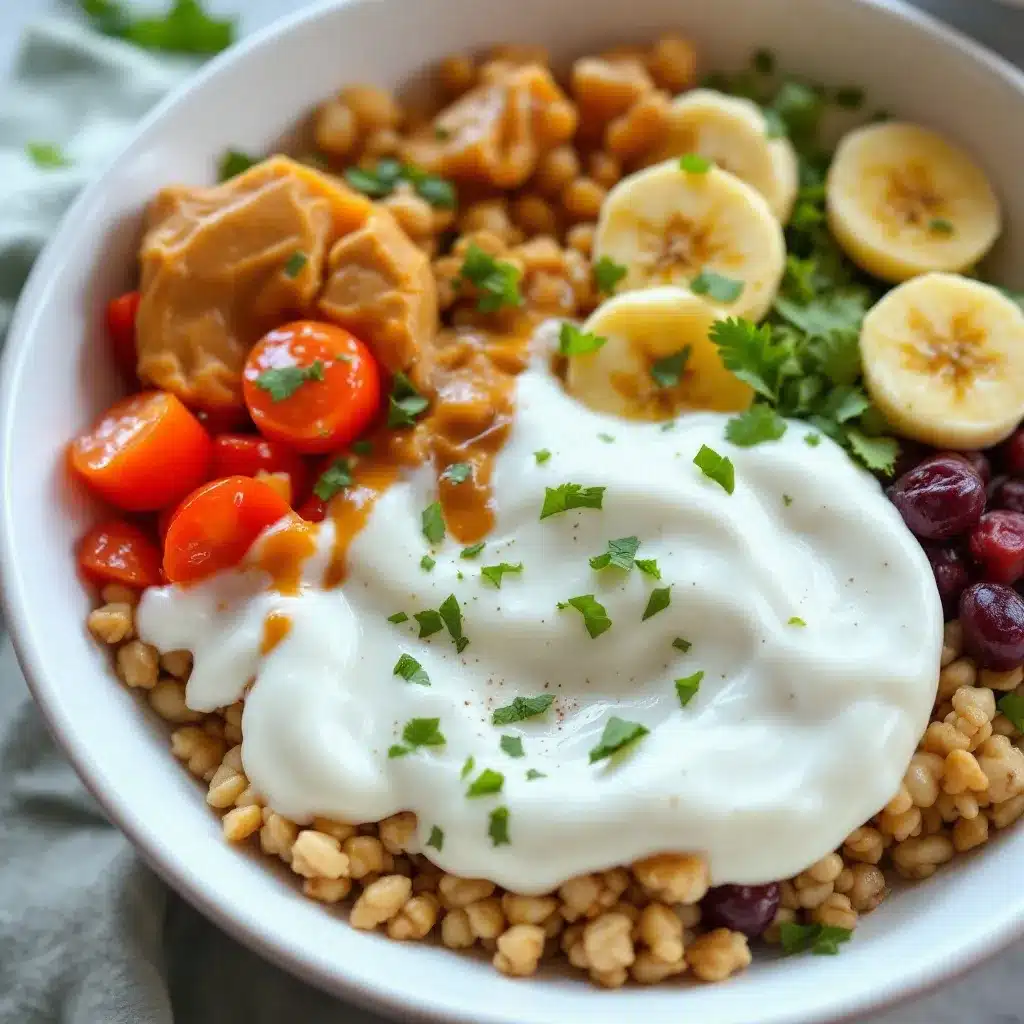
Alright, let’s get rolling—literally. This is the fun part.
- Mash the banana: In a large mixing bowl, mash the ripe banana with a fork until it’s mostly smooth. A few small lumps are fine—they add texture. You should have about 1/3 to 1/2 cup of mashed banana.
- Add the wet ingredients: Add the peanut butter, honey (or maple syrup), and vanilla extract to the bowl. Stir everything together until it’s well combined. The mixture will look a little glossy and smell amazing. If your peanut butter is stiff, microwave it for 10 seconds to soften it—just don’t overheat it.
- Mix in the dry ingredients: Add the rolled oats, ground flaxseed, and a pinch of salt. Stir until everything is evenly distributed. The mixture should be thick and slightly sticky—not wet. If it feels too dry, add a teaspoon of water or extra honey. If it’s too wet, add a tablespoon more oats.
- Fold in the chocolate chips: Gently fold in the mini chocolate chips (if using). Don’t overmix here—you want the chips to stay intact, not melt into the batter.
- Chill the mixture: Pop the bowl in the fridge for 10-15 minutes. This step is crucial. Chilling makes the mixture easier to handle and helps the bites hold their shape. I’ve skipped this before and ended up with sticky fingers and lopsided balls. Don’t be like me.
- Roll into bites: Line a baking sheet or plate with parchment paper. Using a cookie scoop or tablespoon, scoop out portions of the mixture and roll them into 1-inch balls. Wet your hands slightly if the mixture sticks to your palms. Place each ball on the parchment paper.
- Final chill: Refrigerate the rolled bites for at least 30 minutes before serving. This firms them up and lets the flavors meld. If you’re in a hurry, 15 minutes in the freezer works too.
And that’s it! You’ll end up with about 18-20 bites, depending on size. The texture should be soft but firm—like a no-bake cookie that doesn’t fall apart. If they’re too crumbly, you might need more banana or peanut butter next time. If they’re too sticky, add a few more oats.
One more thing: I always taste-test one before rolling the whole batch. It’s my quality control moment. If it needs more salt or sweetness, I adjust right then. It’s saved me from a bland batch more than once.
Cooking Tips & Techniques
After making these Quick Peanut Butter Banana Energy Bites for School Lunches at least a dozen times, I’ve picked up a few tricks that make the process smoother and the results better.
Don’t skip the chill step. I know it’s tempting to skip straight to rolling, but the mixture needs that time in the fridge to firm up. Without it, you’ll end up with sticky hands and uneven balls. Trust the process—it’s only 15 minutes.
Use a cookie scoop for uniform bites. This isn’t just about looks. Uniform bites chill and store evenly, and they’re easier to pack in a lunchbox. Plus, it speeds up the rolling process. I got mine for $5 at a kitchen supply store, and it’s paid for itself in time saved.
Adjust for humidity. This is a real thing. On humid days, the oats absorb more moisture, and the mixture can get stickier. If that happens, add an extra tablespoon of oats or flaxseed. On dry days, you might need a tiny splash of water or milk. Learn to feel the texture—it should be like a soft dough, not a batter.
Toast the oats for extra flavor. This is optional but amazing. Spread the oats on a baking sheet and toast them at 350°F for 8-10 minutes until golden. Let them cool completely before mixing. It adds a nutty, warm flavor that takes these bites to another level. I do this when I have an extra five minutes and want to impress.
Don’t overmix. Once you add the dry ingredients, stir just until combined. Overmixing can make the bites dense and tough. You want them tender and chewy.
I once made a batch where I forgot the flaxseed entirely. The bites were still good, but they fell apart in the lunchbox. That’s when I realized the flax isn’t just for nutrition—it’s the glue. So don’t skip it unless you have a good substitute.
Variations & Adaptations
One of the best things about this recipe is how flexible it is. You can change it up depending on what you have on hand or what your family likes. Here are some variations I’ve tried and loved:
Nut-Free Version
Swap the peanut butter with sunflower seed butter or WowButter. The flavor is different—more earthy—but the texture holds up perfectly. Just note that sunflower seed butter can react with baking soda (if you ever bake these), turning them green. That doesn’t happen here since we’re not baking, so you’re safe.
Chocolate Lover’s Version
Add 1 tablespoon of cocoa powder to the dry ingredients. It turns the bites into a chocolate-peanut butter dream. I also like to drizzle melted dark chocolate over the top after they’ve chilled. It makes them look fancy, like something from a bakery.
Vegan Version
Use maple syrup instead of honey, and make sure your chocolate chips are dairy-free. That’s it. Everything else is already plant-based. I’ve made this version for my vegan sister-in-law, and she couldn’t tell the difference.
Seasonal Twist
In the fall, add 1/2 teaspoon of pumpkin pie spice and swap the chocolate chips for dried cranberries. In the summer, use shredded coconut and a splash of lime zest. It keeps the recipe feeling fresh all year round.
Protein-Packed Version
Add 1 scoop of vanilla or chocolate protein powder. You’ll need to increase the wet ingredients slightly—add an extra tablespoon of peanut butter or a splash of milk—to keep the texture right. This is my go-to post-workout snack.
I once tried a version with crushed pretzels mixed in. It added a salty crunch that was absolutely addictive. My kids called them “salty sweet bites,” and they were gone in two days. Sometimes the best variations come from just throwing in whatever’s in the pantry.
Serving & Storage Suggestions
These Quick Peanut Butter Banana Energy Bites for School Lunches are best served cold or at room temperature. I usually pack them straight from the fridge into my daughter’s lunchbox. By lunchtime, they’ve softened slightly but still hold their shape perfectly.
For presentation, I like to arrange them in a small container or a bento box with other snacks—apple slices, cheese cubes, or a handful of berries. They look cute and inviting, which honestly makes kids more likely to eat them. I’ve also served them on a platter for playdates, and they disappear fast.
Storage tips:
- Refrigerator: Store in an air-tight container for up to 7 days. I line the container with a paper towel to absorb any excess moisture.
- Freezer: These freeze beautifully. Place the bites in a single layer on a baking sheet and freeze for 1 hour. Then transfer them to a freezer-safe bag or container. They’ll keep for up to 3 months. I grab one straight from the freezer for a quick snack—they thaw in about 5 minutes.
- Reheating: No need to reheat. Just let them sit at room temperature for a few minutes if frozen. If you prefer them softer, microwave one for 5-10 seconds.
One thing I love about these bites is that the flavors actually develop over time. Day two or three, they taste even better—the oats have absorbed the moisture from the banana, and everything melds together. So don’t worry if they seem a little loose on day one. They’ll tighten up beautifully.
Nutritional Information & Benefits
Here’s a rough estimate per bite (based on 18 bites):
| Nutrient | Amount per bite |
|---|---|
| Calories | 110-120 |
| Protein | 4g |
| Carbohydrates | 14g |
| Fiber | 3g |
| Sugar | 6g |
| Fat | 6g |
These bites are packed with good-for-you ingredients. The oats provide slow-release energy, which is perfect for keeping kids focused through the school day. The peanut butter adds protein and healthy fats, while the banana offers potassium and natural sweetness. Flaxseed is a great source of omega-3s and fiber, which supports digestion.
From a dietary perspective, these are naturally gluten-free (if you use certified oats) and can be made vegan and nut-free with simple swaps. They’re also free of refined sugar—the sweetness comes from banana and honey or maple syrup. That’s something I feel good about packing in my kid’s lunch.
If you’re watching your sugar intake, you can reduce the honey to 1 tablespoon. The banana provides enough sweetness on its own, especially if it’s very ripe. I’ve tested this, and the bites are still delicious—just a little less sweet.
Conclusion
So there you have it—Quick Peanut Butter Banana Energy Bites for School Lunches that are as easy to make as they are delicious. They’re the kind of recipe that solves a real problem: what to pack that’s healthy, tasty, and actually gets eaten. No more sad lunches or uneaten snacks.
I love that this recipe is forgiving. You can tweak it based on what’s in your pantry, add your favorite mix-ins, and it still turns out great. It’s become our go-to for busy mornings, after-school snacks, and even road trips. Honestly, I don’t think a week goes by without a batch in our fridge.
If you make these, I’d love to hear how they turned out. Did your kids love them? Did you try a fun variation? Drop a comment below and let me know—I read every single one. And if you’re looking for more easy, wholesome snack ideas, you might also enjoy these healthy energy balls with dates, oats, and dark chocolate or this fresh Greek yogurt bowl with pomegranate for a quick breakfast. For something savory, these crispy air fryer chickpea snacks are a total game-changer. Happy snacking!
Frequently Asked Questions
Can I use instant oats instead of rolled oats?
I wouldn’t recommend it. Instant oats are much finer and absorb moisture differently, which can make the bites mushy or too dense. Rolled oats give that chewy texture that makes these bites so satisfying. If that’s all you have, reduce the liquid slightly—but honestly, rolled oats are worth the trip to the store.
How do I keep these from falling apart in a lunchbox?
The key is the right ratio of wet to dry ingredients. Make sure your banana is very ripe and mashed well, and don’t skip the flaxseed—it acts as a binder. Chilling the mixture before rolling also helps. If they still seem loose, add an extra tablespoon of oats or flaxseed next time.
Can I make these without a food processor?
Absolutely. This recipe is completely no-bake and no-food-processor-needed. You just mix everything in a bowl by hand. That’s one of the reasons I love it—minimal cleanup, maximum payoff.
Are these safe for school nut-free policies?
Only if you use a nut-free seed butter like sunflower seed butter or WowButter. The recipe itself is adaptable, but if your school has a strict nut-free policy, skip the peanut butter entirely. The texture will still be great with a seed butter alternative.
How long do these last in the fridge?
Stored in an air-tight container, they’ll stay fresh for up to 7 days in the fridge. They also freeze beautifully for up to 3 months. I always make a double batch and freeze half—it’s a lifesaver on busy mornings when I forget to prep lunches the night before.
Pin This Recipe!
Quick Peanut Butter Banana Energy Bites (Easy Lunch Idea)
These no-bake energy bites combine creamy peanut butter, ripe banana, and rolled oats for a wholesome, kid-friendly snack that comes together in under 15 minutes. Perfect for school lunches, they are naturally sweetened and packed with fiber and protein.
- Prep Time: 15 minutes
- Cook Time: 0 minutes
- Total Time: 45 minutes
- Yield: 18-20 bites 1x
- Category: Snack
- Cuisine: American
Ingredients
- 1 cup rolled oats (not instant)
- 1/2 cup creamy peanut butter
- 1 large ripe banana, mashed
- 2 tablespoons honey or maple syrup
- 1/4 cup mini chocolate chips (optional)
- 1/4 cup ground flaxseed or chia seeds
- 1/2 teaspoon vanilla extract
- Pinch of salt
Instructions
- Mash the banana: In a large mixing bowl, mash the ripe banana with a fork until mostly smooth. A few small lumps are fine.
- Add the wet ingredients: Add the peanut butter, honey (or maple syrup), and vanilla extract to the bowl. Stir until well combined.
- Mix in the dry ingredients: Add the rolled oats, ground flaxseed, and a pinch of salt. Stir until evenly distributed. The mixture should be thick and slightly sticky.
- Fold in the chocolate chips: Gently fold in the mini chocolate chips (if using). Do not overmix.
- Chill the mixture: Refrigerate the bowl for 10-15 minutes to make the mixture easier to handle.
- Roll into bites: Line a baking sheet or plate with parchment paper. Using a cookie scoop or tablespoon, scoop portions and roll into 1-inch balls. Wet hands slightly if sticky.
- Final chill: Refrigerate the rolled bites for at least 30 minutes before serving. For a quicker option, freeze for 15 minutes.
Notes
For nut-free version, use sunflower seed butter or WowButter. For gluten-free, ensure oats are certified gluten-free. For vegan, use maple syrup and dairy-free chocolate chips. Chilling the mixture before rolling is crucial for easy handling. The bites can be stored in the refrigerator for up to 7 days or frozen for up to 3 months.
Nutrition
- Serving Size: 1 bite
- Calories: 115
- Sugar: 6
- Sodium: 50
- Fat: 6
- Saturated Fat: 1.5
- Carbohydrates: 14
- Fiber: 3
- Protein: 4
Keywords: peanut butter banana energy bites, no-bake energy balls, school lunch snacks, healthy snack for kids, easy energy bites


