The smoke detector went off at 9 PM on a Tuesday, and I was elbow-deep in black buttercream, trying to salvage a batch of cookies that looked less like delicate webs and more like something a very sad spider had dragged through a puddle. I had promised my niece, Clara, that I’d bring “the coolest Halloween cookies ever” to her school party the next day. The only problem? My first attempt was a crumbly, sticky disaster that tasted fine but looked like a crime scene. I stared at the mess, the bag of powdered sugar I’d just knocked over, and the half-empty bottle of vanilla extract. Then, I looked at the clock. There was no time for a grocery run. I had to work with what was already in my pantry: basic sugar cookie dough, a bag of semi-sweet chocolate chips, and a desperate hope that a toothpick could fix my life.
This is how the Perfect Spiderweb Halloween Sugar Cookies were born—not from a pristine test kitchen, but from a frantic Tuesday night fueled by stubbornness and a little bit of cookie dough. I wasn’t aiming for perfection anymore. I was aiming for edible and, honestly, something that wouldn’t make Clara cry. I pulled out a fresh sheet of parchment paper, took a deep breath, and started over. Instead of trying to pipe intricate webs, I used a simple flooding technique with a chocolate glaze and dragged a toothpick through it. The result was so satisfying, so genuinely spooky-chic, that I actually laughed out loud. The kids at the party devoured them, and Clara told me I was “the best aunt ever.” That night, I knew I had stumbled onto something special. These cookies aren’t just about Halloween; they’re about the magic that happens when you stop stressing and start having fun with your food.
Why You’ll Love This Recipe
Let’s be honest—most decorated cookies look amazing on Pinterest but take three hours and a degree in pastry arts to pull off. These Perfect Spiderweb Halloween Sugar Cookies are the opposite. They deliver that impressive, spooky-chic look with a fraction of the effort. I’ve tested this method more times than I care to admit, and I can promise you: if I can do it on a frantic Tuesday night, you can absolutely nail it for your Halloween party.
- Quick & Easy: From start to finish, you’re looking at about 45 minutes of active time. The dough comes together fast, and the decorating trick is almost embarrassingly simple. No piping bags, no steady hands required.
- Simple Ingredients: You probably already have everything in your kitchen. Butter, sugar, flour, eggs, vanilla, and chocolate chips. No weird stabilizers or fancy extracts. Just real, pantry-friendly stuff.
- Perfect for Halloween Parties: These are the star of any spooky spread. They look like you spent hours on them, which is always a fun little secret to keep. Great for school events, office parties, or a cozy night in with a scary movie.
- Crowd-Pleaser: Kids love the spiderweb design, and adults love the classic, buttery sugar cookie taste. They disappear fast. I’ve seen it happen. One minute there’s a full plate, the next there’s just crumbs and a few happy faces.
- Unbelievably Delicious: The texture is the real win here. A soft, slightly chewy center with a lightly crisp edge, topped with a glossy chocolate web that adds just the right amount of richness. It’s comfort food with a costume on.
What makes this recipe different from every other sugar cookie out there? It’s the one-bowl dough and the 10-second decorating hack. No chilling the dough for hours. No royal icing that crusts over before you finish. Just a soft, forgiving dough and a chocolate glaze that creates perfect webs every single time. This isn’t just another version of a Halloween cookie—it’s the one that will make you feel like a kitchen wizard, even if you’re just a regular person who wants a little spooky fun without the stress.
What Ingredients You Will Need
This recipe uses simple, wholesome ingredients to deliver that classic sugar cookie flavor and a perfectly soft texture. The magic is in the balance, and each ingredient plays a specific role. Here’s everything you’ll need, along with a few tips I’ve picked up from my own kitchen trials.
For the Sugar Cookies
- 1 cup (226g) unsalted butter, softened: This is non-negotiable for the right texture. Make sure it’s truly soft—room temperature, not melted. I usually leave mine out for about an hour. If you’re in a rush, cut it into small cubes and let it sit for 15 minutes. It should give slightly when you press it with a finger.
- 1 cup (200g) granulated sugar: White sugar gives these cookies their classic sweetness and helps create that slightly crisp edge. I don’t recommend swapping in brown sugar here, as it would change the texture and color.
- 1 large egg, room temperature: A cold egg can seize the butter and make the dough stiff. I always crack mine into a small bowl and let it sit on the counter while I gather the other ingredients. It takes just 10 minutes to come to temperature.
- 1 teaspoon vanilla extract: Pure vanilla is best, but imitation works in a pinch. I’m a big fan of Nielsen-Massey for its rich flavor, but honestly, any brand will do the job. It adds that warm, comforting note that makes a sugar cookie taste like a hug.
- 2 cups (250g) all-purpose flour: Spoon and level your flour for the most accurate measurement. Scooping directly from the bag can pack in too much flour, leading to dry, crumbly cookies. I use Gold Medal unbleached flour, but any standard brand works well.
- ½ teaspoon baking soda: This helps the cookies spread just the right amount and gives them a little lift. Too much, and they’ll puff up and lose their shape. I use a precise ½ teaspoon, leveled off with a knife.
- ½ teaspoon salt: Don’t skip this! Salt balances the sweetness and enhances all the other flavors. I use fine sea salt for baking. If you only have kosher salt, use a slightly heaping ½ teaspoon.
For the Spiderweb Glaze
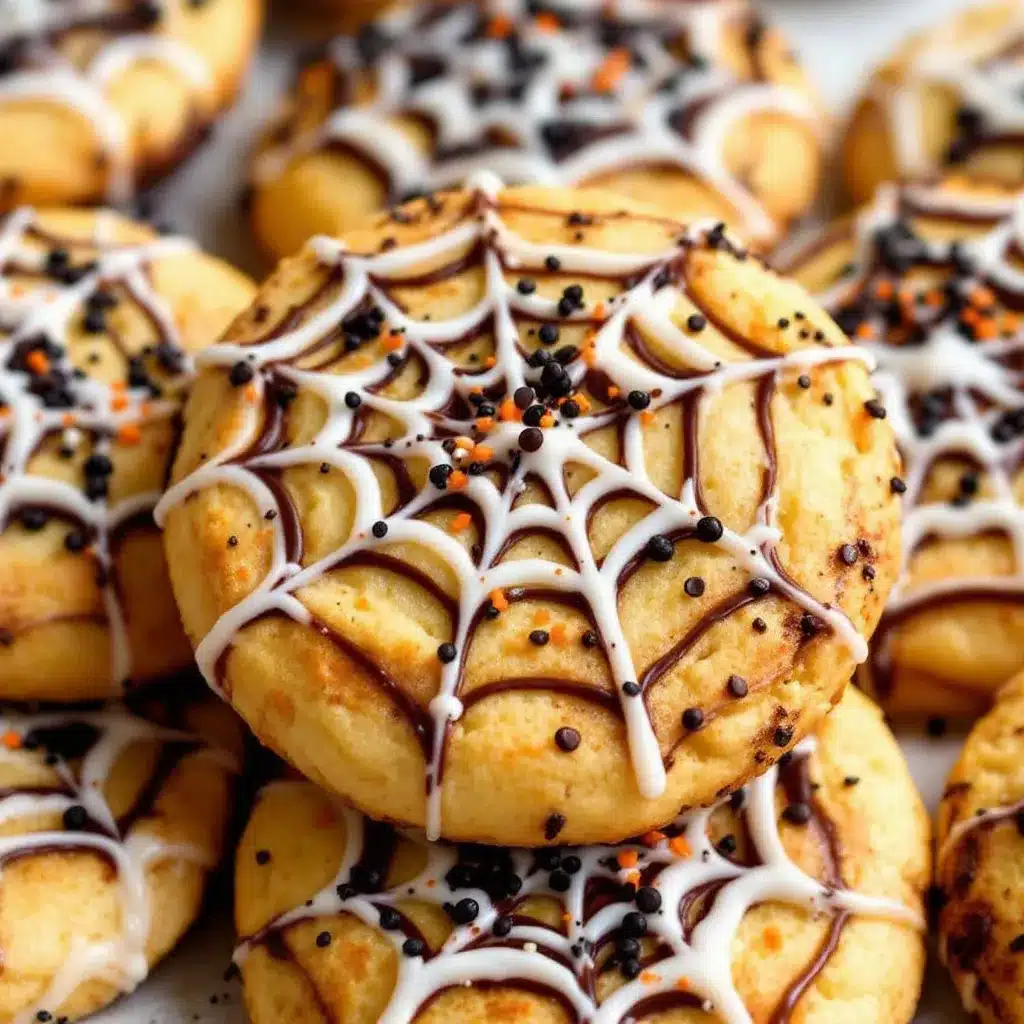
- 1 cup (170g) semi-sweet chocolate chips: I prefer Ghirardelli for its smooth melting quality and deep flavor. But any good-quality chip will work. Dark chocolate chips are also fantastic if you want a more intense, less sweet web.
- 2 tablespoons (30ml) coconut oil or vegetable oil: This thins the chocolate into a pourable glaze. Coconut oil adds a subtle, almost invisible flavor that I love, but vegetable oil is perfectly neutral. Don’t use butter here—it can seize the chocolate.
- Optional: ½ teaspoon black gel food coloring: If you want a truly black spiderweb, add this to the melted chocolate. I’ve done it both ways, and the natural dark brown looks great, but the black is undeniably spookier. Use gel, not liquid, to avoid thinning the glaze too much.
Substitution Notes
If you need a dairy-free option, use a high-quality vegan butter stick (like Earth Balance) in the dough. The texture will be slightly different—a bit more tender—but still delicious. For the glaze, coconut oil is already dairy-free. If you’re gluten-sensitive, swap the all-purpose flour with a 1-to-1 gluten-free baking blend. I’ve had good luck with Bob’s Red Mill. Just be aware that the cookies might spread a tiny bit more, so give them extra space on the baking sheet.
Equipment Needed
You don’t need a fancy kitchen to pull these off. Here’s what I use, along with a few honest thoughts on what works and what doesn’t.
- Electric hand mixer or stand mixer: A hand mixer is totally fine. I’ve made this dough with both, and the results are identical. Just make sure you cream the butter and sugar for the full 2-3 minutes until it’s light and fluffy.
- Large mixing bowl: Any bowl you have. I use a glass one because I like to see if the butter is fully incorporated.
- Baking sheets: Two standard 13×18 inch sheets work perfectly. If you only have one, let it cool completely between batches. A hot sheet will cause the dough to spread too much.
- Parchment paper or silicone baking mat: Parchment is my go-to. It’s cheap, disposable, and the cookies slide right off. Silicone mats work too, but the cookies may spread slightly less.
- 3-inch round cookie cutter: This is the perfect size for a spiderweb. If you don’t have one, use a drinking glass with a thin rim. Just dip the rim in flour before each cut to prevent sticking.
- Small microwave-safe bowl: For melting the chocolate. I use a Pyrex measuring cup because the spout makes pouring easier.
- Toothpick or wooden skewer: The star of the show! This is what creates the web design. A toothpick gives a thinner line, while a skewer creates a bolder web. I prefer a toothpick for more delicate patterns.
- Cooling rack: Essential for letting the cookies cool completely before glazing. If you glaze warm cookies, the chocolate will just slide right off.
I bought a cheap set of toothpicks from the dollar store, and they work perfectly. No need for anything fancy. The only thing I’d recommend spending a little extra on is the chocolate chips—cheap ones don’t melt as smoothly and can leave a grainy texture in the glaze.
Preparation Method
Let’s get into the nitty-gritty. I’ve broken this down into clear steps, with all the little notes I wish someone had told me the first time. Take your time, and don’t rush the chilling step—it’s the secret to perfectly shaped cookies.
Step 1: Make the Cookie Dough
In a large mixing bowl, beat the softened butter and granulated sugar together with an electric mixer on medium speed until light and fluffy—about 2 to 3 minutes. Scrape down the sides of the bowl once during mixing. You’re looking for a pale, creamy texture. Add the egg and vanilla extract, then beat for another minute until fully combined. The mixture might look a little separated at this point, but that’s normal.
In a separate small bowl, whisk together the flour, baking soda, and salt. Gradually add the dry ingredients to the wet mixture, mixing on low speed until just combined. Don’t overmix! Stop as soon as you no longer see streaks of flour. The dough will be soft and slightly sticky, which is exactly what you want.
Step 2: Chill the Dough
This step is non-negotiable. Wrap the dough in plastic wrap and flatten it into a disc. Refrigerate for at least 30 minutes, or up to 2 days. Chilling firms up the butter, which prevents the cookies from spreading into flat, shapeless blobs in the oven. I learned this the hard way after a batch of cookies that looked more like pancakes than circles. If you’re in a rush, pop the wrapped dough in the freezer for 15 minutes.
Step 3: Cut and Bake
Preheat your oven to 350°F (175°C). Line two baking sheets with parchment paper. Lightly flour your work surface and rolling pin. Roll the chilled dough out to about ¼-inch thickness. If the dough cracks at the edges, let it sit at room temperature for 5 minutes to soften slightly. Use your 3-inch round cutter to cut out cookies, re-rolling the scraps once. Place the cookies about 2 inches apart on the prepared baking sheets.
Bake for 8 to 10 minutes, or until the edges are just barely golden. The centers will look slightly puffy and pale. Don’t overbake! They will continue to set on the baking sheet as they cool. Let them cool on the sheet for 5 minutes, then transfer to a wire rack to cool completely. This is crucial—warm cookies will melt the chocolate glaze.
Step 4: Make the Spiderweb Glaze
In a small microwave-safe bowl, combine the chocolate chips and coconut oil. Microwave in 20-second intervals, stirring well after each, until the chocolate is fully melted and smooth. This usually takes about 40 to 60 seconds total. If you’re using the black gel food coloring, stir it in now until the color is uniform. The glaze should be thin enough to drip slowly from a spoon. If it’s too thick, add another ½ teaspoon of oil.
Step 5: Decorate the Cookies
Here’s the fun part. Take a completely cooled cookie and spoon about 1 teaspoon of the chocolate glaze into the center. Use the back of the spoon to gently spread it outward in a circular motion, leaving about a ½-inch border of plain cookie around the edge. Don’t worry if it’s not perfect—the web will cover any imperfections.
While the glaze is still wet, dip a toothpick into the center of the chocolate circle. Drag the toothpick outward toward the edge of the cookie in a straight line. Repeat this step, creating 6 to 8 spokes radiating from the center. Then, without cleaning the toothpick, drag it through the glaze in a circular motion around the center, connecting the spokes. You’ll see the web pattern appear instantly! Work quickly, as the glaze sets fast. If it starts to thicken, pop the bowl back in the microwave for 5 seconds.
Let the cookies sit at room temperature for about 20 minutes until the glaze is fully set. They’re ready to serve immediately.
Cooking Tips & Techniques
I’ve made these cookies more times than I can count, and I’ve definitely had my share of mishaps. Here are the biggest lessons I’ve learned, so you can skip the frustration.
Don’t skip the chill. I know it’s tempting to skip the fridge and just roll the dough out right away. But warm dough is sticky, soft, and impossible to cut cleanly. It also spreads like crazy in the oven. I once made a batch that merged into one giant cookie blob. It tasted fine, but it looked like a sad, sugary puddle. Just give it the 30 minutes—it’s worth it.
Use a light hand with the flour. When rolling out the dough, you only need a light dusting of flour on your surface and rolling pin. Too much flour will dry out the dough and make the cookies tough. If the dough starts sticking, use a bench scraper to gently lift it rather than adding more flour.
Work in small batches. Only decorate 2 or 3 cookies at a time. The chocolate glaze starts to set within a minute or two, so if you try to do a whole batch at once, the glaze will be too firm to create the web pattern. I learned this after my first attempt resulted in a bunch of brown circles with no webs. Just do a few at a time, and you’ll get perfect results every single time.
Keep the glaze warm. If the glaze starts to thicken as you work, just pop it back in the microwave for 5 seconds. Stir it well, and it will be pourable again. Don’t let it boil—just a quick warm-up is all it needs.
Practice on a spare cookie. If you’re nervous about the web technique, grab a cooled cookie that broke or an edge piece and practice on that. It takes about 2 tries to get the hang of it. Once you see that first perfect web form, you’ll be hooked.
Variations & Adaptations
One of the best things about this recipe is how easy it is to tweak. Here are a few variations I’ve tried and loved.
- Spooky White Chocolate Webs: Swap the semi-sweet chocolate chips for white chocolate chips. The pale, creamy web looks ghostly and elegant against the golden cookie. Add a drop of orange or purple gel food coloring for a festive twist. I did this for a Halloween brunch, and everyone thought I’d bought them from a bakery.
- Gluten-Free Version: Use a 1-to-1 gluten-free baking blend. I’ve tested this with Bob’s Red Mill, and the cookies come out slightly more tender and a bit more crumbly, but the flavor is spot on. Just handle the dough gently when rolling it out.
- Spiced Pumpkin Sugar Cookies: Add 1 teaspoon of pumpkin pie spice and 2 tablespoons of pumpkin puree to the dough. Reduce the butter by 2 tablespoons to compensate for the extra moisture. These are incredible for a fall-themed party and pair beautifully with the chocolate glaze.
- Vegan Adaptation: Use a vegan butter stick and a flax egg (1 tablespoon ground flaxseed mixed with 3 tablespoons water). The cookies will be a little less tender, but the flavor is still great. For the glaze, coconut oil is already vegan, so no changes needed there.
- Mini Spiderwebs: Use a 2-inch round cutter to make mini cookies. These are perfect for treat bags or as a garnish for a Halloween dessert table. Reduce the baking time to 6-7 minutes, and use a smaller amount of glaze per cookie.
I once tried adding a pinch of cayenne pepper to the glaze for a spicy kick. It was… interesting. Not bad, but definitely not for everyone. Stick with the classic if you’re serving a crowd.
Serving & Storage Suggestions
These cookies are best served at room temperature, ideally within a few hours of decorating. The glaze stays glossy and the cookie remains perfectly soft. If you’re planning a party, I recommend baking and glazing the cookies the day before. They actually taste even better the next day—the flavors meld together beautifully.
For storage, place the cookies in a single layer in an airtight container. Separate layers with parchment paper to prevent the glaze from sticking. They’ll stay fresh at room temperature for up to 5 days. I don’t recommend refrigerating them, as the cold can make the cookies dry out and the glaze may become brittle.
To freeze, place the undecorated baked cookies in a freezer-safe bag for up to 3 months. When you’re ready to serve, thaw them at room temperature, then make the glaze and decorate. This is my go-to strategy for Halloween parties—I bake the cookies weeks in advance, then do the fun decorating part the night before. It makes the whole process feel like a craft project rather than a chore.
These cookies pair wonderfully with a warm cup of spiced cider or a creamy pumpkin latte. If you’re hosting a Halloween movie night, set them out alongside a bowl of creamy slow cooker queso blanco dip for a sweet-and-savory spread that everyone will love. For a fun treat, crumble a cookie over a bowl of fresh Greek yogurt bowl with pomegranate for a crunchy, sweet breakfast the next morning.
Nutritional Information & Benefits
Let’s be real—these are a treat, not a health food. But here’s a rough estimate per cookie (based on a 3-inch cookie with glaze):
- Calories: 180
- Fat: 9g
- Carbohydrates: 24g
- Sugar: 14g
- Protein: 2g
That said, there are a few silver linings. The butter provides a small amount of vitamin A, and the dark chocolate in the glaze is rich in antioxidants. If you use dark chocolate chips (70% cocoa or higher), you’ll get a dose of flavonoids, which are good for heart health. The cookies are also free of artificial preservatives and weird additives—just real, whole ingredients.
From a wellness perspective, I think the biggest benefit is the joy they bring. Baking and sharing these cookies is a form of self-care and connection. It’s a way to slow down, get creative, and make something that makes people smile. And honestly, that kind of nourishment matters just as much as the numbers on a nutrition label.
If you’re watching your sugar intake, you can reduce the sugar in the dough to ¾ cup and use a sugar-free chocolate chip for the glaze. The texture will be slightly different, but the cookies will still be delicious and festive.
Conclusion
These Perfect Spiderweb Halloween Sugar Cookies are more than just a recipe—they’re a little piece of kitchen magic. They’re proof that you don’t need fancy tools, a pastry degree, or hours of free time to create something that looks and tastes spectacular. Whether you’re baking for a Halloween party, a school event, or just a quiet night in with a scary movie, these cookies deliver every single time.
I love how forgiving this recipe is. It doesn’t demand perfection. In fact, the slightly imperfect, hand-drawn webs are what make each cookie unique and charming. So go ahead, get a little messy, and have fun with it. If your first web looks a bit wonky, just call it an abstract spiderweb—it’s Halloween, after all!
I’d love to hear how yours turn out. Drop a comment below and let me know if you tried any of the variations, or share your own creative twist. And if you’re looking for more easy, crowd-pleasing treats, check out my creamy strawberry cream cheese stuffed French toast for a sweet breakfast that feels just as special. Happy baking, and have a wonderfully spooky Halloween!
Frequently Asked Questions
Can I use store-bought sugar cookie dough?
Yes, absolutely. If you’re short on time, a refrigerated tube of sugar cookie dough works fine. Just slice it, bake according to the package directions, and let the cookies cool completely before glazing. The homemade dough is more flavorful and has a better texture, but store-bought is a perfectly acceptable shortcut.
How do I get the spiderweb pattern to look perfect?
The key is working quickly while the glaze is still wet. Start with a small circle of glaze in the center, then drag the toothpick outward in straight lines. Then, without wiping the toothpick, drag it in a circular motion around the center. The glaze will naturally create a web pattern. If it doesn’t look right, just spoon a fresh layer of glaze over the cookie and try again—the old pattern will disappear.
Can I make these cookies ahead of time?
Yes! You can bake the cookies up to a week in advance and store them in an airtight container at room temperature. Decorate them the day you plan to serve them for the freshest look. You can also freeze the undecorated baked cookies for up to 3 months. Just thaw and glaze when you’re ready.
Why did my cookies spread too much?
This usually happens if the dough wasn’t chilled long enough, or if the butter was too soft when you mixed it. Make sure your butter is just softened, not melted, and always chill the dough for at least 30 minutes. Also, check that your baking soda is fresh—old baking soda loses its potency and can cause spreading.
Can I use a different type of chocolate for the glaze?
Absolutely. Milk chocolate will give a sweeter, lighter web. Dark chocolate (70% or higher) will be richer and less sweet. White chocolate creates a ghostly white web that looks beautiful against the golden cookie. Just adjust the amount of oil slightly—white chocolate and milk chocolate are softer and may need a bit less oil to reach the right consistency.
Pin This Recipe!
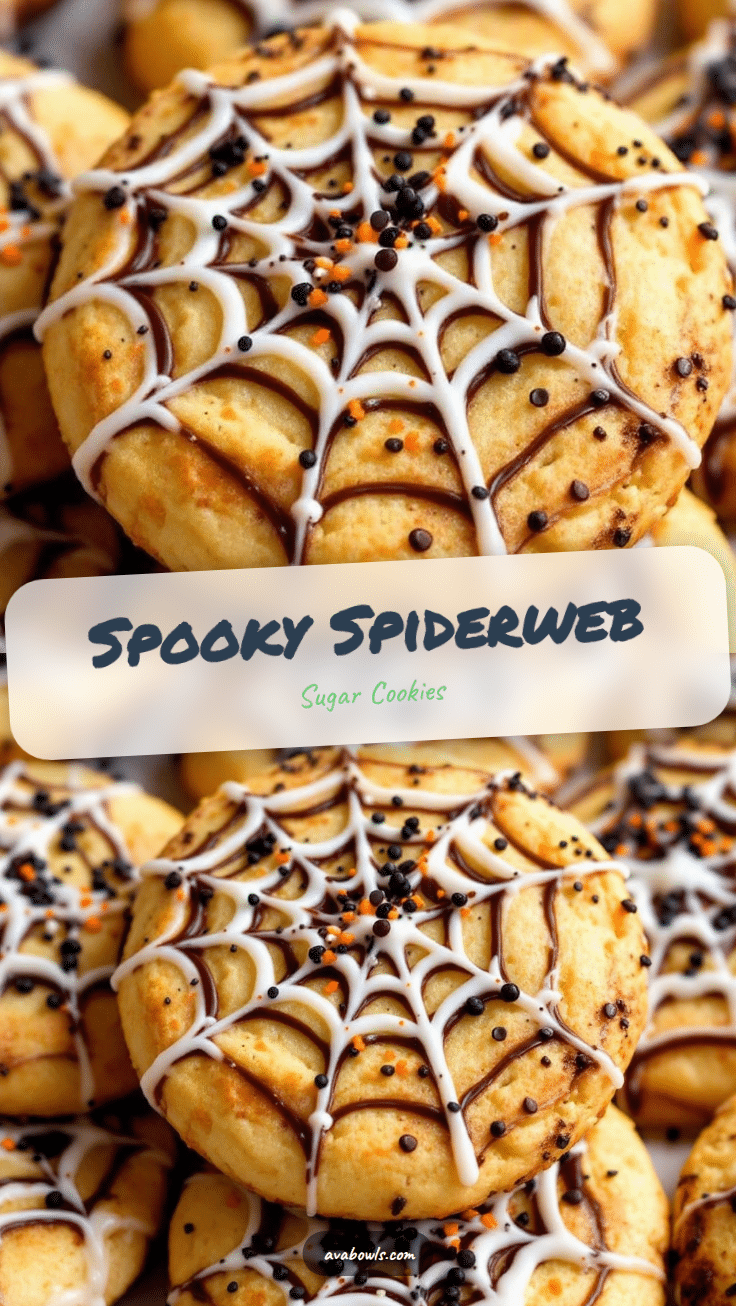
Perfect Spiderweb Halloween Sugar Cookies

These easy spiderweb sugar cookies deliver a spooky-chic look with a simple chocolate glaze and toothpick technique. Perfect for Halloween parties, they require minimal effort and basic pantry ingredients.
- Prep Time: 15 minutes
- Cook Time: 10 minutes
- Total Time: 45 minutes
- Yield: 24 servings 1x
- Category: Dessert
- Cuisine: American
Ingredients
- 1 cup (226g) unsalted butter, softened
- 1 cup (200g) granulated sugar
- 1 large egg, room temperature
- 1 teaspoon vanilla extract
- 2 cups (250g) all-purpose flour
- ½ teaspoon baking soda
- ½ teaspoon salt
- 1 cup (170g) semi-sweet chocolate chips
- 2 tablespoons (30ml) coconut oil or vegetable oil
- Optional: ½ teaspoon black gel food coloring
Instructions
- In a large mixing bowl, beat the softened butter and granulated sugar together with an electric mixer on medium speed until light and fluffy—about 2 to 3 minutes. Scrape down the sides of the bowl once during mixing. Add the egg and vanilla extract, then beat for another minute until fully combined.
- In a separate small bowl, whisk together the flour, baking soda, and salt. Gradually add the dry ingredients to the wet mixture, mixing on low speed until just combined. Do not overmix.
- Wrap the dough in plastic wrap and flatten it into a disc. Refrigerate for at least 30 minutes, or up to 2 days.
- Preheat your oven to 350°F (175°C). Line two baking sheets with parchment paper. Lightly flour your work surface and rolling pin. Roll the chilled dough out to about ¼-inch thickness. Use a 3-inch round cutter to cut out cookies, re-rolling the scraps once. Place the cookies about 2 inches apart on the prepared baking sheets.
- Bake for 8 to 10 minutes, or until the edges are just barely golden. Let them cool on the sheet for 5 minutes, then transfer to a wire rack to cool completely.
- In a small microwave-safe bowl, combine the chocolate chips and coconut oil. Microwave in 20-second intervals, stirring well after each, until the chocolate is fully melted and smooth. If using black gel food coloring, stir it in now.
- Take a completely cooled cookie and spoon about 1 teaspoon of the chocolate glaze into the center. Use the back of the spoon to gently spread it outward in a circular motion, leaving about a ½-inch border of plain cookie around the edge.
- While the glaze is still wet, dip a toothpick into the center of the chocolate circle. Drag the toothpick outward toward the edge of the cookie in a straight line. Repeat to create 6 to 8 spokes radiating from the center. Then, without cleaning the toothpick, drag it through the glaze in a circular motion around the center, connecting the spokes. Let the cookies sit at room temperature for about 20 minutes until the glaze is fully set.
Notes
Chill the dough for at least 30 minutes to prevent spreading. Work in small batches when decorating—only glaze 2-3 cookies at a time. If the glaze thickens, microwave for 5 seconds. For a dairy-free version, use vegan butter and coconut oil. For gluten-free, use a 1-to-1 gluten-free baking blend.
Nutrition
- Serving Size: 1 cookie
- Calories: 180
- Sugar: 14
- Sodium: 95
- Fat: 9
- Saturated Fat: 5
- Carbohydrates: 24
- Fiber: 1
- Protein: 2
Keywords: Halloween cookies, spiderweb cookies, sugar cookies, easy Halloween dessert, chocolate glaze cookies


