My friend Jess showed up at my door on a rainy October Saturday with a sad-looking pumpkin and a box of brownie mix. “I bought this for a party that got cancelled,” she said, holding them up like evidence. I looked in my fridge—half a block of cream cheese, some eggs, a little sour cream. Not exactly a pastry chef’s pantry. But I’d been craving something with that swirl thing you see in those fancy bakery photos. The ones that look impossible but you know they’re just a few smart moves away.
So I started messing around. I roasted that pumpkin right there, let it cool while we had tea, and then just started throwing things together. The first batch came out a little lopsided—the swirl sank to the bottom like a sad secret. But the second one? That one had those beautiful ribbons of cheesecake running right through the middle, and the pumpkin flavor was warm and subtle, not like a candle. I remember pulling the pan out of the oven and Jess just staring at it. “You made that?” she said. And honestly, it felt kind of magic.
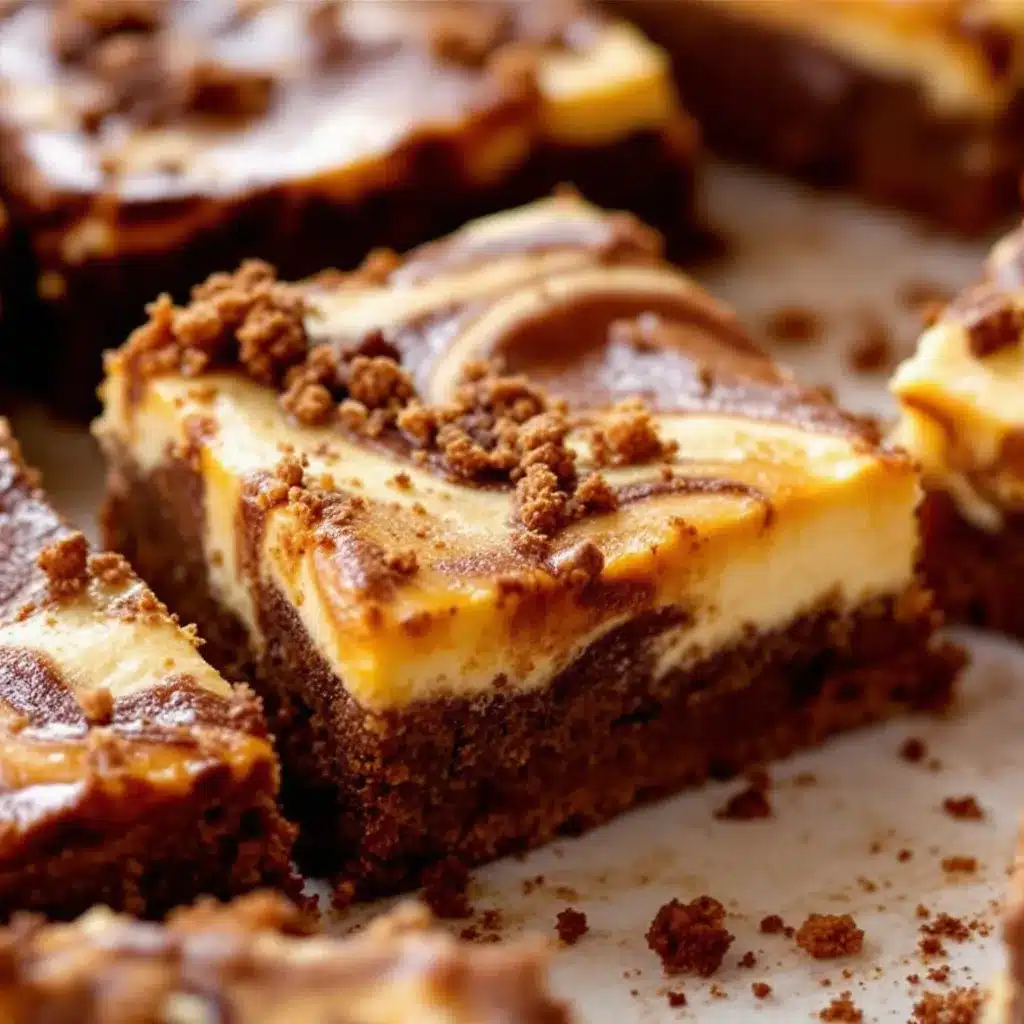
That’s how these Pumpkin Cheesecake Swirl Brownies were born—not from a plan, but from a rainy afternoon and a friend who showed up with the wrong ingredients. They’ve become my go-to for fall gatherings, and I’ve made them so many times now I barely need the recipe. The brownie base is fudgy but sturdy enough to hold that creamy, tangy cheesecake layer, and the pumpkin adds this earthy sweetness that plays perfectly with the chocolate. It’s the kind of dessert that makes people close their eyes on the first bite. And that’s not something I say lightly.
Why You’ll Love This Recipe
I’ve tested this recipe more times than I care to admit. There were batches where the swirl looked like abstract art gone wrong, and others where the brownie came out too cakey. But after all that trial and error—and a few late-night sugar rushes—I landed on a version that just works. Here’s why it’s worth your time:
- Foolproof Swirl Technique : No sinking, no muddy colors. I’ll show you exactly how to get those beautiful ribbons every single time.
- One Bowl for the Brownie Base : Less dishes, more brownies. That’s a win in my book.
- Real Pumpkin, Not Just Spices : We’re using actual pumpkin puree here, which gives the cheesecake layer a silky texture and authentic flavor. No artificial stuff.
- Perfect for Fall Baking : This is the dessert that shows up to Friendsgiving, Halloween parties, and cozy Sunday afternoons when you just want something warm and chocolatey.
- Better Than Bakery Quality : Honestly, I’ve paid twelve dollars for a slice of something similar at a café, and mine tastes better. The cream cheese tang cuts through the rich chocolate in a way that feels sophisticated but totally approachable.
What makes this recipe different from all the other pumpkin brownie recipes out there? It’s the balance. The brownie is dense and fudgy—not cakey—so it holds up against the creamy cheesecake layer without getting soggy. The pumpkin isn’t overpowering; it’s there to complement, not compete. And the swirl? It stays put because we’re layering and swirling at the right temperature. No sinking disasters here, I promise.
This is the kind of recipe that makes you look like you spent hours in the kitchen when really, it comes together in about 20 minutes of active work. And honestly, that’s my favorite kind of baking.
What Ingredients You Will Need
This recipe uses simple, pantry-friendly ingredients, but each one plays a specific role in creating that perfect texture and flavor. Here’s what you’ll need and why each ingredient matters.
For the Brownie Layer
- Unsalted butter (½ cup, 1 stick, melted) — Use good quality butter here. It’s the base of your brownie flavor. I prefer Kerrygold for its richness, but any unsalted butter works fine.
- Granulated sugar (1 cup) — Not just for sweetness. Sugar helps create that crackly top crust we all love. Don’t reduce it, or the texture will change.
- Large eggs (2, room temperature) — Room temperature eggs incorporate better into the melted butter, giving you a smoother batter. Take them out 20 minutes before you start.
- Vanilla extract (1 teaspoon) — Pure vanilla, not imitation. It deepens the chocolate flavor without being obvious.
- Unsweetened cocoa powder (⅓ cup) — I use Dutch-processed cocoa for a richer, darker flavor. Natural cocoa works too, but the color will be lighter.
- All-purpose flour (½ cup) — Just enough to give structure without making the brownies cakey. Spoon and level your flour for accuracy.
- Salt (¼ teaspoon) — Salt is not optional. It balances sweetness and makes the chocolate taste more chocolatey.
For the Pumpkin Cheesecake Swirl
- Cream cheese (8 oz, softened) — Full-fat block cream cheese is non-negotiable here. The spreadable kind in a tub has too much water and will make your swirl weepy. Let it sit out for at least 30 minutes.
- Pumpkin puree (½ cup) — Not pumpkin pie filling. Look for 100% pure pumpkin. I’ve used Libby’s for years and it’s consistently good. If you’re feeling ambitious, homemade roasted pumpkin puree works beautifully too.
- Granulated sugar (¼ cup) — Just enough to sweeten the cheesecake layer without making it candy-like.
- Large egg yolk (1) — The yolk adds richness and helps the cheesecake layer set properly. Save the white for another use.
- Vanilla extract (½ teaspoon) — Again, pure vanilla. It rounds out the pumpkin spice flavors.
- Pumpkin pie spice (1 teaspoon) — You can use store-bought or make your own with cinnamon, nutmeg, ginger, and a pinch of cloves. I prefer homemade because I can control the cinnamon-to-nutmeg ratio.
- Pinch of salt — A tiny pinch. Trust me.
Ingredient Selection Tip: For the best texture, make sure your cream cheese is truly softened. If it’s cold, you’ll end up with lumps in your cheesecake layer that won’t swirl smoothly. And if you’re using a different brand of pumpkin puree, check the consistency—some are more watery than others. If yours seems thin, let it drain in a fine-mesh sieve for 10 minutes before using.
Equipment Needed
- 8×8-inch baking pan — This size gives you thick, fudgy brownies. A 9×9 will work, but your brownies will be thinner and bake faster. Adjust your bake time by about 5 minutes if using a larger pan.
- Parchment paper — Not foil, not wax paper. Parchment lets you lift the entire block of brownies out cleanly for easy slicing. Leave overhang on two opposite sides.
- Mixing bowls (one medium, one small) — Glass or stainless steel works best. Avoid plastic bowls for the brownie batter; they can retain odors.
- Whisk — A good whisk is better than an electric mixer here. We don’t want to overmix the brownie batter.
- Spatula — For spreading the layers evenly. A small offset spatula is ideal for the swirl step.
- Knife or skewer — For creating the swirl pattern. A butter knife works perfectly fine.
- Cooling rack — Essential for even cooling. If you let the brownies cool in the pan on the counter, the bottom will stay too warm and the texture won’t set properly.
Budget-Friendly Tip: You don’t need fancy equipment for this recipe. I’ve made these brownies with a fork instead of a whisk and a chopstick instead of a skewer. They turned out just fine. The only thing I wouldn’t skip is the parchment paper—it makes cleanup so much easier.
Preparation Method
Let’s get baking. This recipe moves quickly once you start, so read through everything first. Trust me, I learned the hard way that scrambling for an ingredient mid-step is not fun.
- Preheat and Prep Your Pan. Preheat your oven to 350°F (175°C). Line your 8×8-inch baking pan with parchment paper, leaving about 2 inches of overhang on two opposite sides. Lightly grease the parchment with butter or non-stick spray. This step is your insurance policy against stuck brownies.
- Melt the Butter. In a medium microwave-safe bowl, melt the ½ cup of butter in 30-second intervals, stirring between each. You want it just melted, not hot. Let it cool for a minute or two. If it’s too hot when you add the eggs, you’ll end up with scrambled eggs in your brownie batter. Not a good look.
- Mix the Brownie Batter. Add 1 cup of granulated sugar to the melted butter and whisk until combined. It’ll look a little grainy—that’s normal. Add the 2 room-temperature eggs and 1 teaspoon of vanilla extract, and whisk vigorously for about 30 seconds. You want the mixture to look smooth and slightly thickened. This is where that crackly top comes from. Now, sift in the ⅓ cup cocoa powder, ½ cup flour, and ¼ teaspoon salt. Fold gently with a spatula until just combined. A few streaks of flour are okay. Overmixing makes tough brownies.
- Make the Pumpkin Cheesecake Layer. In a small bowl, beat the softened 8 oz of cream cheese with a spatula until smooth. Add ¼ cup of sugar, ½ cup of pumpkin puree, 1 egg yolk, ½ teaspoon of vanilla, 1 teaspoon of pumpkin pie spice, and a pinch of salt. Mix until everything is smooth and uniform. Don’t overbeat—you don’t want to incorporate too much air. The texture should be thick and spreadable, like a soft frosting.
- Layer the Batters. Spread about two-thirds of the brownie batter into your prepared pan. It’ll be thick—use your spatula to push it into the corners and create an even layer. Now, carefully spoon the pumpkin cheesecake mixture on top of the brownie layer. Spread it gently, trying not to disturb the brownie underneath. Drop the remaining brownie batter in spoonfuls over the cheesecake layer. It won’t cover it completely, and that’s exactly what you want.
- Create the Swirl. Here’s the fun part. Take a butter knife or a skewer and drag it through the batters in a figure-eight pattern. Go all the way to the bottom, then back up. Don’t over-swirl—about 6 to 8 passes is plenty. You want distinct ribbons, not a muddy mess. If you swirl too much, you’ll lose the contrast between the layers. Trust the process.
- Bake. Place the pan in the center of your preheated oven and bake for 35 to 40 minutes. At 35 minutes, start checking. The edges should look set and slightly pulling away from the pan. The center should still have a slight jiggle—like a gentle wobble, not a wave. A toothpick inserted into the center should come out with a few moist crumbs, not wet batter. If it comes out clean, you’ve overbaked them. Sorry.
- Cool Completely. This is the hardest step. Let the brownies cool in the pan on a wire rack for at least 1 hour. Then, using the parchment overhang, lift the entire block out of the pan and transfer to a cutting board. Let them cool completely—another 30 minutes at least—before slicing. If you cut them while they’re warm, you’ll get a crumbly mess. I know it’s tempting, but patience pays off here.
- Slice and Serve. Use a sharp knife and wipe it clean between each cut for the cleanest slices. I like to cut them into 16 squares, but you can go bigger if you’re feeling generous. Serve at room temperature or slightly warm. If you want that gooey, just-baked experience, pop a slice in the microwave for 10 seconds.
Cooking Tips & Techniques
I’ve made this recipe at least a dozen times, and I’ve learned a few things the hard way. Here are the tips that’ll save you from my mistakes.
The Temperature Trap. Your cream cheese needs to be truly softened—not just out of the fridge for 5 minutes. If it’s cold, it won’t blend smoothly with the pumpkin and sugar, and you’ll end up with little white lumps in your swirl. Leave it on the counter for at least 30 minutes. Same goes for the eggs. Cold eggs can seize up your melted butter mixture, making the batter lumpy. Set everything out before you start, and you’ll thank me later.
The Swirl Secret. Don’t overthink the swirl. I used to spend minutes making intricate patterns, and honestly, the brownies didn’t look any better. A few simple passes with a knife is all you need. And here’s the trick—drag your knife all the way to the bottom of the pan. If you only swirl the top layer, you’ll get a thin ribbon of cheesecake on top and a solid brownie underneath. You want those ribbons running through the whole slice.
The Doneness Dilemma. Brownies are tricky because they continue to cook from residual heat after they come out of the oven. If you wait until a toothpick comes out completely clean, you’ll end up with dry, cakey brownies. The center should still have a slight jiggle when you gently shake the pan. That jiggle will set as they cool. I once left mine in for an extra 5 minutes because I was nervous, and they were still good—but not as fudgy as they could have been. Learn from my over-cautiousness.
Multitasking Like a Pro. While the brownie batter comes together in about 5 minutes, you can make the cheesecake layer in another bowl. Then, while the brownies are baking, clean up your dishes. By the time they’re cool enough to slice, your kitchen will be spotless. That’s my favorite kind of baking—delicious results with minimal cleanup.
Variations & Adaptations
One of the best things about this recipe is how adaptable it is. I’ve tried several variations over the years, and here are my favorites.
Gluten-Free Version
Swap the all-purpose flour with a 1:1 gluten-free baking flour blend. I’ve used Bob’s Red Mill and King Arthur’s measure-for-measure blends with great results. Don’t use almond flour or coconut flour—they’ll change the texture completely. The gluten-free version is slightly more delicate, so let the brownies cool completely before slicing.
Dairy-Free Adaptation
Use a high-quality vegan butter substitute (I like Miyoko’s) and a dairy-free cream cheese alternative. Kite Hill makes a really good almond-based cream cheese that works well here. The texture will be slightly softer, so chill the brownies for an extra 30 minutes before slicing. The pumpkin helps keep the cheesecake layer creamy, so you won’t miss the dairy.
Extra Chocolatey Version
Fold ½ cup of semi-sweet chocolate chips into the brownie batter before layering. I’ve also tried adding a handful of white chocolate chips to the cheesecake layer, and the combination is incredible—like a pumpkin chocolate chip cookie in brownie form. Just don’t overdo it, or the swirl will get lost.
Spice It Up
If you love bold pumpkin flavor, add an extra ½ teaspoon of pumpkin pie spice to the cheesecake layer, and sprinkle a pinch of cinnamon on top of the brownies before baking. For a savory-sweet twist, try adding a tiny pinch of cayenne pepper to the brownie batter. It won’t make the brownies spicy, but it’ll deepen the chocolate flavor in a way that’s hard to pinpoint but impossible to ignore.
Different Pan Sizes
I’ve made these in a 9×9 pan for thinner, more portable brownies (bake time: 28-32 minutes), and in a mini muffin tin for bite-sized treats (bake time: 12-15 minutes). Both work, but the 8×8 pan gives you that perfect thick-to-swirl ratio that I love. For a more decadent dessert, try making these as a layer in a trifle—just crumble the brownies and layer with whipped cream and more pumpkin cheesecake.
Serving & Storage Suggestions
These brownies are delicious at room temperature, but they’re next-level when served slightly warm. Pop a slice in the microwave for 10 seconds, and the chocolate becomes all melty while the cheesecake layer stays cool and creamy. It’s a textural experience that’s hard to beat.
For a full dessert spread, serve these alongside a scoop of vanilla bean ice cream or a dollop of lightly sweetened whipped cream. A drizzle of caramel sauce takes it over the top—especially if you’re serving them for a holiday gathering. I’ve also paired them with a hot cup of chai or a creamy latte, and the flavors just sing together. If you’re looking for a cozy fall drink to go with these, you might enjoy this creamy iced lavender oat milk latte for a surprising flavor combo, or a creamy pink drink copycat for something fruity and refreshing.
Storage: Store leftover brownies in an airtight container at room temperature for up to 3 days. If your kitchen is warm, refrigerate them—the cream cheese layer is more stable when chilled. They’ll keep in the fridge for up to a week. Just let them sit at room temperature for 15 minutes before serving, or warm them briefly in the microwave.
Freezing: These brownies freeze beautifully. Once they’re completely cool, wrap the entire block (or individual slices) tightly in plastic wrap, then in foil. Freeze for up to 3 months. To thaw, leave them in the fridge overnight or on the counter for about an hour. I love having a stash in the freezer for unexpected guests or late-night cravings.
Flavor Development: Here’s something interesting—these brownies actually taste better the next day. The flavors meld together overnight, and the pumpkin spice becomes more pronounced. So if you’re making them for a party, bake them a day ahead. Your future self will thank you.
Nutritional Information & Benefits
Let’s be real—these are brownies, not health food. But there are a few bright spots in the nutritional picture. Here’s the approximate breakdown per brownie (based on 16 servings):
| Nutrient | Amount per Serving |
|---|---|
| Calories | 195 |
| Total Fat | 12g |
| Saturated Fat | 7g |
| Cholesterol | 65mg |
| Sodium | 135mg |
| Total Carbohydrates | 22g |
| Dietary Fiber | 1g |
| Sugars | 16g |
| Protein | 3g |
| Vitamin A | 25% DV |
| Calcium | 4% DV |
| Iron | 6% DV |
The pumpkin puree adds a good dose of Vitamin A (hello, healthy vision and immune support), and the cream cheese provides a little protein and calcium. The cocoa powder is rich in antioxidants—specifically flavonoids, which are good for heart health. So while I wouldn’t call these a health food, they’re not empty calories either. They’re a treat made with real ingredients, and that counts for something.
Dietary Considerations: This recipe contains gluten, dairy, and eggs. For a gluten-free version, see the variations section above. For a dairy-free option, use vegan butter and dairy-free cream cheese. The egg in the brownie batter is essential for structure, so I don’t recommend trying to make these vegan—the texture won’t be the same.
Conclusion
These Pumpkin Cheesecake Swirl Brownies are the kind of recipe that makes you look like a baking genius without actually having to be one. The brownie base is rich and fudgy, the cheesecake layer is creamy and spiced just right, and that beautiful swirl makes every slice look like it came from a fancy bakery. It’s the perfect dessert for fall gatherings, cozy weekends, or anytime you want to impress someone with something that tastes way more complicated than it actually is.
I love this recipe because it’s forgiving. It doesn’t care if your cream cheese has a few tiny lumps or if your swirl isn’t picture-perfect. It still tastes amazing. And honestly, that’s the kind of recipe I want in my life—one that’s more about joy than perfection. So go ahead, give it a try. Customize it, make it your own, and don’t stress about the details. The only rule is to save a piece for yourself before everyone else devours them.
I’d love to hear how yours turn out! Drop a comment below and let me know if you tried any variations, or tag me in your photos on social media. Happy baking, friends!
Frequently Asked Questions
Can I use canned pumpkin pie filling instead of pumpkin puree?
No, please don’t. Pumpkin pie filling is already sweetened and spiced, and it has added thickeners that will throw off the texture of your cheesecake layer. Stick with 100% pure pumpkin puree for the best results. If you accidentally bought pie filling, save it for making pumpkin pie or adding to oatmeal.
Why did my swirl sink to the bottom of the pan?
This usually happens when the cheesecake layer is too heavy or the brownie batter is too thin. Make sure your cream cheese is fully softened so it blends smoothly without lumps. Also, don’t overmix the brownie batter—overmixing can make it too thin. If your brownie batter seems runny, let it sit for 5 minutes before layering; the flour will absorb some moisture and thicken it up.
Can I make these brownies ahead of time?
Absolutely. In fact, I recommend it. These brownies taste even better the next day after the flavors have had time to meld. Bake them a day ahead, let them cool completely, and store them in an airtight container at room temperature or in the fridge. They’re perfect for taking to parties or holiday gatherings.
How do I get clean, neat slices?
Patience is key. Let the brownies cool completely before slicing—at least 2 hours after they come out of the oven. Use a sharp chef’s knife and wipe it clean with a damp paper towel between each cut. For the absolute cleanest slices, chill the brownies in the fridge for 30 minutes before cutting. The cold cream cheese layer will slice like a dream.
Can I double this recipe for a 9×13 pan?
Yes! Double all the ingredients and bake in a 9×13-inch pan. The bake time will be similar, but start checking at 35 minutes. You may need to bake for 40-45 minutes total. The brownies will be slightly thinner, but the swirl-to-brownie ratio will still be perfect. Just make sure your pan is lined with parchment for easy lifting.
Pin This Recipe!
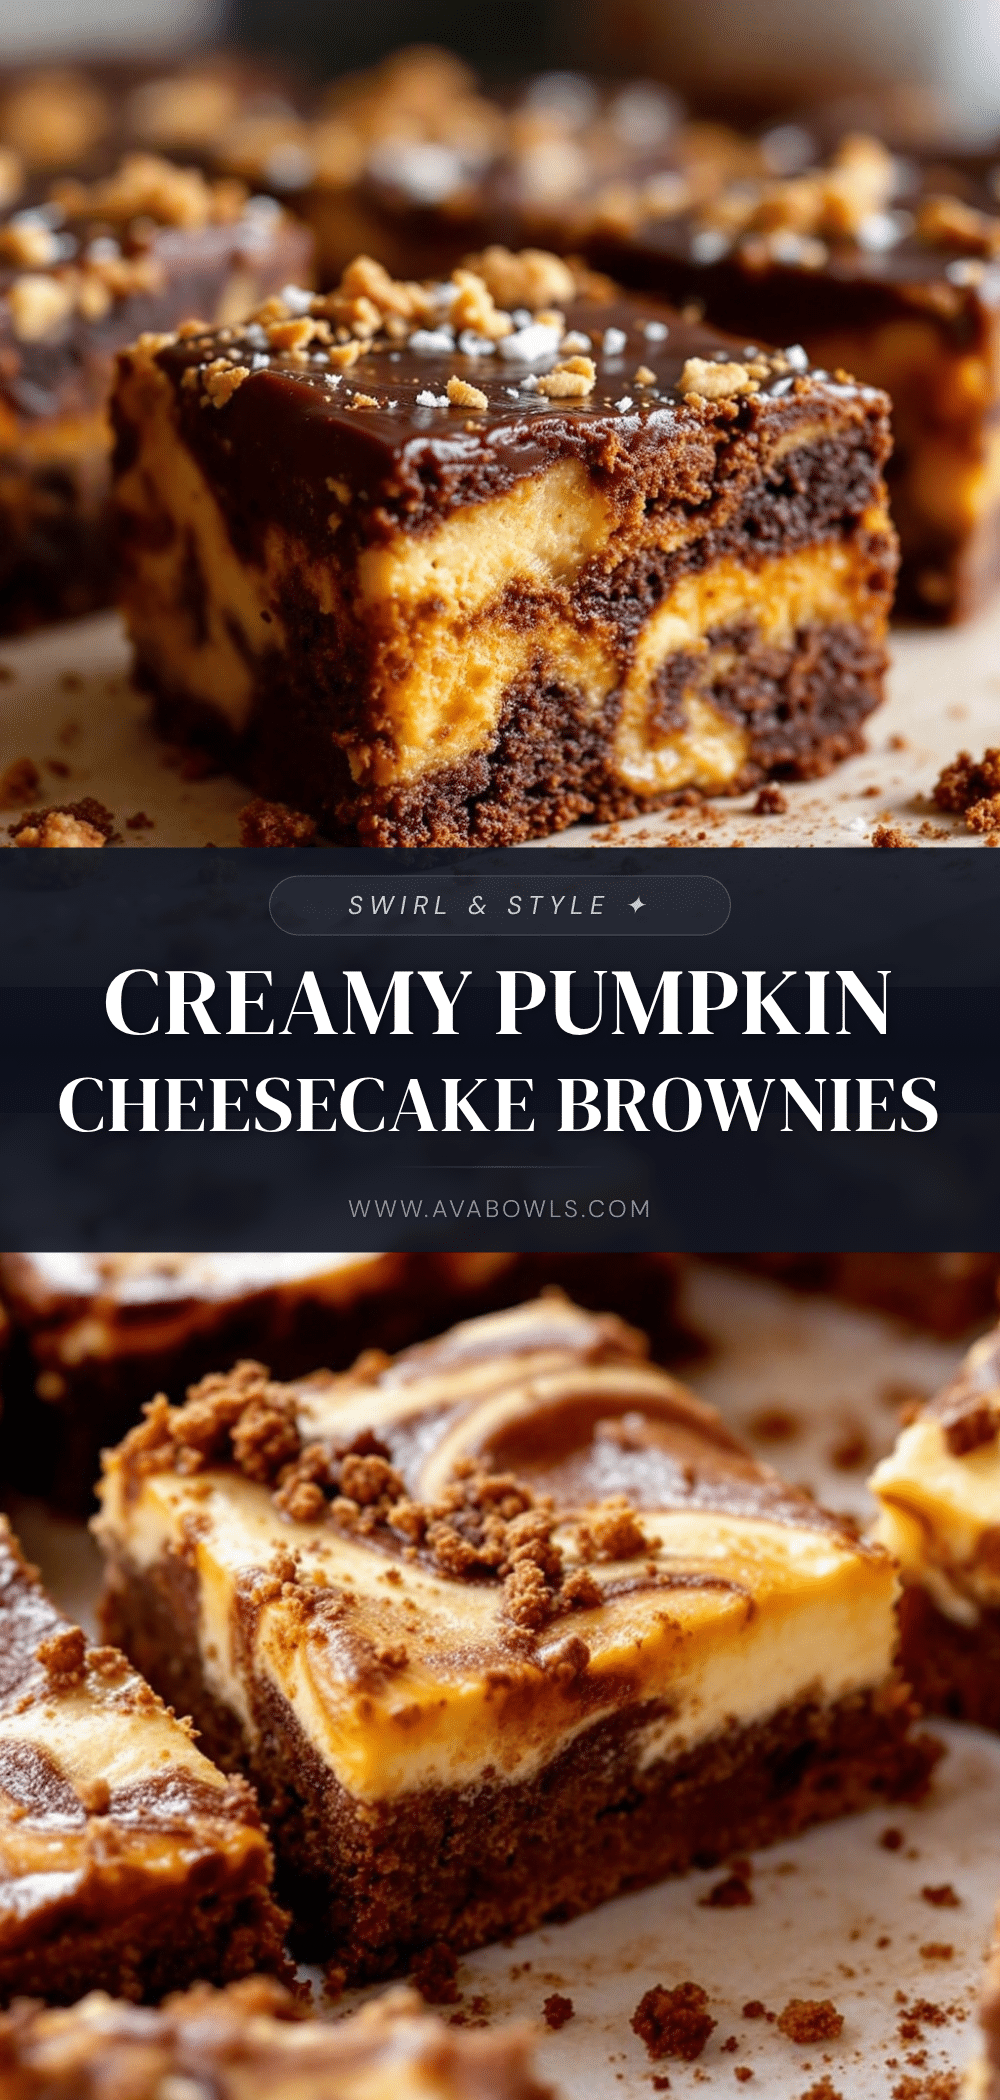
Perfect Pumpkin Cheesecake Swirl Brownies Recipe
Rich, fudgy brownies swirled with a creamy pumpkin cheesecake layer. This foolproof recipe delivers beautiful ribbons of cheesecake and warm pumpkin spice in every bite.
- Prep Time: 20 minutes
- Cook Time: 35 minutes
- Total Time: 55 minutes
- Yield: 16 servings 1x
- Category: Dessert
- Cuisine: American
Ingredients
- ½ cup unsalted butter (1 stick), melted
- 1 cup granulated sugar
- 2 large eggs, room temperature
- 1 teaspoon vanilla extract
- ⅓ cup unsweetened cocoa powder (Dutch-processed preferred)
- ½ cup all-purpose flour
- ¼ teaspoon salt
- 8 oz cream cheese, softened
- ½ cup pumpkin puree (100% pure)
- ¼ cup granulated sugar
- 1 large egg yolk
- ½ teaspoon vanilla extract
- 1 teaspoon pumpkin pie spice
- Pinch of salt
Instructions
- Preheat oven to 350°F (175°C). Line an 8×8-inch baking pan with parchment paper, leaving overhang on two opposite sides. Lightly grease the parchment.
- In a medium microwave-safe bowl, melt the butter in 30-second intervals. Let cool for 1-2 minutes.
- Add 1 cup sugar to the melted butter and whisk until combined. Add the eggs and 1 teaspoon vanilla, whisk vigorously for 30 seconds until smooth and slightly thickened.
- Sift in the cocoa powder, flour, and ¼ teaspoon salt. Fold gently with a spatula until just combined. Do not overmix.
- In a small bowl, beat the softened cream cheese until smooth. Add ¼ cup sugar, pumpkin puree, egg yolk, ½ teaspoon vanilla, pumpkin pie spice, and a pinch of salt. Mix until smooth and uniform.
- Spread about two-thirds of the brownie batter into the prepared pan. Spoon the pumpkin cheesecake mixture on top and spread gently. Drop remaining brownie batter in spoonfuls over the cheesecake layer.
- Use a butter knife or skewer to drag through the batters in a figure-eight pattern, making 6-8 passes. Do not over-swirl.
- Bake for 35-40 minutes. The edges should be set and the center should have a slight jiggle. A toothpick inserted into the center should come out with a few moist crumbs.
- Cool in the pan on a wire rack for at least 1 hour. Then lift out using the parchment and cool completely on the rack for another 30 minutes before slicing.
- Slice into 16 squares using a sharp knife, wiping clean between cuts. Serve at room temperature or slightly warm.
Notes
For best results, ensure cream cheese is fully softened (at least 30 minutes at room temperature). Do not overmix the brownie batter. The brownies taste even better the next day. For clean slices, chill the brownies for 30 minutes before cutting.
Nutrition
- Serving Size: 1 brownie
- Calories: 195
- Sugar: 16
- Sodium: 135
- Fat: 12
- Saturated Fat: 7
- Carbohydrates: 22
- Fiber: 1
- Protein: 3
Keywords: pumpkin cheesecake swirl brownies, fall brownies, pumpkin brownies, cheesecake brownies, fudgy brownies


