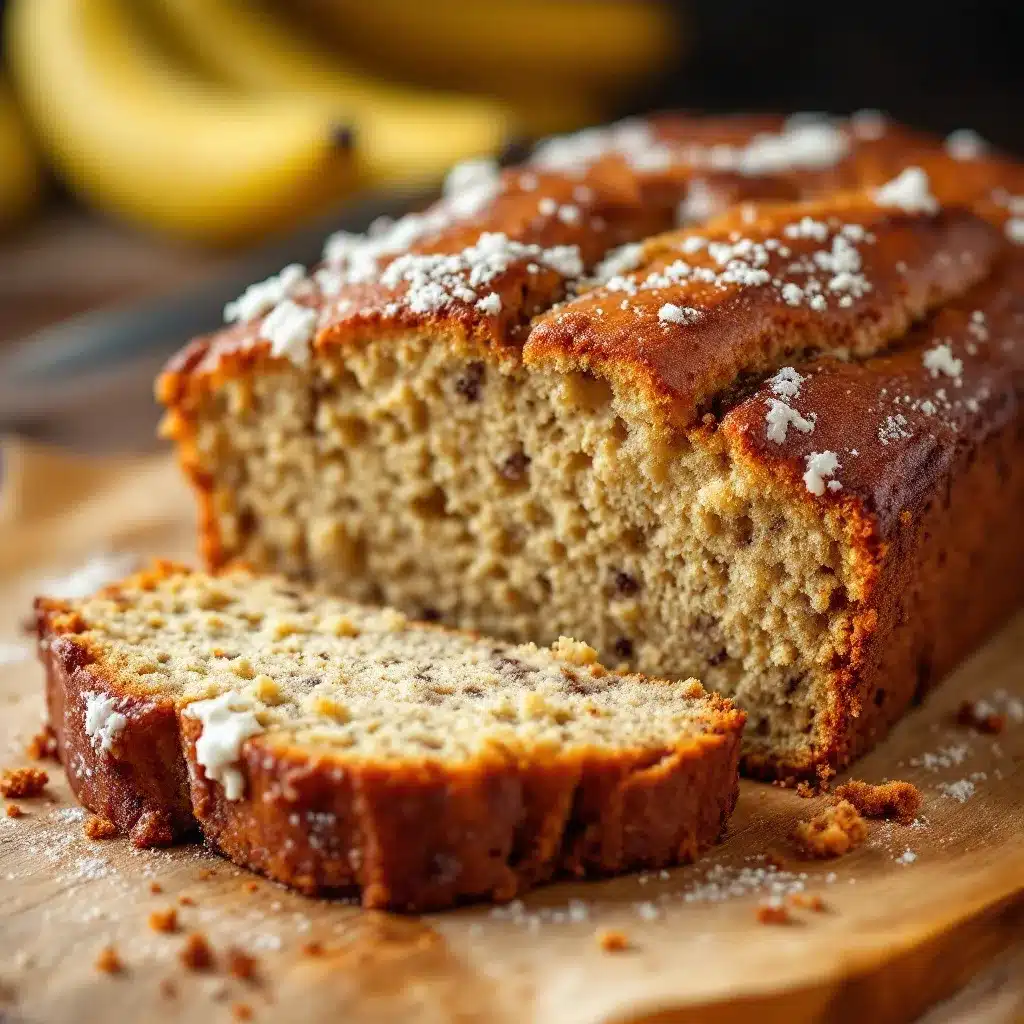
The crackled top, golden and domed, with a single deep fissure running right through the center — that’s what I wait for every single time. Not the smell, not the taste, but that specific, almost architectural crown that tells you the inside is going to be impossibly tender. And honestly, the rest of the loaf is just the payoff for that first visual hit. This moist classic banana bread with sour cream started as a happy accident one rainy Tuesday when I had three spotty bananas and a half-used tub of sour cream staring at me from the fridge. I wasn’t trying to reinvent anything. I was just tired of dry, crumbly loaves that promised moisture but delivered disappointment.
So I threw caution (and a few extra tablespoons of sour cream) to the wind. The result? A loaf so tender it barely held its own weight, with a crumb that practically dissolved on your tongue. The sour cream isn’t just an ingredient here — it’s the secret weapon that keeps every slice soft for days. No more reaching for a glass of milk to choke down a dry piece of bread. This one stands alone, proud and perfectly moist, from the first slice to the last sad little heel. (And yes, I fight my husband for that heel every single time.)
If you’ve been hunting for a banana bread that actually delivers on its promise of moisture, this is it. No gimmicks, no fussy techniques — just a simple, foolproof recipe that works because the science is sound and the ingredients are doing exactly what they should. Trust me on this one.
Why You’ll Love This Recipe
Let me tell you why this recipe has earned a permanent spot in my weekly baking rotation. After testing dozens of banana bread variations (some tragic, some just okay), this one stands head and shoulders above the rest. Here’s what makes it special:
- Incredibly Moist Texture: The sour cream adds fat and acidity, which tenderizes the gluten and keeps the bread soft for days. You won’t find a dry crumb here.
- Simple Pantry Ingredients: You probably have everything you need right now. No weird flours or specialty extracts — just real, recognizable ingredients.
- Perfect for Overripe Bananas: You know those sad, brown bananas sitting on your counter? This is their destiny. The riper, the better.
- Foolproof for Beginners: I’ve made this with my niece (she’s seven) and it turned out perfect. If a kid can do it, so can you.
- Freezes Like a Dream: Make two loaves — one for now, one for later. It thaws beautifully and tastes just-baked.
This isn’t just another banana bread recipe. It’s the one I bring to potlucks, the one my neighbors request, the one that disappears within hours of coming out of the oven. The sour cream creates a velvety crumb that’s almost custard-like, while the bananas provide that deep, caramelized sweetness you only get when they’re properly spotty. And here’s the thing — it actually gets better on day two. The flavors meld, the texture settles, and suddenly you’re cutting yourself “just one more slice” at 10 PM.
What Ingredients You Will Need
This recipe uses simple, wholesome ingredients that work together to create something truly special. Most of these are pantry staples, which makes this the perfect last-minute bake. Let me walk you through each one and explain why it matters.
For the Banana Bread
- 3 large ripe bananas, mashed — The riper the better! Look for bananas with plenty of brown spots. They should be soft and almost mushy. (I prefer using bananas that are at least 3-4 days past their prime.)
- 1/2 cup (113g) unsalted butter, softened — Butter adds richness and flavor. Make sure it’s at room temperature so it creams properly with the sugar. I use Kerrygold when I want to be fancy, but any good unsalted butter works.
- 3/4 cup (150g) granulated sugar — Regular white sugar works perfectly. It adds sweetness and helps create that beautiful golden crust.
- 2 large eggs, room temperature — Room temperature eggs incorporate more easily into the batter, creating a smoother texture. Take them out of the fridge 30 minutes before starting.
- 1 teaspoon vanilla extract — Pure vanilla extract makes a difference here. Skip the imitation stuff — this recipe deserves the real deal.
- 1/2 cup (120g) sour cream, full-fat — This is the magic ingredient! Full-fat sour cream provides the best moisture and tenderness. I’ve tested this with low-fat versions and it’s just not the same. (Daisy brand is my go-to.)
- 1 1/2 cups (190g) all-purpose flour — Regular all-purpose flour gives the perfect structure. Spoon and level your flour — don’t scoop directly from the bag or you’ll end up with too much.
- 1 teaspoon baking soda — This provides the rise. Make sure it’s fresh (test it by dropping a bit in vinegar — it should fizz vigorously).
- 1/2 teaspoon salt — Salt balances the sweetness and enhances the banana flavor. I use fine sea salt.
- 1/2 teaspoon ground cinnamon (optional) — Cinnamon adds warmth and complements the bananas beautifully. I never skip it, but feel free to omit if you prefer pure banana flavor.
Optional Mix-Ins
- 1/2 cup chopped walnuts or pecans — Adds wonderful crunch and nutty flavor. Toast them first for extra depth.
- 1/2 cup chocolate chips — Because chocolate makes everything better. Dark chocolate chips are my personal favorite.
I recommend using all full-fat dairy for the best results. The sour cream is non-negotiable — it’s what makes this bread so incredibly moist. If you’re in a pinch, full-fat Greek yogurt can work as a substitute, but the texture won’t be quite as tender.
Equipment Needed
You don’t need a fancy kitchen to make this bread. Here’s what you’ll need:
- 9×5-inch loaf pan — Standard size works perfectly. If you use an 8×4 pan, you’ll need to increase baking time by 5-10 minutes.
- Large mixing bowl — For creaming the butter and sugar, then combining everything.
- Medium bowl — For whisking the dry ingredients together.
- Hand mixer or stand mixer — Makes creaming easier, but you can absolutely do this by hand with a wooden spoon. (I actually prefer doing it by hand — less cleanup!)
- Rubber spatula — For folding in the bananas and scraping down the bowl.
- Parchment paper — Lining the pan makes removal effortless. I never grease a pan without it.
- Cooling rack — Essential for even cooling. Placing the hot pan directly on the counter can trap steam and make the bottom soggy.
- Wire whisk — For aerating the flour mixture.
I’ve made this recipe in a friend’s kitchen using a fork instead of a mixer and a metal spatula instead of a rubber one — it still turned out amazing. Don’t let missing equipment stop you. That said, a good loaf pan makes a difference. I use a USA Pan brand loaf pan and it distributes heat beautifully, giving an even golden crust every time.
Preparation Method
Let me walk you through this step by step. I’ve included all the little details I wish someone had told me when I first started baking banana bread.
- Preheat and prep: Preheat your oven to 350°F (175°C). Grease a 9×5-inch loaf pan and line it with parchment paper, leaving some overhang on the long sides. This makes lifting the bread out so much easier.
- Mash the bananas: In a medium bowl, mash your ripe bananas with a fork until they’re mostly smooth with a few small lumps. You want some texture — completely smooth puree can make the bread dense. Set aside. (Pro tip: mash them in the same bowl you’ll use for the wet ingredients to save dishes.)
- Cream butter and sugar: In a large bowl, beat the softened butter and granulated sugar together until light and fluffy, about 3-4 minutes with a hand mixer or 5 minutes by hand. Scrape down the sides and bottom of the bowl halfway through. This step is crucial — it incorporates air that helps the bread rise.
- Add eggs and vanilla: Add the eggs one at a time, beating well after each addition. Stir in the vanilla extract. The mixture should look smooth and slightly glossy.
- Mix in sour cream and bananas: Fold in the sour cream until just combined, then add the mashed bananas. Mix until evenly distributed. Don’t overmix here — a few streaks are fine.
- Combine dry ingredients: In a separate bowl, whisk together the flour, baking soda, salt, and cinnamon (if using). This ensures the baking soda and salt are evenly distributed throughout the flour.
- Fold dry into wet: Add the dry ingredients to the wet mixture in two additions, folding gently with a rubber spatula. Mix just until you can’t see any more flour streaks. Overmixing at this stage develops gluten and makes the bread tough. (I’ve learned this the hard way — trust me, stop mixing sooner than you think you should.)
- Fold in mix-ins (optional): If using nuts or chocolate chips, fold them in gently at the end. Reserve a handful to sprinkle on top for a pretty finish.
- Pour and smooth: Pour the batter into your prepared loaf pan and spread it evenly. Tap the pan gently on the counter a few times to release any air bubbles.
- Bake: Bake for 55-65 minutes, or until a toothpick inserted into the center comes out clean or with just a few moist crumbs. The top should be deep golden brown and cracked beautifully. If the top is browning too quickly (around the 40-minute mark), tent loosely with foil.
- Cool properly: Let the bread cool in the pan on a wire rack for 15 minutes. Then lift it out using the parchment overhang and transfer directly to the rack to cool completely. Resist the urge to slice it while it’s warm — it needs time to set, or it will crumble.
Your kitchen will smell absolutely incredible during the last 15 minutes of baking. That’s how you know it’s almost ready.
Cooking Tips & Techniques
After making this bread more times than I can count (and failing spectacularly a few times), here are my best tips for success:
- Use a kitchen scale for flour: Measuring flour by volume can be wildly inconsistent. One cup can weigh anywhere from 120g to 150g depending on how you scoop. A scale costs $15 and will transform your baking forever. (I use the OXO brand and love it.)
- Don’t overmix the batter: This is the number one mistake I see. Mix until the flour just disappears. A few small lumps are totally fine. Overmixing develops gluten and gives you a tough, dense loaf instead of a tender, moist one.
- Check for doneness with a thermometer: If you’re unsure about the toothpick test, use an instant-read thermometer. The internal temperature should be around 200-205°F (93-96°C) when done. This takes the guesswork out completely.
- Let it rest overnight: Honestly, this bread is even better the next day. The flavors meld and the texture becomes even more tender. Wrap it tightly in plastic wrap once completely cool and let it sit on the counter overnight. You’ll thank me later.
- Room temperature ingredients matter: Cold eggs and cold sour cream won’t incorporate as smoothly into the batter, which can lead to a denser texture. Take everything out of the fridge 30-45 minutes before starting.
- Toast the nuts first: If you’re adding walnuts or pecans, toast them in a dry skillet over medium heat for 3-4 minutes until fragrant. This deepens their flavor and adds wonderful crunch.
I once forgot to add the sour cream entirely (rookie mistake, I know) and ended up with a dry, sad loaf that my kids politely refused to eat. That failure taught me just how crucial that ingredient is. Don’t skip it!
Variations & Adaptations
This recipe is incredibly versatile. Here are some of my favorite ways to change it up:
- Chocolate Chip Banana Bread: Fold in 1/2 cup of dark chocolate chips along with the dry ingredients. The chocolate chunks melt into gooey pockets throughout the bread. My kids beg for this version.
- Nutty Banana Walnut Bread: Add 1/2 cup of toasted walnuts and reduce the sugar to 2/3 cup. The nuts provide a wonderful crunch and earthy flavor that balances the sweetness.
- Gluten-Free Version: Substitute the all-purpose flour with a 1:1 gluten-free baking blend (I like King Arthur’s). Add 1 teaspoon of xanthan gum if your blend doesn’t already include it. The texture will be slightly more delicate but still delicious.
- Vegan Banana Bread: Use melted coconut oil instead of butter, flax eggs (1 tablespoon ground flaxseed + 3 tablespoons water per egg), and a dairy-free sour cream alternative. The texture will be a bit denser but still moist and satisfying.
- Spiced Banana Bread: Add 1/2 teaspoon of ground ginger, 1/4 teaspoon of nutmeg, and a pinch of cardamom along with the cinnamon. This creates a warm, aromatic loaf perfect for fall mornings.
- Banana Muffins: Pour the batter into a greased muffin tin (fill each cup about 3/4 full) and bake at 350°F for 18-22 minutes. Perfect for grab-and-go breakfasts! This version makes about 12 muffins.
I’ve tried all of these variations, and honestly, the chocolate chip version is my personal favorite. There’s something about warm banana and melted chocolate that feels like a hug in food form.
Serving & Storage Suggestions
This bread is wonderful in so many ways. Here’s how to serve and store it for the best experience:
- Serving temperature: Slice and serve at room temperature for the best texture. If you want to warm it up, microwave individual slices for 10-15 seconds — it’s like fresh-baked all over again.
- Spread ideas: A pat of salted butter melting into a warm slice is classic for a reason. For something different, try cream cheese, honey, or even a drizzle of Nutella. (Don’t judge me — it’s amazing.)
- Pairings: Serve alongside a hot cup of coffee, a cold glass of milk, or a warm chai latte. It’s also fantastic with a scoop of vanilla ice cream for dessert.
- Room temperature storage: Wrap tightly in plastic wrap or store in an airtight container at room temperature for up to 4 days. The sour cream keeps it moist longer than regular banana bread.
- Refrigerator storage: You can refrigerate it for up to a week, but it will dry out faster. I don’t recommend it unless you live in a very warm climate.
- Freezing instructions: Wrap the completely cooled loaf (or individual slices) tightly in plastic wrap, then foil, and freeze for up to 3 months. Thaw overnight in the refrigerator or at room temperature for a few hours. Individual slices thaw in about 30 minutes — perfect for when you need a quick treat.
- Flavor development: The flavors actually deepen and meld after a day or two. If you can resist, let it sit wrapped on the counter for 24 hours before serving. The texture becomes even more tender and the banana flavor intensifies.
I always freeze a few slices when I make a loaf. It’s my secret weapon for unexpected guests — just pull out a few slices, warm them up, and everyone thinks you’ve been baking all day.
Nutritional Information & Benefits
Here’s the estimated nutritional breakdown per slice (based on 10 slices, without mix-ins):
- Calories: Approximately 285
- Fat: 14g (9g saturated)
- Carbohydrates: 37g
- Fiber: 2g
- Sugar: 20g
- Protein: 4g
- Sodium: 280mg
While this is definitely a treat (not a health food), the bananas do provide some nutritional benefits. They’re rich in potassium, vitamin B6, and vitamin C. The sour cream adds calcium and a bit of protein. Plus, using real butter and full-fat dairy means you’re getting natural, recognizable ingredients rather than processed alternatives.
If you’re watching your sugar intake, you can reduce the sugar to 1/2 cup without sacrificing too much moisture. The bananas provide plenty of natural sweetness. For a lower-fat option, you can substitute half the butter with unsweetened applesauce, though the texture will be slightly less tender.
This bread contains gluten, dairy, and eggs. For allergen-friendly versions, check the variations section above.
Conclusion
This moist classic banana bread with sour cream has become my most-requested recipe for a reason. It’s simple enough for a weekday baking session, special enough for holiday mornings, and forgiving enough for beginners. The sour cream makes all the difference — creating a tender, velvety crumb that stays moist for days without any weird ingredients or complicated techniques.
I love that this recipe uses up those sad, spotty bananas sitting on my counter and turns them into something genuinely special. It’s comfort food at its finest — warm, nostalgic, and deeply satisfying. Whether you’re baking for your family, bringing a gift to a neighbor, or just treating yourself, this bread delivers every single time.
I’d love to hear how yours turns out! Did you add chocolate chips? Go the nutty route? Or keep it classic? Drop a comment below and let me know. And if you’re looking for more cozy baking ideas, check out my creamy strawberry cream cheese stuffed french toast or my fluffy heart-shaped red velvet pancakes for more breakfast inspiration. Happy baking!
Frequently Asked Questions
Can I use Greek yogurt instead of sour cream?
Yes, full-fat plain Greek yogurt works as a substitute. The texture will be slightly less tender, but it’s still delicious. Avoid non-fat versions — they don’t provide enough fat for proper moisture.
Why did my banana bread sink in the middle?
This usually happens for one of three reasons: the batter was overmixed (developing too much gluten), the oven temperature was too low, or the bread wasn’t baked long enough. Make sure your oven is properly calibrated and bake until a toothpick comes out clean.
Can I freeze this banana bread?
Absolutely! Wrap the completely cooled loaf tightly in plastic wrap, then foil, and freeze for up to 3 months. Thaw at room temperature for a few hours or overnight in the fridge. Individual slices thaw in about 30 minutes.
How ripe should the bananas be?
The riper, the better! Look for bananas with plenty of brown spots — they should be soft and almost mushy. Green or barely yellow bananas won’t provide enough sweetness or moisture. If your bananas aren’t ripe enough, you can speed things up by baking them at 300°F for 15-20 minutes until they’re soft and spotty.
Can I make this recipe into muffins instead?
Yes! Pour the batter into a greased muffin tin, filling each cup about 3/4 full. Bake at 350°F for 18-22 minutes, or until a toothpick comes out clean. This makes about 12 standard muffins. They’re perfect for freezing and grabbing on busy mornings.
Pin This Recipe!
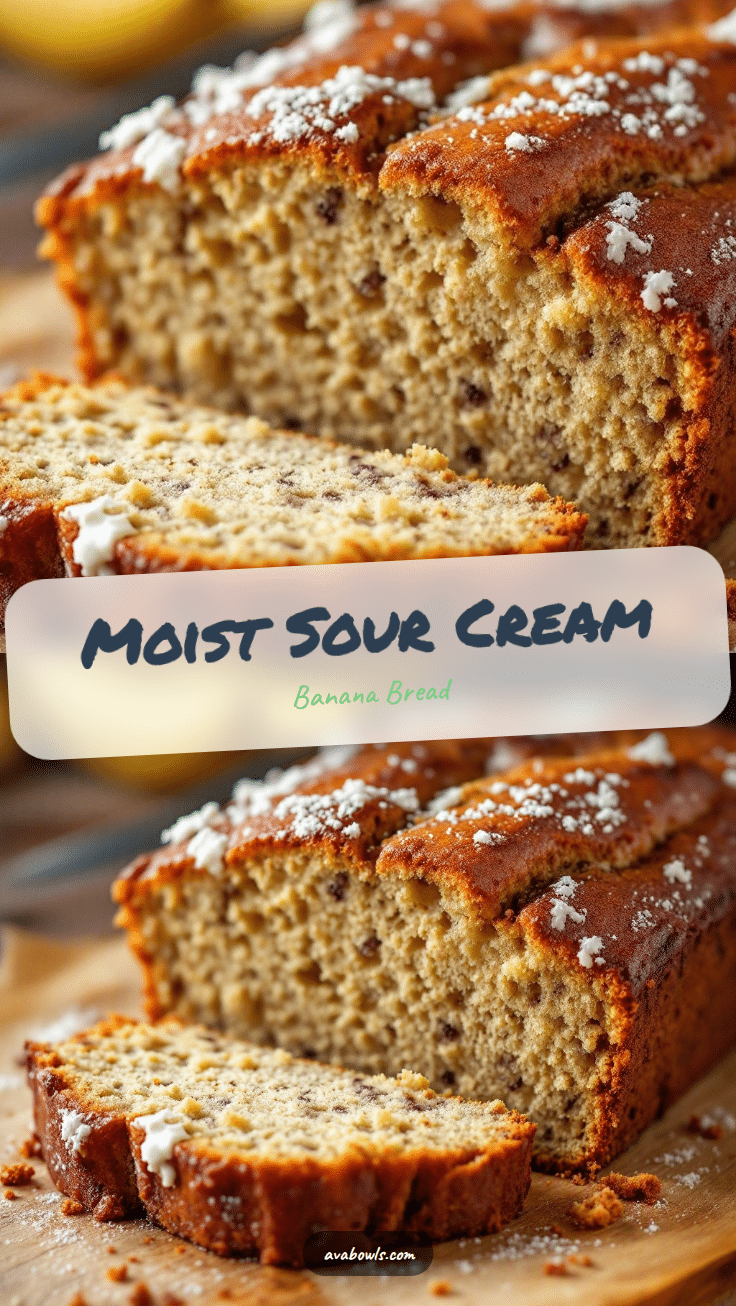
Moist Classic Banana Bread with Sour Cream
This moist classic banana bread with sour cream is incredibly tender, with a velvety crumb that stays soft for days. The sour cream is the secret weapon that keeps every slice perfectly moist, making it the ultimate comfort food.
- Prep Time: 15 minutes
- Cook Time: 55-65 minutes
- Total Time: 1 hour 10 minutes - 1 hour 20 minutes
- Yield: 10 servings 1x
- Category: Dessert
- Cuisine: American
Ingredients
- 3 large ripe bananas, mashed
- 1/2 cup (113g) unsalted butter, softened
- 3/4 cup (150g) granulated sugar
- 2 large eggs, room temperature
- 1 teaspoon vanilla extract
- 1/2 cup (120g) sour cream, full-fat
- 1 1/2 cups (190g) all-purpose flour
- 1 teaspoon baking soda
- 1/2 teaspoon salt
- 1/2 teaspoon ground cinnamon (optional)
- 1/2 cup chopped walnuts or pecans (optional)
- 1/2 cup chocolate chips (optional)
Instructions
- Preheat your oven to 350°F (175°C). Grease a 9×5-inch loaf pan and line it with parchment paper, leaving some overhang on the long sides.
- In a medium bowl, mash your ripe bananas with a fork until they’re mostly smooth with a few small lumps. Set aside.
- In a large bowl, beat the softened butter and granulated sugar together until light and fluffy, about 3-4 minutes with a hand mixer or 5 minutes by hand. Scrape down the sides and bottom of the bowl halfway through.
- Add the eggs one at a time, beating well after each addition. Stir in the vanilla extract.
- Fold in the sour cream until just combined, then add the mashed bananas. Mix until evenly distributed. Don’t overmix.
- In a separate bowl, whisk together the flour, baking soda, salt, and cinnamon (if using).
- Add the dry ingredients to the wet mixture in two additions, folding gently with a rubber spatula. Mix just until you can’t see any more flour streaks.
- If using nuts or chocolate chips, fold them in gently at the end. Reserve a handful to sprinkle on top for a pretty finish.
- Pour the batter into your prepared loaf pan and spread it evenly. Tap the pan gently on the counter a few times to release any air bubbles.
- Bake for 55-65 minutes, or until a toothpick inserted into the center comes out clean or with just a few moist crumbs. If the top is browning too quickly (around the 40-minute mark), tent loosely with foil.
- Let the bread cool in the pan on a wire rack for 15 minutes. Then lift it out using the parchment overhang and transfer directly to the rack to cool completely.
Notes
Use full-fat sour cream for the best moisture. Room temperature ingredients are important for proper incorporation. Let the bread rest overnight for even better flavor and texture. Freezes well for up to 3 months.
Nutrition
- Serving Size: 1 slice
- Calories: 285
- Sugar: 20
- Sodium: 280
- Fat: 14
- Saturated Fat: 9
- Carbohydrates: 37
- Fiber: 2
- Protein: 4
Keywords: banana bread, moist banana bread, sour cream banana bread, classic banana bread, easy banana bread, homemade banana bread


