Standing over a sink of boiling water, tongs in one hand and a sticky jar in the other, when I realized I had exactly forty-five minutes before the farmers market closed and absolutely nothing to show for it. The counter was a disaster—knives, a colander full of Roma tomatoes my neighbor had dropped off that morning, and three empty jars I’d been meaning to return to my mom for about six months. I hadn’t planned on making homemade canned tomato sauce that day. Honestly, I was supposed to be meal-prepping for a week of chaos, but life had other ideas.
The tomatoes were too ripe to ignore. You know that smell—that deep, sweet, almost earthy scent that hits you when a tomato is so ready it’s practically begging to be cooked. I had no big canning setup, no fancy water bath canner, and definitely no experience with small-batch preserving. But I had a big pot, a little bit of stubbornness, and a deep desire to not let those beautiful tomatoes go to waste. So I just started. I chopped, I simmered, I tasted, and somewhere between the steam fogging up my glasses and the sound of jars popping closed, something clicked. This wasn’t complicated. It was just me, some fruit, and a little bit of patience.
That first batch was far from perfect—a little too thick, maybe a touch acidic—but it was mine. And every time I opened a jar of that homemade canned tomato sauce over the next few months, I was transported back to that messy, unplanned afternoon. It wasn’t about being a homesteader or a preservation expert. It was about capturing a moment of summer in a jar. That’s the kind of magic that keeps you coming back to the stove, even when you’re not sure what you’re doing.
Why You’ll Love This Recipe
This small-batch homemade canned tomato sauce recipe is the kind of kitchen project that feels both practical and deeply satisfying. It’s not a huge, overwhelming canning operation that takes over your weekend. It’s a manageable, rewarding process that fits into a single afternoon—even a busy one.
- Simple Ingredients: You only need tomatoes, onions, garlic, herbs, and a little salt. No weird preservatives or mystery additives. You probably have half of this in your kitchen right now.
- Small Batch, Big Reward: This recipe makes about 3-4 pints. It’s perfect for a single person, a couple, or a small family. No need to process 20 pounds of tomatoes unless you really want to.
- No Special Equipment Required: You don’t need a pressure canner or a massive water bath setup. A large pot, some clean jars, and a bit of patience are all it takes.
- Incredible Flavor: Store-bought sauce just can’t compete with the bright, concentrated taste of tomatoes you’ve simmered yourself. It’s a flavor you can’t fake.
- Perfect for Gifts: A jar of homemade canned tomato sauce tied with a bit of twine makes a thoughtful, personal gift that people actually use and appreciate.
What makes this recipe different from others is the approach. It’s not about following a rigid, scientific process. It’s about learning to trust your senses—how the sauce looks, smells, and tastes at each stage. I’ve tested this method dozens of times, tweaking the simmering time and the herb ratios until I found the sweet spot. This isn’t just another canning recipe; it’s the one I turn to when I want to preserve summer without the stress. It’s the kind of sauce that makes you close your eyes after the first bite of pasta, remembering exactly where those tomatoes came from.
What Ingredients You Will Need
This recipe uses simple, whole ingredients to create a sauce that’s rich, balanced, and deeply flavorful. The beauty is in the quality of the tomatoes, not in a long list of fancy additions.
- Roma Tomatoes (5-6 pounds): These are my go-to for canning. They have fewer seeds and less water than other varieties, which means a thicker sauce with less simmering time. Look for deep red, firm tomatoes with no soft spots. If you can’t find Romas, San Marzano or Amish Paste tomatoes work beautifully too.
- Yellow Onion (1 large): Finely diced. The onion adds a savory backbone to the sauce. I prefer yellow for its balanced sweetness, but a sweet Vidalia would work in a pinch.
- Garlic (4-6 cloves): Smashed and roughly chopped. Fresh garlic is non-negotiable here. The jarred stuff just doesn’t have the same punch.
- Extra Virgin Olive Oil (2-3 tablespoons): For sweating the onions and garlic. Use a good quality oil here—it’s a primary flavor component.
- Fresh Basil (a handful): Torn, not chopped. Basil adds that classic, sweet-herbaceous note that screams summer. I add it at the end of cooking to preserve its brightness.
- Fresh Oregano (1 tablespoon) or Dried (1 teaspoon): A little goes a long way. Oregano adds an earthy, slightly peppery depth that complements the tomatoes perfectly.
- Kosher Salt (1-2 teaspoons, to taste): Don’t be shy with salt. It’s crucial for bringing out the tomatoes’ natural sweetness and for safe canning. I use Diamond Crystal kosher salt.
- Citric Acid or Bottled Lemon Juice (per jar): This is non-negotiable for safe water bath canning. It raises the acidity of the sauce to a safe level. Use 1 tablespoon of bottled lemon juice or 1/4 teaspoon of citric acid per pint jar.
Ingredient Tips: I’ve tried this with standard grocery store beefsteak tomatoes, and while the flavor was still good, the sauce took much longer to reduce because of the extra water content. Stick with paste tomatoes for the best results. If you’re using dried oregano instead of fresh, add it with the garlic so it can bloom in the oil. And please, use bottled lemon juice for canning—fresh lemon juice has inconsistent acidity levels and isn’t reliable for preservation.
Equipment Needed
You don’t need a dedicated canning kit for this. Most of these items are probably already in your kitchen.
- Large Heavy-Bottomed Pot (8-10 quarts): A Dutch oven or a stainless steel stockpot works great. The heavy bottom prevents scorching.
- Sharp Chef’s Knife and Cutting Board: For prepping the tomatoes and aromatics.
- Food Mill or Immersion Blender: A food mill is traditional and removes seeds and skins in one step. An immersion blender is faster but leaves the skins in. I prefer the food mill for a smoother, more refined sauce.
- Water Bath Canner or Large Stockpot: For processing the sealed jars. You need a pot deep enough to cover the jars with at least an inch of water.
- Canning Jars (3-4 pint-sized or 6-7 half-pint): Use standard Mason jars with new lids and bands. Never reuse commercial pasta sauce jars for canning—they aren’t tempered for the heat.
- Jar Lifter and Canning Funnel: These make the process safer and less messy. A jar lifter is especially important for avoiding burns.
- Clean Kitchen Towels: For drying jars and catching spills.
Budget-Friendly Tip: You can find a basic canning kit with a jar lifter, funnel, and magnetic lid wand for under $20. It’s a worthwhile investment if you plan on making this a regular thing. I still use the same $15 kit I bought five years ago.
Preparation Method
- Prepare Your Tomatoes (10 minutes): Wash the tomatoes well. Cut a small “X” on the bottom of each one with your knife. Bring a large pot of water to a boil and prepare a bowl of ice water. Working in batches, blanch the tomatoes for 45-60 seconds, or until the skins start to peel back at the “X”. Transfer them immediately to the ice water. Once cool enough to handle, slip the skins off. They should come off easily. Core the tomatoes and roughly chop them.
- Start the Aromatics (10 minutes): In your large pot, heat the olive oil over medium heat. Add the diced onion and a pinch of salt. Cook, stirring occasionally, for 5-7 minutes until the onion is soft and translucent. Add the chopped garlic and cook for another minute until fragrant. Be careful not to burn the garlic—it turns bitter quickly.
- Cook Down the Tomatoes (30-40 minutes): Add the chopped, peeled tomatoes to the pot. Stir to combine with the onions and garlic. Increase the heat to medium-high and bring the mixture to a gentle boil. Then, reduce the heat to a simmer. Let it cook, stirring occasionally, for 30-40 minutes. The tomatoes will break down and release their juices. You’re looking for the mixture to reduce by about a third and thicken slightly. It should look like a chunky, rustic sauce at this point.
- Process the Sauce (10 minutes): Remove the pot from the heat. If using a food mill, pass the tomato mixture through it into a clean bowl. This will remove the seeds and any remaining tough bits of skin, leaving you with a smooth, velvety sauce. If using an immersion blender, blend the sauce directly in the pot until it reaches your desired consistency. I like mine smooth but with a little bit of texture.
- Season and Simmer (20-30 minutes): Return the processed sauce to the pot (if you used a food mill). Add the torn basil, oregano, and more salt to taste. I usually start with 1 teaspoon and adjust from there. Bring the sauce back to a gentle simmer and cook for another 20-30 minutes, stirring occasionally. The sauce should be thick enough to coat the back of a spoon. Taste and adjust seasoning. This is your last chance to get the flavor right.
- Prepare Your Jars (While sauce simmers): Wash your jars, lids, and bands in hot, soapy water. Rinse well. Place the jars in your water bath canner or a large pot, cover them with water, and bring to a simmer. Keep them hot until you’re ready to fill them. Place the lids in a small bowl of hot water to soften the sealing compound.
- Fill and Seal the Jars (10 minutes): When the sauce is ready, remove the hot jars from the canner using your jar lifter. Place them on a clean kitchen towel. Using your canning funnel, ladle the hot sauce into the hot jars, leaving 1/2 inch of headspace at the top. Wipe the rims of the jars with a clean, damp paper towel to remove any sauce residue. This is crucial for a good seal. Add 1 tablespoon of bottled lemon juice or 1/4 teaspoon of citric acid to each pint jar. Place the lids on the jars and screw on the bands until they are fingertip-tight—don’t overtighten.
- Process the Jars (35 minutes): Using your jar lifter, carefully lower the filled jars back into the simmering water bath. Make sure the jars are covered by at least 1 inch of water. Bring the water to a full rolling boil, then start your timer. Process pint jars for 35 minutes at altitudes under 1,000 feet. Adjust processing time for your altitude if needed.
- Cool and Check Seals (12-24 hours): After processing, turn off the heat and let the jars sit in the water for 5 minutes. Then, remove them with your jar lifter and place them on a clean towel, leaving at least an inch of space between them. Let them cool completely, undisturbed, for 12-24 hours. As they cool, you’ll hear the satisfying “pop” of the lids sealing. After they’ve cooled, press down on the center of each lid. If it doesn’t flex or pop, the jar is sealed. If it does, refrigerate that jar and use it first.
Cooking Tips & Techniques
This is where the real learning happens. I’ve made every mistake in the book so you don’t have to.
Don’t skip the blanching step. I know it seems like an extra chore, but it makes peeling the tomatoes so much easier. The first time I tried to peel tomatoes without blanching, I spent a frustrating 20 minutes wrestling with stubborn skins. The blanching and shocking method takes less than two minutes and saves you a world of hassle.
Watch your heat during the initial cook. When you first add the tomatoes, the mixture will be very watery. That’s normal. But if you boil it too vigorously, you risk splattering hot tomato juice everywhere. I speak from experience—cleaning tomato sauce off the ceiling is not a fun afternoon activity. Keep it at a gentle simmer.
Trust your senses over the clock. The cooking times I’ve given are guidelines, not gospel. Every batch of tomatoes is different. Some are juicier, some are sweeter, some take longer to break down. The best way to know if your sauce is ready is to look at it. It should be thick, glossy, and deeply red. Dip a spoon in—the sauce should coat it evenly without being watery.
Acidity is your friend. I cannot stress this enough. The added lemon juice or citric acid isn’t just for flavor—it’s for safety. Tomatoes are borderline in terms of acidity for safe water bath canning. Adding that acid ensures your sauce is safe to store at room temperature. Don’t skip it, and don’t substitute fresh lemon juice.
Patience with the jars. The hardest part of this whole process is waiting for the jars to cool. I know you’ll want to test the seals, move them around, or even open one to taste. Resist the urge. Let them sit completely undisturbed for at least 12 hours. Moving them while they’re still hot can break the seal.
Variations & Adaptations
This homemade canned tomato sauce is a fantastic base that you can easily customize. Once you’ve mastered the basic method, feel free to experiment.
Herb-Infused Sauce: Add a sprig of fresh rosemary or a few sprigs of thyme along with the basil and oregano. The woody herbs infuse a lovely, aromatic depth. Just remember to remove the woody stems before processing the sauce.
Spicy Arrabbiata-Style: Add 1-2 teaspoons of red pepper flakes with the garlic. The heat will mellow and meld into the sauce as it simmers. This is my personal favorite variation—it adds a wonderful warmth without being overwhelming.
Roasted Tomato Version: For an even deeper, more concentrated flavor, roast the halved tomatoes in a 400°F oven for 30 minutes before adding them to the pot. This caramelizes the natural sugars and adds a subtle smokiness. Just be aware that this will make the sauce even thicker, so you might need to add a splash of water or vegetable broth during the final simmer.
Dietary Adaptations: This recipe is naturally vegan, gluten-free, and dairy-free. For a low-sodium version, simply reduce the salt. The sauce will still be safe to can, but the flavor won’t be as bright. You can always add more salt when you use the sauce later.
Different Tomato Varieties: While Roma tomatoes are my top recommendation, you can use a mix of paste tomatoes and heirlooms for a more complex flavor profile. Just be prepared for a longer simmering time if you use juicier varieties. I once made a batch with a mix of Romas and Brandywines, and the sauce had a wonderfully sweet, almost fruity undertone.
Serving & Storage Suggestions
This sauce is incredibly versatile. Here’s how to use and store it.
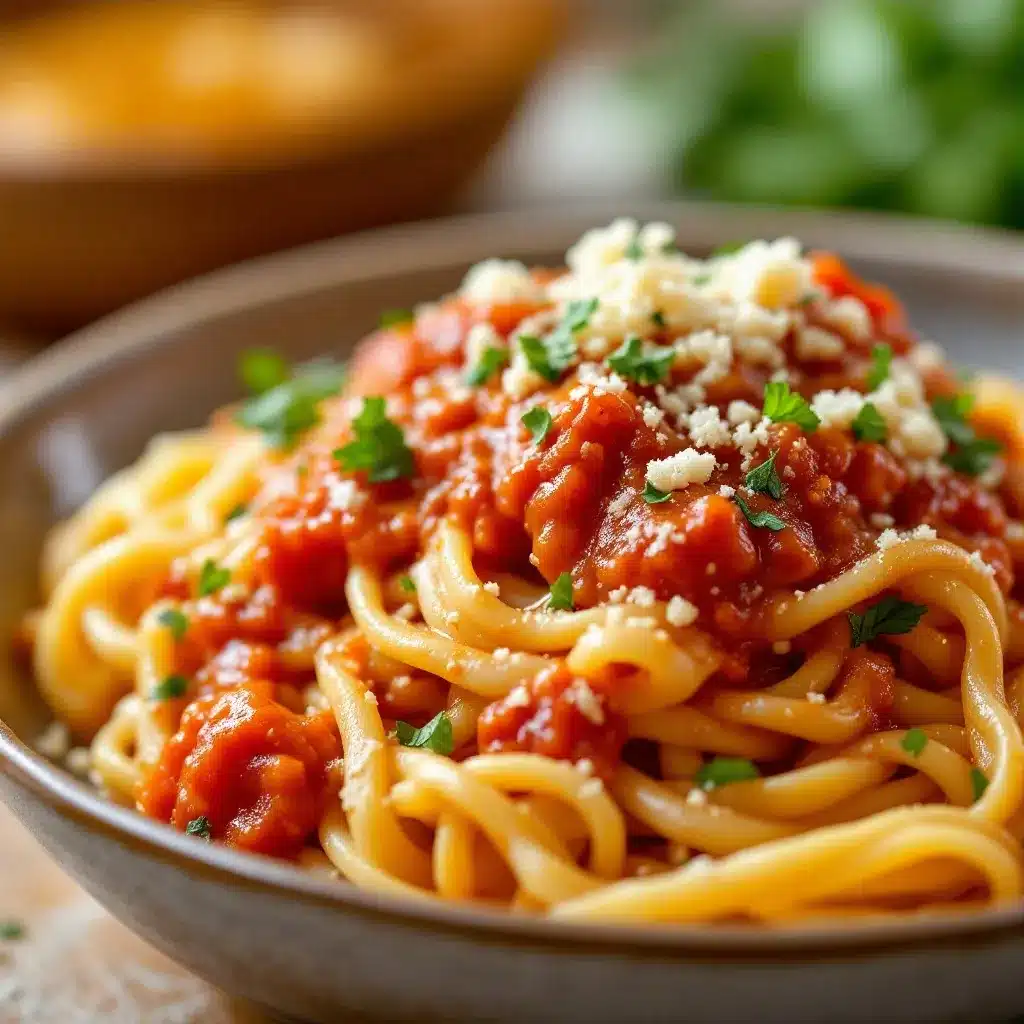
Serving: The sauce is ready to use straight from the jar. Simply heat it in a saucepan over medium-low heat. It’s perfect over your favorite pasta, as a base for creamy roasted tomato basil soup, or as a dipping sauce for crusty bread. For a heartier meal, brown some Italian sausage or ground beef and simmer it in the sauce for 15 minutes. The flavors meld beautifully.
Storage: Properly sealed jars of homemade canned tomato sauce can be stored in a cool, dark, dry place for up to 12-18 months. A pantry or a basement shelf is ideal. Once opened, refrigerate the jar and use the sauce within 5-7 days.
Reheating: Simply pour the desired amount into a small saucepan and warm over medium-low heat, stirring occasionally. You can also microwave it in a microwave-safe bowl for 1-2 minutes, stirring halfway through. The flavor actually deepens and improves after a few months of storage.
Freezing: If you’re not into canning, you can absolutely freeze this sauce. Let it cool completely, then pour it into freezer-safe containers or zip-top bags. Leave about an inch of headspace for expansion. Frozen sauce will keep for 4-6 months. Thaw it overnight in the refrigerator before using.
Nutritional Information & Benefits
This homemade canned tomato sauce is not just delicious—it’s packed with nutrients. A standard 1/2 cup serving contains approximately:
- Calories: 45-60
- Fat: 2-3g (from olive oil)
- Sodium: 200-300mg (depending on added salt)
- Carbohydrates: 7-9g
- Fiber: 2-3g
- Sugar: 4-6g (naturally occurring)
- Protein: 1-2g
Health Benefits: Tomatoes are an excellent source of lycopene, a powerful antioxidant linked to heart health and reduced risk of certain cancers. Cooking tomatoes actually increases the bioavailability of lycopene, making this sauce even more beneficial. The olive oil adds healthy monounsaturated fats, which help your body absorb the fat-soluble vitamins and lycopene. Garlic and onions provide prebiotic fiber and compounds that support immune function.
Dietary Considerations: This recipe is naturally vegan, gluten-free, dairy-free, and nut-free. It’s also Whole30 and paleo-friendly. The only potential allergen is the olive oil, which is a tree nut, but olive allergies are extremely rare.
Conclusion
Making your own homemade canned tomato sauce is one of those kitchen projects that feels both practical and deeply rewarding. It’s not about being a master preserver or having a perfectly organized pantry. It’s about taking something simple—a tomato—and transforming it into something you can enjoy all year long. The first time you open a jar in the middle of winter and smell that sweet, concentrated summer flavor, you’ll understand exactly why I love this recipe so much.
I encourage you to make this recipe your own. Adjust the herbs, try different tomato varieties, or add a pinch of red pepper flakes for heat. The method is forgiving, and the results are always delicious. If you give this a try, I’d love to hear about it. Leave a comment below and let me know how your batch turned out—what you added, what you changed, or just how good it felt to hear those lids pop. Happy canning, friends!
Frequently Asked Questions
Can I use this recipe for canning without a water bath?
No, you cannot. For safe, shelf-stable storage, you must process the sealed jars in a boiling water bath. This step kills any harmful bacteria and creates a vacuum seal. If you don’t want to can, you can freeze the sauce instead.
Why did my sauce turn out too thin?
This usually happens if you used a juicier variety of tomato or didn’t simmer the sauce long enough. You can fix a thin sauce by simmering it longer, uncovered, to allow more water to evaporate. Next time, try using Roma tomatoes and simmering until the sauce is thick enough to coat a spoon.
Can I add meat or vegetables to the sauce before canning?
It’s not recommended for water bath canning. Adding low-acid ingredients like meat, onions (in large quantities), or peppers can change the pH of the sauce and make it unsafe for water bath canning. It’s safer to can the plain sauce and add your extras when you use it.
How do I know if a jar is properly sealed?
After the jars have cooled completely, press down on the center of the lid. If it doesn’t flex or pop up and down, it’s sealed. You can also remove the band and gently lift the jar by the lid—if the lid holds, it’s sealed. If the lid pops up and down, the jar is not sealed and should be refrigerated and used first.
Can I double this recipe?
Absolutely. This recipe scales up beautifully. Just make sure you have a large enough pot for the initial cooking and enough jars and space in your canner for processing. If you’re doubling, expect the simmering time to increase slightly because you’ll have more volume to reduce.
Pin This Recipe!
Homemade Canned Tomato Sauce: Easy Small Batch Recipe

This small-batch homemade canned tomato sauce recipe is a manageable, rewarding process that fits into a single afternoon. Made with simple ingredients like Roma tomatoes, onions, garlic, and herbs, it yields a rich, flavorful sauce perfect for pasta, soups, or gifts.
- Prep Time: 20 minutes
- Cook Time: 1 hour 30 minutes
- Total Time: 1 hour 50 minutes
- Yield: 3-4 pints 1x
- Category: Preserves
- Cuisine: American
Ingredients
- 5–6 pounds Roma tomatoes
- 1 large yellow onion, finely diced
- 4–6 cloves garlic, smashed and roughly chopped
- 2–3 tablespoons extra virgin olive oil
- A handful fresh basil, torn
- 1 tablespoon fresh oregano (or 1 teaspoon dried)
- 1–2 teaspoons kosher salt (to taste)
- 1 tablespoon bottled lemon juice or 1/4 teaspoon citric acid per pint jar
Instructions
- Prepare Your Tomatoes (10 minutes): Wash the tomatoes well. Cut a small ‘X’ on the bottom of each one. Bring a large pot of water to a boil and prepare a bowl of ice water. Working in batches, blanch the tomatoes for 45-60 seconds, or until the skins start to peel back at the ‘X’. Transfer them immediately to the ice water. Once cool enough to handle, slip the skins off. Core the tomatoes and roughly chop them.
- Start the Aromatics (10 minutes): In your large pot, heat the olive oil over medium heat. Add the diced onion and a pinch of salt. Cook, stirring occasionally, for 5-7 minutes until the onion is soft and translucent. Add the chopped garlic and cook for another minute until fragrant.
- Cook Down the Tomatoes (30-40 minutes): Add the chopped, peeled tomatoes to the pot. Stir to combine. Increase the heat to medium-high and bring to a gentle boil. Then reduce the heat to a simmer. Let it cook, stirring occasionally, for 30-40 minutes until the mixture reduces by about a third and thickens slightly.
- Process the Sauce (10 minutes): Remove the pot from the heat. If using a food mill, pass the tomato mixture through it into a clean bowl. If using an immersion blender, blend the sauce directly in the pot until it reaches your desired consistency.
- Season and Simmer (20-30 minutes): Return the processed sauce to the pot. Add the torn basil, oregano, and more salt to taste. Bring back to a gentle simmer and cook for another 20-30 minutes, stirring occasionally, until the sauce is thick enough to coat the back of a spoon.
- Prepare Your Jars (While sauce simmers): Wash your jars, lids, and bands in hot, soapy water. Rinse well. Place the jars in your water bath canner or a large pot, cover with water, and bring to a simmer. Keep them hot until ready to fill. Place the lids in a small bowl of hot water to soften the sealing compound.
- Fill and Seal the Jars (10 minutes): Remove the hot jars from the canner using a jar lifter. Place them on a clean kitchen towel. Using a canning funnel, ladle the hot sauce into the hot jars, leaving 1/2 inch of headspace. Wipe the rims with a clean, damp paper towel. Add 1 tablespoon of bottled lemon juice or 1/4 teaspoon of citric acid to each pint jar. Place the lids on and screw on the bands until fingertip-tight.
- Process the Jars (35 minutes): Using a jar lifter, carefully lower the filled jars into the simmering water bath. Ensure jars are covered by at least 1 inch of water. Bring to a full rolling boil, then process pint jars for 35 minutes at altitudes under 1,000 feet.
- Cool and Check Seals (12-24 hours): After processing, turn off the heat and let jars sit in the water for 5 minutes. Remove with jar lifter and place on a clean towel, leaving space between them. Let cool completely, undisturbed, for 12-24 hours. Check seals by pressing the center of each lid; if it doesn’t flex, the jar is sealed.
Notes
Don’t skip the blanching step; it makes peeling tomatoes much easier. Watch your heat during the initial cook to avoid splattering. Trust your senses over the clock; cooking times are guidelines. Acidity is crucial for safe canning—use bottled lemon juice or citric acid. Be patient with the jars; let them cool undisturbed for at least 12 hours.
Nutrition
- Serving Size: 1/2 cup
- Calories: 4560
- Sugar: 46
- Sodium: 200300
- Fat: 23
- Carbohydrates: 79
- Fiber: 23
- Protein: 12
Keywords: homemade canned tomato sauce, small batch canning, tomato sauce recipe, water bath canning, Roma tomatoes, homemade sauce, preserving tomatoes


