The way the top cracks open while it bakes — that’s the part I wait for every single time. Not the smell of cinnamon filling the kitchen (though that’s good too), and not the moment I pull it from the oven. It’s those first few minutes when the yellow cake mix starts to bubble up through the pumpkin filling, forming these little fissures and craters that catch the light. That’s when I know it’s working.
I stumbled onto this easy pumpkin dump cake recipe completely by accident a few falls ago. I had a can of pumpkin puree sitting on the counter, a box of yellow cake mix in the pantry, and absolutely no energy to make a proper crust from scratch. Honestly, I almost just made a simple pumpkin pie. But then I remembered how much I hate rolling out dough — like, genuinely dread it — and decided to see what would happen if I just dumped everything in a pan and let the oven figure it out.
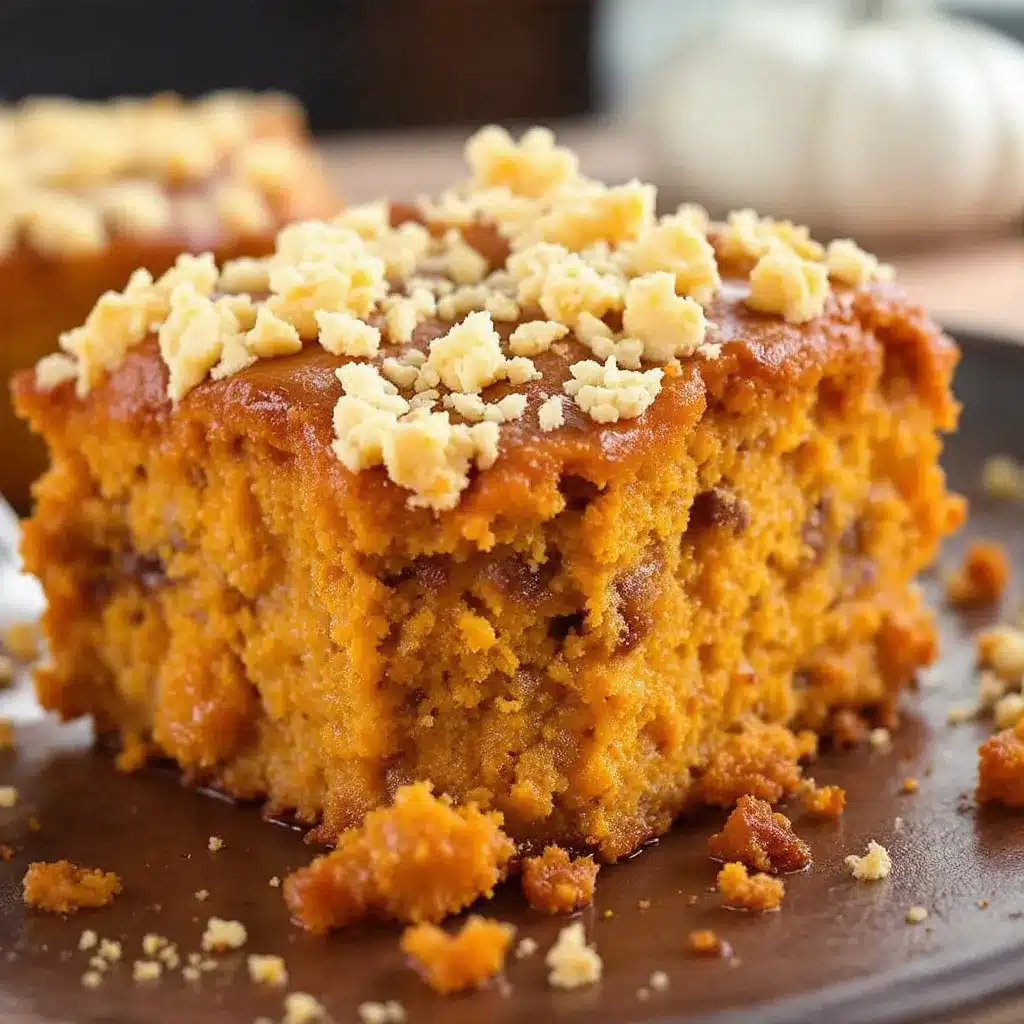
Turns out, the oven knows what it’s doing. The pumpkin layer stays soft and almost pudding-like underneath, while that cake mix topping turns into this buttery, crunchy crust that shatters a little when you cut into it. It’s not fancy. It’s not complicated. But it’s the kind of dessert that makes people close their eyes after the first bite, and honestly, that’s way better than fancy.
I’ve made this for Thanksgiving, for random Tuesday nights, and for those moments when you just need something sweet without a whole production. It never lets me down.
Why You’ll Love This Recipe
Let me tell you why this easy pumpkin dump cake has become my go-to fall dessert — and why it’ll probably become yours too.
- Ridiculously Easy : We’re talking dump, stir, and bake. No mixer, no rolling pin, no complicated steps. If you can open a can and sprinkle powder, you can make this.
- Simple Ingredients : You probably have most of this stuff already. Pumpkin puree, evaporated milk, eggs, sugar, and a box of yellow cake mix. That’s it.
- Perfect for Fall Gatherings : Thanksgiving, Friendsgiving, potlucks, or just a cozy night in — this cake fits everywhere. It feeds a crowd without making you sweat.
- Crowd-Pleaser : I’ve served this to pumpkin lovers and pumpkin skeptics alike, and the pan always comes back empty. The crunchy topping wins everyone over.
- Unbelievably Delicious : The contrast between the creamy pumpkin filling and the crisp, buttery topping is next-level comfort food. It’s like pumpkin pie and coffee cake had a baby.
What makes this different from other pumpkin dump cakes? It’s all in the technique. I’ve tested this recipe more times than I care to admit — trying different cake mixes, adjusting the butter amount, playing with bake times. The version I’m sharing today is the one that consistently gives you that perfect crackly top and silky filling. No soggy spots, no dry patches. Just pure pumpkin perfection.
This is the kind of dessert that makes you feel like a hero with almost zero effort. It’s comfort food at its finest — simple, warm, and deeply satisfying.
What Ingredients You Will Need
This recipe uses simple, wholesome ingredients to deliver bold pumpkin flavor and that signature crunchy topping. Most of these are pantry staples, especially during fall baking season.
For the Pumpkin Filling
- 1 can (15 oz) pumpkin puree — Make sure you grab pure pumpkin puree, not pumpkin pie filling. They’re different! Puree is just pumpkin; pie filling has sugar and spices already added. I prefer Libby’s for consistent texture.
- 1 can (12 oz) evaporated milk — This adds richness without making the filling too heavy. You can use regular milk in a pinch, but evaporated milk gives a creamier result.
- 3 large eggs — Room temperature eggs blend more smoothly into the filling. If you forgot to take them out early, just place them in warm water for 5 minutes.
- 1 cup granulated sugar — Just regular white sugar. It dissolves easily and sweetens the pumpkin without overpowering it.
- 1 teaspoon vanilla extract — Pure vanilla adds warmth and depth. Imitation works fine too, but pure is better.
- 2 teaspoons pumpkin pie spice — You can use store-bought or make your own with cinnamon, nutmeg, ginger, and cloves. I’ll share my blend in the tips section.
- 1/2 teaspoon salt — Don’t skip this! Salt balances the sweetness and makes the pumpkin flavor pop.
For the Topping
- 1 box (15.25 oz) yellow cake mix — This is the magic ingredient. Just the dry mix, straight from the box. I’ve tested this with Betty Crocker, Duncan Hines, and store brands — they all work, but I slightly prefer Duncan Hines for its finer texture.
- 1 cup chopped pecans or walnuts (optional) — Adds a lovely crunch and nutty flavor. Totally optional but highly recommended.
- 3/4 cup unsalted butter, melted — This is what creates that golden, crackly crust. Use real butter, not margarine. The flavor difference is noticeable.
Ingredient Selection Tip : When buying pumpkin puree, look for cans that feel heavy for their size — that means more pumpkin, less air. And for the cake mix, any brand works, but avoid the “butter recipe” or “extra moist” varieties as they can change the texture of the topping.
Substitution Guidance : For a dairy-free version, use full-fat coconut milk instead of evaporated milk and a plant-based butter alternative. The texture will be slightly different but still delicious. For a gluten-free option, use a gluten-free yellow cake mix — just check the box size as some are smaller and may need adjustment.
Equipment Needed
One of the best things about this easy pumpkin dump cake is that it doesn’t require fancy equipment. Here’s what you’ll need:
- 9×13-inch baking dish — Glass or metal both work. I use a glass dish because I like being able to see the bottom layer as it bakes.
- Large mixing bowl — For whisking together the pumpkin filling ingredients.
- Whisk or wooden spoon — A whisk works best for smoothing out the pumpkin mixture.
- Measuring cups and spoons — For the sugar, spice, and vanilla.
- Small bowl — For melting the butter (if using the microwave).
- Rubber spatula — For scraping every last bit of filling into the pan.
Budget-Friendly Options : If you don’t have a 9×13-inch dish, you can use a 10-inch cast iron skillet or even two 8×8-inch square pans. Just adjust the baking time slightly. I’ve used a disposable aluminum pan before when traveling to a potluck, and it worked perfectly.
Personal Experience : I once tried making this in a metal pan without greasing it properly. Let’s just say the cleanup was not fun. Always grease your dish well, even if it’s nonstick. A quick spray of cooking spray or a swipe of butter makes all the difference.
Preparation Method
Alright, let’s get to the good part. Here’s how to make this easy pumpkin dump cake step by step.
Step 1: Preheat and Prepare
Preheat your oven to 350°F (175°C). Grease a 9×13-inch baking dish generously with butter or nonstick spray. Set it aside while you prepare the filling.
Step 2: Make the Pumpkin Filling
In a large mixing bowl, combine the pumpkin puree, evaporated milk, eggs, granulated sugar, vanilla extract, pumpkin pie spice, and salt. Whisk everything together until smooth and well combined. The mixture should be a uniform orange color with no streaks of egg or spice. This takes about 2 minutes of whisking.
Sensory Cue : The filling should smell like fall — warm, spiced, and slightly sweet. It will be fairly thin, similar to a pancake batter consistency. Don’t worry if it seems runny; it will set beautifully as it bakes.
Step 3: Pour the Filling
Pour the pumpkin mixture into the prepared baking dish. Use a rubber spatula to spread it evenly to the edges. Give the dish a gentle tap on the counter to release any air bubbles.
Step 4: Add the Cake Mix Topping
Here’s the slightly tricky part. Sprinkle the dry yellow cake mix evenly over the pumpkin filling. Don’t stir it in! Just let it sit on top like a blanket. Try to cover the entire surface as evenly as possible. If you have lumps in the cake mix, break them up with your fingers before sprinkling.
Personal Tip : I like to sprinkle the cake mix in sections — first the edges, then the middle. This helps distribute it more evenly. If you just dump it all in the center, you’ll end up with a thick mountain of mix that won’t cook properly.
Step 5: Add the Nuts (Optional)
If you’re using pecans or walnuts, sprinkle them evenly over the cake mix layer. They’ll toast as the cake bakes and add a wonderful crunch.
Step 6: Pour the Melted Butter
Drizzle the melted butter evenly over the entire top. Try to cover as much of the cake mix as possible. The butter will soak into the cake mix as it bakes, creating that signature crunchy topping.
Warning : Don’t skip the butter! I tried making this once with oil to save calories, and it just wasn’t the same. The butter is essential for that golden, crispy crust. If you’re watching your fat intake, you can reduce the butter to 1/2 cup, but the topping won’t be quite as crunchy.
Step 7: Bake
Place the dish in the preheated oven and bake for 45-50 minutes. The cake is done when the top is golden brown and the filling is bubbly around the edges. A toothpick inserted into the center should come out mostly clean, though the filling underneath will still be soft.
Troubleshooting Tip : If the top is browning too quickly but the center isn’t set yet, tent the dish loosely with aluminum foil for the last 10-15 minutes of baking. This prevents the topping from burning while the filling finishes cooking.
Step 8: Cool and Serve
Remove the cake from the oven and let it cool on a wire rack for at least 20 minutes before serving. This allows the filling to set properly. Serve warm or at room temperature. A scoop of vanilla ice cream or a dollop of whipped cream takes this over the top.
Cooking Tips & Techniques
After making this easy pumpkin dump cake about a dozen times (seriously, I lost count), I’ve picked up some tricks that make a real difference.
Don’t Overmix the Filling : Whisk just until everything is combined. Overmixing can incorporate too much air, which might cause the filling to puff up and then collapse. You want a smooth, dense filling, not a fluffy one.
The Butter Distribution Matters : Drizzle the melted butter slowly and evenly. I use a circular motion starting from the outside and working my way in. If you pour it all in one spot, that area will be greasy while other parts stay dry.
Room Temperature Ingredients : This is one of those tips that actually makes a difference. Cold eggs and cold milk can make the filling lumpy and prevent it from setting properly. Let everything sit out for about 30 minutes before you start.
My Homemade Pumpkin Pie Spice Blend : If you don’t have store-bought pumpkin pie spice, mix together 1 teaspoon cinnamon, 1/2 teaspoon ginger, 1/4 teaspoon nutmeg, and 1/4 teaspoon cloves. This makes exactly 2 teaspoons and tastes way fresher than most jarred blends.
Common Mistake to Avoid : The first time I made this, I stirred the cake mix into the pumpkin filling. Don’t do that! The whole point of a dump cake is that the layers stay separate. The cake mix forms a crust on top while the pumpkin stays soft underneath. Stirring them together creates a weird, gummy texture.
Timing Strategy : This cake actually tastes better the next day. The flavors meld together overnight, and the topping softens slightly while staying crunchy. I often make it a day ahead for Thanksgiving and just reheat it gently before serving.
Variations & Adaptations
One of the best things about this easy pumpkin dump cake is how adaptable it is. Here are some variations I’ve tried and loved.
Spiced Apple Pumpkin Dump Cake : Add 2 cups of thinly sliced apples (Granny Smith or Honeycrisp work great) to the bottom of the dish before pouring in the pumpkin filling. The apples soften as they bake and add a tart contrast to the sweet pumpkin. Sprinkle a little extra cinnamon over the apples for good measure.
Chocolate Pumpkin Dump Cake : Use a chocolate cake mix instead of yellow. I know it sounds weird, but chocolate and pumpkin are surprisingly good together. The chocolate adds a rich, almost mocha-like flavor that complements the pumpkin spice. My kids absolutely love this version.
Gluten-Free Version : Swap the regular yellow cake mix for a gluten-free yellow cake mix. I’ve tested this with King Arthur Flour’s gluten-free mix, and it works beautifully. Just make sure all your other ingredients are certified gluten-free if needed.
Low-Sugar Option : Use a sugar substitute like monk fruit sweetener in place of the granulated sugar, and look for a “reduced sugar” or “no sugar added” yellow cake mix. The texture will be slightly different, but the flavor is still fantastic.
Pumpkin Cheesecake Dump Cake : Drop spoonfuls of softened cream cheese (about 8 ounces) over the pumpkin filling before adding the cake mix. Swirl it gently with a knife for a marbled effect. The cream cheese adds a tangy richness that takes this dessert to another level.
Serving & Storage Suggestions
This easy pumpkin dump cake is incredibly versatile when it comes to serving. Here’s how I like to enjoy it.
Serving Temperature : This cake is delicious warm, at room temperature, or even cold from the fridge. Warm is my personal favorite — the filling is extra soft and the topping has that just-baked crunch. If you’re reheating, pop individual servings in the microwave for 15-20 seconds.
Presentation Ideas : Serve it straight from the baking dish for a casual gathering, or cut it into neat squares and plate them with a drizzle of caramel sauce and a sprinkle of cinnamon. A scoop of vanilla ice cream or a dollop of freshly whipped cream is practically mandatory in my house.
Complementary Dishes : This cake pairs beautifully with a cup of hot coffee or a warm mug of chai tea. For a full fall spread, serve it alongside a bowl of creamy butternut squash soup with maple cream swirl for a cozy autumn meal. Or, if you’re planning a holiday brunch, it goes wonderfully with a creamy strawberry cream cheese stuffed french toast for a sweet and savory balance.
Storage Instructions : Cover the baking dish tightly with plastic wrap or aluminum foil and store in the refrigerator for up to 5 days. The topping will soften slightly as it sits, but the flavor actually improves. I don’t recommend freezing this cake — the texture of the topping changes too much when thawed.
Reheating Tips : To restore some of the crunch, reheat individual portions in a toaster oven or air fryer at 350°F for 3-4 minutes. If you’re reheating the whole cake, place it in a 300°F oven for 10-15 minutes, covered loosely with foil to prevent the top from burning.
Flavor Development : Here’s a secret — this cake tastes even better on day two. The pumpkin filling absorbs more of the spice flavors, and the topping settles into this perfect sweet-salty-crunchy situation. I actually prefer making it a day ahead for special occasions.
Nutritional Information & Benefits
While this is definitely a treat, there are some nutritional bright spots worth mentioning.
Estimated Nutritional Values (per serving, 1/12 of recipe) :
| Nutrient | Amount |
|---|---|
| Calories | 380 |
| Total Fat | 18g |
| Saturated Fat | 9g |
| Cholesterol | 75mg |
| Sodium | 420mg |
| Total Carbohydrates | 52g |
| Dietary Fiber | 3g |
| Sugars | 35g |
| Protein | 6g |
| Vitamin A | 190% DV |
Health Benefits : Pumpkin is packed with vitamin A (one serving provides nearly 200% of your daily needs), which supports eye health and immune function. It’s also a good source of fiber, which aids digestion and helps you feel full. The eggs add protein, and the nuts (if you use them) contribute healthy fats and vitamin E.
Dietary Considerations : This recipe can be made gluten-free and nut-free with simple substitutions. It’s not suitable for a low-carb or keto diet due to the sugar and cake mix. For a lighter option, you can reduce the butter to 1/2 cup and use a sugar substitute, but the texture will be slightly different.
Personal Perspective : I believe in balance. This easy pumpkin dump cake is a dessert, not a health food, and that’s okay. It’s meant to be enjoyed in moderation, shared with people you love, and savored without guilt. Sometimes the best thing you can do for your wellness is eat a piece of cake and smile.
Conclusion
This easy pumpkin dump cake with yellow cake mix topping is the kind of recipe that reminds me why I love cooking. It’s simple, forgiving, and absolutely delicious. No complicated techniques, no fancy ingredients, no stress — just pure, honest comfort food that tastes like fall in every bite.
I’ve made this for Thanksgiving dinners, for casual get-togethers, and for those quiet nights when I just needed something warm and sweet. Every single time, it delivers. The crackly top, the silky pumpkin filling, the way it makes the whole house smell like cinnamon and butter — it never gets old.
I’d love to hear how this turns out for you. Did you add nuts? Try a different cake mix flavor? Serve it with ice cream or whipped cream? Drop a comment below and let me know your favorite way to enjoy it. And if you share a photo on social media, tag me — I love seeing your creations!
Go ahead, grab that can of pumpkin and that box of cake mix. You’re about to make something really, really good.
Frequently Asked Questions
Can I use pumpkin pie filling instead of pumpkin puree?
I wouldn’t recommend it. Pumpkin pie filling already has sugar and spices added, so using it would throw off the sweetness and spice levels. Stick with pure pumpkin puree for the best results. The filling will be too sweet and overly spiced if you use pie filling.
Do I need to refrigerate pumpkin dump cake?
Yes, because of the eggs and milk in the filling, this cake should be stored in the refrigerator. Cover it tightly and it will keep for up to 5 days. Let it come to room temperature or reheat gently before serving.
Can I make this in a slow cooker?
You can! Grease the slow cooker insert, prepare the filling as directed, and pour it in. Sprinkle the cake mix and drizzle the butter on top. Cook on low for 3-4 hours or on high for 1.5-2 hours. The topping won’t get as crispy as in the oven, but it’s still delicious.
Why is my dump cake soggy in the middle?
This usually happens when the cake mix isn’t distributed evenly or the butter doesn’t cover the entire surface. Make sure you sprinkle the cake mix in an even layer and drizzle the butter over every part of the top. If it’s still soggy, bake it for an additional 5-10 minutes.
Can I use a different flavor of cake mix?
Absolutely! Spice cake mix is a natural choice and adds even more warm flavor. White cake mix works well too. I’ve even used butter pecan cake mix with great results. Just avoid chocolate cake mix unless you’re going for that chocolate-pumpkin combo I mentioned in the variations section.
Pin This Recipe!
Easy Pumpkin Dump Cake with Yellow Cake Mix Topping
This easy pumpkin dump cake features a silky pumpkin filling topped with a buttery, crunchy yellow cake mix crust. It’s a simple, no-fuss dessert that tastes like fall in every bite and is perfect for Thanksgiving, potlucks, or cozy nights in.
- Prep Time: 15 minutes
- Cook Time: 50 minutes
- Total Time: 1 hour 5 minutes
- Yield: 12 servings 1x
- Category: Dessert
- Cuisine: American
Ingredients
- 1 can (15 oz) pumpkin puree
- 1 can (12 oz) evaporated milk
- 3 large eggs, room temperature
- 1 cup granulated sugar
- 1 teaspoon vanilla extract
- 2 teaspoons pumpkin pie spice
- 1/2 teaspoon salt
- 1 box (15.25 oz) yellow cake mix
- 1 cup chopped pecans or walnuts (optional)
- 3/4 cup unsalted butter, melted
Instructions
- Preheat your oven to 350°F (175°C). Grease a 9×13-inch baking dish generously with butter or nonstick spray.
- In a large mixing bowl, combine the pumpkin puree, evaporated milk, eggs, granulated sugar, vanilla extract, pumpkin pie spice, and salt. Whisk until smooth and well combined, about 2 minutes.
- Pour the pumpkin mixture into the prepared baking dish. Use a rubber spatula to spread it evenly to the edges. Tap the dish gently on the counter to release air bubbles.
- Sprinkle the dry yellow cake mix evenly over the pumpkin filling. Do not stir it in. Break up any lumps with your fingers before sprinkling.
- If using, sprinkle the chopped pecans or walnuts evenly over the cake mix layer.
- Drizzle the melted butter evenly over the entire top, covering as much of the cake mix as possible.
- Bake for 45-50 minutes, until the top is golden brown and the filling is bubbly around the edges. A toothpick inserted into the center should come out mostly clean.
- If the top browns too quickly, tent loosely with aluminum foil for the last 10-15 minutes of baking.
- Remove from the oven and let cool on a wire rack for at least 20 minutes before serving. Serve warm or at room temperature.
Notes
Don’t stir the cake mix into the pumpkin filling; keep layers separate for the best texture. The cake tastes even better the next day as flavors meld. For a dairy-free version, use full-fat coconut milk instead of evaporated milk and a plant-based butter alternative. For gluten-free, use a gluten-free yellow cake mix. Store covered in the refrigerator for up to 5 days.
Nutrition
- Serving Size: 1 slice (1/12 of rec
- Calories: 380
- Sugar: 35
- Sodium: 420
- Fat: 18
- Saturated Fat: 9
- Carbohydrates: 52
- Fiber: 3
- Protein: 6
Keywords: pumpkin dump cake, easy pumpkin dessert, fall dessert, yellow cake mix, pumpkin recipe, Thanksgiving dessert, dump cake


