The little blue container came back empty again. Not just licked clean—I mean empty. No stray meatball rolled into a corner, no sauce smudge on the lid. My five-year-old had actually handed it to me with a straight face and said, “Can you make these again tomorrow?” That never happens. Usually I get a half-eaten bento box with the apple slices floating in juice and the sandwich crusts tucked under the napkin like evidence of a crime. But these mini turkey meatball cups? They disappeared. Third time that week.
I didn’t set out to invent the perfect lunchbox recipe. Honestly, I was just tired of the morning scramble—you know the one, where you’re packing lunches at 6:45 AM with coffee in one hand and a granola bar hanging out of your mouth. I needed something I could make ahead, freeze, and grab without thinking. Something that wouldn’t get soggy by noon or require a fork and a prayer. These mini turkey meatball cups were born from desperation, not inspiration. And honestly? That’s usually where the best recipes come from.
They’re basically tiny meatloaves baked in a muffin tin, sized perfectly for little hands (or adult hands pretending they’re just having a snack). The turkey keeps them light, the cheese keeps them moist, and the whole thing holds together like a dream. No crumbling, no falling apart in the lunchbox. Just a perfectly portable, protein-packed little cup that makes lunch feel special without any extra effort. I’ve been making them for two years now, and I still get a little thrill when I see that empty container come home.
Why You’ll Love This Recipe
Let me tell you why these little cups have become my most-requested recipe—and I mean that literally, because my sister texted me at 10 PM last week asking for the measurements. She’s a pediatric nurse with three kids, so if she’s taking time to make meatball cups, you know they’re worth it.
- Quick & Easy: From start to finish, you’re looking at about 30 minutes. The active prep time is maybe 10 minutes—the oven does the rest. Perfect for Sunday meal prep or a Tuesday night when you realize you have nothing for tomorrow’s lunches.
- Simple Ingredients: Ground turkey, breadcrumbs, cheese, an egg, and some seasonings. That’s it. No weird specialty items, no trips to three different stores. You probably have everything except the turkey right now.
- Perfect for Lunchboxes: They hold their shape beautifully, taste great cold or reheated, and fit perfectly into those compartment-style bento boxes. No more sad, smashed sandwiches.
- Crowd-Pleaser: I’ve served these at playdates, family gatherings, and even a Super Bowl party (as a healthier option next to the creamy slow cooker queso blanco dip). Kids inhale them. Adults pretend they’re being healthy while eating four of them. Everyone wins.
- Unbelievably Delicious: Turkey can be dry and boring—let’s be honest. But these cups are juicy, flavorful, and have this perfect little crust on the outside from the muffin tin. The cheese melts into the meat and keeps everything tender. It’s comfort food that doesn’t leave you feeling heavy.
What makes these different from every other meatball recipe out there is the texture. I spent months tweaking the ratio of breadcrumbs to egg to cheese, trying to get that perfect balance where the cups hold together without being dense. The secret is using panko breadcrumbs instead of regular ones—they absorb moisture differently and create a lighter, more tender cup. Plus, baking them in a muffin tin means you get that crispy edge all around, not just on one side. It’s a game-changer, honestly.
What Ingredients You Will Need
This recipe uses simple, wholesome ingredients that come together to create something surprisingly special. Most of these are pantry staples, which makes this an easy last-minute meal prep option when you’re staring blankly into your fridge on a Sunday evening.
For the Mini Turkey Meatball Cups
- 1 pound ground turkey (93/7 lean-to-fat ratio works best—too lean and they get dry, too fatty and they shrink too much)
- 1/2 cup panko breadcrumbs (regular breadcrumbs work too, but panko gives a lighter texture)
- 1/2 cup shredded mozzarella cheese (low-moisture, part-skim is ideal—it melts without making the cups greasy)
- 1/4 cup grated Parmesan cheese (the real stuff in a wedge, not the green can—it makes a difference in flavor)
- 1 large egg, lightly beaten
- 2 tablespoons milk (any kind works—I use 2% but almond milk is fine too)
- 2 cloves garlic, minced (or 1/2 teaspoon garlic powder if you’re in a rush)
- 1 teaspoon dried oregano
- 1/2 teaspoon salt
- 1/4 teaspoon black pepper
- 1 tablespoon olive oil (for greasing the muffin tin—don’t skip this or they’ll stick)
Optional Add-Ins

- 1/4 cup finely chopped onion (sauté it first if you want it softer; raw works too for a little crunch)
- 1/4 cup finely chopped fresh parsley (adds color and freshness)
- 1 teaspoon Italian seasoning (if you want a more herb-forward flavor)
- Pinch of red pepper flakes (for a tiny kick—my personal favorite addition)
I recommend using ground turkey from a brand you trust—I personally prefer Jennie-O or Butterball for consistent fat content. If you can find ground turkey that’s 93% lean, 7% fat, grab it. That little bit of fat is what keeps these cups from turning into hockey pucks. And please, please use freshly grated Parmesan. I know it’s tempting to use the pre-shredded stuff, but it has anti-caking agents that affect how it melts. Your taste buds will thank you.
For a gluten-free version, swap the panko for gluten-free breadcrumbs or crushed pork rinds (yes, really—they work surprisingly well). For a dairy-free option, use nutritional yeast instead of Parmesan and skip the mozzarella, or use a dairy-free shredded cheese that melts well. I’ve tested both variations, and while they’re not identical to the original, they’re still delicious in their own right.
Equipment Needed
You don’t need a fancy kitchen to make these—I’ve made them in rental apartments, my mom’s outdated kitchen, and my own well-stocked space, and they turn out great every time. Here’s what you’ll need:
- 12-cup standard muffin tin (non-stick is ideal, but any metal tin works with enough greasing)
- Large mixing bowl (for combining all the ingredients)
- Measuring cups and spoons
- Garlic press or knife (for mincing the garlic)
- Cookie scoop or spoon (a 2-tablespoon scoop makes portioning so much easier and gives you uniform cups)
- Pastry brush or paper towel (for greasing the muffin tin)
- Cooling rack (optional but helpful for letting the cups cool evenly)
If you don’t have a muffin tin, you can absolutely shape these into regular meatballs and bake them on a lined sheet pan. The cooking time will be slightly shorter—about 15-18 minutes instead of 20-22—and you’ll lose that cute cup shape, but the flavor will be the same. I’ve also used a mini muffin tin for bite-sized versions that are perfect for toddlers or party appetizers. Just reduce the cooking time to 12-15 minutes.
One tip: invest in a good non-stick muffin tin if you make these regularly. I learned this the hard way after scraping burnt cheese off a cheap tin for 20 minutes. A quality one costs about $20 and will last for years. Wash it by hand, not in the dishwasher, and it’ll stay non-stick much longer.
Preparation Method
Alright, let’s get cooking. I’m going to walk you through this step by step, including all the little things I’ve learned from making these dozens of times. Trust me on the details—they matter.
- Preheat your oven to 400°F (200°C). Position the rack in the middle of the oven. While it’s heating, generously grease your 12-cup muffin tin with olive oil. I use a pastry brush to get into all the nooks and crannies. Don’t be shy here—this is the number one thing that prevents sticking. If you’re using a non-stick tin, grease it anyway. I’ve had cups stick even in “non-stick” tins because the cheese caramelizes and acts like glue.
- In a large mixing bowl, combine the panko breadcrumbs and milk. Let them sit for 2-3 minutes until the breadcrumbs absorb the milk and become paste-like. This is called a panade, and it’s the secret to moist meatballs. The breadcrumbs soak up the milk and create a barrier that prevents the meat from releasing all its moisture during cooking. Don’t skip this step—I did once when I was in a hurry, and the cups came out noticeably drier.
- Add the ground turkey, mozzarella, Parmesan, beaten egg, minced garlic, oregano, salt, and pepper to the bowl with the breadcrumb mixture. If you’re adding any optional ingredients like onion or parsley, throw those in too. Use your hands to mix everything together—I know it’s messy, but it’s the best way to ensure everything is evenly distributed without overmixing. Overmixing is the enemy of tender meatballs; it develops the protein too much and makes them tough. Mix just until everything comes together, about 30 seconds of gentle squeezing and folding.
- Portion the mixture into the prepared muffin tin. Use a 2-tablespoon cookie scoop or a spoon to divide the mixture evenly among the 12 cups. Each cup should be about 2 heaping tablespoons. Don’t press the mixture down too firmly—you want them to be lightly packed so they stay tender. Gently shape them into domes on top. The mixture will shrink as it cooks, so a little mound is perfect.
- Bake for 20-22 minutes, or until the internal temperature reaches 165°F (74°C) on an instant-read thermometer. The tops should be golden brown and the edges should be crispy and slightly caramelized. If you want extra browning, you can switch the oven to broil for the last 1-2 minutes, but watch them carefully—they go from golden to burnt very quickly. I learned this the hard way when I got distracted by a phone call and ended up with charcoal cups.
- Let the cups cool in the pan for 5 minutes. This is crucial—if you try to remove them immediately, they’ll fall apart. The resting time allows the fat to re-solidify slightly and the structure to set. After 5 minutes, run a butter knife around the edges of each cup to loosen them, then gently lift them out with a fork or small spatula. Transfer to a cooling rack to cool completely if you’re storing them, or serve warm if you’re eating them right away.
One more thing: if you’re making a double batch (which I highly recommend), don’t try to cram all 24 cups into the oven at once. Bake them in batches on the center rack for even cooking. Convection ovens are more forgiving, but standard ovens need that space for air circulation.
Cooking Tips & Techniques
After making these cups more times than I can count, I’ve collected a few tricks that make the process smoother and the results more consistent. Here are the ones I wish someone had told me from the start:
Don’t overwork the meat. This is the most common mistake people make with ground turkey. It’s leaner than beef, so it’s more prone to becoming tough and dry. Mix the ingredients just until they’re combined—stop when you can’t see any more streaks of raw egg or pockets of breadcrumbs. A few lumps are fine. Overmixing is what turns tender meatballs into rubbery erasers.
Use an ice cream scoop for perfect portioning. A 2-tablespoon cookie scoop gives you uniform cups that cook evenly. If you’re eyeballing it, some cups will be bigger and take longer to cook, while smaller ones will dry out. Uniformity matters more than you think. Plus, it makes the whole process faster and less messy.
Let the cups rest after baking. I mentioned this in the method, but it bears repeating. Those 5 minutes of resting in the pan are non-negotiable. The cups continue cooking from residual heat, and the structure firms up enough that they won’t crumble when you remove them. If you’re meal-prepping, let them cool completely on a wire rack before storing—trapping steam in a container makes them soggy.
Test for doneness with a thermometer. Visual cues can be deceiving with turkey. It stays pinkish even when fully cooked, so don’t rely on color. An instant-read thermometer is your best friend here. Stick it into the center of a cup from the side, not the top, for the most accurate reading. 165°F is the magic number.
Batch cook and freeze. These freeze beautifully, so make a double batch whenever you have the time. Arrange the cooled cups in a single layer on a baking sheet and freeze for 1-2 hours until solid, then transfer to a freezer bag. They’ll keep for up to 3 months. To reheat, microwave a few cups for 30-45 seconds, or pop them in a 350°F oven for 10 minutes. They taste almost as good as fresh.
Don’t skip the milk in the panade. I know it seems like a small amount, but that milk-soaked breadcrumb mixture is what keeps these cups from drying out. Turkey has less fat than beef, so it needs that extra moisture insurance. If you’re out of milk, water or broth works in a pinch, but milk adds a subtle richness that you’ll notice.
Variations & Adaptations
One of the best things about this recipe is how versatile it is. I’ve tried dozens of variations over the years, and here are my favorites:
Italian-Style Cups: Add 1 teaspoon of Italian seasoning and swap the mozzarella for provolone. Serve with marinara sauce for dipping. This is my husband’s favorite version—he eats them like they’re mini Italian meatloaves and always goes back for seconds.
BBQ Turkey Cups: Mix 2 tablespoons of your favorite BBQ sauce into the meat mixture and brush another tablespoon on top before baking. The caramelized BBQ glaze on top is incredible. These are perfect for game day or a fun twist on lunch. I served these at a party alongside savory Philly cheesesteak sliders, and they were a hit with everyone who wanted something lighter.
Mexican-Inspired Cups: Add 1/2 teaspoon cumin, 1/2 teaspoon chili powder, and 2 tablespoons of finely chopped cilantro. Swap the mozzarella for pepper jack cheese. Serve with salsa, guacamole, or sour cream. These are fantastic in lunchboxes with a side of black beans and rice.
Low-Carb/Keto Version: Replace the panko breadcrumbs with crushed pork rinds or almond flour. Use full-fat mozzarella and add an extra tablespoon of Parmesan. The texture is slightly denser but still delicious. My keto friend requests these for every gathering.
Cheesy Herb Cups: Add 2 tablespoons of fresh chopped basil and 1 tablespoon of fresh chopped thyme to the mixture. Use a blend of mozzarella and fontina for extra creamy, melty goodness. These feel fancy enough for a dinner party but are easy enough for a Tuesday.
Spicy Buffalo Cups: Mix 2 tablespoons of buffalo sauce into the meat and serve with blue cheese or ranch dressing for dipping. I make these when I’m craving something with a kick, and they pair perfectly with crispy baked buffalo cauliflower bites for a full buffalo-themed meal.
Feel free to mix and match—that’s the beauty of this recipe. It’s a blank canvas that takes well to almost any flavor profile. The only thing I wouldn’t recommend is swapping the ground turkey for something very lean like ground chicken breast—you need that little bit of fat for moisture.
Serving & Storage Suggestions
These mini turkey meatball cups are incredibly versatile when it comes to serving. Here’s how I like to enjoy them:
Serving Temperature: They’re delicious warm, at room temperature, or even cold straight from the fridge. For lunchboxes, I pack them cold and they’re perfectly tasty by lunchtime. If you’re serving them for dinner, let them rest for 5 minutes after baking, then serve warm with your favorite sides.
Presentation Ideas: For kids, I thread them onto toothpicks or small skewers with cherry tomatoes and cheese cubes for a fun “meatball kabob.” For adults, I arrange them on a platter with dipping sauces like marinara, ranch, honey mustard, or BBQ sauce. They also work great on top of a salad for a protein boost—I crumble them over greens with a simple vinaigrette.
Complementary Dishes: These cups pair beautifully with roasted vegetables, a simple green salad, or pasta. I often serve them with hearty Tuscan white bean soup with kale for a cozy, satisfying meal. They’re also great alongside roasted sweet potato wedges or a side of steamed broccoli.
Storage Instructions: Store cooled cups in an airtight container in the refrigerator for up to 4 days. Layer them between sheets of parchment paper to prevent sticking. For longer storage, freeze them as described above. I always keep a bag in the freezer for emergency lunches—they’re a lifesaver when you realize at 7 AM that you have nothing packed.
Reheating Methods: Microwave: Place 3-4 cups on a microwave-safe plate and heat for 30-45 seconds. Oven: Reheat at 350°F for 8-10 minutes. Air fryer: Reheat at 350°F for 3-4 minutes for extra crispy edges. My favorite method is the air fryer—it brings back that crispy exterior that gets a little soft in the microwave.
Flavor Development: Here’s a little secret—these cups actually taste better the next day. The flavors meld together overnight, and the texture becomes even more uniform. So don’t feel like you have to serve them fresh. Meal-prepping these on Sunday means you have delicious lunches all week that actually get better as the days go by.
Nutritional Information & Benefits
These mini turkey meatball cups are a nutritional powerhouse disguised as comfort food. Here’s a breakdown per cup (based on 12 servings):
| Nutrient | Amount Per Cup |
|---|---|
| Calories | 110-120 |
| Protein | 12-14g |
| Fat | 5-6g |
| Saturated Fat | 2-3g |
| Carbohydrates | 3-4g |
| Fiber | 0.5g |
| Sugar | 0.5g |
| Sodium | 200-250mg |
Ground turkey is an excellent source of lean protein, which helps keep you full and satisfied. It’s also rich in B vitamins, particularly B6 and B12, which support energy metabolism. The mozzarella and Parmesan add calcium for bone health, while the garlic and oregano provide antioxidants and anti-inflammatory benefits.
These cups are naturally gluten-free if you use gluten-free breadcrumbs, and they can be made dairy-free with simple substitutions. They’re low in carbohydrates, making them suitable for low-carb and keto diets. The protein-to-fat ratio is excellent for muscle recovery and sustained energy—perfect for active kids and adults alike.
One thing I love about this recipe is that it feels indulgent without being heavy. You get that satisfying, savory meatball experience without the grease or the guilt. It’s the kind of food that makes you feel good about what you’re eating, whether you’re packing it in a lunchbox or serving it for dinner.
Frequently Asked Questions
Can I use ground beef or chicken instead of turkey?
Absolutely. Ground beef (85/15) will give you juicier, richer cups—just drain any excess fat after baking. Ground chicken works well too, but make sure it’s not too lean (93/7 is ideal). If using very lean chicken, add an extra tablespoon of olive oil to the mixture to keep it moist.
How do I prevent the cups from sticking to the muffin tin?
Generously grease the muffin tin with olive oil or cooking spray, making sure to get into the corners. Let the cups rest in the pan for exactly 5 minutes after baking—this allows them to release naturally. If any do stick, run a butter knife around the edge gently before lifting them out.
Can I make these ahead of time and freeze them?
Yes, and I highly recommend it! Bake the cups, let them cool completely, then freeze them in a single layer on a baking sheet. Once frozen solid (about 2 hours), transfer them to a freezer bag. They’ll keep for up to 3 months. Reheat directly from frozen in the microwave or oven.
What dipping sauces go well with these?
The options are endless! Marinara sauce is a classic choice. Ranch dressing, honey mustard, BBQ sauce, buffalo sauce, tzatziki, or even a simple garlic aioli all work beautifully. For kids, ketchup is always a hit (no judgment here—I eat them with ketchup too sometimes).
How do I make these dairy-free?
Replace the mozzarella with a dairy-free shredded cheese that melts well (I like Violife or Daiya). Skip the Parmesan or use nutritional yeast for a cheesy flavor. The texture will be slightly different, but still delicious. Add an extra tablespoon of olive oil to compensate for the missing fat from the cheese.
Conclusion
These easy mini turkey meatball cups have become a staple in my kitchen for a reason—they’re simple, versatile, and genuinely delicious. Whether you’re a busy parent trying to get ahead of the lunchbox game, a meal-prepper looking for high-protein options, or just someone who loves a good meatball, these cups deliver every time.
What I love most about this recipe is how forgiving it is. You can tweak the seasonings, swap the cheese, add vegetables, or change up the dipping sauce, and it still works. It’s the kind of recipe that adapts to whatever you have in your fridge and whatever your family’s craving. And that empty lunchbox coming home at the end of the day? That’s the best feedback you could ask for.
I’d love to hear how these turn out for you! Drop a comment below and let me know what variations you tried, or tag me in your photos if you share them online. Did your kids eat them? Did you find a dipping sauce combo that blew your mind? Tell me all about it. And if you have a picky eater at home, these might just be the recipe that changes everything—they were for me.
Happy cooking, friends. Your lunchboxes are about to get a whole lot more interesting.
Pin This Recipe!
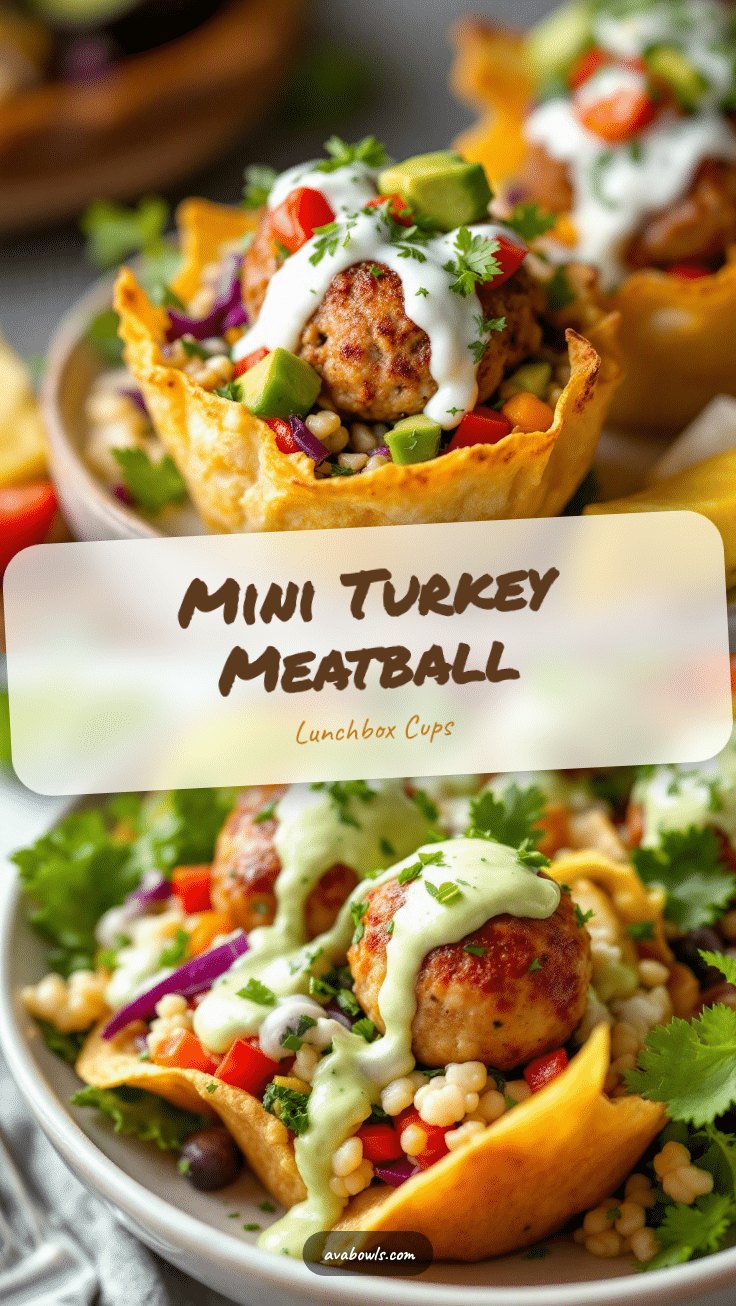
Easy Mini Turkey Meatball Cups: Best Lunchbox Recipe

These mini turkey meatball cups are perfectly portable, protein-packed, and ideal for lunchboxes. Made with simple ingredients and baked in a muffin tin, they’re juicy, flavorful, and a crowd-pleaser for kids and adults alike.
- Prep Time: 10 minutes
- Cook Time: 22 minutes
- Total Time: 32 minutes
- Yield: 12 cups (4 servings of 3 cups each) 1x
- Category: Main Course
- Cuisine: American
Ingredients
- 1 pound ground turkey (93/7 lean-to-fat ratio)
- 1/2 cup panko breadcrumbs
- 1/2 cup shredded mozzarella cheese (low-moisture, part-skim)
- 1/4 cup grated Parmesan cheese
- 1 large egg, lightly beaten
- 2 tablespoons milk (any kind)
- 2 cloves garlic, minced (or 1/2 teaspoon garlic powder)
- 1 teaspoon dried oregano
- 1/2 teaspoon salt
- 1/4 teaspoon black pepper
- 1 tablespoon olive oil (for greasing the muffin tin)
- Optional: 1/4 cup finely chopped onion
- Optional: 1/4 cup finely chopped fresh parsley
- Optional: 1 teaspoon Italian seasoning
- Optional: Pinch of red pepper flakes
Instructions
- Preheat your oven to 400°F (200°C). Position the rack in the middle of the oven. Generously grease a 12-cup standard muffin tin with olive oil.
- In a large mixing bowl, combine the panko breadcrumbs and milk. Let them sit for 2-3 minutes until the breadcrumbs absorb the milk and become paste-like.
- Add the ground turkey, mozzarella, Parmesan, beaten egg, minced garlic, oregano, salt, and pepper to the bowl with the breadcrumb mixture. If using optional ingredients, add them now. Mix with your hands just until everything is combined, about 30 seconds.
- Portion the mixture into the prepared muffin tin using a 2-tablespoon cookie scoop or spoon, dividing evenly among the 12 cups. Gently shape them into domes on top without pressing too firmly.
- Bake for 20-22 minutes, or until the internal temperature reaches 165°F (74°C) on an instant-read thermometer. The tops should be golden brown and the edges crispy.
- Let the cups cool in the pan for 5 minutes. Run a butter knife around the edges of each cup to loosen them, then gently lift them out with a fork or small spatula. Transfer to a cooling rack to cool completely if storing, or serve warm.
Notes
For gluten-free, use gluten-free breadcrumbs or crushed pork rinds. For dairy-free, use nutritional yeast instead of Parmesan and dairy-free shredded cheese. The cups freeze well for up to 3 months. Reheat in microwave for 30-45 seconds or in a 350°F oven for 10 minutes.
Nutrition
- Serving Size: 3 cups
- Calories: 110120
- Sugar: 0.5
- Sodium: 200250
- Fat: 56
- Saturated Fat: 23
- Carbohydrates: 34
- Fiber: 0.5
- Protein: 1214
Keywords: mini turkey meatball cups, lunchbox recipe, turkey meatballs, meal prep, kid-friendly, healthy meatballs, easy dinner


