“Wait, you can just set out a whole bar of nachos? Like, a DIY thing?” My brother-in-law, Dave, stood in my kitchen doorway, clutching a bag of tortilla chips like I’d just told him Santa was real. It was the morning of the big game, and I was elbow-deep in ground beef, shredding a block of cheddar with the intensity of someone who had been up since 6 AM.
He wasn’t wrong to be skeptical. Most people think of nachos as a sad, soggy plate of chips you order at a bar. But this? This was a full-on, self-serve loaded nacho bar with ground beef. I had a slow cooker full of creamy queso blanco bubbling away, a skillet of seasoned beef that smelled like my favorite taco joint, and little bowls of everything from jalapeños to sour cream. It was controlled chaos, but the good kind.
That moment—the surprise in his voice, the way he immediately grabbed a bowl and started building his own mountain—is exactly why I love this setup. It’s not just about the food; it’s about the permission to be messy and creative. You don’t have to share a plate or worry about your perfect chip-to-topping ratio. You just build your own little masterpiece. That’s the magic of a game day spread that actually works with the flow of a party, not against it.
Why You’ll Love This Recipe
I’ve tested this loaded nacho bar more times than I can count (including one particularly disastrous attempt with pre-shredded cheese that refused to melt—we don’t talk about that). This version is the result of years of trial and error, and it’s the one that always disappears first.
- Ultimate Crowd-Pleaser: Honestly, I have never met a single person who doesn’t love a good nacho. It’s salty, crunchy, cheesy, and completely customizable. Kids, adults, picky eaters—everyone wins.
- Stress-Free Hosting: The best part? You do all the heavy lifting before anyone arrives. The beef simmers in a skillet, the queso stays warm in a slow cooker, and you just set everything out. You get to actually watch the game instead of being stuck in the kitchen.
- Simple, Real Ingredients: No canned cheese sauce or mystery meat here. Just ground beef, real cheddar, fresh veggies, and a few pantry staples. You probably have most of these things in your fridge right now.
- Perfect for Game Day (or Any Day): While it’s a no-brainer for the Super Bowl or a playoff game, I’ve also made this for casual movie nights and even a birthday party. It’s just a fun, interactive way to eat.
- Completely Customizable: This is not a one-recipe-fits-all situation. You can make it as mild or as spicy as you want. You can load it up with beans for a heartier bite or keep it classic. It’s your bar, your rules.
This isn’t just another recipe for nachos. It’s a system. It’s the difference between a sad plate of chips and a full-blown, memorable meal that makes people go back for seconds (and thirds). It’s comfort food at its most social and satisfying.
What Ingredients You Will Need
This loaded nacho bar relies on a few key components that work together to create the perfect bite. Don’t overthink it—just grab your favorite stuff. Here’s what you’ll need to build the ultimate bar.
For the Seasoned Ground Beef
- 2 lbs ground beef (80/20): I prefer 80/20 for the best flavor—it has enough fat to keep the meat juicy without being greasy. You can use leaner beef (like 93/7), but you might need to add a splash of oil to the skillet.
- 1 medium yellow onion, diced: Adds a savory base flavor. Red onion works too, if that’s what you have.
- 3 cloves garlic, minced: Fresh is best here. Don’t skip it.
- 2 tablespoons chili powder: This is the backbone of your taco seasoning. I use a standard grocery store brand, but feel free to use a smoky or spicy blend.
- 1 teaspoon ground cumin: Adds that warm, earthy depth that makes taco meat taste authentic.
- 1 teaspoon smoked paprika: For a subtle smoky flavor that mimics a slow-cooked filling.
- 1/2 teaspoon garlic powder: Not a typo—we’re using fresh garlic and powder for a double hit of flavor.
- 1/2 teaspoon onion powder: Rounds out the savory profile.
- 1 teaspoon salt: Kosher salt is my go-to, but table salt works too—just use a little less.
- 1/2 teaspoon black pepper: Freshly ground is always better.
- 1/2 cup beef broth (or water): This helps create a slightly saucy texture that clings to the chips instead of falling off.
- 1 tablespoon tomato paste: Adds a touch of sweetness and color to the meat.
For the Cheese Sauce & Toppings
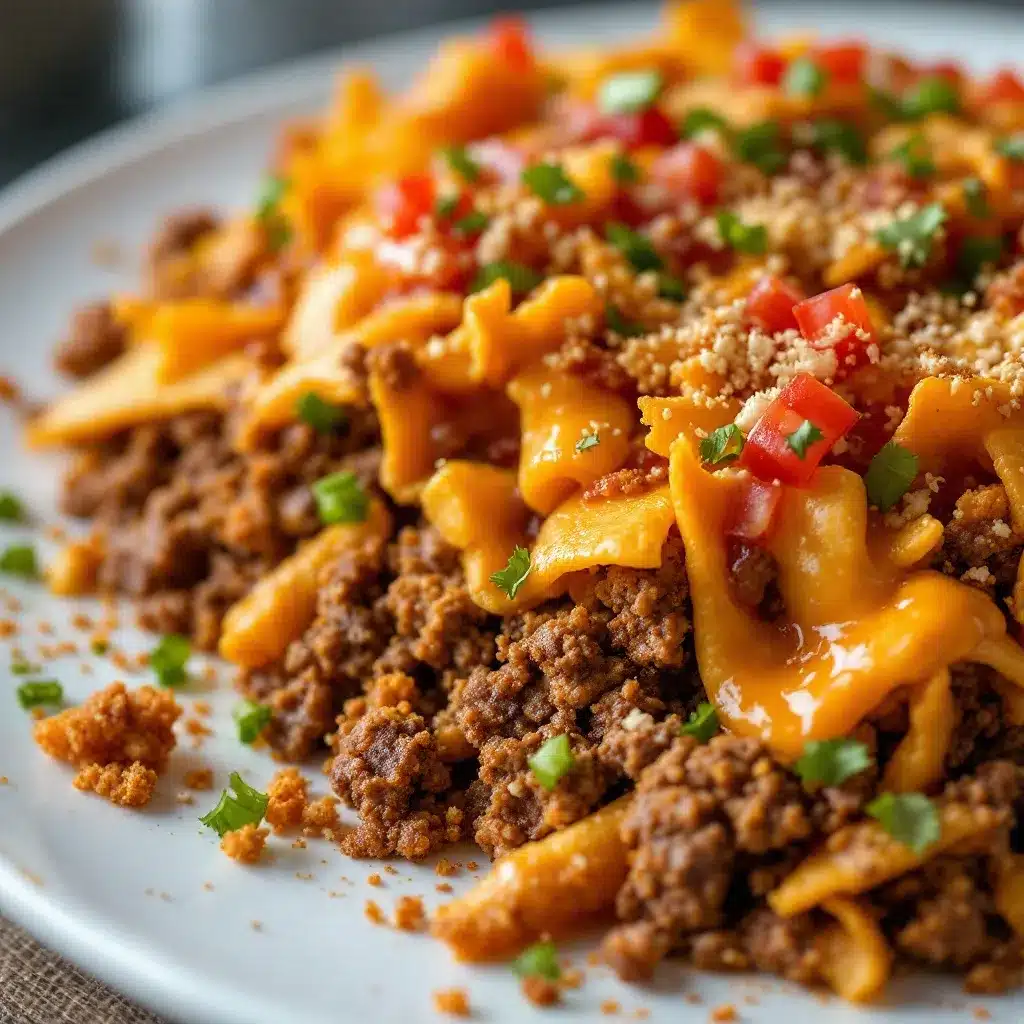
- 1 lb block of sharp cheddar cheese, freshly shredded: This is non-negotiable. Pre-shredded cheese has a coating that prevents it from melting smoothly. Shred your own—it takes 5 minutes and makes a world of difference.
- 1 tablespoon cornstarch: This stabilizes the cheese sauce and prevents it from breaking.
- 1 can (12 oz) evaporated milk: The secret to a silky, never-grainy cheese sauce. Don’t substitute regular milk; it’s not the same.
- 1 can (4 oz) diced green chiles: Mild and slightly tangy. They add a pop of flavor without heat.
- 1/2 teaspoon cayenne pepper (optional): For a little kick.
For the Nacho Bar Setup
- 1 large bag (13-16 oz) restaurant-style tortilla chips: Go for the sturdy ones. You need chips that can hold up to a lot of weight without breaking.
- 1 can (15 oz) black beans, drained and rinsed: Adds fiber and heartiness.
- 1 can (15 oz) pinto beans, drained and rinsed: Creamier than black beans, they add a different texture.
- 1 cup sour cream: For coolness and tang.
- 1 cup pico de gallo or fresh salsa: Use your favorite store-bought or homemade.
- 1/2 cup pickled jalapeños: For heat and acidity.
- 1 avocado, diced: Or guacamole, if you’re feeling fancy.
- 1/2 cup fresh cilantro, chopped: For a pop of freshness.
- 1 lime, cut into wedges: A squeeze of lime juice over the top is a game-changer.
- Optional toppings: Sliced black olives, diced tomatoes, shredded lettuce, hot sauce.
Equipment Needed
You don’t need a ton of fancy gear for this, but having the right tools makes the process smoother. Here’s what I use.
- Large skillet or cast iron pan: For browning the beef. A 12-inch skillet is ideal. I have a well-seasoned cast iron that I love for this job—it gets super hot and gives the meat a nice sear.
- Medium saucepan: For the cheese sauce. A non-stick or stainless steel pot works fine.
- Box grater: For shredding your block of cheese. It’s a bit of an arm workout, but it’s worth it. You can use a food processor with a shredding disc if you have one.
- Slow cooker or chafing dish: To keep the queso and beef warm during the party. A 2-quart slow cooker is perfect. If you don’t have one, you can keep the sauce in a double boiler or just reheat it in the microwave.
- Wooden spoon or spatula: For breaking up the beef as it cooks.
- Measuring spoons and cups: For accuracy. I know I said to eyeball it, but for the seasoning blend, it’s worth measuring.
- Serving bowls and platters: You’ll need lots of small bowls for the toppings. I use a mix of ramekins and small ceramic bowls. A large platter or sheet pan works great for the chips.
- Tongs: For serving the chips and meat.
- Ladle: For the cheese sauce.
If you don’t have a slow cooker, a large thermos works surprisingly well for keeping the cheese sauce hot. Just preheat it with hot water before you pour the sauce in.
Preparation Method
Alright, let’s get cooking. This is all about building layers of flavor. I’ll walk you through it step by step so there’s no guesswork.
- Start the beef: Place your large skillet over medium-high heat. Add the ground beef and diced onion. Cook, breaking the meat up with a wooden spoon, until the beef is browned and no longer pink—about 6-8 minutes. Don’t drain the fat completely; leave about 1 tablespoon in the pan for flavor.
- Bloom the spices: Reduce the heat to medium. Add the minced garlic, chili powder, cumin, smoked paprika, garlic powder, onion powder, salt, and pepper. Stir constantly for about 1 minute. This is called “blooming” the spices, and it wakes them up. Your kitchen will smell incredible.
- Finish the beef: Stir in the tomato paste and cook for another minute, until it darkens slightly. Pour in the beef broth and scrape up any browned bits from the bottom of the pan. Let it simmer for 3-4 minutes, or until the liquid has mostly evaporated and the meat is saucy but not wet. Taste and adjust salt if needed. Transfer to a serving bowl or a slow cooker set to “warm.”
- Make the cheese sauce: While the beef is simmering, start the queso. In a medium saucepan, toss the freshly shredded cheddar with the cornstarch until the cheese is evenly coated. This step prevents clumps.
- Melt the cheese: Pour the evaporated milk into the saucepan with the cheese. Place over medium-low heat. Stir constantly with a whisk or rubber spatula. Do not let it boil. In about 4-5 minutes, you’ll have a smooth, glossy sauce. Stir in the diced green chiles and cayenne (if using). Pour into a slow cooker or a heatproof bowl.
- Prepare the toppings: While the meat and cheese are cooking, get your toppings ready. Drain and rinse the beans. Dice the avocado. Chop the cilantro. Cut the lime into wedges. Open the jar of jalapeños. Arrange everything in small bowls on your serving table.
- Set up the bar: On a large platter or a clean sheet pan, spread out a generous layer of tortilla chips. You can also let guests build their own plates directly. Place the bowls of seasoned beef, cheese sauce, beans, sour cream, pico de gallo, jalapeños, avocado, and cilantro around the chips.
- Serve immediately: Let everyone build their own nacho masterpiece. Encourage them to start with a layer of chips, then add beef, then cheese sauce, and then pile on the cold toppings. The key is to not overload the chips right away—build in layers!
Pro Tip: If you want to make individual loaded nacho plates (like for a sit-down dinner), place a single layer of chips on an oven-safe plate, top with beef and cheese sauce, and broil for 2-3 minutes until bubbly. Then add the cold toppings. This is my favorite way to eat them—every chip is perfectly coated.
Cooking Tips & Techniques
Over the years, I’ve learned a few hard lessons about nachos. Here are my best tips for making sure your bar is a hit, not a soggy mess.
- Shred your own cheese: I cannot stress this enough. Pre-shredded cheese is coated in cellulose and potato starch to prevent clumping in the bag. That same coating prevents it from melting into a smooth sauce. It will turn out grainy and clumpy. Spend the 5 minutes to shred a block of cheddar—it’s the single most important step.
- Don’t skip the cornstarch: When making the queso, tossing the cheese with cornstarch acts as a stabilizer. It binds with the liquid and prevents the sauce from breaking or becoming oily. It’s a simple trick that guarantees a perfect sauce every time.
- Keep the heat low on the queso: Cheese sauce is delicate. If you boil it, the proteins will seize up and you’ll get a grainy, separated mess. Always melt it over low heat and stir constantly. If you’re keeping it warm in a slow cooker, set it to the “warm” setting, not “low.”
- Season the beef generously: Tortilla chips are salty, and the toppings are mostly mild. The beef needs to be the star of the show. Don’t be shy with the spices. Taste it and ask yourself, “Would I want to eat a whole bowl of this?” If the answer is yes, you’re good.
- Layer, don’t dump: The biggest mistake people make with a loaded nacho bar is just dumping everything on top of a pile of chips. The bottom chips get crushed and the top chips have nothing. Encourage guests to build a single layer of chips, then a layer of beef and cheese, then another layer of chips, then more toppings. This ensures every bite is perfect.
- Keep the hot and cold separate: Don’t put the sour cream or avocado directly on top of the hot beef or cheese sauce while it’s sitting out. The heat will make them warm and sad. Keep cold toppings in a separate bowl or on the side so people can add them at the end.
I once forgot the cornstarch for the queso. The sauce looked beautiful for about 10 minutes, then it turned into a greasy, lumpy mess. My guests were polite, but I knew. Never again. Learn from my mistakes!
Variations & Adaptations
This loaded nacho bar is a template, not a rigid rulebook. Here are some of my favorite ways to switch it up depending on the crowd or my mood.
- Spicy Chorizo Nachos: Swap the ground beef for Mexican chorizo. Remove it from the casing and cook it in the skillet until browned and crispy. It’s fattier and spicier, and it adds a whole new level of flavor. You can also use a mix of half beef, half chorizo.
- Vegetarian Black Bean & Sweet Potato Nachos: This is a huge hit with my vegetarian friends. Roast cubed sweet potatoes with chili powder and cumin until tender. Instead of beef, use a can of black beans seasoned with the same spice blend. The sweetness of the potato plays beautifully with the spicy beans and the creamy queso.
- BBQ Chicken Nachos: For a completely different vibe, swap the taco-seasoned beef for shredded BBQ chicken. Use leftover rotisserie chicken or slow-cook chicken breasts in your favorite BBQ sauce. Swap the queso for a smoky cheddar or pepper jack, and add some pickled red onions on top. It’s a Southern twist that always gets rave reviews.
- Breakfast Nachos: Yes, this is a thing. Use the same setup but swap the beef for crispy breakfast sausage or chorizo. Top with scrambled eggs, the queso, and a drizzle of hot sauce. It’s the ultimate hangover cure or a fun brunch idea.
- Low-Carb / Keto Nachos: Skip the tortilla chips and use pork rinds or baked cheese crisps instead. The beef and queso are already low-carb, so just load up on the meat, cheese, sour cream, and avocado. It’s surprisingly satisfying and completely grain-free.
My personal favorite variation is the BBQ Chicken version. I made it for a summer cookout once, and people were going back for fourths. The smoky, sweet, tangy flavors just work so well with the creamy cheese sauce. Give it a try sometime!
Serving & Storage Suggestions
This is a party recipe, but if you do have leftovers (it’s rare, but it happens), here’s how to handle them.
- Serving Temperature: The beef and queso should be served hot. Keep them in separate slow cookers or chafing dishes. The cold toppings should be served chilled. I like to set the bar up on a counter or a side table so people can graze throughout the game.
- Presentation: I use a large wooden cutting board or a rimmed baking sheet for the chips. It looks rustic and inviting. Arrange the toppings in small bowls or ramekins around the board. A squeeze of lime and a sprinkle of fresh cilantro on top of the beef bowl makes it look professional.
- Complementary Dishes: This bar is a meal in itself, but if you want to round it out, serve it with a side of creamy beer cheese pretzel dip for a different kind of dipper, or a simple side of Greek yogurt veggie dip with crunchy vegetables for a lighter option. For drinks, a cold Mexican lager like Corona or a spicy michelada pairs perfectly. A pitcher of iced brown sugar shaken espresso is also a great non-alcoholic option that feels festive.
- Storing Leftovers: Store the beef and queso in separate airtight containers in the refrigerator. They will last for up to 4 days. Store the chips in a sealed bag or container at room temperature. Do not store assembled nachos—they will get soggy.
- Reheating: The beef reheats beautifully in a skillet over medium heat with a splash of water or broth. The queso is best reheated slowly in a saucepan over low heat, stirring constantly. You might need to add a splash of milk to bring it back to a smooth consistency. Do not microwave the queso on high—it will break.
- How Flavors Develop: The beef actually tastes better the next day after the spices have had time to meld. The queso is best fresh, but it’s still good reheated. The cold toppings (avocado, pico, sour cream) should always be fresh.
Nutritional Information & Benefits
Let’s be real—this is indulgent food. But it doesn’t have to be a nutritional disaster. Here’s a rough breakdown per serving (about 2 cups of assembled nachos, assuming you don’t go overboard on the chips).
- Estimated Nutritional Values (per serving): Calories: 550-650, Fat: 35g, Saturated Fat: 15g, Cholesterol: 95mg, Sodium: 900mg, Carbohydrates: 35g, Fiber: 5g, Sugar: 8g, Protein: 30g.
- Protein Power: The ground beef provides a solid amount of high-quality protein, which helps keep you full and satisfied. This is not just empty carbs—it’s a balanced meal.
- Healthy Fats: The avocado and cheese provide healthy monounsaturated fats and calcium. Avocados are also packed with potassium and fiber.
- Vitamins & Minerals: The fresh toppings (pico de gallo, cilantro, lime) add a dose of Vitamin C and antioxidants. The beans add fiber and plant-based protein.
- Dietary Considerations: This recipe is naturally gluten-free (check your spice blends for hidden gluten). To make it dairy-free, use a dairy-free cheese sauce and skip the sour cream. To make it lower in fat, use lean ground beef and reduce the amount of cheese.
- Potential Allergens: This recipe contains dairy (cheese, sour cream) and possible gluten (in some spice blends or chips). Always check labels if you are serving someone with allergies.
I’m not a nutritionist, but I believe in balance. This is a fantastic, satisfying meal that you can feel good about serving to your family and friends. It’s real food, made with love.
Conclusion
Honestly, this easy loaded nacho bar with ground beef has become my go-to for any gathering where I want to actually enjoy myself. It’s forgiving, it’s fun, and it’s the kind of meal that makes people feel like they’re at a party, even if it’s just a Tuesday night.
I love that everyone can build their own plate. You can be a minimalist with just beef and cheese, or you can go full-on with every single topping. It’s your call. That freedom is what makes it so special.
So go ahead and give it a try. Set up your bar, invite some people over, and watch the magic happen. And when you do, come back and tell me about it! Leave a comment below and let me know what your favorite topping combination was. Did you try the BBQ chicken version? Did you go full spice mode with extra jalapeños? I want to hear all about it. Happy snacking!
Frequently Asked Questions
Can I make the beef and cheese sauce ahead of time?
Absolutely. You can cook the beef and make the queso up to 2 days in advance. Store them separately in the fridge. Reheat the beef in a skillet and the queso slowly on the stovetop or in a slow cooker before serving. The flavors actually get better overnight!
What are the best chips to use for a loaded nacho bar?
Go for the sturdy, restaurant-style tortilla chips. They are thicker and can handle the weight of the beef and cheese without breaking. Avoid thin, “gourmet” chips—they will turn to dust under the toppings. I always buy the big bag from the store brand.
How do I keep the queso from getting a skin on top?
If you are keeping the queso warm in a slow cooker, give it a stir every 20-30 minutes. You can also lay a piece of plastic wrap directly on the surface of the queso before putting the lid on. This prevents a skin from forming. If it does get a skin, just whisk it back in—it’s fine.
Can I use a different type of meat?
Yes! Ground turkey, ground chicken, or shredded rotisserie chicken all work great. If using lean turkey or chicken, add a tablespoon of olive oil to the pan to prevent it from drying out. You can also use shredded pork carnitas for a different flavor profile.
How do I prevent the nachos from getting soggy?
The key is layering and serving immediately. Don’t let the assembled nachos sit out for more than 10 minutes. If you are serving a buffet, encourage guests to build their own plates in batches. Keeping the hot and cold toppings separate until the last second also helps tremendously.
Pin This Recipe!
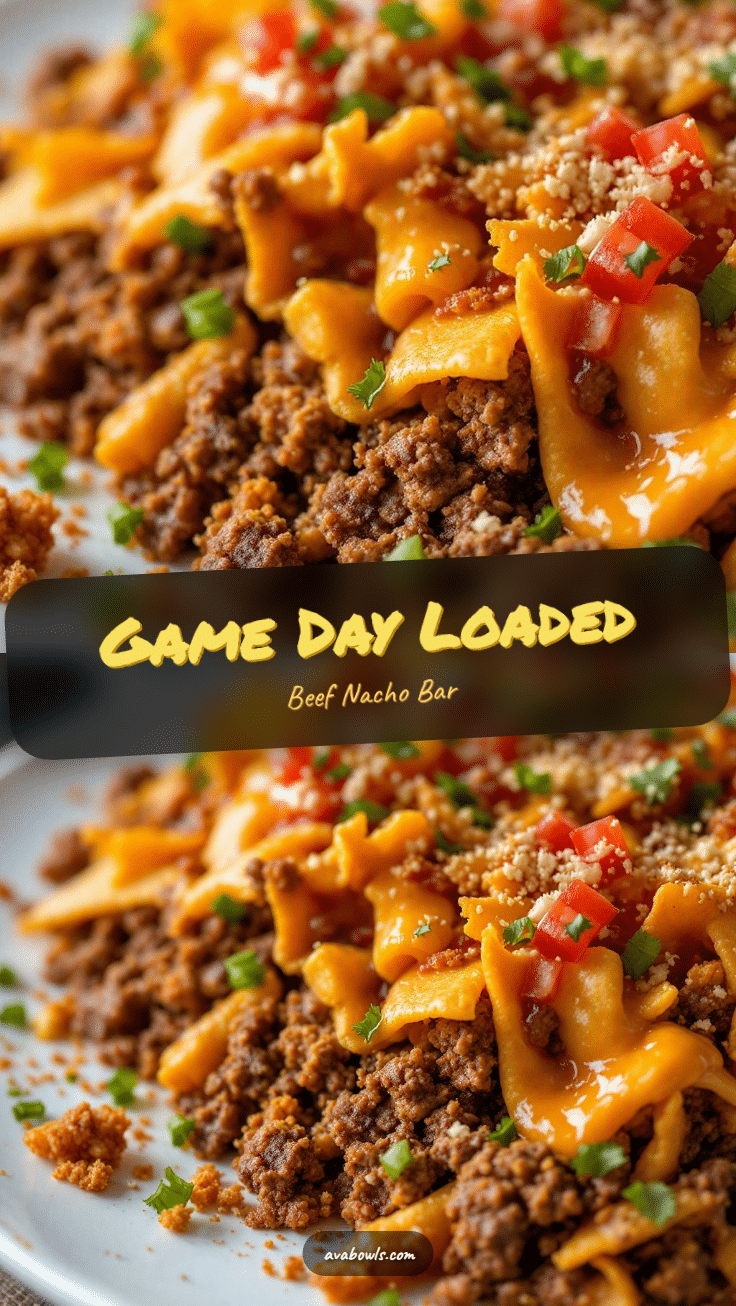
Easy Loaded Nacho Bar with Ground Beef

A fun, interactive DIY nacho bar with seasoned ground beef, creamy queso, and all your favorite toppings. Perfect for game day or any party where you want to enjoy the company instead of being stuck in the kitchen.
- Prep Time: 20 minutes
- Cook Time: 20 minutes
- Total Time: 40 minutes
- Yield: 8 servings 1x
- Category: Main Course
- Cuisine: Mexican-American
Ingredients
- 2 lbs ground beef (80/20)
- 1 medium yellow onion, diced
- 3 cloves garlic, minced
- 2 tablespoons chili powder
- 1 teaspoon ground cumin
- 1 teaspoon smoked paprika
- 1/2 teaspoon garlic powder
- 1/2 teaspoon onion powder
- 1 teaspoon salt
- 1/2 teaspoon black pepper
- 1/2 cup beef broth (or water)
- 1 tablespoon tomato paste
- 1 lb block of sharp cheddar cheese, freshly shredded
- 1 tablespoon cornstarch
- 1 can (12 oz) evaporated milk
- 1 can (4 oz) diced green chiles
- 1/2 teaspoon cayenne pepper (optional)
- 1 large bag (13–16 oz) restaurant-style tortilla chips
- 1 can (15 oz) black beans, drained and rinsed
- 1 can (15 oz) pinto beans, drained and rinsed
- 1 cup sour cream
- 1 cup pico de gallo or fresh salsa
- 1/2 cup pickled jalapeños
- 1 avocado, diced
- 1/2 cup fresh cilantro, chopped
- 1 lime, cut into wedges
- Optional toppings: sliced black olives, diced tomatoes, shredded lettuce, hot sauce
Instructions
- Start the beef: Place your large skillet over medium-high heat. Add the ground beef and diced onion. Cook, breaking the meat up with a wooden spoon, until the beef is browned and no longer pink—about 6-8 minutes. Don’t drain the fat completely; leave about 1 tablespoon in the pan for flavor.
- Bloom the spices: Reduce the heat to medium. Add the minced garlic, chili powder, cumin, smoked paprika, garlic powder, onion powder, salt, and pepper. Stir constantly for about 1 minute.
- Finish the beef: Stir in the tomato paste and cook for another minute, until it darkens slightly. Pour in the beef broth and scrape up any browned bits from the bottom of the pan. Let it simmer for 3-4 minutes, or until the liquid has mostly evaporated and the meat is saucy but not wet. Taste and adjust salt if needed. Transfer to a serving bowl or a slow cooker set to ‘warm’.
- Make the cheese sauce: While the beef is simmering, start the queso. In a medium saucepan, toss the freshly shredded cheddar with the cornstarch until the cheese is evenly coated.
- Melt the cheese: Pour the evaporated milk into the saucepan with the cheese. Place over medium-low heat. Stir constantly with a whisk or rubber spatula. Do not let it boil. In about 4-5 minutes, you’ll have a smooth, glossy sauce. Stir in the diced green chiles and cayenne (if using). Pour into a slow cooker or a heatproof bowl.
- Prepare the toppings: While the meat and cheese are cooking, get your toppings ready. Drain and rinse the beans. Dice the avocado. Chop the cilantro. Cut the lime into wedges. Open the jar of jalapeños. Arrange everything in small bowls on your serving table.
- Set up the bar: On a large platter or a clean sheet pan, spread out a generous layer of tortilla chips. You can also let guests build their own plates directly. Place the bowls of seasoned beef, cheese sauce, beans, sour cream, pico de gallo, jalapeños, avocado, and cilantro around the chips.
- Serve immediately: Let everyone build their own nacho masterpiece. Encourage them to start with a layer of chips, then add beef, then cheese sauce, and then pile on the cold toppings. The key is to not overload the chips right away—build in layers!
Notes
Shred your own cheese for the smoothest queso. Keep the hot and cold toppings separate until serving to prevent sogginess. For individual loaded nacho plates, layer chips, beef, and cheese sauce on an oven-safe plate and broil for 2-3 minutes before adding cold toppings.
Nutrition
- Serving Size: 2 cups assembled nac
- Calories: 600
- Sugar: 8
- Sodium: 900
- Fat: 35
- Saturated Fat: 15
- Carbohydrates: 35
- Fiber: 5
- Protein: 30
Keywords: nacho bar, loaded nachos, ground beef nachos, game day food, party appetizer, DIY nacho bar, queso, taco meat


