By the third time I made cheese quesadilla dippers that week—a Tuesday, I think, right after the bus pulled away—I finally stopped cutting them into triangles. I don’t know why triangles felt so mandatory for so long. Maybe it’s some leftover rule from birthday parties or the way restaurants serve them, all neat and predictable. But on that Tuesday, with a half-eaten sleeve of tortillas and a block of cheddar that was starting to sweat on the counter, I just sliced them into skinny strips. Finger-length strips. The kind a small hand can grab without thinking.
And honestly? That was the moment everything clicked.
My kid had been rejecting lunchbox sandwiches for weeks. Not with words—he’s not the dramatic type—but with that specific sigh and the way he’d push the container to the side. So I started making these easy cheese quesadilla dippers out of pure survival instinct. They’re warm, they’re melty, and they travel shockingly well. Plus, there’s something about the strip shape that makes them feel more like a snack than a meal, which is apparently the whole appeal when you’re seven and suspicious of anything that looks too much like lunch.
I’ve made them every school morning since. Some days with sharp cheddar, others with whatever shredded blend is lingering in the fridge. They take under ten minutes, require exactly one pan, and somehow manage to come out consistently crispy on the outside and gooey on the inside. No magic involved—just a little patience and a medium heat.
This recipe isn’t fancy. It’s not going to win any food photography awards. But it’s the kind of thing that makes the lunchbox come back empty, and honestly, that’s a better win than any Michelin star.
Why You’ll Love This Recipe
These easy cheese quesadilla dippers aren’t just another lunch idea—they’re the lunchbox hack you didn’t know you needed. I’ve tested them at least a dozen times (give or take a few late-night experiments) and here’s why they keep earning a permanent spot in our weekly rotation:
- Quick & Easy: From fridge to lunchbox in under 10 minutes. Seriously. You can make these while your coffee brews.
- Simple Ingredients: You need tortillas, cheese, and maybe a little butter or oil. That’s it. No specialty shopping required.
- Perfect for Lunchboxes: They hold up at room temperature, don’t get soggy, and kids actually eat them. The strip shape makes them dippable too.
- Crowd-Pleaser: I’ve served these at playdates, after-school snacks, and even as a quick dinner side. Adults sneak them. I’ve caught myself doing it.
- Unbelievably Delicious: The contrast between the crispy, golden exterior and the stretchy, melted cheese inside? It’s simple comfort food done right.
What makes this version different from the standard quesadilla is the technique. Instead of one big tortilla folded in half, I use two full tortillas pressed together with cheese in between. This creates a more even melt and a sturdier structure that holds up better for dipping. Plus, cutting them into strips instead of wedges makes them lunchbox-friendly and way more fun to eat.
This is the recipe that turned my kid from a lunch-skipper into someone who actually looks forward to opening his container. And if that’s not a win, I don’t know what is.
What Ingredients You Will Need
This recipe uses the kind of ingredients you probably already have in your kitchen right now. No fancy shopping list, no obscure items from the specialty aisle—just simple, reliable staples that come together to make something genuinely good.
- Flour tortillas (8-inch) – Look for soft, pliable tortillas that aren’t too thick. I prefer Mission or Guerrero brand for the best texture. Corn tortillas work too, but they’re smaller and more prone to cracking.
- Shredded cheddar cheese (1 cup / 120g) – Sharp cheddar gives the most flavor, but mild works fine too. Pre-shredded is convenient, though freshly shredded melts more smoothly (it doesn’t have the anti-caking coating).
- Shredded mozzarella cheese (½ cup / 60g) – This adds that signature stretchiness. Low-moisture part-skim mozzarella is best—it melts without making the quesadilla soggy.
- Unsalted butter (2 tablespoons / 28g) – For spreading on the outside of the tortillas. It creates that golden, crispy crust. You can use salted butter if that’s what you have—just skip any extra salt.
- Optional: Sour cream (¼ cup / 60g) – For dipping. The tanginess balances the richness of the cheese. Greek yogurt works as a substitute.
- Optional: Salsa (¼ cup / 60ml) – Mild or medium, depending on your kid’s tolerance. I use a simple tomato-based salsa for lunchboxes.
Ingredient Selection Tips: If you’re using pre-shredded cheese, look for blocks that are labeled “natural” or “artisan” shreds—they tend to have less cellulose and melt better. For the tortillas, avoid the “carb balance” or low-carb varieties unless you’ve tested them; they can turn brittle when cooked.
Substitution Guidance: Need a dairy-free version? Use vegan shredded cheese (Daiya or Violife work well) and swap the butter for vegan butter or olive oil. Gluten-free? Corn tortillas or gluten-free flour tortillas are both solid choices—just cook them a minute less since they brown faster. For a protein boost, add a thin layer of refried beans or shredded chicken between the cheese layers.
Equipment Needed
You don’t need much for these easy cheese quesadilla dippers, which is honestly my favorite part. Here’s what you’ll want to have on hand:
- Non-stick skillet (10-inch or 12-inch) – A good non-stick pan is worth its weight in gold here. It ensures even browning and easy flipping. I use a GreenPan ceramic skillet and it’s never let me down.
- Spatula – A thin, flexible metal or silicone spatula works best for flipping. Avoid thick wooden spatulas—they’ll crush the quesadilla.
- Butter knife or offset spatula – For spreading butter on the tortillas. A regular knife works fine, but an offset spatula makes it faster and more even.
- Cutting board and sharp knife or pizza cutter – A pizza cutter is my go-to for slicing the quesadillas into strips. It’s faster and gives cleaner edges than a knife.
- Measuring cups and spoons – For the cheese and butter. Honestly, I eyeball the cheese most days, but measuring helps when you’re first learning.
- Lunchbox container – A bento-style container with a separate compartment for dip works perfectly. I use a PlanetBox or a simple glass Snapware.
Budget-Friendly Alternatives: If you don’t have a non-stick skillet, a well-seasoned cast iron pan works beautifully—just add a little extra butter to prevent sticking. No pizza cutter? A sharp chef’s knife does the job, just use a gentle sawing motion.
Maintenance Tip: After cooking quesadillas, let your pan cool completely before washing. Thermal shock can warp non-stick surfaces. Hand wash with a soft sponge—no steel wool.
Preparation Method

This is where the magic happens. Follow these steps, and you’ll have perfect cheese quesadilla dippers every single time.
- Prep your workspace. Lay two tortillas flat on your cutting board. Spread a thin, even layer of softened butter on one side of each tortilla. Don’t go overboard—you want a light coating, not a butter bath. (I learned this the hard way after a greasy first attempt.)
- Assemble the quesadilla. Place one tortilla butter-side down in your cold skillet. Evenly sprinkle ½ cup (60g) of shredded cheddar and ¼ cup (30g) of shredded mozzarella over the entire surface. Make sure the cheese reaches the edges—bare tortilla edges are sad tortilla edges. Place the second tortilla on top, butter-side up.
- Cook over medium heat. Turn the heat to medium and let it cook undisturbed for 2-3 minutes. You’ll know it’s ready to flip when the bottom is golden brown and the cheese starts to melt around the edges. Don’t rush this step—medium heat is crucial. Too high and the tortilla burns before the cheese melts.
- Flip carefully. Slide your spatula under the quesadilla and flip it in one confident motion. If you’re nervous, use two spatulas—one on top to guide it. Cook the other side for another 2-3 minutes, until golden brown and the cheese is fully melted. Press down gently with the spatula halfway through to encourage even browning.
- Rest before cutting. Transfer the quesadilla to your cutting board and let it rest for 1-2 minutes. This is crucial—cutting too early turns the inside into a molten cheese explosion. I speak from experience (and a burned tongue).
- Slice into strips. Use a pizza cutter or sharp knife to cut the quesadilla into 1-inch wide strips. Aim for 6-8 strips per quesadilla. If you’re making them for lunchboxes, let them cool completely before packing to prevent condensation.
- Repeat for remaining quesadillas. This recipe makes about 4 full-size quesadillas (roughly 24-32 strips). Wipe out your skillet between batches if there’s any burned cheese residue.
Time Estimate: Each quesadilla takes about 6-8 minutes total. So for a batch of 4, you’re looking at 25-30 minutes from start to finish. Not bad for a week’s worth of lunchbox prep.
Sensory Cues: The tortilla should sizzle gently when it hits the pan—not aggressively. You’ll smell a toasty, buttery aroma when it’s ready to flip. The cheese should be visibly melted and stretchy when you cut into it, not still solid in the middle.
Cooking Tips & Techniques
After making these easy cheese quesadilla dippers more times than I can count, I’ve picked up a few tricks that make a real difference. Here are the ones worth knowing:
- Medium heat is non-negotiable. I burned my first three quesadillas because I thought high heat would make them crispier faster. It doesn’t. It burns the outside and leaves the cheese cold in the middle. Medium heat gives the cheese time to melt without scorching the tortilla. Trust the process.
- Don’t overcrowd the pan. Cook one quesadilla at a time. If you try to cook two in the same pan, they steam instead of crisping up. The moisture from the tortillas creates steam, and steam is the enemy of crispy.
- Use a lid for the first minute. If you’re struggling with cheese that won’t melt fast enough, cover the pan with a lid for the first minute of cooking. The trapped heat helps the cheese melt evenly. Just remove the lid before flipping.
- Let them cool completely before packing. I learned this one the hard way. If you pack warm quesadillas in a sealed container, the steam makes them soggy. Let them cool on a wire rack for at least 10 minutes before packing. Your lunchbox will thank you.
- Double up on cheese for extra gooeyness. If you’re making these for a special treat (or a particularly rough Monday), add an extra ¼ cup of cheese per quesadilla. It gets gloriously messy but so worth it.
- Keep a batch in the freezer. Make a double batch on Sunday, let them cool completely, and freeze them in a single layer on a baking sheet. Once frozen, transfer to a freezer bag. They reheat in the microwave in about 30 seconds or in a toaster oven for 3-4 minutes.
Common Mistake: Using too much butter. I know it sounds counterintuitive, but a thin layer is all you need. Too much butter makes the tortilla greasy instead of crispy. You want it golden, not oily.
Variations & Adaptations
One of the best things about this recipe is how endlessly adaptable it is. Here are some variations I’ve tried (and loved):
- Black Bean & Corn Quesadilla Dippers: Add ¼ cup (60g) of drained black beans and ¼ cup (40g) of corn kernels to the cheese mixture before cooking. The beans add protein, and the corn adds a little sweetness. My kid calls these “confetti quesadillas.”
- Spicy Southwestern Version: Mix 1 teaspoon of chili powder and ½ teaspoon of cumin into the shredded cheese. Add a few pickled jalapeño slices if your kid can handle the heat. This version pairs perfectly with a side of creamy slow cooker queso blanco dip for dipping.
- Breakfast Quesadilla Dippers: Scramble one egg and add it along with the cheese. Cook as directed. These are perfect for busy mornings when you need something portable. They also freeze well for quick breakfasts.
- Gluten-Free Version: Use gluten-free flour tortillas or corn tortillas. Corn tortillas are smaller, so you’ll need to adjust the cooking time (about 1-2 minutes less per side). They’re also more delicate, so flip gently.
- Dairy-Free Version: Use vegan shredded cheese and vegan butter. Daiya and Violay both melt surprisingly well. Just note that vegan cheese takes slightly longer to melt, so cook over medium-low heat for an extra minute per side.
- Protein-Packed Version: Add ¼ cup (60g) of shredded rotisserie chicken or crumbled cooked turkey sausage between the cheese layers. This turns the dippers into a more substantial meal.
Personal Favorite: I’m partial to the black bean and corn version with a side of fresh Greek yogurt veggie dip with herbs. The cool, tangy dip balances the warm, melty quesadilla perfectly. It’s become our Friday lunchbox tradition.
Serving & Storage Suggestions
These easy cheese quesadilla dippers are versatile enough for lunchboxes, after-school snacks, or even a quick dinner. Here’s how to make the most of them:
- Serving Temperature: They’re best served warm, but they’re also surprisingly good at room temperature. For lunchboxes, I pack them completely cooled to avoid condensation. If you want to reheat them, a quick 15-20 seconds in the microwave or 3-4 minutes in a toaster oven brings back the crispiness.
- Dipping Suggestions: These strips are made for dipping. Try them with sour cream, salsa, guacamole, or creamy beer cheese pretzel dip for an extra indulgent treat. For a healthier option, serve with a side of cucumber slices or cherry tomatoes.
- Storage Instructions: Store leftover quesadilla strips in an airtight container in the refrigerator for up to 4 days. Layer them with parchment paper to prevent sticking. For longer storage, freeze them in a single layer on a baking sheet, then transfer to a freezer bag for up to 3 months.
- Reheating Methods: The toaster oven or air fryer is your best bet for restoring crispiness. Air fry at 350°F (175°C) for 3-4 minutes. Microwave works in a pinch but will make them softer. If you’re packing for lunch, they don’t need reheating at all—they’re delicious cold.
- Flavor Development: Interestingly, these quesadilla dippers taste even better the next day. The flavors meld together overnight, and the tortilla absorbs a bit of the cheese flavor. I’ve actually started making them a day ahead on purpose.
Presentation Tip: For a fun lunchbox presentation, arrange the strips in a small container with a separate compartment for dip. Add a few baby carrots and cucumber slices for color. It looks like a mini snack board, and kids love the variety.
Nutritional Information & Benefits
Here’s a rough nutritional breakdown for one serving (about 4 strips, or ¼ of the recipe):
| Nutrient | Amount per Serving |
|---|---|
| Calories | 290 |
| Total Fat | 16g |
| Saturated Fat | 9g |
| Cholesterol | 40mg |
| Sodium | 420mg |
| Total Carbohydrates | 24g |
| Dietary Fiber | 1g |
| Sugars | 2g |
| Protein | 12g |
| Calcium | 250mg (25% DV) |
Health Benefits: Cheese is a good source of calcium and protein, which are essential for growing kids. The tortillas provide carbohydrates for energy. If you use whole wheat tortillas, you’ll add fiber and B vitamins. For a lower-sodium option, use reduced-sodium cheese and skip the added salt.
Dietary Considerations: This recipe is vegetarian as written. For gluten-free, use corn or gluten-free tortillas. For dairy-free, use vegan cheese and butter. It’s naturally nut-free, making it a safe option for school lunchboxes with allergy policies.
Personal Wellness Note: I love that these dippers are customizable. On days when my kid needs more protein, I add chicken or beans. On days when we’re keeping it simple, just cheese and tortillas are enough. It’s comfort food that can fit into a balanced diet without guilt.
Conclusion
If you’re tired of the lunchbox struggle—the uneaten sandwiches, the sad leftovers, the “I don’t like that” before even trying—these easy cheese quesadilla dippers might just be your answer. They’re quick, they’re simple, and they actually get eaten. That’s a win in my book.
What I love most about this recipe is how forgiving it is. You can use whatever cheese you have, swap out tortillas, add extras, or keep it plain. It’s a template, not a rigid formula. And honestly, that’s what makes it work so well for real life. Some mornings you have time to shred cheese and add black beans. Other mornings you’re grabbing whatever’s in the fridge and hoping for the best. This recipe works either way.
I’d love to hear how these turn out for you. Do your kids have a favorite dip? Did you try a variation I haven’t thought of? Drop a comment below and let me know. And if you’re looking for more lunchbox inspiration, check out these healthy energy balls with dates, oats, and dark chocolate—they’re another lunchbox favorite in our house.
Happy cooking, and here’s to empty lunchboxes!
Frequently Asked Questions
Can I make these ahead of time for the whole week?
Absolutely! These quesadilla dippers are perfect for meal prep. Make a double batch on Sunday, let them cool completely, and store them in an airtight container in the fridge for up to 4 days. You can also freeze them for up to 3 months. Just reheat in a toaster oven or air fryer for best results.
What’s the best cheese for quesadillas?
A blend of cheddar and mozzarella is my go-to. Cheddar provides sharp flavor, while mozzarella gives that stretchy, melty texture. Monterey Jack, Colby, or even pepper jack work great too. Avoid using only soft cheeses like brie or goat cheese, as they can make the quesadilla too wet.
How do I keep them from getting soggy in the lunchbox?
The key is letting them cool completely before packing. Warm quesadillas create steam inside the container, which leads to sogginess. I let them cool on a wire rack for at least 10 minutes before packing. Also, use a container with a separate compartment for any dip to keep the strips dry.
Can I use corn tortillas instead of flour?
Yes, but they behave differently. Corn tortillas are smaller and more delicate, so you’ll want to use two per quesadilla and cook them over slightly lower heat. They also brown faster, so keep an eye on them. The flavor is different—more earthy—but still delicious, especially with a side of salsa or Greek yogurt veggie dip.
How do I make these dairy-free?
Use vegan shredded cheese (Daiya or Violife work well) and swap the butter for vegan butter or olive oil. Cook over medium-low heat since vegan cheese takes slightly longer to melt. The texture will be a bit different—less stretchy—but the flavor is still great. Just be sure to check the labels if you’re avoiding all dairy.
Pin This Recipe!
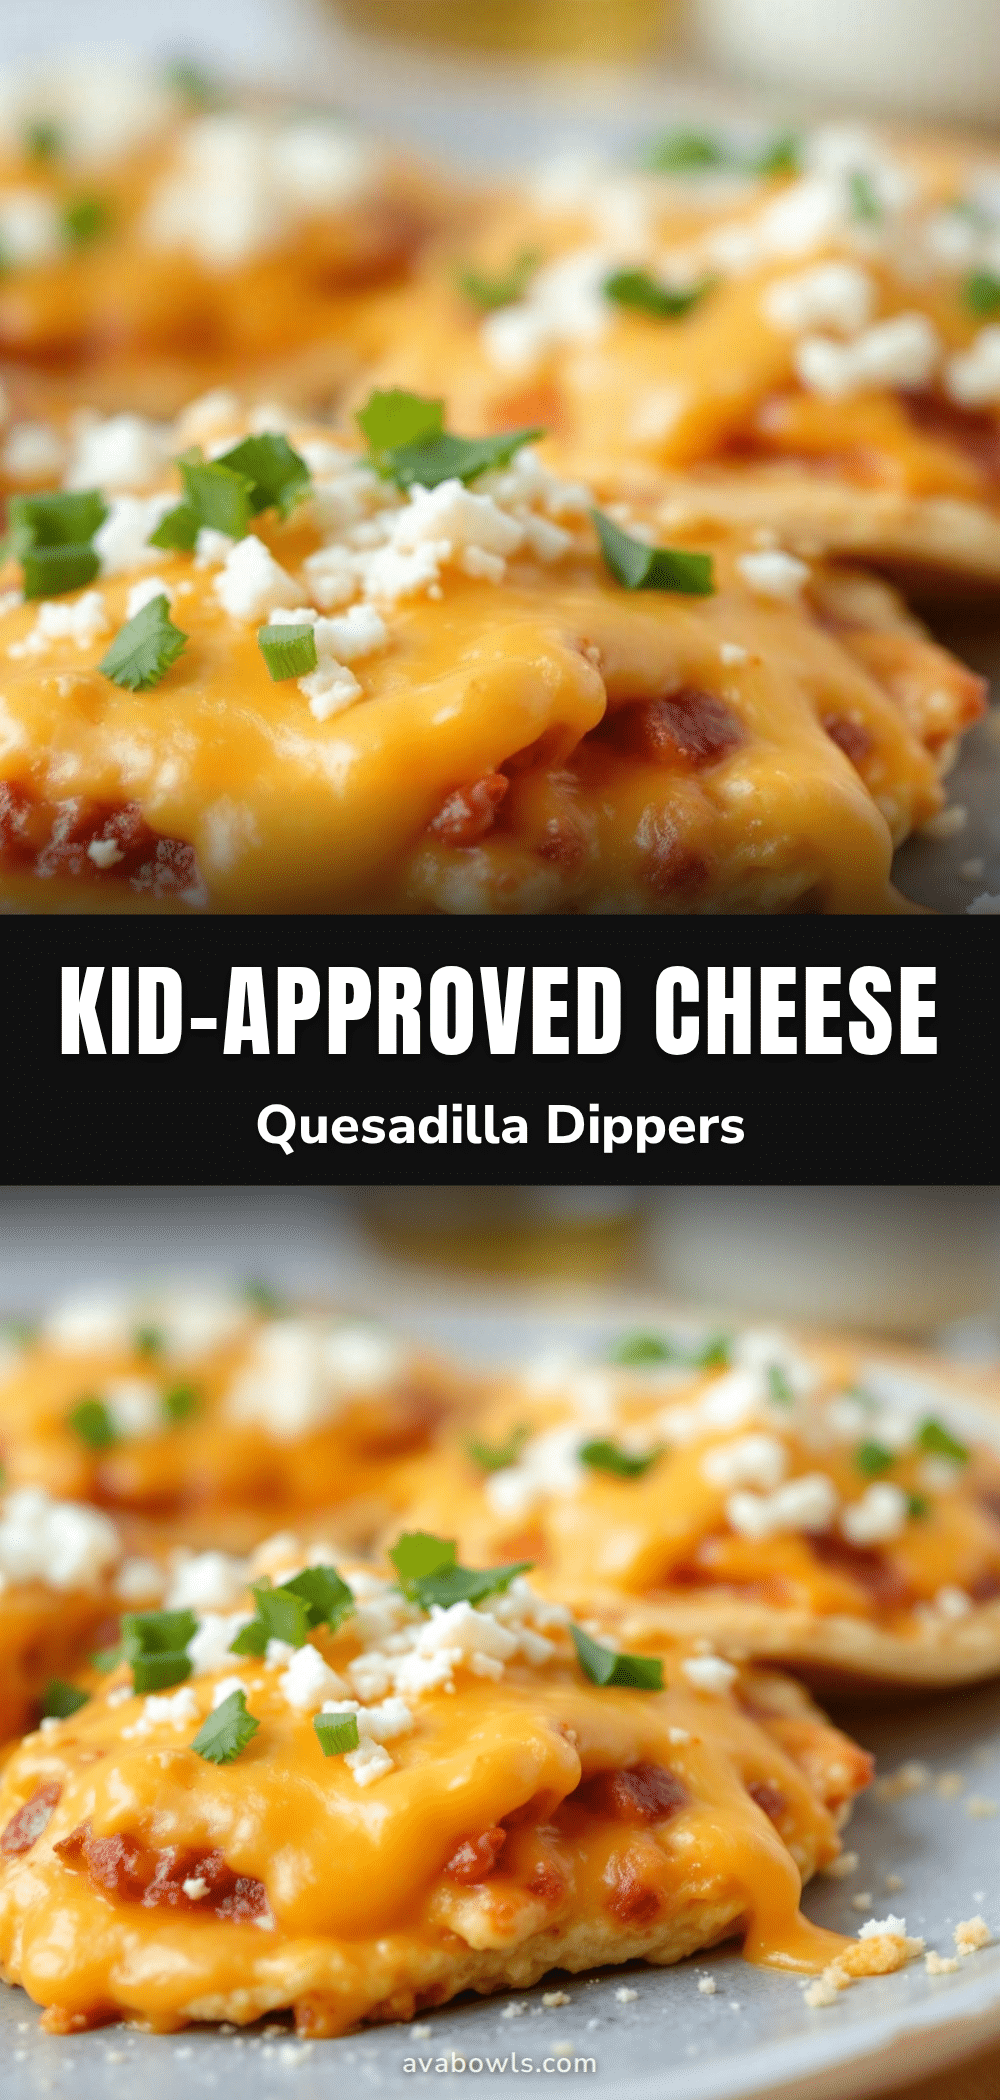
Easy Cheese Quesadilla Dippers | Best Lunchbox Snack

Quick and easy cheese quesadilla dippers made with simple ingredients, perfect for lunchboxes or after-school snacks. These crispy, gooey strips are a crowd-pleaser and take under 10 minutes to make.
- Prep Time: 5 minutes
- Cook Time: 8 minutes per batch
- Total Time: 30 minutes
- Yield: 4 servings (about 24-32 strips) 1x
- Category: Snack
- Cuisine: Mexican-American
Ingredients
- 4 (8-inch) flour tortillas
- 1 cup (120g) shredded cheddar cheese
- ½ cup (60g) shredded mozzarella cheese
- 2 tablespoons (28g) unsalted butter, softened
- Optional: ¼ cup (60g) sour cream, for dipping
- Optional: ¼ cup (60ml) salsa, for dipping
Instructions
- Prep your workspace: Lay two tortillas flat on a cutting board. Spread a thin, even layer of softened butter on one side of each tortilla.
- Assemble the quesadilla: Place one tortilla butter-side down in a cold non-stick skillet. Evenly sprinkle ½ cup (60g) cheddar and ¼ cup (30g) mozzarella over the entire surface. Place the second tortilla on top, butter-side up.
- Cook over medium heat: Turn heat to medium and cook undisturbed for 2-3 minutes until bottom is golden brown and cheese starts to melt around edges.
- Flip carefully: Slide a spatula under the quesadilla and flip in one confident motion. Cook other side for 2-3 minutes until golden brown and cheese is fully melted. Press down gently with spatula halfway through.
- Rest before cutting: Transfer to cutting board and let rest for 1-2 minutes to prevent cheese from exploding.
- Slice into strips: Use a pizza cutter or sharp knife to cut into 1-inch wide strips (6-8 strips per quesadilla). Let cool completely before packing for lunchboxes.
- Repeat for remaining quesadillas: Makes about 4 full-size quesadillas (24-32 strips). Wipe out skillet between batches if needed.
Notes
Medium heat is crucial to avoid burning the tortilla before cheese melts. Let quesadillas cool completely before packing to prevent sogginess. For extra gooeyness, add an extra ¼ cup of cheese per quesadilla. Freeze cooled strips in a single layer, then transfer to a freezer bag for up to 3 months.
Nutrition
- Serving Size: 4 strips (¼ of recip
- Calories: 290
- Sugar: 2
- Sodium: 420
- Fat: 16
- Saturated Fat: 9
- Carbohydrates: 24
- Fiber: 1
- Protein: 12
Keywords: cheese quesadilla dippers, lunchbox snack, easy quesadilla, kid-friendly snack, quick snack, cheese strips, tortilla snack


