Fourth batch in three days and I finally figured out the piping tip situation. The first ones looked like deflated ghosts—more like sad little clouds that lost their way. The second batch? Let’s just say they could’ve passed for misshapen potatoes if you squinted hard enough. But this time, the peaks held. The little meringue bodies stood up straight, and when I drew on the faces with melted dark chocolate, they actually looked like they were about to float away. That’s the thing about these crispy ghost-shaped meringue cookies for Halloween—they demand a certain kind of patience, but once you get the rhythm, they practically make themselves. I kept coming back because there’s something deeply satisfying about watching egg whites transform into something this ethereal, this perfectly Halloween. And honestly? They taste like tiny clouds of vanilla sweetness that dissolve on your tongue. Not bad for a Tuesday night experiment that turned into an obsession.
Why You’ll Love This Recipe
These ghost-shaped meringue cookies for Halloween aren’t just cute—they’re genuinely foolproof once you understand a few simple rules. I’ve tested this recipe more times than I care to admit, and each batch taught me something new about getting that perfect crisp exterior with the soft, marshmallowy center.
- Simple Ingredients : You probably have everything already—egg whites, sugar, vanilla, and cream of tartar. No specialty baking aisle required.
- Naturally Gluten-Free : Meringues are naturally free of flour, making them perfect for guests with dietary restrictions. No one will even notice.
- Make-Ahead Friendly : These keep for weeks in an airtight container, so you can prep them well before your Halloween party.
- Customizable Decorations : Draw different ghost faces, add sprinkles, or dust with edible glitter—each ghost gets its own personality.
- Surprisingly Impressive : Everyone thinks you spent hours when really, the oven does most of the work.
What sets this recipe apart from other meringue cookies is the technique: low and slow baking at 200°F ensures they dry out completely without browning. No chewy centers, no sticky bottoms—just pure, crisp perfection. I learned this trick after my first batch came out looking like toasted marshmallows (not in a good way).
There’s something magical about handing a plate of these to guests at a Halloween gathering. Kids light up, adults get nostalgic, and suddenly everyone’s talking about the time they made meringues with their grandmother. It’s comfort food reimagined—lighter, airier, but with the same soul-soothing satisfaction as any holiday treat.
What Ingredients You Will Need
This recipe relies on a handful of pantry staples that work together to create something genuinely special. The key is using room-temperature egg whites—they whip up higher and hold their structure better than cold ones. Trust me, I learned this the hard way after a batch that refused to stiffen.
- 4 large egg whites, room temperature (about 120 grams – cold eggs won’t whip properly)
- 1 cup granulated sugar (200 grams – I prefer organic cane sugar for cleaner flavor)
- 1 teaspoon vanilla extract (pure, not imitation – it makes a difference in the final taste)
- 1/4 teaspoon cream of tartar (stabilizes the meringue – don’t skip this!)
- Pinch of salt (balances sweetness)
- 1/4 cup dark chocolate chips (for decorating the ghost faces – about 45 grams)
- Optional: 1/2 teaspoon almond extract (adds a subtle nutty undertone that pairs beautifully with vanilla)
Ingredient Selection Tips: I recommend using organic eggs if possible—the whites whip up more consistently, and the flavor is cleaner. For the sugar, avoid superfine varieties; regular granulated sugar dissolves beautifully during the slow baking process. If you’re feeling adventurous, try swapping half the vanilla for peppermint extract for a candy-cane ghost vibe (though my kids prefer the classic version).
Substitution Guidance: Need a vegan option? Aquafaba (the liquid from a can of chickpeas) works surprisingly well here—use 3 tablespoons per egg white. The texture won’t be quite as crisp, but the ghosts will still hold their shape. For a lower-sugar version, try using monk fruit sweetener blended with a bit of cornstarch, though the texture will be slightly softer.
Brand Preferences: I’ve tested this with several brands and consistently get the best results with Bob’s Red Mill cream of tartar and Ghirardelli dark chocolate chips for decorating. The chocolate melts smoothly and sets firmly, which matters when you’re drawing tiny ghost eyes.
Equipment Needed
You don’t need a professional pastry kitchen to make these ghost-shaped meringue cookies for Halloween, but a few key tools make the process infinitely easier.
- Stand mixer or hand mixer – Whipping meringue by hand is possible but exhausting. I’ve done it exactly once and regretted every second. A stand mixer with the whisk attachment is ideal.
- Large mixing bowl – Make sure it’s completely clean and dry. Any trace of grease will prevent the egg whites from whipping properly.
- Piping bag with a star tip – I use a Wilton 1M tip for that classic ghost shape. If you don’t have a piping bag, a zip-top bag with the corner snipped works in a pinch.
- Baking sheet lined with parchment paper – Silicone mats work too, but parchment gives a slightly crisper bottom.
- Small piping bag or toothpick – For drawing the ghost faces with melted chocolate.
- Cooling rack – Essential for letting the ghosts cool completely before decorating.
Budget-Friendly Alternatives: No piping bag? Use a sturdy zip-top bag and cut a small hole in one corner. The shapes won’t be as defined, but they’ll still look adorable. No stand mixer? A hand mixer works fine—just be prepared to hold it for a solid 8-10 minutes while the meringue whips.
Maintenance Tip: Wash your whisk attachment and bowl with hot, soapy water before starting, then dry thoroughly. A tiny bit of oil residue can sabotage your entire batch. I keep a separate bowl specifically for meringue-making to avoid this issue.
Preparation Method
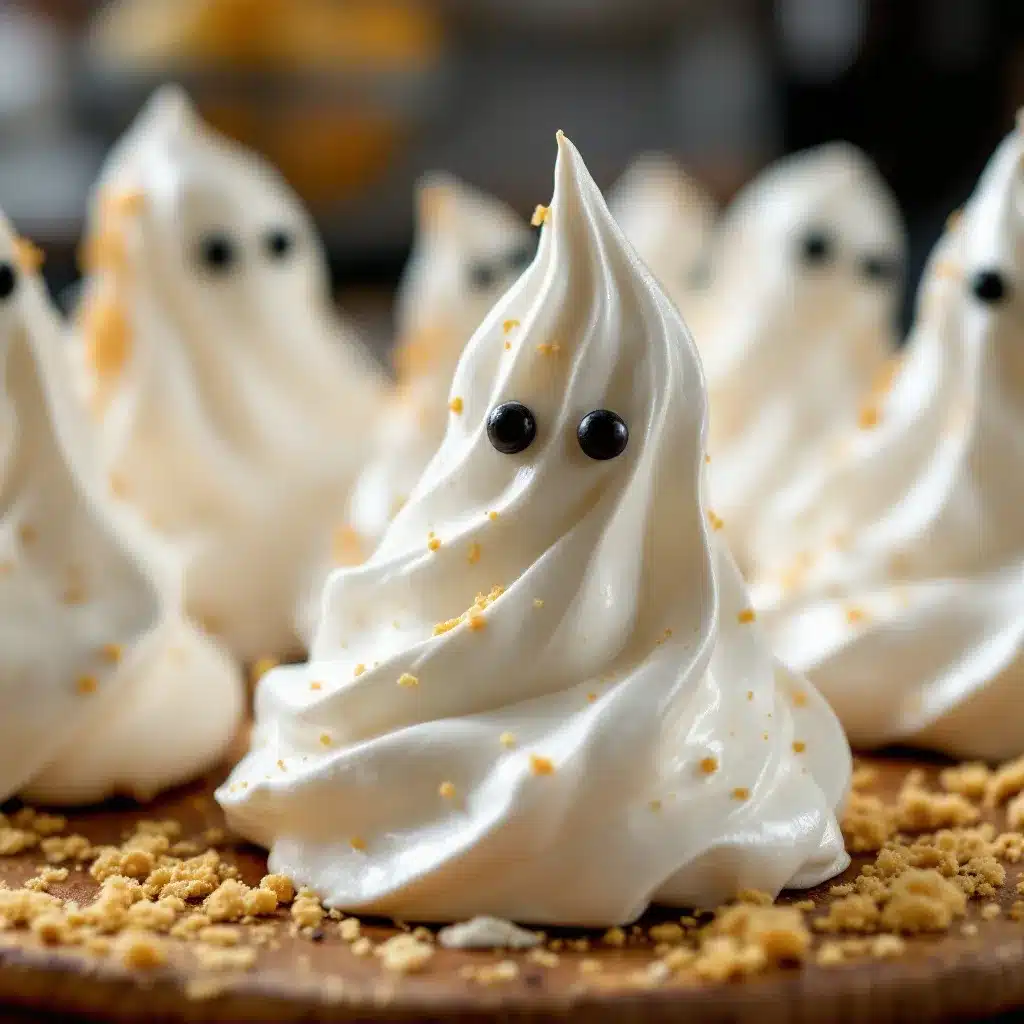
This is where the magic happens. Follow these steps carefully, and you’ll have the most adorable ghost-shaped meringue cookies for Halloween that actually taste as good as they look.
- Preheat your oven to 200°F (93°C). Line two baking sheets with parchment paper. The low temperature is critical—we’re drying the meringues, not baking them. Any hotter and they’ll brown and crack.
- Separate your eggs while cold, then let the whites come to room temperature. Cold egg whites don’t whip as high. I usually separate them, cover the bowl, and let them sit on the counter for about 30 minutes. Pro tip: save the yolks for a batch of creamy lemon ricotta pasta later in the week.
- Add cream of tartar and salt to the egg whites. Start whipping on medium speed until foamy—about 2 minutes. You’ll see bubbles forming, and the mixture will look like sea foam.
- Gradually add the sugar, one tablespoon at a time. This is the most important step. If you dump all the sugar in at once, the meringue will deflate. I set a timer for 5 minutes and add a spoonful every 15 seconds. Keep whipping on medium-high speed.
- Add the vanilla extract. Once all the sugar is incorporated and the meringue looks glossy, drizzle in the vanilla. Continue whipping for another 2-3 minutes.
- Test for stiff peaks. Stop the mixer and lift the whisk attachment. The meringue should stand up straight without drooping. If it flops over, keep whipping. The mixture should also feel smooth between your fingers—no graininess from undissolved sugar.
- Transfer the meringue to a piping bag fitted with a star tip. Fill it about halfway to avoid overflow. Twist the top of the bag to seal it.
- Pipe ghost shapes onto the prepared baking sheets. Hold the piping bag perpendicular to the sheet, about 1/2 inch above the surface. Squeeze gently to form a round base, then lift straight up while reducing pressure to create a pointed top. Release pressure and pull away quickly. Space them about 2 inches apart—they don’t spread much, but they need airflow.
- Bake for 90 minutes. Yes, 90 minutes. This seems excessive, but it’s what gives them that perfectly crisp texture. Rotate the pans halfway through for even drying.
- Turn off the oven and let the ghosts cool inside for 1 hour. This prevents cracking from sudden temperature changes. The meringues should easily lift off the parchment when done—if they stick, they need more time.
- Melt the dark chocolate chips. Microwave in 15-second intervals, stirring between each, until smooth. Transfer to a small piping bag or zip-top bag with a tiny hole snipped in the corner.
- Draw faces on the cooled ghosts. I start with two tiny dots for eyes and a small oval for the mouth. Some ghosts get surprised expressions, others look mischievous. Let the chocolate set for about 15 minutes at room temperature.
Sensory Cue: When the meringue is properly whipped, it should feel like marshmallow fluff—light, airy, and slightly sticky. If it looks grainy or separates, you’ve over-whipped it. Start fresh if that happens.
Troubleshooting Tip: If your ghosts spread into flat blobs instead of holding their shape, the meringue was under-whipped. Next time, whip until the mixture is so stiff it almost feels difficult to pipe. You want it to hold its shape like soft clay.
Cooking Tips & Techniques
After making these ghost-shaped meringue cookies for Halloween more times than I’d like to admit, I’ve collected a few hard-won lessons that will save you from my early mistakes.
Humidity is your enemy. Meringue is essentially sugar and protein foam, and moisture destroys its structure. Don’t make these on a rainy day—I tried once and ended up with sticky, chewy ghosts that refused to crisp up. If you must bake on a humid day, add an extra 15 minutes to the drying time in the oven.
Room temperature eggs aren’t optional. I know it’s tempting to use cold eggs straight from the fridge, but trust me on this. Cold egg whites produce a denser, less stable meringue that doesn’t pipe as cleanly. Set your eggs out 30 minutes before starting, or place them in a bowl of warm water for 5 minutes.
Don’t open the oven door. I know you want to peek. Resist the urge. Opening the door lets in cool air and moisture, which can cause your ghosts to crack or deflate. Use the oven light to check on them if you must.
Multitasking strategy: While the meringues are baking, use that time to prep other Halloween treats. I often make a batch of crispy baked buffalo cauliflower bites for a savory contrast to the sweet ghosts. The oven temperatures work well together—just make sure to stagger the timing.
Storage secret: Once completely cool and decorated, store these in an airtight container at room temperature. Never refrigerate them—the moisture will ruin their crisp texture. They’ll stay fresh for up to two weeks, though I’ve never had them last that long.
My biggest failure: The time I forgot to add cream of tartar. The meringue never stiffened properly, and my ghosts looked like sad, flat pancakes. Don’t skip it—that little ingredient is what gives meringue its structural integrity.
Variations & Adaptations
One of the best things about these ghost-shaped meringue cookies for Halloween is how easily they adapt to different tastes and dietary needs. Here are a few variations I’ve tried and loved.
Chocolate Ghosts: Swap 2 tablespoons of the granulated sugar for unsweetened cocoa powder. Sift it together with the sugar before adding to the egg whites. The result is a subtle chocolate flavor with a pale brown color—perfect for “dirty” ghosts that look like they’ve been playing in the dirt.
Berry Ghosts: Add 1/4 cup freeze-dried strawberry powder (just blitz freeze-dried strawberries in a food processor) along with the sugar. The meringues turn a lovely pale pink, and the strawberry flavor is intense and natural. My kids went absolutely crazy for these.
Peppermint Ghosts: Replace the vanilla extract with 1/2 teaspoon peppermint extract. For extra flair, crush a few candy canes and sprinkle the pieces over the ghosts before baking. The peppermint pairs beautifully with the dark chocolate faces.
Vegan Version: Replace each egg white with 3 tablespoons of aquafaba (the liquid from canned chickpeas). Whip it exactly as you would egg whites, though it may take a minute or two longer to reach stiff peaks. The texture is slightly less crisp but still delicious.
Air Fryer Method: If you’re short on time, pipe the ghosts onto parchment circles that fit your air fryer basket. Cook at 200°F for 30-35 minutes, checking frequently. The air fryer’s convection heat dries them faster, but you’ll need to work in batches.
My personal favorite variation: I made a batch with lavender extract and a tiny drop of purple food coloring for a “haunted lavender field” vibe. The floral notes are subtle but sophisticated—perfect for an adults-only Halloween party. Just be careful with the extract; a little goes a long way.
Serving & Storage Suggestions
These ghost-shaped meringue cookies for Halloween are best served at room temperature, straight from the container. They’re light, airy, and practically melt in your mouth—perfect for snacking while watching a scary movie.
Presentation Ideas: Arrange the ghosts on a black serving platter for maximum spooky effect. Add a few fake spiderwebs or plastic spiders around the edges for a theatrical touch. For a Halloween party, I like to place them in a glass jar with a “Ghosts for Sale” label tied around the neck.
Complementary Dishes: These pair beautifully with a warm mug of creamy iced lavender oat milk latte for a cozy autumn afternoon. For a full Halloween spread, serve them alongside a batch of creamy slow cooker queso blanco dip for a sweet-and-savory balance that guests will love.
Storage Instructions: Store in an airtight container at room temperature for up to 2 weeks. Layer them between sheets of parchment paper to prevent the chocolate faces from smudging. Do not refrigerate—the moisture will make them sticky and soft.
Freezer Option: You can freeze undecorated meringues for up to 3 months. Place them in a single layer in a freezer-safe container with parchment between layers. Thaw at room temperature for about 30 minutes before decorating and serving. The texture remains surprisingly good.
Flavor Development: Interestingly, these ghosts actually taste better after a day or two. The flavors meld together, and the texture becomes even more crisp. If you can resist eating them all immediately, they’ll reward your patience.
Nutritional Information & Benefits
Per serving (2 ghosts): approximately 85 calories, 0g fat, 20g carbohydrates, 1g protein, 19g sugar. These numbers are estimates and will vary based on exact ingredients and portion sizes.
Health Benefits: While these are definitely a treat, they’re lower in calories than most cookies because they contain no butter or oil. The egg whites provide a small amount of protein, and the dark chocolate offers antioxidants. Plus, they’re naturally gluten-free and dairy-free, making them accessible to many dietary needs.
Dietary Considerations: These ghosts are naturally gluten-free, dairy-free, and nut-free (as written). For a vegan version, use aquafaba. For a lower-sugar option, try a monk fruit-based sweetener blend, though the texture will be slightly softer.
Potential Allergens: Eggs are the primary allergen here. The dark chocolate may contain traces of milk or soy depending on the brand. Always check labels if serving to guests with allergies.
Personal Wellness Perspective: I believe in balance—these ghosts are a celebration treat, not an everyday snack. They’re perfect for Halloween parties, movie nights, or whenever you need a little whimsy in your life. Enjoy them mindfully and without guilt.
Conclusion
These crispy ghost-shaped meringue cookies for Halloween have become a tradition in my kitchen, and I hope they become one in yours too. They’re surprisingly simple to make, endlessly customizable, and guaranteed to bring smiles to faces both young and old. Whether you’re hosting a Halloween party, looking for a fun baking project with kids, or just want to treat yourself to something light and sweet, these ghosts deliver.
I encourage you to make them your own—try different extracts, experiment with colors, and let each ghost develop its own personality. That’s the beauty of this recipe; it’s forgiving enough for beginners but rewarding enough for experienced bakers.
If you make these, I’d love to hear about it. Drop a comment below with your favorite variation, share a photo of your ghost creations, or tag me on social media. Happy Halloween baking, and may your ghosts be perfectly crisp and delightfully spooky!
Frequently Asked Questions
Why did my meringue ghosts turn out chewy instead of crispy?
Chewy meringues usually mean they weren’t baked long enough. The low temperature (200°F) and long baking time (90 minutes) are essential for drying them out completely. If they’re still chewy, pop them back in the oven for another 15-20 minutes. Also check that you stored them in an airtight container—moisture from the air can soften them.
Can I make these ghost-shaped meringue cookies for Halloween without a piping bag?
Absolutely! Use a sturdy zip-top bag with one corner snipped off. The shapes won’t be as defined, but they’ll still look adorable. You can also use a spoon to drop small dollops of meringue onto the baking sheet, then gently shape them into ghost forms with the back of the spoon.
How do I get the ghost faces to look perfect?
Practice makes perfect, but here’s a trick: use a toothpick dipped in melted chocolate to draw the faces instead of a piping bag. You’ll have more control over the tiny details. Start with simple dots for eyes and a small oval for the mouth—you can always add more details later.
Can I color the meringue ghosts different colors?
Yes! Use gel food coloring (not liquid, which adds too much moisture) and fold it in gently after the meringue reaches stiff peaks. For Halloween, try orange, purple, or green ghosts. Just be careful not to overmix or you’ll deflate the meringue.
Why did my meringue ghosts deflate after piping?
This usually happens when the meringue is under-whipped. Make sure you whip until stiff peaks form—the mixture should hold its shape firmly when you lift the whisk. Also, make sure your bowl and whisk are completely clean and dry; any trace of grease will prevent the egg whites from whipping properly.
Pin This Recipe!
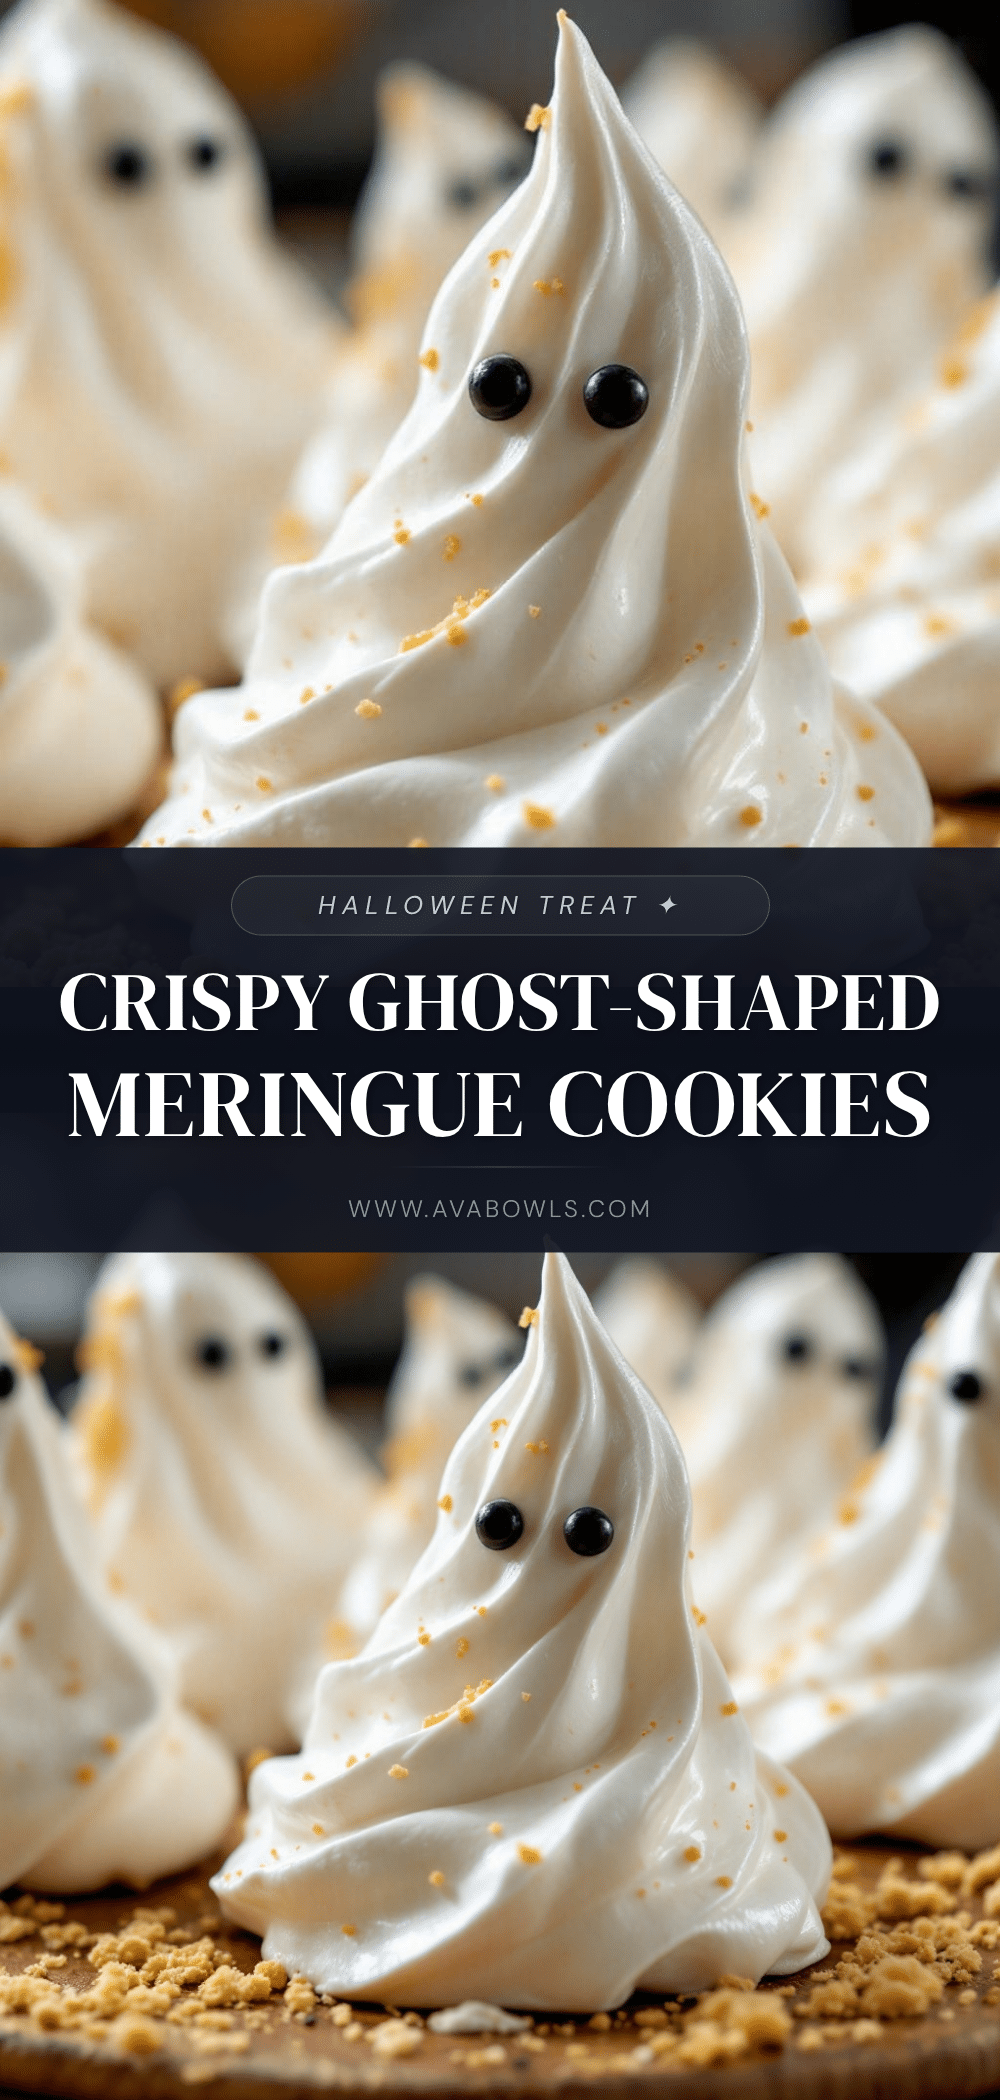
Crispy Ghost-Shaped Meringue Cookies: Best Easy Halloween Treat
These ghost-shaped meringue cookies for Halloween are light, airy, and perfectly crisp with a marshmallowy center. Made with simple ingredients, they’re naturally gluten-free and endlessly customizable with different faces and flavors.
- Prep Time: 30 minutes
- Cook Time: 90 minutes
- Total Time: 2 hours 30 minutes
- Yield: 24 servings 1x
- Category: Dessert
- Cuisine: American
Ingredients
- 4 large egg whites, room temperature (about 120 grams)
- 1 cup granulated sugar (200 grams)
- 1 teaspoon vanilla extract (pure)
- 1/4 teaspoon cream of tartar
- Pinch of salt
- 1/4 cup dark chocolate chips (about 45 grams)
- Optional: 1/2 teaspoon almond extract
Instructions
- Preheat your oven to 200°F (93°C). Line two baking sheets with parchment paper.
- Separate your eggs while cold, then let the whites come to room temperature (about 30 minutes).
- Add cream of tartar and salt to the egg whites. Start whipping on medium speed until foamy—about 2 minutes.
- Gradually add the sugar, one tablespoon at a time, while whipping on medium-high speed. Set a timer for 5 minutes and add a spoonful every 15 seconds.
- Add the vanilla extract once all sugar is incorporated and the meringue looks glossy. Continue whipping for another 2-3 minutes.
- Test for stiff peaks: lift the whisk attachment—the meringue should stand up straight without drooping. The mixture should feel smooth between your fingers with no graininess.
- Transfer the meringue to a piping bag fitted with a star tip. Fill it about halfway and twist the top to seal.
- Pipe ghost shapes onto the prepared baking sheets: hold the piping bag perpendicular to the sheet, about 1/2 inch above the surface. Squeeze gently to form a round base, then lift straight up while reducing pressure to create a pointed top. Space them about 2 inches apart.
- Bake for 90 minutes, rotating the pans halfway through for even drying.
- Turn off the oven and let the ghosts cool inside for 1 hour to prevent cracking.
- Melt the dark chocolate chips in the microwave in 15-second intervals, stirring between each, until smooth. Transfer to a small piping bag or zip-top bag with a tiny hole snipped in the corner.
- Draw faces on the cooled ghosts with the melted chocolate. Let the chocolate set for about 15 minutes at room temperature.
Notes
Humidity is your enemy—don’t make these on a rainy day. Room temperature eggs are essential for proper whipping. Don’t open the oven door during baking. Store in an airtight container at room temperature for up to 2 weeks; do not refrigerate. For vegan version, use aquafaba (3 tablespoons per egg white).
Nutrition
- Serving Size: 2 ghosts
- Calories: 85
- Sugar: 19
- Sodium: 20
- Carbohydrates: 20
- Protein: 1
Keywords: Halloween cookies, meringue cookies, ghost cookies, gluten-free cookies, easy Halloween treats, meringue ghosts


