My buddy Dave took one bite, stopped mid-sentence, and just pointed at the plate with his eyes wide open. That was the third one he’d grabbed in about four minutes, and honestly, I lost count after that. We were huddled around a folding table in his driveway before the big game, and these little bites were disappearing faster than I could pull them from the oven. I’d been tinkering with the recipe all week, trying to get that perfect ratio of creamy, spicy, crunchy, and salty. Seeing Dave—a man who rarely gets excited about anything that isn’t a touchdown—completely speechless over a jalapeno popper bite? That felt like a win before the game even started.
The thing about a good tailgate appetizer is that it has to do a lot of things at once. It needs to be sturdy enough to hold up on a paper plate. It needs to be easy to eat while standing up and holding a drink. And it really, really needs to be the kind of thing people remember. These crispy bacon-wrapped jalapeno popper bites check every single box. They’ve got that familiar, creamy, cheesy filling you love from a classic popper, but wrapping them in bacon and baking them until they’re shatteringly crisp takes them to a whole new level. It’s not just another dip or a tray of wings. It’s the appetizer that makes people hover around the table.
I’ve made these for everything from casual Sunday football to a big playoff watch party, and they never fail. The smell of bacon and roasting jalapenos alone is enough to pull people away from the TV. And when you bite through that crispy bacon into the cool, creamy filling, followed by the little kick of heat from the pepper? It’s a perfect bite. Honestly, this is the kind of recipe you’ll keep coming back to, not just for game day, but for any time you need a guaranteed crowd-pleaser. Let’s get into it.
Why You’ll Love This Recipe
These aren’t your average poppers. I’ve tested this method a dozen times to make sure the bacon gets perfectly crispy without the filling turning into a mess. It’s a balance of technique and simple ingredients that just works.
- Game-Day Perfect: These bites are built for a crowd. They’re easy to grab, they don’t need a fork, and they stay delicious for a good while on a buffet table.
- Simple Ingredients: You don’t need any fancy grocery store finds. Cream cheese, jalapenos, bacon, and a few pantry staples are all it takes.
- Customizable Heat: You control the spice level. Leave the ribs and seeds in for a fiery kick, or scrape them clean for a milder, more approachable bite.
- Unbelievably Crispy: The secret is in the par-baking. We start the bacon in the oven before wrapping it, so it renders fat and gets a head start on crisping. No flabby bacon here.
- Crowd-Pleaser: I’ve yet to meet someone who doesn’t love these. They’re the first thing to vanish at any party, and people always ask for the recipe.
What makes this version different? It’s the texture. So many popper recipes end up with bacon that’s either undercooked or burnt on the edges while the filling is still cold. By par-baking the bacon strips, you ensure they’re already on their way to crispy before they even hit the pepper. This means the whole thing finishes in the oven at the same time, giving you a perfectly crisp exterior and a warm, gooey center. It’s a small step that makes a huge difference.
There’s a reason these are my go-to for any tailgate. It’s the kind of food that brings people together. You see someone grab one, close their eyes for a second, and then reach for another. It’s comfort food at its most shareable—salty, creamy, spicy, and completely satisfying. Whether you’re hosting a big party or just want a snack that feels special, these bites deliver every single time.
What Ingredients You Will Need
This recipe uses a handful of simple ingredients to create something truly special. Here’s what you’ll need and a few notes on how to pick the best ones.
For the Poppers:
- Fresh Jalapenos (12-15): Look for firm, dark green peppers with smooth skin. The size matters here—try to pick ones that are relatively straight and about 3-4 inches long, as they’re easier to stuff and wrap evenly.
- 8 oz Cream Cheese, softened: Full-fat cream cheese gives the richest, creamiest texture. Let it sit on the counter for about 30 minutes before you start mixing, or pop it in the microwave for 10-15 seconds to soften it up.
- 1 cup Sharp Cheddar Cheese, shredded: I prefer sharp cheddar for its bold flavor, but you can use a Mexican blend or pepper jack for extra heat. Shred it yourself from a block—it melts so much better than the pre-shredded stuff.
- 1 lb Thin-Cut Bacon: This is important. Thin-cut bacon crisps up much faster and more evenly than thick-cut, which can stay chewy. I like Wright Brand or Oscar Mayer for consistency.
- 2-3 Green Onions, thinly sliced: They add a fresh, mild onion flavor that cuts through the richness of the cheese and bacon.
- ½ teaspoon Garlic Powder: For a subtle savory depth. Don’t use garlic salt, as the bacon and cheese are already plenty salty.
- ¼ teaspoon Black Pepper: Just a pinch to balance the flavors.
For the Dipping Sauce (Optional but Recommended):
- ½ cup Sour Cream or Greek Yogurt: This provides a cool, tangy base that’s perfect for balancing the heat.
- 1 tablespoon Ranch Dressing Mix: You can use a packet or make your own blend. It adds that classic savory, herby flavor.
- 1 tablespoon Fresh Lime Juice: A little brightness goes a long way.
When you’re shopping for jalapenos, give them a gentle squeeze. They should be firm, not soft or wrinkly. If you’re worried about the heat level, you can mix in a few mini sweet peppers for the folks who prefer zero spice. I’ve done that before, and they disappear just as fast. For the cream cheese, Philadelphia is my go-to, but any block-style cream cheese works great. Avoid the whipped kind, as it has too much air and won’t give you that dense, creamy filling.
Equipment Needed
You don’t need a ton of fancy tools for this recipe, which is part of its beauty. Here’s what you’ll need to have on hand:
- Baking Sheet: A standard half-sheet pan works perfectly. Line it with parchment paper or aluminum foil for easy cleanup.
- Wire Rack: This is a game-changer. Placing a wire rack on your baking sheet allows air to circulate around the poppers, helping the bacon get crispy on all sides. If you don’t have one, you can still make these, but you’ll want to flip them halfway through.
- Small Mixing Bowl: For combining the cream cheese, cheddar, green onions, and spices.
- Sharp Knife and Cutting Board: You’ll need a good knife to slice the jalapenos in half and a sturdy cutting board to work on.
- Small Spoon or Butter Knife: For scooping out the jalapeno seeds and ribs, and for stuffing the filling.
- Kitchen Shears (optional): These make cutting the bacon strips in half a breeze. A knife works just fine, too.
- Toothpicks (optional): If your bacon strips are a little short, you can secure them with a toothpick. I usually don’t need them, but they’re good to have on hand just in case.
I’ve made these without a wire rack before, and they still came out great. You just have to be a little more careful. If you don’t have one, bake the poppers for 15 minutes, then carefully flip each one over with tongs and bake for another 10-15 minutes. It works, but the rack method is definitely easier and gives you a more even crisp. A good, sturdy baking sheet is worth its weight in gold for recipes like this, too.
Preparation Method
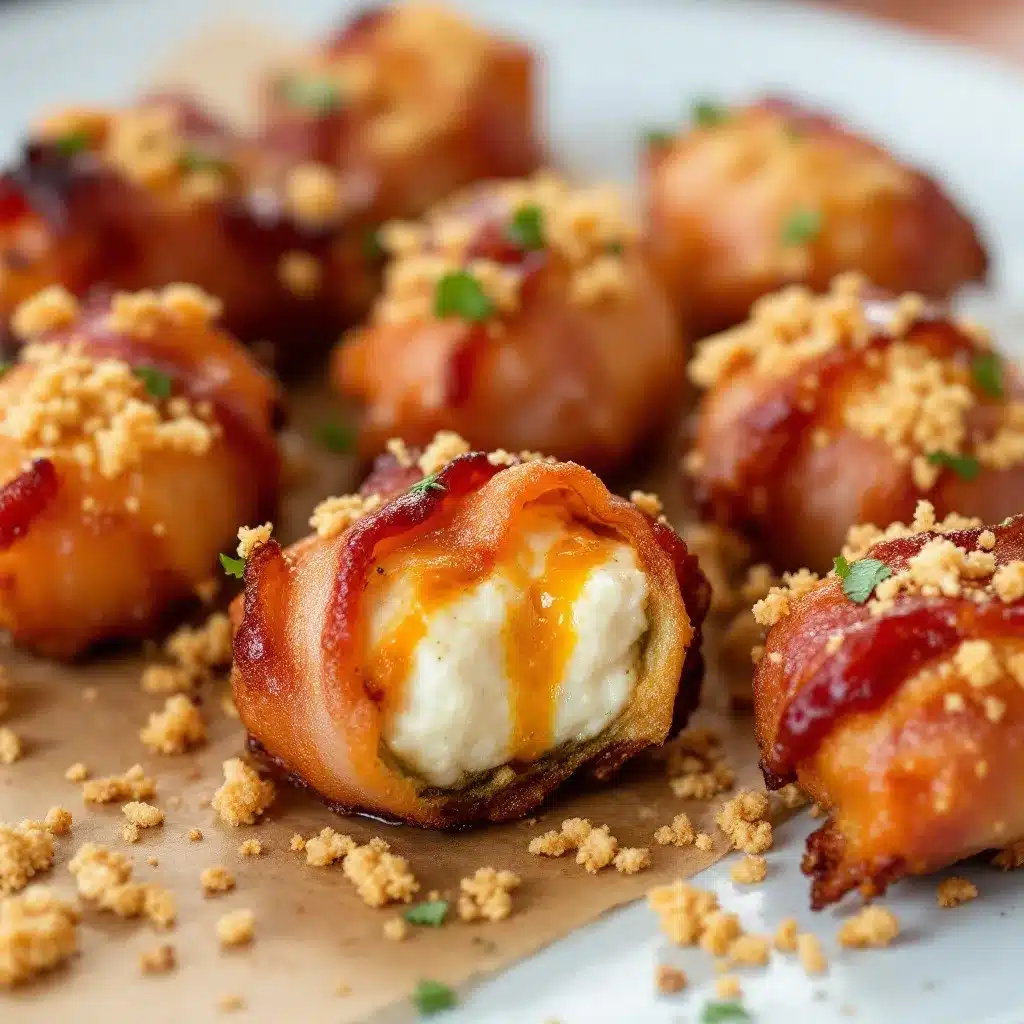
Alright, let’s get cooking. This method ensures perfectly crispy, cheesy, spicy bites every single time. Follow these steps, and you’ll be the tailgate hero.
Step 1: Prep the Bacon (The Secret Step)
Preheat your oven to 400°F (200°C). Line a baking sheet with parchment paper and lay out your bacon strips in a single layer. Don’t let them overlap. Bake for 10-12 minutes, until the bacon is just starting to turn golden but is still very pliable. You want it to have rendered some fat but not be crispy yet. Remove from the oven and let it cool on a paper towel-lined plate. This par-baking step is the key to getting that perfectly crisp bacon without overcooking the peppers. Once cool, cut each strip in half crosswise.
Step 2: Prepare the Jalapenos
While the bacon is cooling, put on some disposable gloves (trust me on this). Slice each jalapeno in half lengthwise. Use a small spoon to carefully scrape out the white ribs and seeds. If you like things spicy, leave a few seeds in. For a milder bite, get them all out. Rinse the jalapeno halves under cold water to remove any stray seeds, then pat them dry with a paper towel. Dry peppers help the filling stick better.
Step 3: Make the Filling
In your small mixing bowl, combine the softened cream cheese, shredded cheddar, sliced green onions, garlic powder, and black pepper. Mix everything together until it’s smooth and well-combined. Give it a taste—you can add a little more garlic powder or a pinch of salt if you like, but remember the bacon is salty, so go easy.
Step 4: Stuff the Poppers
Take a jalapeno half and fill it generously with the cream cheese mixture. Don’t be shy—you want a nice mound of filling that sits slightly above the edge of the pepper. A small spoon or a butter knife works great for this. Repeat until all the jalapeno halves are filled.
Step 5: Wrap in Bacon
Now for the fun part. Take a half-strip of your par-baked bacon and wrap it tightly around the center of a stuffed jalapeno half. The bacon should hold itself in place, but if it feels loose, you can secure it with a toothpick. Place the wrapped popper on your wire rack set over a baking sheet, seam-side down. Repeat for all the poppers.
Step 6: Bake to Crispy Perfection
Bake the poppers at 400°F (200°C) for 20-25 minutes, or until the bacon is deeply golden and crispy and the filling is hot and bubbly. The bacon will shrink and tighten around the pepper as it cooks. You’ll know they’re done when the edges of the bacon look dark and crunchy.
Step 7: Make the Dipping Sauce (Optional)
While the poppers are baking, whisk together the sour cream, ranch dressing mix, and lime juice in a small bowl. Pop it in the fridge to let the flavors meld.
Step 8: Cool and Serve
Let the poppers cool on the wire rack for about 5 minutes before serving. They are molten hot inside! Serve them warm with the cool, creamy dipping sauce on the side. Watch them disappear.
Cooking Tips & Techniques
I’ve made a few batches of these that didn’t turn out perfectly, so let me save you the trouble. Here are the things I’ve learned the hard way.
Don’t Skip Par-Baking the Bacon. This is the single most important tip. If you wrap raw bacon around a stuffed jalapeno and bake it, the bacon will take too long to crisp up. By the time it’s done, the pepper will be mushy and the filling might be overcooked. Par-baking gives the bacon a head start, so everything finishes at the same time.
Dry Your Peppers Thoroughly. After you rinse the jalapenos, make sure you pat them bone-dry with a paper towel. Any leftover water will create steam in the oven, which can make the bacon soggy and prevent it from crisping up. Same goes for the cream cheese—make sure it’s softened but not watery.
Use a Wire Rack. I know it’s an extra thing to wash, but it really does make a difference. The wire rack lifts the poppers off the baking sheet, allowing hot air to circulate all around them. This means the bacon gets crispy on the bottom, not just the top. If you don’t have one, flipping them halfway through is a decent alternative.
Watch Your Oven. Every oven runs a little differently. The first time I made these, I walked away for a few minutes and came back to bacon that was a little too dark on one side. Start checking them at the 18-minute mark. You’re looking for a deep golden brown, not burnt.
Let Them Rest. I know it’s hard to wait, but let the poppers sit on the rack for 5 minutes after they come out of the oven. The filling is essentially molten cheese, and biting into one too soon can burn your mouth. That brief rest also helps the bacon set and become even crispier.
Variations & Adaptations
This recipe is a fantastic base, and it’s easy to tweak it to fit your mood or your guests’ preferences. Here are a few ways I’ve changed it up.
Spicy Sausage Poppers: Add ½ cup of cooked and crumbled spicy breakfast sausage or chorizo to the cream cheese filling. It adds a whole new layer of savory flavor and makes them even more substantial. This is my go-to for a big game where people are hungry.
Smoky Poppers: Swap the regular bacon for thick-cut smoked bacon. The smokiness pairs incredibly well with the jalapeno and cheese. Just remember, if you use thick-cut bacon, you might need to par-bake it a little longer (about 15 minutes) and bake the finished poppers for a few extra minutes.
Milder Version: For guests who don’t love heat, you can use mini sweet bell peppers in place of some or all of the jalapenos. They have a great crunch and sweetness that works beautifully with the bacon and cheese. I usually do a mix of half jalapenos and half sweet peppers, so everyone is happy.
Air Fryer Method: You can absolutely make these in an air fryer. Preheat your air fryer to 375°F (190°C). Place the poppers in a single layer in the basket (you may need to work in batches). Cook for 10-12 minutes, flipping halfway through, until the bacon is crispy. The air fryer does a fantastic job of getting everything evenly crisp.
Buffalo Style: After baking, toss the poppers in a little buffalo sauce. Serve them with a side of blue cheese or ranch dressing for dipping. It’s a fun twist that combines two classic game-day flavors into one bite.
Serving & Storage Suggestions
These poppers are best served hot and fresh from the oven, but they’re still pretty great at room temperature for a little while. Here’s how to handle them.
Serving: Arrange the warm poppers on a large platter. I like to put the dipping sauce in a small bowl right in the center. A sprinkle of fresh, sliced green onions or a little crumbled bacon on top of the sauce makes it look extra nice. They pair perfectly with other tailgate classics like creamy slow cooker queso blanco dip or a platter of savory Philly cheesesteak sliders for a full spread.
Storage: If you have leftovers (which is rare), let them cool completely. Store them in an airtight container in the refrigerator for up to 3 days. The bacon will lose some of its crispiness, but the flavor will still be fantastic.
Reheating: The best way to reheat them is in the oven or air fryer. For the oven, place them on a wire rack over a baking sheet at 350°F (175°C) for 8-10 minutes. For the air fryer, reheat at 350°F for 3-4 minutes. Avoid the microwave, as it will make the bacon soggy and the filling rubbery.
Nutritional Information & Benefits
I’ll be honest: these are a treat, not a health food. But they’re made with real, whole ingredients, and that counts for something. Here’s a rough estimate per popper, assuming you get about 24 from the recipe.
- Calories: ~120-150
- Fat: 10-12g
- Protein: 5-6g
- Carbohydrates: 2-3g
- Fiber: 0.5g
The jalapenos themselves are a great source of vitamin C and capsaicin, which can give your metabolism a little boost. The cream cheese and cheddar provide calcium and protein. And hey, if you’re using fresh Greek yogurt veggie dip as your base for the dipping sauce, you’re getting a little extra protein and probiotics. It’s all about balance, right? Enjoy these as part of a fun game-day spread, and don’t overthink it.
Conclusion
These crispy bacon-wrapped jalapeno popper bites are the real deal. They have everything you want from a tailgate appetizer: they’re easy to make, they’re incredibly flavorful, and they’re the kind of thing people talk about long after the game is over. The combination of cool, creamy cheese, spicy pepper, and salty, crunchy bacon is just unbeatable.
I love making these because they feel like a little bit of a secret weapon. They look impressive, but they’re so simple to put together. And honestly, watching someone take their first bite and get that look of surprise and delight is one of my favorite things. It’s a small moment of joy that you created with your own two hands.
So give them a try for your next tailgate, party, or just a fun weekend snack. Play around with the fillings and the heat level to make them your own. And when you do, I’d love to hear about it. Drop a comment below and tell me how they turned out, or share a photo of your spread. Until next time, happy cooking, and go team!
Frequently Asked Questions
Can I make these ahead of time?
Absolutely. You can assemble the poppers completely (stuff and wrap them in bacon) up to 24 hours in advance. Store them on the wire rack in the refrigerator, covered loosely with plastic wrap. When you’re ready to serve, just pop them in the oven. You may need to add 5-7 minutes to the baking time since they’ll be starting cold.
How do I keep the bacon from unrolling?
The par-baking step helps a lot, as the bacon becomes more pliable and less likely to shrink unevenly. If you’re still having trouble, secure the bacon with a toothpick. Just remember to tell your guests to remove the toothpicks before eating! You can also try wrapping the bacon a little tighter, seam-side down on the rack.
Can I use a different type of cheese?
Yes! Cream cheese is the non-negotiable base for that creamy texture, but you can swap the cheddar for other melting cheeses. Pepper jack adds more heat, monterey jack is mild and melty, and smoked gouda gives a wonderful smoky flavor. A mix of cheddar and monterey jack is also a fantastic choice.
My bacon is crispy, but the peppers are still hard. What went wrong?
This usually happens if the jalapenos are very large or if the oven temperature is too high. Make sure you’re using medium-sized peppers. Also, ensure your oven is at a steady 400°F (200°C). If the bacon is browning too fast, you can tent the poppers loosely with foil for the last 5-10 minutes of baking to let the peppers soften without burning the bacon.
What can I serve with these for a full tailgate menu?
These poppers are a star on their own, but they pair beautifully with other finger foods. A big batch of loaded nachos supreme is always a hit, and a creamy beer cheese pretzel dip alongside some soft pretzels rounds out the spread perfectly. Don’t forget the drinks!
Pin This Recipe!
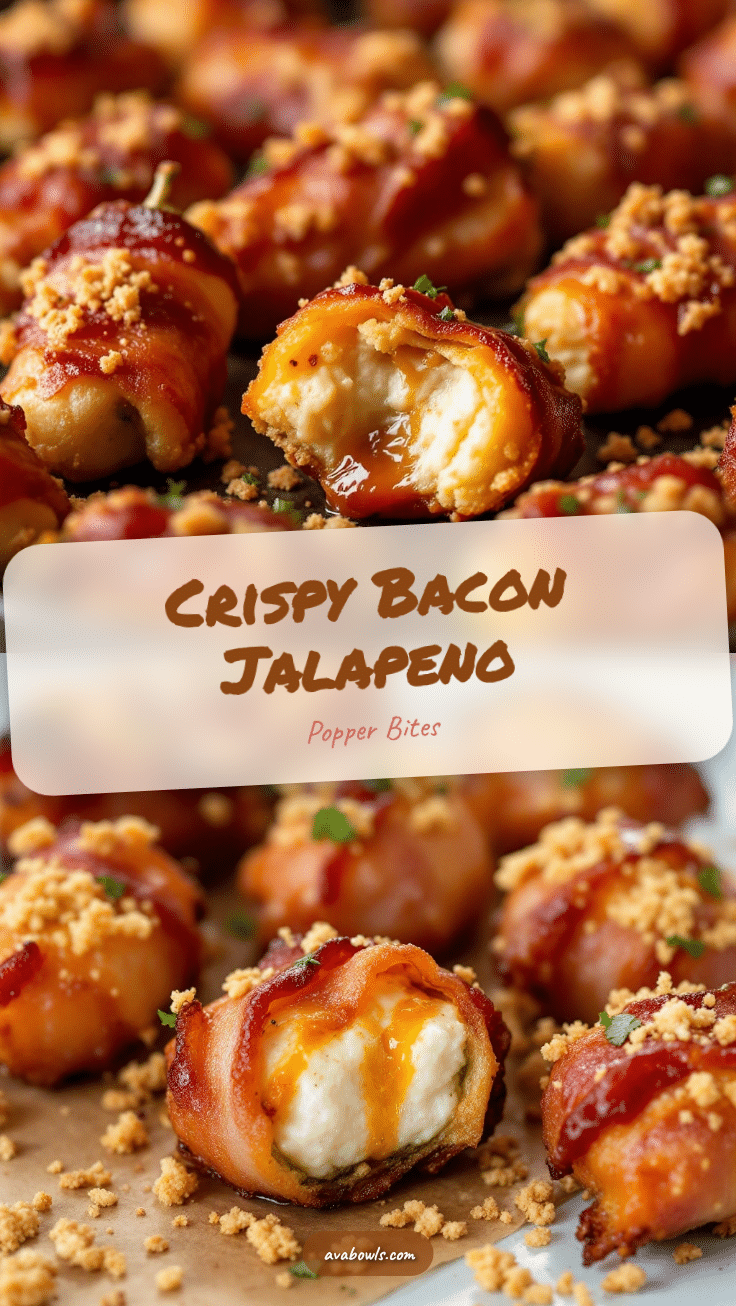
Crispy Bacon-Wrapped Jalapeno Popper Bites: The Best Tailgate Appetizer

These crispy bacon-wrapped jalapeno popper bites are the ultimate tailgate appetizer, featuring a creamy, cheesy filling wrapped in perfectly crispy bacon. They’re easy to make, customizable in heat, and guaranteed to disappear fast at any party.
- Prep Time: 20 minutes
- Cook Time: 30 minutes
- Total Time: 50 minutes
- Yield: 24 servings 1x
- Category: Appetizer
- Cuisine: American
Ingredients
- 12–15 fresh jalapenos, halved lengthwise and seeded
- 8 oz cream cheese, softened
- 1 cup sharp cheddar cheese, shredded
- 1 lb thin-cut bacon, halved crosswise
- 2–3 green onions, thinly sliced
- 1/2 teaspoon garlic powder
- 1/4 teaspoon black pepper
- 1/2 cup sour cream or Greek yogurt (for dipping sauce)
- 1 tablespoon ranch dressing mix (for dipping sauce)
- 1 tablespoon fresh lime juice (for dipping sauce)
Instructions
- Preheat oven to 400°F (200°C). Line a baking sheet with parchment paper. Lay bacon strips in a single layer and bake for 10-12 minutes until just starting to turn golden but still pliable. Remove and let cool on paper towels. Cut each strip in half crosswise.
- Wear disposable gloves. Slice each jalapeno in half lengthwise. Use a small spoon to scrape out ribs and seeds. Rinse under cold water and pat dry thoroughly.
- In a small bowl, combine softened cream cheese, shredded cheddar, sliced green onions, garlic powder, and black pepper. Mix until smooth.
- Fill each jalapeno half generously with the cream cheese mixture, mounding slightly above the edge.
- Wrap a half-strip of par-baked bacon tightly around the center of each stuffed jalapeno half. Place seam-side down on a wire rack set over a baking sheet. Secure with toothpicks if needed.
- Bake at 400°F (200°C) for 20-25 minutes, until bacon is deeply golden and crispy and filling is hot and bubbly.
- While poppers bake, whisk together sour cream, ranch dressing mix, and lime juice for the dipping sauce. Refrigerate until serving.
- Let poppers cool on the wire rack for 5 minutes before serving. Serve warm with dipping sauce.
Notes
Par-baking the bacon is crucial for crispiness. Dry peppers thoroughly to avoid steam. Use a wire rack for even crisping. Let poppers rest 5 minutes before serving to avoid burning. Can be assembled up to 24 hours ahead and refrigerated.
Nutrition
- Serving Size: 1 popper
- Calories: 135
- Sugar: 1
- Sodium: 280
- Fat: 11
- Saturated Fat: 5
- Carbohydrates: 2
- Fiber: 0.5
- Protein: 5
Keywords: jalapeno popper, bacon wrapped, tailgate appetizer, game day snack, crispy bacon, cream cheese, cheddar, spicy appetizer


