Late October, and the only thing I want is these creamy no-bake pumpkin cheesecake bars.
The kitchen light hums. Outside, the wind is doing that thing where it rattles the last leaves against the window screen. I should probably be making something more complicated—something that requires the oven, something that fills the house with that roasted-pumpkin smell everyone posts about. But I’m tired. Not the bad kind of tired. The good kind. The kind where you just want something sweet and cold and easy, and you don’t want to wait for anything to bake, and you definitely don’t want to wash a mixer bowl.
So I pull out the cream cheese to soften. It’s a small carton, not even a full block. I grab the pumpkin puree from the back of the fridge—leftover from something I made last week, the can half-full and covered with foil. It feels like a little win, using it up. I don’t measure perfectly. I never do with this kind of thing. A little more vanilla than the recipe says. A little less sugar because I like the tang of the cream cheese to come through. I press the crust into the pan with my fingers instead of a measuring cup. It’s uneven. I don’t care.
That’s the thing about no-bake desserts. They don’t ask for precision. They ask for patience—just the cold kind, the waiting kind. You make them, you put them in the fridge, and you forget about them for a few hours. Then you remember, and they’re ready. It’s like a quiet gift you left for yourself.
These bars have become my fall anchor. Not the showstopper dessert, not the one I bring to parties. The one I make on a Tuesday night when I need something to look forward to after dinner. The one that doesn’t require the oven because the oven is for roasting vegetables and baking bread and all the other things that feel like work. This is not work. This is a small, cold, creamy reward.
And honestly? They taste like the best parts of fall without any of the fuss.
Why You’ll Love This Recipe
I’ve tested this one about six times. The first batch was too soft. The second was too sweet. The third—well, the third was the one where I stopped tweaking and started eating. Here’s what I learned along the way, and why I think you’ll love it too.
- No oven required. Seriously. No turning on the oven, no waiting for it to preheat, no checking if it’s done. Just a bowl, a spatula, and some fridge space.
- 10 minutes of active work. I timed it. From pulling out the ingredients to pressing the crust into the pan, it took me nine minutes and forty-two seconds. The rest is just refrigeration.
- Simple ingredients. Cream cheese, pumpkin puree, graham crackers, butter, sugar, and spices. That’s it. No gelatin, no eggs, no complicated techniques.
- Perfect for make-ahead. You can make these a day or two before you need them. They actually get better after a full night in the fridge—the flavors meld, the texture firms up perfectly.
- Crowd-pleaser. I brought a batch to a Friendsgiving last year and watched someone eat three pieces before anyone else got a second. They work for holidays, but they also work for a random Tuesday.
- Dietary-friendly. Easily made gluten-free with GF graham crackers. Easily made dairy-free with vegan cream cheese and butter. The pumpkin does most of the heavy lifting anyway.
What makes these different from other pumpkin cheesecake bars I’ve tried is the texture. A lot of no-bake pumpkin desserts turn out either too dense or too soft—like a pudding that can’t quite decide what it wants to be. This one hits that sweet spot. It’s firm enough to slice cleanly but still creamy and almost mousse-like on the tongue. The secret? Draining the pumpkin puree slightly before mixing it in. It sounds fussy, but it takes thirty seconds and makes all the difference.
I also use a touch of maple syrup alongside the brown sugar. Not enough to make it taste like maple, just enough to add a little depth. It rounds out the pumpkin spice without making it taste like a candle.
This is the kind of dessert that makes you close your eyes after the first bite. Not because it’s fancy. Because it’s exactly what you wanted, and you didn’t even have to work for it.
What Ingredients You Will Need
This recipe uses simple, mostly pantry-friendly ingredients. No weird extracts, no specialty flours, no hunting down obscure items at three different stores. Here’s what you’ll need, plus a few notes from my test batches.
For the Crust
- 1 ½ cups graham cracker crumbs (about 12 full sheets, crushed finely). I prefer the honey kind, but plain works too. For a gluten-free version, use certified GF graham crackers—they work exactly the same.
- 6 tablespoons unsalted butter, melted. Salted butter works if that’s what you have—just skip the pinch of salt I normally add. I use salted butter sometimes because I like the contrast with the sweet filling.
- 2 tablespoons granulated sugar. Just enough to give the crust a little sweetness. You can skip this if you’re using sweetened graham crackers, but I like the extra touch.
- ¼ teaspoon salt. Only if using unsalted butter. Trust me on this one—salt in the crust balances the sweetness of the filling.
For the Pumpkin Cheesecake Filling
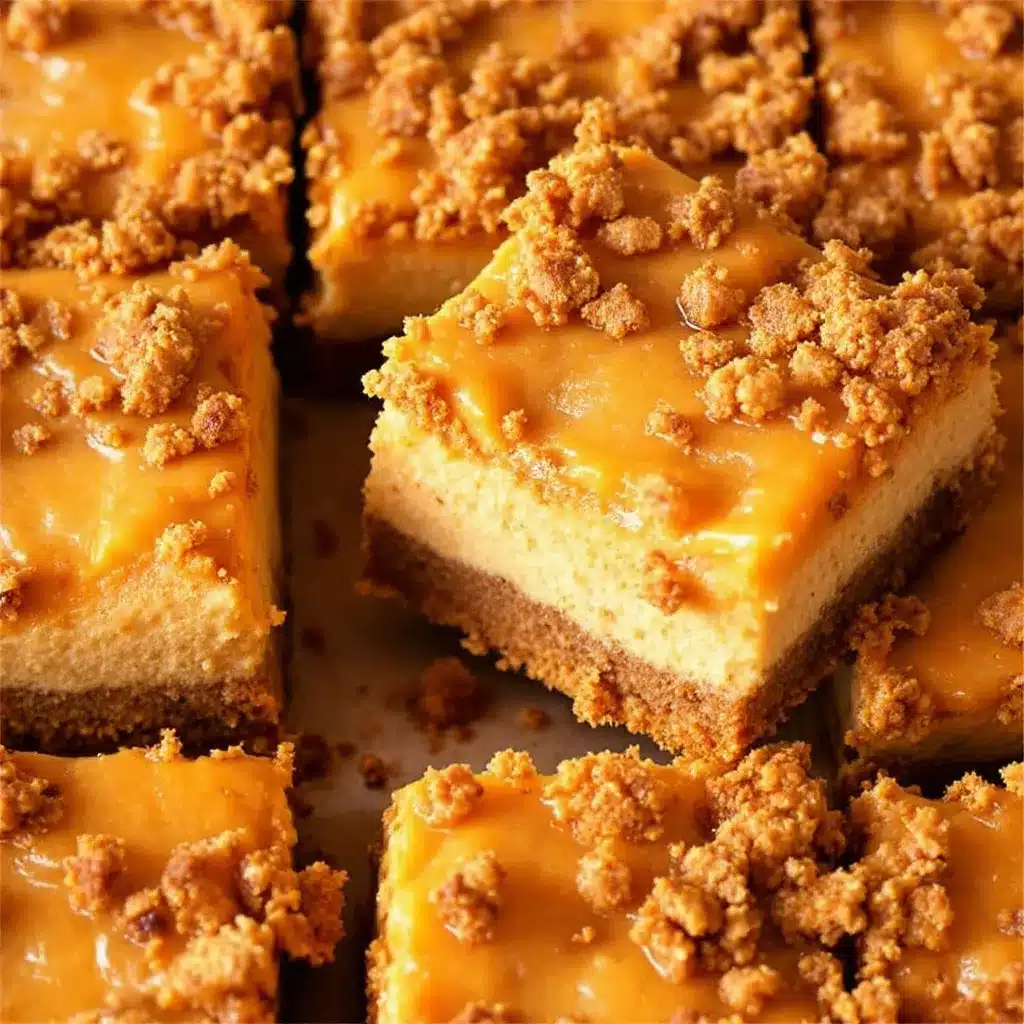
- 16 ounces cream cheese, softened to room temperature. Full-fat is best here. Low-fat cream cheese has more water content and won’t set as firmly. I learned this the hard way with batch two—it was still delicious but too soft to slice cleanly. Let it sit on the counter for at least an hour before starting.
- 1 cup pumpkin puree. Not pumpkin pie filling. Make sure you grab the 100% pure pumpkin. I recommend Libby’s for consistent texture, but any brand works. If your pumpkin puree looks watery, pat it gently with a paper towel to remove excess moisture.
- ½ cup packed brown sugar. Light or dark both work. Dark brown sugar gives a deeper, almost molasses-like flavor that I love in the fall.
- ¼ cup maple syrup. Real maple syrup, not pancake syrup. It adds a subtle complexity that makes the filling taste more “cooked” even though it isn’t.
- 1 teaspoon vanilla extract. Pure if you have it, imitation is fine. I use pure because I think the flavor is cleaner, but honestly, in a dessert with this much pumpkin spice, you probably won’t notice the difference.
- 2 teaspoons pumpkin pie spice. Or make your own: 1 teaspoon cinnamon, ½ teaspoon ginger, ¼ teaspoon nutmeg, ¼ teaspoon allspice, and a tiny pinch of cloves. I make my own blend because I like more ginger than most store-bought mixes.
- ½ teaspoon cinnamon. Extra cinnamon because I’m that person. You can skip this if you’re spice-averse, but why would you be?
- Pinch of salt. To balance the sweetness and bring out the pumpkin flavor.
For the Topping (Optional but Recommended)
- 1 cup heavy cream. For whipping into a soft, billowy topping. Or use 1 ½ cups Cool Whip if you want to keep it truly no-fuss. I’ve done both. Cool Whip is easier; homemade whipped cream is better.
- 2 tablespoons powdered sugar. To sweeten the whipped cream. Skip if using Cool Whip.
- ½ teaspoon vanilla extract. For the whipped cream.
- Optional garnishes: A light dusting of cinnamon or pumpkin pie spice, a drizzle of caramel sauce, or a few candied pecans. I usually just do a sprinkle of cinnamon because I’m lazy and it looks pretty.
Equipment Needed
Nothing fancy here. You probably already own everything you need.
- 8×8-inch baking pan. A 9×9 works too, but the bars will be slightly thinner. Line it with parchment paper for easy removal—leave some overhang on two sides to use as handles.
- Mixing bowls. One medium for the crust, one large for the filling. Glass or stainless steel both work.
- Hand mixer or stand mixer. You can do this by hand with a whisk and some elbow grease, but a mixer makes the filling much smoother. I’ve done it both ways. The hand-mixed version has a slightly denser texture, which isn’t bad, but the mixer version is fluffier.
- Spatula. For scraping every last bit of filling into the pan. A silicone spatula is ideal.
- Measuring cups and spoons. Standard set.
- Plastic wrap or foil. For covering the pan while it chills.
- Sharp knife. For clean slices. Run it under hot water and wipe it dry between cuts for the prettiest bars.
If you don’t have an 8×8 pan, you can use a 9-inch pie dish or even a 9-inch springform pan. The springform makes for very pretty slices, but it’s not necessary. I’ve also made these in a 9×13 pan with double the crust and filling—they’re thinner but still delicious, and they disappear faster at parties.
Preparation Method
This is the easy part. I promise. If you can stir, you can make these bars.
- Prepare the pan. Line your 8×8-inch baking pan with parchment paper, leaving about 2 inches of overhang on two opposite sides. This makes lifting the bars out later incredibly easy. If you don’t have parchment, you can grease the pan well with butter or non-stick spray, but the parchment method is foolproof.
- Make the crust. In a medium bowl, combine 1 ½ cups graham cracker crumbs, 2 tablespoons granulated sugar, and ¼ teaspoon salt (if using). Pour in 6 tablespoons melted butter and stir with a fork until the mixture looks like wet sand. Every crumb should be coated. If it looks dry, add another tablespoon of melted butter. The texture should hold together when you squeeze a handful.
- Press the crust. Transfer the crumb mixture to your prepared pan. Press it down firmly and evenly. I use the bottom of a flat measuring cup for this—it creates a much more even surface than using your fingers. Don’t forget the edges. The crust should be compact, not loose. Pop the pan in the fridge while you make the filling.
- Drain the pumpkin (optional but recommended). Place your 1 cup of pumpkin puree in a small bowl lined with a paper towel or a clean kitchen towel. Let it sit for 2-3 minutes. The towel will absorb excess moisture. This step prevents your filling from being too watery and helps it set firmly. I skipped this in my first test batch and regretted it.
- Beat the cream cheese. In a large mixing bowl, beat 16 ounces of softened cream cheese with a hand mixer or stand mixer on medium speed until smooth and creamy. About 2 minutes. Scrape down the sides and bottom of the bowl with a spatula. There should be no lumps. This is the most important step for a silky filling.
- Add the sugars and flavorings. Add ½ cup packed brown sugar, ¼ cup maple syrup, and 1 teaspoon vanilla extract. Beat on medium speed until combined, about 1 minute. Scrape the bowl again.
- Add the pumpkin and spices. Add the drained pumpkin puree, 2 teaspoons pumpkin pie spice, ½ teaspoon cinnamon, and a pinch of salt. Beat on low speed until just combined. Don’t overmix at this stage—you don’t want to incorporate too much air, which can cause the filling to crack as it sets. Mix until you see no more white streaks.
- Check the texture. The filling should be thick, smooth, and slightly fluffy. If it looks runny, your cream cheese might not have been soft enough, or your pumpkin might have been too watery. Don’t panic—it will still set, just give it a little more time in the fridge.
- Assemble the bars. Remove the crust from the fridge. Spoon the pumpkin cheesecake filling over the crust and spread it evenly with a spatula. Give the pan a few gentle taps on the counter to release any air bubbles.
- Chill. Cover the pan with plastic wrap or foil and refrigerate for at least 6 hours, preferably overnight. I know it’s hard to wait, but the overnight chill makes a noticeable difference in texture. The filling firms up, the flavors meld, and the crust sets properly.
- Make the whipped cream topping (optional). If you’re adding homemade whipped cream, make it right before serving. In a chilled bowl, beat 1 cup heavy cream, 2 tablespoons powdered sugar, and ½ teaspoon vanilla extract on medium-high speed until soft peaks form. This takes about 3-4 minutes. Don’t overbeat, or you’ll end up with butter.
- Slice and serve. Lift the bars out of the pan using the parchment overhang. Place on a cutting board. Use a sharp knife to slice into 9 or 16 squares. Wipe the knife clean between cuts for the neatest edges. Top with whipped cream and a dusting of cinnamon. Serve cold.
Cooking Tips & Techniques
I’ve made this recipe enough times to know where things can go wrong. Here’s what I’ve learned, sometimes the hard way.
Softening cream cheese properly. This is the most common mistake. Cold cream cheese creates lumps that won’t smooth out no matter how long you beat it. Leave it on the counter for at least an hour. If you forgot, cut it into small cubes and microwave at 50% power in 10-second bursts until it’s soft to the touch but not warm. I’ve done the microwave method more times than I’d like to admit. It works, but you have to be careful not to melt it.
Don’t skip the draining step. Pumpkin puree contains a surprising amount of water. If you don’t drain it, your filling will be softer and might not set properly. I learned this when my first batch was more like pumpkin pudding than cheesecake. Still delicious, but impossible to slice neatly.
Press the crust firmly enough. A loose crust will crumble when you try to cut the bars. Press it down with the bottom of a measuring cup or a flat glass. You want it compact and even. If you can see the pan through the crust in spots, add more crumbs or press harder.
Be patient with chilling time. I know 6 hours sounds like forever. But if you cut into these too early, the filling will be soft and the slices won’t hold their shape. Overnight is truly best. I usually make these after dinner and serve them the next afternoon. The wait is worth it.
Use a hot knife for clean slices. Run your knife under hot water, wipe it dry, then make one clean cut. Wipe the blade and repeat. This gives you those beautiful, Instagram-worthy slices with no smearing. I’m not an Instagram person, but I do like clean edges.
Room temperature matters. These bars should be served cold. If they sit out for more than 30 minutes, they’ll start to soften. That’s fine for a party, but if you’re serving them as a planned dessert, pull them out of the fridge right before serving.
Variations & Adaptations
One of the best things about this recipe is how flexible it is. Here are some variations I’ve tried and loved.
Gluten-Free Version. Use gluten-free graham crackers for the crust. Most brands work well. I’ve tried three different GF graham cracker brands, and they all produced a perfectly good crust. The texture is slightly more crumbly, but the flavor is identical.
Dairy-Free Version. Use vegan cream cheese and vegan butter. I’ve had good results with both Kite Hill and Miyoko’s brands. The texture is slightly softer, so I recommend chilling for a full 24 hours. The flavor is still fantastic—pumpkin and spices are strong enough to mask any “vegan” taste.
Keto/Low-Carb Version. Replace the graham crackers with almond flour and butter for the crust. Use a sugar substitute like monk fruit or erythritol in place of the brown sugar and maple syrup. The texture will be denser, but the flavor is still excellent. I made this for a friend on keto, and she asked for the recipe.
Pumpkin Chocolate Swirl. Melt ¼ cup of dark chocolate chips and drizzle it over the filling before chilling. Use a knife to gently swirl it through the top layer. The chocolate and pumpkin combination is surprisingly good—like a pumpkin chocolate chip cookie in bar form.
Gingersnap Crust. Replace half the graham crackers with crushed gingersnap cookies. The spicy, molasses-y flavor of the gingersnaps pairs beautifully with the pumpkin filling. This is my personal favorite variation, especially around the holidays. It tastes like Christmas in a bar.
Individual Servings. Instead of using an 8×8 pan, divide the crust and filling among 6-8 small jars or ramekins. Layer them like mini parfaits. These are perfect for parties or gifting. Plus, no slicing required.
Serving & Storage Suggestions
These bars are best served cold, straight from the fridge. The texture is firm but creamy, and the flavors are clean and bright. If you let them sit at room temperature too long, they’ll soften and lose their structure.
How to serve. Place a bar on a small plate. Top with a dollop of whipped cream (homemade or store-bought). Sprinkle a little cinnamon or pumpkin pie spice on top. Add a drizzle of caramel sauce if you’re feeling fancy. I usually keep it simple—just whipped cream and a light dusting of cinnamon.
What to serve with them. A hot cup of coffee or spiced chai latte is perfect. The bitterness of coffee balances the sweetness of the bars. For a fall-themed dessert board, arrange these bars alongside a warm bowl of creamy butternut squash soup for a cozy contrast. Or pair them with a creamy matcha latte for a beautiful color contrast and a slightly earthy flavor pairing.
Storage. Store leftover bars in an airtight container in the refrigerator for up to 5 days. The crust will soften slightly over time, but the flavor actually improves after a day or two. I’ve never had leftovers last longer than 3 days in my house, but they should be fine for 5.
Freezing. These bars freeze beautifully. Freeze them uncovered on a baking sheet until solid (about 2 hours), then wrap each bar individually in plastic wrap and store in a freezer-safe bag or container for up to 3 months. Thaw in the refrigerator overnight before serving. The texture is slightly softer after freezing, but still delicious. I always keep a few in the freezer for unexpected cravings.
Make-ahead tip. These are perfect for holiday prep. Make them up to 2 days in advance and keep them in the fridge. Add the whipped cream topping right before serving. This is my go-to strategy for Thanksgiving—one less thing to worry about on the day.
Nutritional Information & Benefits
Let’s be real: these are a dessert, not a health food. But they do have some redeeming qualities, especially compared to traditional baked cheesecake.
Estimated nutrition per bar (based on 9 servings):
- Calories: 320
- Fat: 22g
- Carbohydrates: 28g
- Fiber: 2g
- Sugar: 18g
- Protein: 5g
Pumpkin is a nutritional powerhouse. It’s packed with vitamin A (great for eye health), vitamin C, and fiber. It’s also low in calories, so most of the calorie count here comes from the cream cheese and butter—which is fine, because this is a treat, not a salad.
Cream cheese provides calcium and protein. It’s not the healthiest dairy option, but it does contribute some calcium and a little protein. Full-fat cream cheese also helps you feel satisfied with a smaller portion.
Dietary considerations. This recipe is vegetarian. It can be made gluten-free, dairy-free, and lower-carb with the substitutions mentioned above. It is not vegan as written, but the dairy-free version works well.
Potential allergens. Contains dairy and gluten. The gluten can be removed with GF graham crackers. The dairy can be removed with vegan alternatives. Always check your ingredient labels if serving to someone with allergies.
I don’t believe in guilt-based eating. Dessert is meant to be enjoyed. But I do appreciate that this recipe uses real ingredients—no artificial flavors, no preservatives, nothing you can’t pronounce. That counts for something.
Conclusion
These creamy no-bake pumpkin cheesecake bars have become my fall signature. Not because they’re fancy or complicated, but because they’re exactly what I want in a dessert: easy, delicious, and satisfying without requiring a lot of effort.
I love that I can make them in 10 minutes and then forget about them until dessert time. I love that they use simple ingredients I usually have on hand. And I really love that first bite—cold, creamy, spicy, and just sweet enough. It tastes like fall, but without the fuss of baking.
If you try this recipe, I’d love to hear how it goes. Did you add a chocolate swirl? Use a gingersnap crust? Top it with extra whipped cream and a drizzle of caramel? Let me know in the comments below. And if you have a favorite fall dessert that’s equally easy, share that too—I’m always looking for new recipes to add to my rotation.
In the meantime, I’ll be here, eating another bar straight from the fridge. No judgment, please.
Frequently Asked Questions
Can I use low-fat cream cheese?
You can, but the texture won’t be as firm or as creamy. Low-fat cream cheese has more water content, which can make the filling softer. If you do use it, add an extra hour or two of chilling time. The flavor will still be good, just expect a slightly different texture.
How long do these bars need to chill?
At least 6 hours. Overnight is better. The longer they chill, the firmer and more sliceable they become. I’ve made the mistake of trying to rush this step, and the bars were too soft to cut neatly. Patience pays off here.
Can I use canned pumpkin pie filling instead of pure pumpkin?
I don’t recommend it. Pumpkin pie filling is already sweetened and spiced, so the sugar and spice amounts in this recipe would be off. The texture is also different because pie filling contains thickeners. Stick with 100% pure pumpkin puree for the best results.
Can I make these without a mixer?
Yes, but you’ll need some arm strength. Make sure your cream cheese is very soft—almost room temperature—and whisk it vigorously until smooth before adding the other ingredients. The filling won’t be quite as fluffy, but it will still taste great. I’ve done it by hand when my mixer was in storage, and it worked fine.
Can I double this recipe?
Absolutely. Use a 9×13 pan and double all the ingredients. The chilling time might need to be extended by an hour or two since the bars will be thicker. I’ve done this for parties, and it works perfectly. Just make sure your pan is large enough—a 9×13 gives you bars that are about the same thickness as the 8×8 version.
Pin This Recipe!
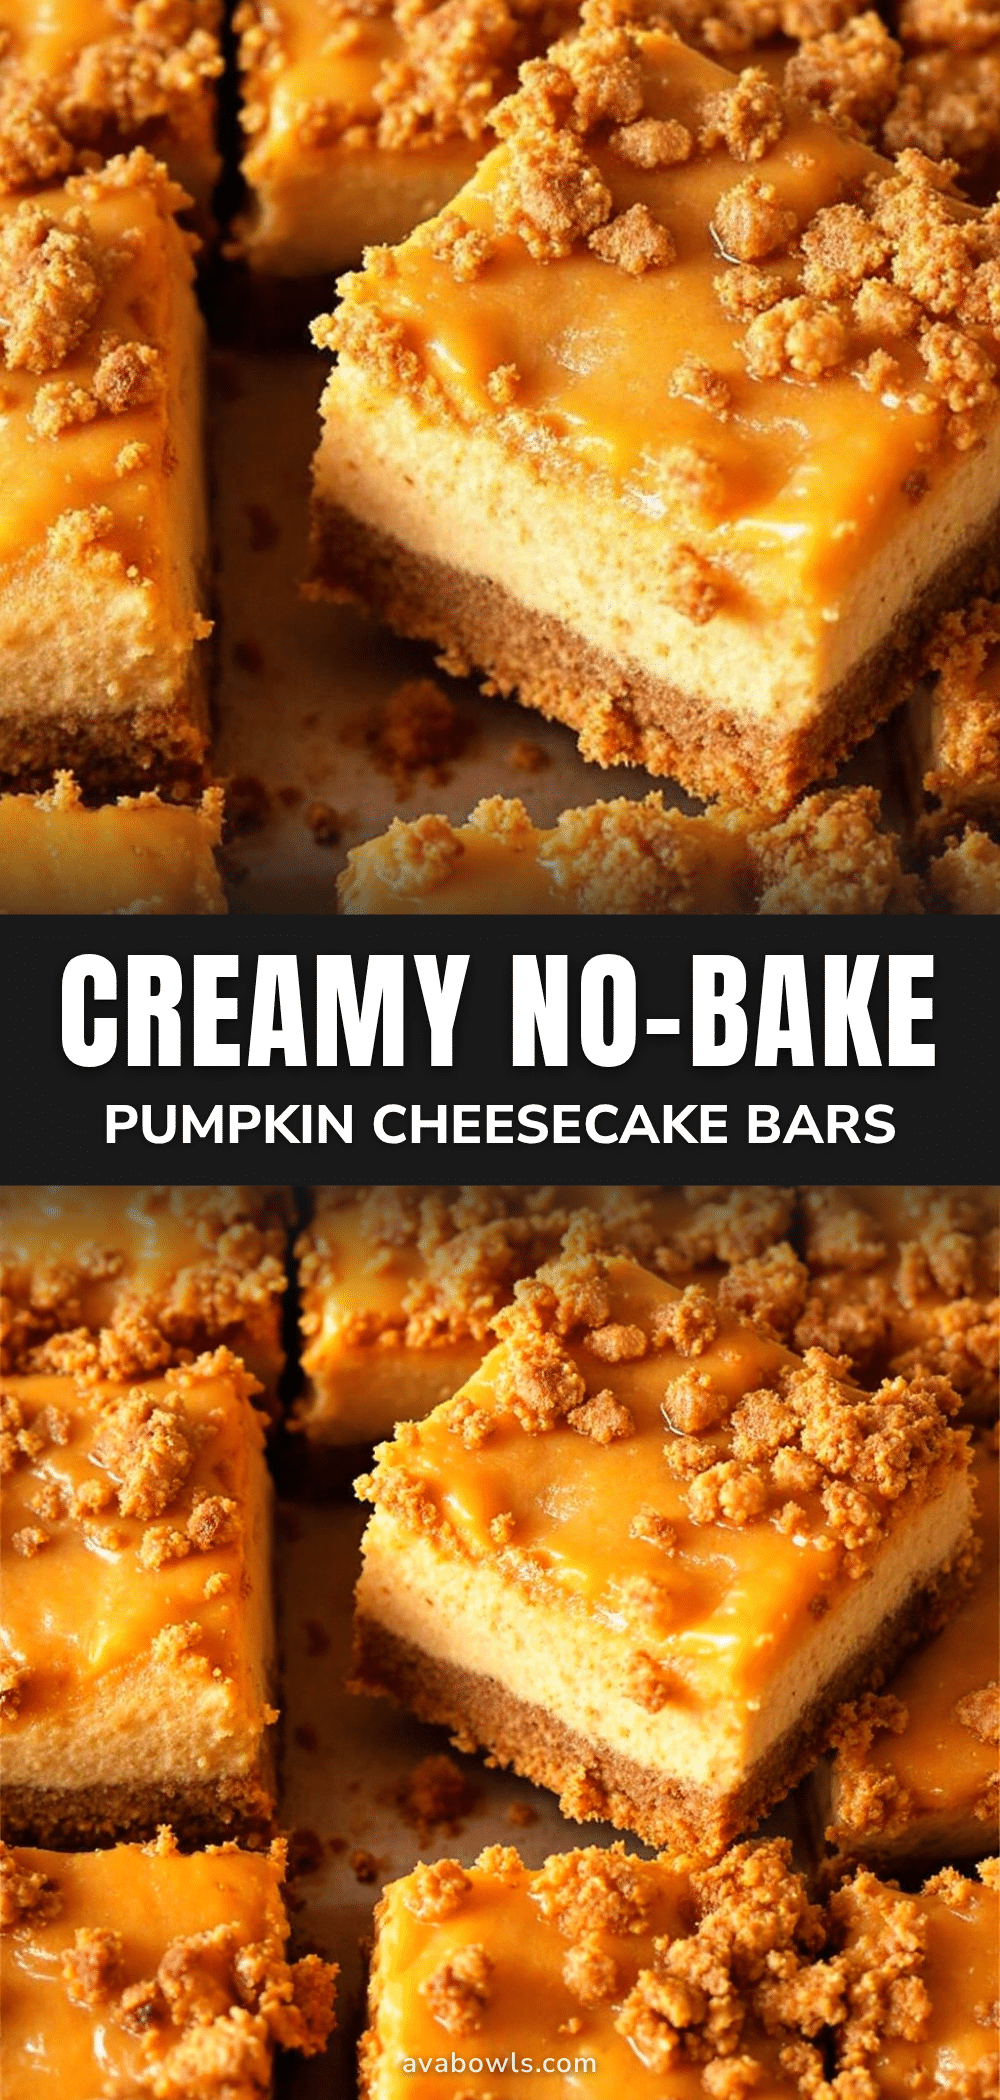
Creamy No-Bake Pumpkin Cheesecake Bars: Easy 10-Minute Dessert
These creamy no-bake pumpkin cheesecake bars are the perfect fall dessert—ready in just 10 minutes of active work with simple ingredients. No oven required, just a bowl, a spatula, and some fridge space.
- Prep Time: 10 minutes
- Cook Time: 0 minutes
- Total Time: 6 hours 10 minutes (includes chilling time)
- Yield: 9 servings 1x
- Category: Dessert
- Cuisine: American
Ingredients
- 1 ½ cups graham cracker crumbs (about 12 full sheets, crushed finely)
- 6 tablespoons unsalted butter, melted
- 2 tablespoons granulated sugar
- ¼ teaspoon salt (only if using unsalted butter)
- 16 ounces cream cheese, softened to room temperature
- 1 cup pumpkin puree (not pumpkin pie filling)
- ½ cup packed brown sugar (light or dark)
- ¼ cup maple syrup (real maple syrup)
- 1 teaspoon vanilla extract
- 2 teaspoons pumpkin pie spice
- ½ teaspoon cinnamon
- Pinch of salt
- 1 cup heavy cream (for whipped topping)
- 2 tablespoons powdered sugar (for whipped topping)
- ½ teaspoon vanilla extract (for whipped topping)
- Optional garnishes: cinnamon, caramel sauce, candied pecans
Instructions
- Prepare the pan: Line an 8×8-inch baking pan with parchment paper, leaving about 2 inches of overhang on two opposite sides.
- Make the crust: In a medium bowl, combine graham cracker crumbs, granulated sugar, and salt (if using). Pour in melted butter and stir with a fork until the mixture looks like wet sand.
- Press the crust: Transfer the crumb mixture to the prepared pan. Press it down firmly and evenly using the bottom of a flat measuring cup. Refrigerate while making the filling.
- Drain the pumpkin (optional but recommended): Place pumpkin puree in a small bowl lined with a paper towel or clean kitchen towel. Let sit for 2-3 minutes to absorb excess moisture.
- Beat the cream cheese: In a large mixing bowl, beat softened cream cheese with a hand mixer or stand mixer on medium speed until smooth and creamy, about 2 minutes. Scrape down the sides and bottom of the bowl.
- Add the sugars and flavorings: Add brown sugar, maple syrup, and vanilla extract. Beat on medium speed until combined, about 1 minute. Scrape the bowl again.
- Add the pumpkin and spices: Add drained pumpkin puree, pumpkin pie spice, cinnamon, and a pinch of salt. Beat on low speed until just combined. Do not overmix.
- Check the texture: The filling should be thick, smooth, and slightly fluffy.
- Assemble the bars: Remove the crust from the fridge. Spoon the pumpkin cheesecake filling over the crust and spread evenly with a spatula. Tap the pan gently on the counter to release air bubbles.
- Chill: Cover the pan with plastic wrap or foil and refrigerate for at least 6 hours, preferably overnight.
- Make the whipped cream topping (optional): In a chilled bowl, beat heavy cream, powdered sugar, and vanilla extract on medium-high speed until soft peaks form, about 3-4 minutes.
- Slice and serve: Lift the bars out of the pan using the parchment overhang. Place on a cutting board. Use a sharp knife to slice into 9 or 16 squares. Wipe the knife clean between cuts. Top with whipped cream and a dusting of cinnamon. Serve cold.
Notes
For best results, chill overnight. Drain pumpkin puree to prevent watery filling. Use full-fat cream cheese for firm texture. Serve cold; bars soften at room temperature after 30 minutes.
Nutrition
- Serving Size: 1 bar (based on 9 se
- Calories: 320
- Sugar: 18
- Sodium: 250
- Fat: 22
- Saturated Fat: 12
- Carbohydrates: 28
- Fiber: 2
- Protein: 5
Keywords: no-bake pumpkin cheesecake bars, easy pumpkin dessert, no-bake dessert, fall dessert, pumpkin cheesecake, 10-minute dessert


