I burned three separate batches of pumpkin scones before I finally figured out why they were turning into dense, dry bricks. It wasn’t the pumpkin puree. It wasn’t even the spices, though I had initially blamed the cinnamon. The problem was the butter. I was using melted butter because I thought it would mix easier, and honestly, I just didn’t want to deal with grating cold sticks. Big mistake.
The first batch came out looking okay, but the texture was wrong. It was more like a quick bread than a scone. You know that heavy, cake-like feel? Yeah, that was my kitchen disaster. I ate them anyway. They tasted fine, just not what I was craving. I wanted something flaky. I wanted layers. I wanted a crumbly exterior that shattered slightly when you broke it open.
The second batch, I tried cutting the butter into the flour too finely. It looked like wet sand. When I baked it, the scones spread out too much and lost their shape. They were flat, sad disks of pumpkin bread. I threw them out. That was a waste of good pumpkin puree.
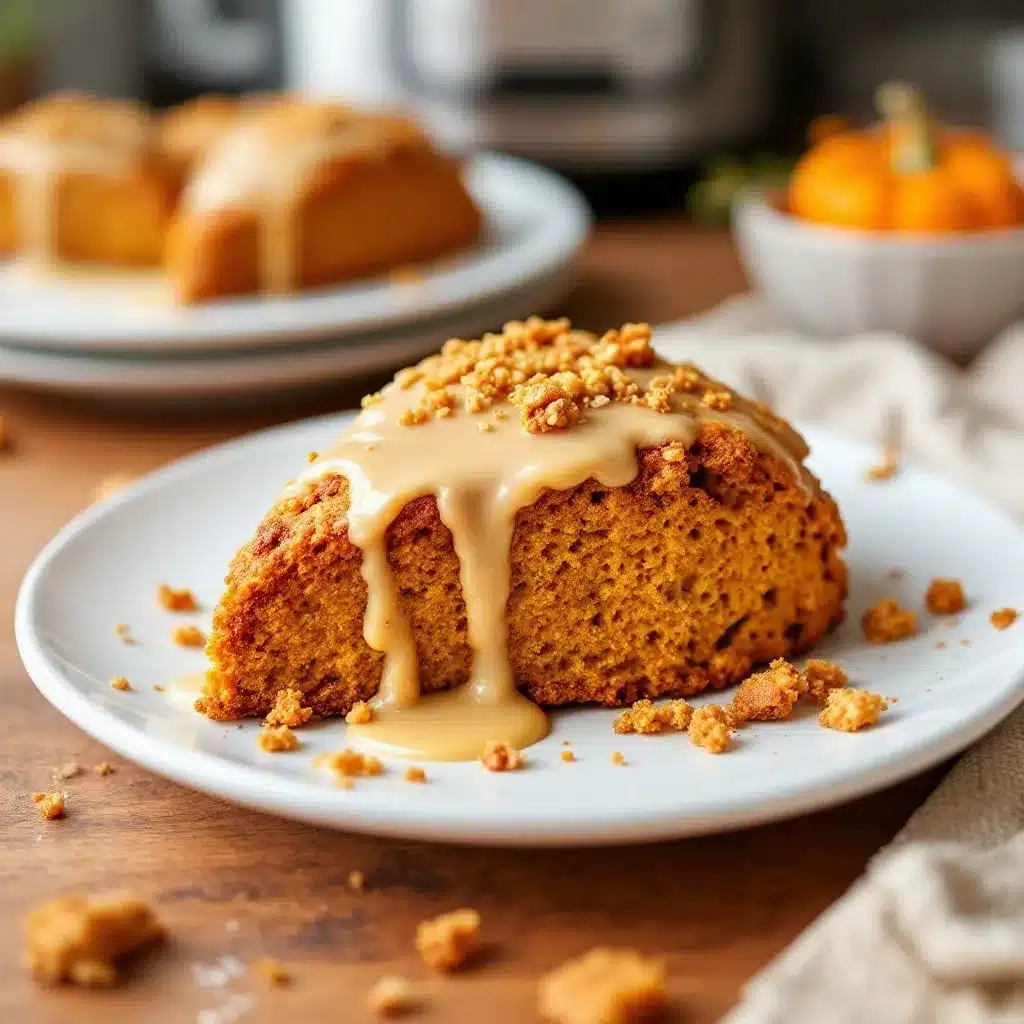
The third batch was the turning point. I chilled the butter. I kept everything cold. I handled the dough as little as possible. The result? Golden, flaky, tender perfection. The maple glaze just made it better. It’s the kind of recipe that sticks with you because you had to fail a few times to get there. Now, I make them every October.
Why You’ll Love This Recipe
These cozy pumpkin scones are not just another fall bake. They are the result of trial, error, and a serious obsession with texture. Here is why this recipe stands out from the crowd:
* **Quick & Easy**: You can have these from oven to table in under 45 minutes. It is perfect for busy weeknights or lazy Saturday mornings when you want something homemade but don’t have hours to spare.
* **Simple Ingredients**: You likely already have everything in your kitchen. Flour, sugar, baking powder, cold butter, pumpkin puree, and maple syrup. No fancy grocery trips needed for obscure spices.
* **Perfect for Autumn**: These scones capture the essence of fall. The warm spices and creamy glaze make them ideal for cozy dinners, holiday mornings, or just a rainy afternoon treat.
* **Crowd-Pleaser**: Kids and adults alike love them. The sweetness is balanced by the savory butter, and the pumpkin flavor is strong but not overpowering.
* **Unbelievably Delicious**: The texture is next-level comfort food. Crispy on the outside, soft and tender on the inside. The maple glaze adds a rich, sticky sweetness that ties everything together.
What makes this recipe different is the technique. By keeping the butter cold and handling the dough minimally, you create steam pockets during baking. This creates those coveted flaky layers. Most pumpkin scone recipes use oil or melted butter, which results in a dense, muffin-like texture. This version uses the creaming method for the dry ingredients and butter, ensuring a light, airy crumb. It is comfort food reimagined—faster, but with the same soul-soothing satisfaction. It is perfect for impressing guests without stress.
What Ingredients You Will Need
This recipe uses simple, wholesome ingredients to deliver bold flavor and satisfying texture without the fuss. The key is quality. Since there are few ingredients, each one matters.
* **All-Purpose Flour**: The base of the scone. I recommend using a high-quality brand like King Arthur for consistent protein content. This ensures the scones hold their shape without being tough.
* **Granulated Sugar**: Adds sweetness and helps with browning. Do not skip this, even if you are watching sugar intake. The glaze adds plenty of sweetness, so the dough itself should be only slightly sweet.
* **Baking Powder**: The leavening agent. Make sure it is fresh. Old baking powder will result in flat, dense scones.
* **Salt**: Enhances the flavor of the pumpkin and spices. Use fine sea salt for even distribution.
* **Ground Cinnamon**: The primary spice. Use fresh ground cinnamon if possible for the best aroma.
* **Ground Ginger**: Adds warmth and depth.
* **Ground Nutmeg**: A pinch goes a long way. It adds that classic pumpkin pie flavor.
* **Cold Unsalted Butter**: The most critical ingredient. It must be very cold. Cube it and keep it in the fridge until the moment you use it. This creates the flaky layers.
* **Pumpkin Puree**: Not pumpkin pie filling. Use 100% pure pumpkin. I prefer Libby’s because it has a consistent texture, but any brand works as long as it is pure.
* **Eggs**: Large eggs, room temperature. They bind the dough and add richness.
* **Heavy Cream**: Adds moisture and tenderness. Whole milk can be used in a pinch, but heavy cream yields a richer scone.
* **Pure Maple Syrup**: For the glaze. Use real maple syrup, not pancake syrup. The flavor difference is night and day.
Equipment Needed
You do not need fancy tools to make these scones. A few basic items will do the job.
* **Large Mixing Bowl**: For combining the dry ingredients.
* **Pastry Blender or Fork**: To cut the butter into the flour. A pastry blender is faster, but a fork works fine if you have patience.
* **Measuring Cups and Spoons**: Accuracy is key in baking. Use standard measuring cups for dry ingredients and liquid measuring cups for wet ingredients.
* **Baking Sheet**: A standard 13×18 inch sheet pan. Line it with parchment paper for easy cleanup and even baking.
* **Cooling Rack**: Essential for letting the scones cool completely before glazing. This prevents the glaze from melting off.
* **Small Saucepan or Microwave-Safe Bowl**: For melting the butter and maple syrup for the glaze.
* **Whisk**: For mixing the glaze until smooth.
If you do not have a pastry blender, use two knives in a crisscross motion. It takes a bit longer, but it works. A heavy-duty mixing bowl is helpful because the dough can be sticky. Avoid using a food processor unless you are experienced; it can easily overwork the dough and melt the butter.
Preparation Method
Follow these steps carefully to ensure the best results. Precision matters.
1. **Preheat the Oven**: Preheat your oven to 400°F (200°C). Place a rack in the upper third of the oven. This helps the scones brown evenly.
2. **Mix Dry Ingredients**: In a large bowl, whisk together 2 cups (250g) all-purpose flour, 1/3 cup (65g) granulated sugar, 1 tablespoon baking powder, 1/2 teaspoon salt, 1 teaspoon ground cinnamon, 1/2 teaspoon ground ginger, and 1/4 teaspoon ground nutmeg. Whisking aerates the flour and distributes the leavening agents evenly.
3. **Cut in the Butter**: Add 1/2 cup (113g) cold, cubed unsalted butter to the dry ingredients. Use a pastry blender or your fingers to cut the butter into the flour until the mixture resembles coarse crumbs with some pea-sized pieces of butter remaining. Do not overmix. The visible butter chunks are what create the flaky layers.
4. **Combine Wet Ingredients**: In a separate bowl, whisk together 1/2 cup (120g) pumpkin puree, 1 large egg, and 1/4 cup (60ml) heavy cream. The mixture should be smooth and uniform.
5. **Combine Wet and Dry**: Pour the wet mixture into the dry ingredients. Use a fork or a spatula to gently fold the ingredients together. Stop mixing as soon as the dough comes together. It will look shaggy and dry. Overmixing develops gluten, which makes scones tough.
6. **Shape the Dough**: Turn the dough out onto a lightly floured surface. Gently press it into a circle about 1 inch thick. Do not knead the dough. Just pat it into shape. Cut the circle into 8 wedges.
7. **Transfer to Baking Sheet**: Place the wedges on the prepared baking sheet, leaving about 2 inches between them. This allows them to expand without merging.
8. **Bake**: Bake for 18-20 minutes, or until the scones are golden brown and a toothpick inserted into the center comes out clean.
9. **Cool**: Let the scones cool on the baking sheet for 5 minutes, then transfer to a cooling rack to cool completely.
10. **Make the Glaze**: While the scones cool, mix 1/2 cup (60g) powdered sugar, 2 tablespoons heavy cream, and 1 tablespoon pure maple syrup in a small bowl. Whisk until smooth. Add more cream if needed for a thinner consistency.
11. **Glaze**: Drizzle the glaze over the cooled scones. Serve immediately.
Cooking Tips & Techniques
Getting the texture right is all about temperature and handling. Here are some professional tips to help you succeed.
* **Keep Everything Cold**: This is the golden rule of scones. If the butter melts before baking, you lose the flaky layers. Keep the butter in the fridge until the last second. If your kitchen is warm, chill your mixing bowl first.
* **Do Not Overmix**: It is tempting to mix the dough until it looks perfect. Resist that urge. The dough should look messy. Overmixing leads to tough, dense scones.
* **Use Fresh Leavening**: Baking powder loses its potency over time. If your scones are flat, check the expiration date on your baking powder. It is cheap insurance for good results.
* **Handle with Care**: When shaping the dough, use your hands gently. Press, do not roll. Rolling compresses the layers. Patting preserves the air pockets.
* **Watch the Oven**: Every oven is different. Start checking your scones at 18 minutes. If they are browning too quickly, cover them loosely with foil.
* **Cool Completely Before Glazing**: Warm scones will melt the glaze. It will soak in rather than sitting on top. Patience pays off.
I once rushed this step and drizzled the glaze on warm scones. The glaze disappeared into the crumb. It tasted good, but it looked messy. Now, I wait. It is worth the wait.
Variations & Adaptations
This recipe is versatile. You can adjust it to suit your tastes or dietary needs.
* **Add-Ins**: Stir in 1/2 cup of chocolate chips, dried cranberries, or chopped pecans into the dough before shaping. These add texture and extra flavor.
* **Gluten-Free**: Substitute the all-purpose flour with a 1:1 gluten-free flour blend. Ensure the blend contains xanthan gum for structure.
* **Dairy-Free**: Use coconut oil instead of butter. Use coconut cream instead of heavy cream. The flavor will be slightly different, but still delicious.
* **Spice Variation**: Add a pinch of cardamom or allspice for a different aromatic profile. These spices pair well with pumpkin and maple.
* **Mini Scones**: Divide the dough into smaller wedges for bite-sized treats. Bake for 12-15 minutes. These are perfect for parties.
I once made a batch with white chocolate chips and dried cranberries. The tartness of the cranberries balanced the sweetness of the chocolate perfectly. It was a hit at a brunch I hosted.
Serving & Storage Suggestions
Serving these scones warm is ideal. They pair well with a hot cup of coffee or tea. The maple glaze complements the earthy flavors of the pumpkin.
* **Storage**: Store leftover scones in an airtight container at room temperature for up to 2 days. For longer storage, freeze them for up to 3 months. Thaw at room temperature before serving.
* **Reheating**: Reheat scones in a 350°F (175°C) oven for 5-10 minutes to restore crispiness. Microwave reheating can make them soft and chewy.
* **Presentation**: Arrange the scones on a wooden board or a ceramic platter. Garnish with a sprinkle of cinnamon or a drizzle of extra maple syrup for visual appeal.
The flavors develop over time. Letting the scones sit for a day allows the spices to meld. They are often better on day two.
Nutritional Information & Benefits
These scones are a moderate treat. Each scone contains approximately 250 calories.
* **Carbohydrates**: The flour and sugar provide energy. The pumpkin adds fiber.
* **Fat**: The butter and cream provide healthy fats. Use unsalted butter to control sodium intake.
* **Protein**: The egg and flour provide a small amount of protein.
* **Allergens**: Contains gluten, eggs, and dairy. Use substitutions as noted above for allergen-friendly versions.
* **Wellness Perspective**: Pumpkin is rich in Vitamin A and antioxidants. While this is a treat, the pumpkin adds nutritional value. Enjoy in moderation.
I try to balance these scones with a light lunch or dinner. They are indulgent but not overwhelmingly heavy.
Conclusion
These cozy pumpkin scones with creamy maple glaze are worth the effort. They are simple, delicious, and perfect for any autumn occasion. Customize them with your favorite add-ins or spices. Make them for your family, friends, or just yourself.
I love this recipe because it brings comfort. The smell of baking pumpkin and spices fills the house. It feels like home. Try it out. Let me know how they turn out. Share your variations. I would love to hear about your baking adventures.
Enjoy the process. The result is always worth it.
FAQs
Can I use canned pumpkin pie filling?
No. Pumpkin pie filling contains added sugar and spices. Use 100% pure pumpkin puree for the correct texture and flavor balance.
How do I keep the scones from spreading?
Ensure the butter is cold and do not overmix the dough. Chill the shaped scones in the fridge for 10 minutes before baking to keep the butter firm.
Can I freeze the glaze?
It is best to make the glaze fresh. It can be stored in the fridge for a few days, but it may separate. Whisk it well before using.
What is the best way to reheat scones?
Reheat in a 350°F oven for 5-10 minutes. This restores the crisp exterior. Avoid the microwave if you want to maintain texture.
Can I make these scones ahead of time?
Yes. Bake the scones and store them in an airtight container. Glaze them just before serving to prevent the glaze from soaking in.
Pin This Recipe!

Cozy Pumpkin Scones: Best Easy Maple Glaze Recipe
Golden, flaky, and tender pumpkin scones with a rich maple glaze. This recipe uses cold butter and minimal handling to achieve the perfect texture, avoiding the dense, cake-like result of common mistakes.
- Prep Time: 15 minutes
- Cook Time: 20 minutes
- Total Time: 45 minutes
- Yield: 8 servings 1x
- Category: Breakfast
- Cuisine: American
Ingredients
- 2 cups (250g) all-purpose flour
- 1/3 cup (65g) granulated sugar
- 1 tablespoon baking powder
- 1/2 teaspoon salt
- 1 teaspoon ground cinnamon
- 1/2 teaspoon ground ginger
- 1/4 teaspoon ground nutmeg
- 1/2 cup (113g) cold, cubed unsalted butter
- 1/2 cup (120g) pumpkin puree
- 1 large egg, room temperature
- 1/4 cup (60ml) heavy cream
- 1/2 cup (60g) powdered sugar (for glaze)
- 2 tablespoons heavy cream (for glaze)
- 1 tablespoon pure maple syrup (for glaze)
Instructions
- Preheat oven to 400°F (200°C) and place a rack in the upper third of the oven.
- In a large bowl, whisk together flour, sugar, baking powder, salt, cinnamon, ginger, and nutmeg.
- Add cold, cubed butter to the dry ingredients. Use a pastry blender or fingers to cut the butter in until the mixture resembles coarse crumbs with pea-sized butter pieces remaining.
- In a separate bowl, whisk together pumpkin puree, egg, and heavy cream until smooth.
- Pour wet ingredients into dry ingredients. Gently fold with a fork or spatula until the dough just comes together; it should look shaggy.
- Turn dough onto a lightly floured surface. Gently press into a 1-inch thick circle. Do not knead.
- Cut the circle into 8 wedges.
- Place wedges on a parchment-lined baking sheet, leaving 2 inches between them.
- Bake for 18-20 minutes until golden brown and a toothpick inserted in the center comes out clean.
- Cool on the baking sheet for 5 minutes, then transfer to a cooling rack to cool completely.
- While scones cool, whisk powdered sugar, 2 tablespoons heavy cream, and maple syrup until smooth.
- Drizzle glaze over completely cooled scones and serve immediately.
Notes
Keep all ingredients, especially butter, very cold to ensure flaky layers. Do not overmix the dough, as this develops gluten and makes scones tough. Cool scones completely before glazing to prevent the glaze from melting into the crumb. For best texture, use fresh baking powder.
Nutrition
- Serving Size: 1 scone
- Calories: 250
- Sugar: 18
- Sodium: 250
- Fat: 12
- Saturated Fat: 7
- Carbohydrates: 32
- Fiber: 1
- Protein: 3
Keywords: pumpkin scones, maple glaze, fall baking, easy scones, autumn recipes, flaky scones, pumpkin spice


