I ruined acorn squash for three straight years before I figured out what I was doing wrong. Not just a little overcooked, but actually inedible—soggy, bland, and sad. The first time I tried to make stuffed squash, I didn’t even bother to pre-cook the filling. I just shoved raw sausage and diced apples into a raw squash half and prayed. The squash was hard as a rock, the sausage was somehow dry, and the apples had turned into a brown paste. My husband took one bite, put his fork down, and said, “Maybe we just don’t like squash.”
But I knew that wasn’t true. I’d had good stuffed squash at restaurants before, that perfect fork-tender flesh with a savory-sweet filling that tastes like fall on a plate. So I kept at it, batch after batch, until I cracked the code. The trick, it turns out, isn’t some fancy technique. It’s about timing, temperature, and not being afraid to let the squash get a little color before it goes in the oven. This savory baked stuffed acorn squash with sausage and apples is the result of all those failures, and honestly, it’s the recipe that made my husband actually apologize for doubting me. That first bite—tender squash, juicy sausage, caramelized apples—he just looked at me and said, “Okay, I was wrong.”
If you’ve ever had a squash disaster, I get it. This recipe is different. It’s forgiving, it’s packed with flavor, and it looks beautiful on a plate without any fuss. Trust me on this one.
Why You’ll Love This Recipe
This isn’t just another stuffed squash recipe. I’ve tested it more times than I care to admit, and here’s what makes it stand out:
- Perfect for Fall Dinners — This is the kind of meal that makes you want to light a candle and put on a sweater. It’s cozy but feels special enough for guests.
- Simple Ingredients — Nothing fancy here. You probably already have most of these in your kitchen, especially if you cook regularly during the cooler months.
- One-Dish Wonder — The squash acts as its own serving bowl. Less cleanup, more time to actually enjoy your meal.
- Sweet and Savory Balance — The sausage brings the savory, the apples bring the sweetness, and the squash ties it all together. It’s a combination that just works.
- Crowd-Pleaser — I’ve served this for picky eaters, vegetable skeptics, and full-on squash lovers, and everyone goes back for seconds.
What makes this version different from the rest? It’s the method. Instead of just stuffing and baking, I partially pre-roast the squash first. This ensures the flesh is tender and creamy while the filling gets golden and bubbly on top. No more crunchy squash or dry filling. It’s a small extra step that changes everything.
Honestly, this recipe has become my go-to for those nights when I want something that feels impressive but doesn’t require hours in the kitchen. It’s comfort food that actually delivers on its promise.
What Ingredients You Will Need
This recipe uses simple, wholesome ingredients that come together to create something genuinely delicious. Most of these are pantry staples or easy to find at any grocery store.
- Acorn squash (2 medium, halved and seeded) — Look for squash that feels heavy for its size and has a deep green color with some orange patches. That orange color means it’s ripe and will be sweeter. I like to pick ones that are roughly the same size so they cook evenly.
- Sweet Italian sausage (1 pound, casings removed) — I prefer sweet Italian sausage for this recipe because the fennel and mild sweetness play nicely with the apples. If you can find it from a local butcher, even better. Hot Italian sausage works too if you want some heat.
- Granny Smith apple (1 large, diced small) — You want a tart apple here. Granny Smith holds its shape during cooking and provides that necessary contrast to the rich sausage. Honeycrisp or Braeburn would also work in a pinch.
- Yellow onion (1 medium, diced) — A standard yellow onion adds depth without overpowering the other flavors. Sweet onion would be fine too.
- Fresh sage (1 tablespoon, chopped) — Sage and squash are a classic pairing for a reason. Dried sage works if that’s what you have, but fresh really shines here. Use about 1 teaspoon dried if substituting.
- Garlic (3 cloves, minced) — Fresh garlic is non-negotiable for me in this recipe. It adds that aromatic punch that makes the filling irresistible.
- Dried cranberries (1/3 cup) — These little bursts of sweetness are optional but highly recommended. They add texture and a pop of color that makes the dish look prettier. Golden raisins would also work.
- Panko breadcrumbs (1/2 cup) — Panko gives the filling a nice texture without making it heavy. Regular breadcrumbs work too, but panko stays crisper. Use gluten-free panko if needed.
- Chicken broth (1/4 cup) — This keeps the filling moist during baking. Vegetable broth works just as well.
- Olive oil (2 tablespoons, divided) — You’ll use some for brushing the squash and some for cooking the filling. A good quality extra virgin olive oil is fine here.
- Salt and black pepper (to taste) — Don’t be shy with the seasoning. Squash can handle it.
- Parmesan cheese (1/4 cup, grated, optional for topping) — I add this sometimes when I want a little extra savory punch. Pecorino Romano works too.
Equipment Needed
You don’t need much for this recipe, which is part of what makes it so approachable. Here’s what you’ll need:
- Sharp chef’s knife — Acorn squash is tough. A dull knife is dangerous here. I learned that the hard way after nearly slicing my finger open.
- Large baking dish or rimmed baking sheet — Something big enough to hold the squash halves without crowding them. A 9×13 dish works perfectly.
- Large skillet — For cooking the filling. A cast iron skillet is ideal, but any large non-stick or stainless steel pan works.
- Mixing bowl — For combining the filling ingredients.
- Measuring spoons and cups — Standard kitchen staples.
- Cutting board — Preferably one with a groove to catch juices from the squash.
- Aluminum foil — For tenting the squash during the final bake if needed.
If you don’t have a large baking dish, a rimmed baking sheet lined with parchment paper works just fine. The squash might brown a bit more on the bottom, but that’s actually a good thing—more caramelization means more flavor.
Preparation Method
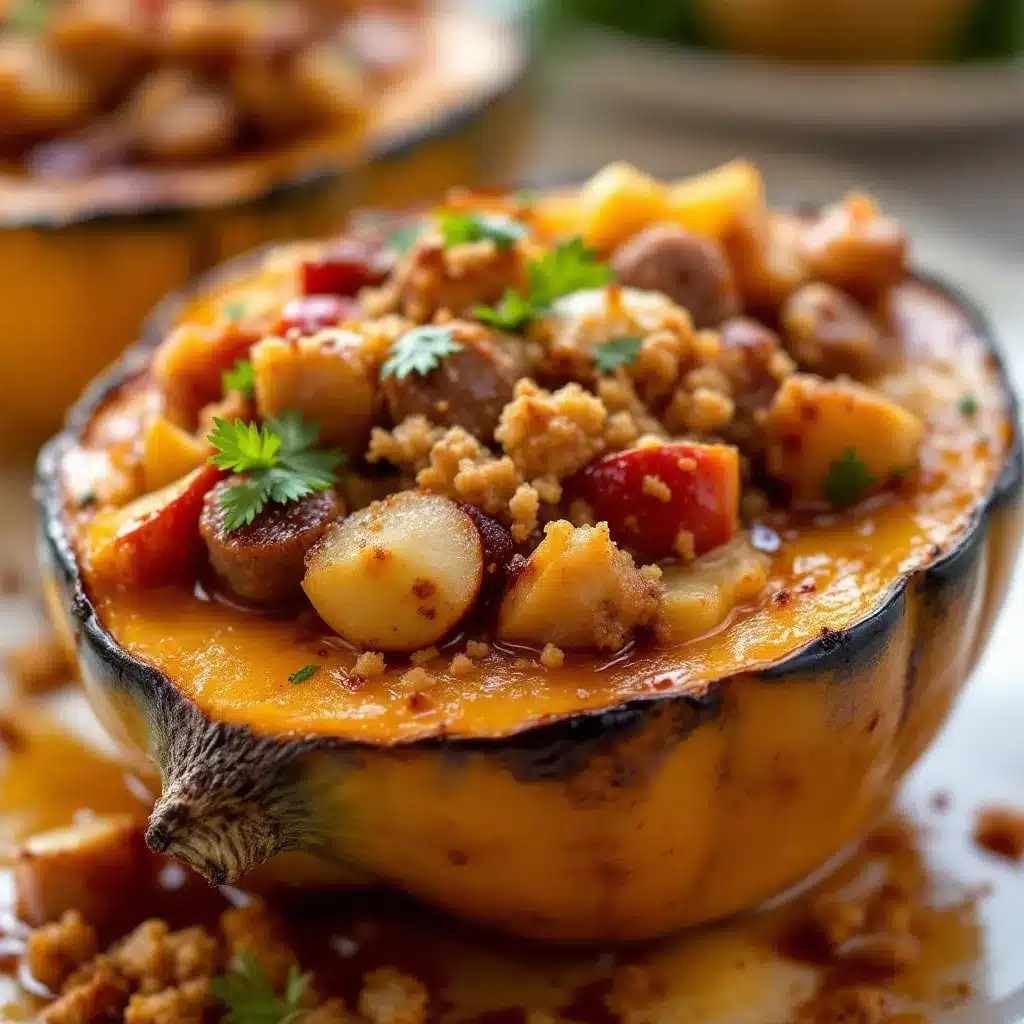
Let me walk you through this step by step. I’ve included all the little details I wish someone had told me when I was ruining squash years ago.
- Preheat your oven to 400°F (200°C). Get this going first so the oven is hot when you need it.
- Prepare the squash. Using a sharp chef’s knife, carefully cut each acorn squash in half from stem to tip. Scoop out the seeds and stringy bits with a spoon. Don’t worry about getting every last fiber—just get the bulk of it. Brush the cut sides and the cavities with 1 tablespoon of olive oil, then season lightly with salt and pepper.
- Start the pre-roast. Place the squash halves cut-side down on your baking dish or sheet. This is the trick that changed everything for me. Roast for 20 minutes. The squash will start to soften and develop a bit of color on the cut surface. It won’t be fully cooked yet, but it’s getting there.
- While the squash roasts, make the filling. Heat the remaining 1 tablespoon of olive oil in a large skillet over medium-high heat. Add the sausage, breaking it up with a wooden spoon as it cooks. Cook until browned and cooked through, about 6-8 minutes. Don’t rush this—browning equals flavor.
- Add the aromatics. Reduce the heat to medium. Add the diced onion to the skillet with the sausage. Cook for 3-4 minutes until the onion starts to soften and turn translucent. Add the minced garlic and chopped sage, and cook for another minute until fragrant. Your kitchen should smell amazing at this point.
- Add the apples and cranberries. Stir in the diced apple and dried cranberries. Cook for 2 minutes, just until the apple starts to soften slightly. You don’t want it mushy—it will continue to cook in the oven.
- Finish the filling. Remove the skillet from heat. Stir in the panko breadcrumbs and chicken broth. The broth helps bind everything together and keeps the filling moist. Season with salt and pepper to taste. Let the mixture cool slightly while the squash finishes its pre-roast.
- Flip the squash. After 20 minutes, carefully flip the squash halves over so they’re cut-side up. Use tongs or an oven mitt—they’ll be hot. Let them cool for a couple of minutes so you don’t burn yourself when filling them.
- Stuff the squash. Divide the filling evenly among the four squash halves. Press it down gently so it stays in place. Don’t overstuff—you want the filling to be mounded but not falling off. If you’re using Parmesan, sprinkle it over the tops now.
- Bake until done. Return the stuffed squash to the oven and bake for another 20-25 minutes. The squash should be fork-tender (a knife should slide in easily), and the filling should be golden brown on top. If the filling is browning too quickly but the squash isn’t done yet, tent loosely with foil for the last 10 minutes.
- Rest before serving. Let the squash rest for 5 minutes after coming out of the oven. This allows the filling to set slightly and makes it easier to serve. The squash will also cool down enough that you won’t burn your mouth on the first bite—trust me on this one.
Your kitchen is going to smell like a combination of roasted squash, savory sausage, and sweet apples. It’s one of those scents that makes you feel like everything is right in the world.
Cooking Tips & Techniques
I’ve made every mistake in the book with this recipe, so let me save you some trouble.
Don’t skip the pre-roast. I know it adds an extra step, but this is the difference between tender squash and crunchy squash. Acorn squash is dense, and if you just stuff it and bake it, the outside will be done before the inside is even close. The pre-roast gives it a head start. I learned this after serving what I can only describe as al dente squash to guests. Not my finest moment.
Use room temperature ingredients. Take the sausage out of the fridge about 15 minutes before you start cooking. It will brown better and more evenly. Same goes for the eggs if you’re adding any to the filling—though this recipe doesn’t call for them, it’s a good general rule.
Watch your oven temperature. Every oven runs differently. If yours runs hot, check the squash at the 15-minute mark during the final bake. If it runs cool, you might need an extra 5-10 minutes. I’ve burned more things than I care to admit by blindly trusting recipe timings instead of using my eyes and a fork.
Don’t overmix the filling. Once you add the breadcrumbs, just stir until everything is combined. Overmixing can make the filling dense and heavy. You want it to be light and crumbly, not like meatloaf.
Use a cookie scoop for even filling. If you want to get really precise, use a medium cookie scoop to portion the filling. It makes the squash look more uniform and professional. Not necessary, but it’s a nice touch if you’re serving guests.
Let the squash rest after cutting. Acorn squash can be tricky to cut. If you’re struggling, microwave the whole squash for 2-3 minutes to soften it slightly. This makes cutting much easier and safer.
Variations & Adaptations
This recipe is flexible, and I’ve tried several variations over the years. Here are some of my favorites:
Vegetarian Version — Swap the sausage for a plant-based sausage or use cooked lentils and chopped mushrooms. The mushrooms add that savory umami flavor that mimics the meatiness of sausage. I’ve made this for a vegetarian friend, and she said it was the best stuffed squash she’d ever had.
Gluten-Free Option — Use gluten-free panko breadcrumbs or crushed pork rinds for a low-carb version. The texture will be slightly different, but it still works beautifully. I’ve tested this with almond flour too, and while it’s not as crispy, it does the job.
Cheese Lover’s Version — Add 1/2 cup of shredded white cheddar or Gruyère to the filling. The cheese adds richness and makes the filling even more decadent. I do this when I want something extra indulgent on a cold winter night.
Spicy Kick — Use hot Italian sausage instead of sweet, and add a pinch of red pepper flakes to the filling. The heat pairs surprisingly well with the sweet apples and squash. My husband loves this version.
Maple Glaze Finish — Brush the squash with a mixture of maple syrup and melted butter during the last 5 minutes of baking. This adds a beautiful glossy finish and an extra layer of sweetness. It’s optional, but it makes the squash look gorgeous on a plate.
Herb Swap — If you don’t have fresh sage, use fresh thyme or rosemary instead. Each herb brings a different flavor profile, but they all work well with squash and apples. I’ve even used a combination of all three when I had leftover herbs in the fridge.
Serving & Storage Suggestions
This dish is best served hot, straight from the oven. Here’s how to make the most of it:
Serving Temperature — Let the squash rest for 5 minutes after baking, then serve immediately. The squash should be tender enough to cut with a fork, and the filling should be golden and slightly crispy on top. A sprinkle of fresh parsley or additional sage leaves makes it look restaurant-worthy.
What to Serve With It — This stuffed squash is a complete meal on its own, but it pairs beautifully with a simple green salad dressed with a tangy vinaigrette. The acidity cuts through the richness of the sausage and squash. A side of roasted Brussels sprouts or steamed green beans would also work well. If you’re in the mood for something heartier, try serving it alongside a bowl of hearty Tuscan white bean soup with kale for a truly cozy fall dinner.
Storage — Store leftover stuffed squash in an airtight container in the refrigerator for up to 4 days. The flavors actually meld together and improve overnight, so leftovers are often better than the first serving. I’ve been known to make extra just for this reason.
Reheating — Reheat in a 350°F oven for 10-15 minutes, or until warmed through. The microwave works in a pinch, but it will make the squash softer and less appealing. If you’re reheating in the oven, cover loosely with foil to prevent the filling from drying out. For a quicker option, you can also reheat in an air fryer at 350°F for 5-7 minutes.
Freezing — You can freeze the stuffed squash before or after baking. If freezing before baking, assemble the squash, wrap tightly in plastic wrap and then foil, and freeze for up to 3 months. Bake from frozen, adding about 15 minutes to the cooking time. If freezing after baking, let the squash cool completely, then wrap and freeze. Reheat directly from frozen in a 350°F oven.
Nutritional Information & Benefits
This recipe is surprisingly nutritious for how indulgent it tastes. Here’s a rough breakdown per serving (one stuffed squash half):
- Calories: Approximately 450-500
- Protein: 22-25 grams
- Fat: 22-25 grams
- Carbohydrates: 45-50 grams
- Fiber: 7-9 grams
- Sugar: 15-18 grams (mostly natural from squash and apples)
Health Benefits — Acorn squash is packed with vitamin A, vitamin C, and fiber. It’s also a good source of potassium and magnesium. The apples add additional fiber and antioxidants, while the sausage provides protein and iron. This is a balanced meal that will keep you full and satisfied without weighing you down.
Dietary Considerations — This recipe is naturally dairy-free if you skip the Parmesan topping. To make it gluten-free, use gluten-free breadcrumbs. It’s also relatively low in added sugars—the sweetness comes mostly from the squash and apples. If you’re watching your sodium, look for low-sodium sausage and broth.
Potential Allergens — This recipe contains gluten (breadcrumbs) and dairy (if using Parmesan). It’s also free of nuts and eggs, making it suitable for many common dietary restrictions.
I personally love that this dish feels like comfort food but doesn’t leave me feeling sluggish afterward. It’s the kind of meal that satisfies both your taste buds and your body.
Frequently Asked Questions
Can I use butternut squash instead of acorn squash?
Yes, but the cooking time will be different. Butternut squash is denser, so you’ll need to pre-roast it for about 30 minutes instead of 20. The flavor is slightly sweeter, which pairs nicely with the savory filling. Just make sure to cut the butternut squash into similarly sized halves for even cooking.
Can I make this recipe ahead of time?
Absolutely. You can prepare the filling up to 2 days in advance and store it in the refrigerator. You can also pre-roast the squash and stuff it a day ahead. When you’re ready to serve, just bake as directed, adding 5-10 minutes to account for the cold filling. This makes it perfect for holiday dinners or entertaining.
What if I don’t have panko breadcrumbs?
Regular breadcrumbs work just fine, though the texture will be slightly less crispy. You can also use crushed crackers, rolled oats (for a heartier texture), or even crushed pork rinds for a low-carb option. In a pinch, I’ve used crushed croutons, and it worked surprisingly well.
Can I use ground turkey instead of sausage?
Yes, but you’ll need to add more seasoning. Ground turkey is leaner and milder than sausage, so I recommend adding extra sage, some fennel seeds, and a pinch of red pepper flakes to mimic the flavor profile of Italian sausage. You might also need to add a tablespoon of olive oil to keep the filling from drying out.
How do I know when the squash is fully cooked?
The squash should be fork-tender. Insert a fork or the tip of a knife into the thickest part of the squash flesh—it should slide in with little resistance. The skin will also start to wrinkle slightly and pull away from the flesh. If the squash is still firm, give it another 5-10 minutes and check again.
Conclusion
This savory baked stuffed acorn squash with sausage and apples is one of those recipes that makes you feel like you’ve accomplished something in the kitchen, even though it’s surprisingly simple. It’s the dish I turn to when I want to impress without stress, when I want to feed my family something that feels special but doesn’t require a culinary degree.
I love this recipe because it’s forgiving. You can swap ingredients, adjust the seasoning, and it still comes out delicious. It’s the kind of meal that makes you want to sit down, take a deep breath, and actually enjoy the moment. And honestly, isn’t that what cooking should be about?
If you make this recipe, I’d love to hear how it turns out. Leave a comment below and let me know if you tried any variations or if this was your first time cooking acorn squash. Don’t be shy—I’ve made every mistake in the book, so there’s no judgment here. And if you’re looking for another cozy fall meal, try my creamy butternut squash soup with maple cream swirl for a perfect starter or side dish.
Happy cooking, friends. Go make something delicious.
Pin This Recipe!
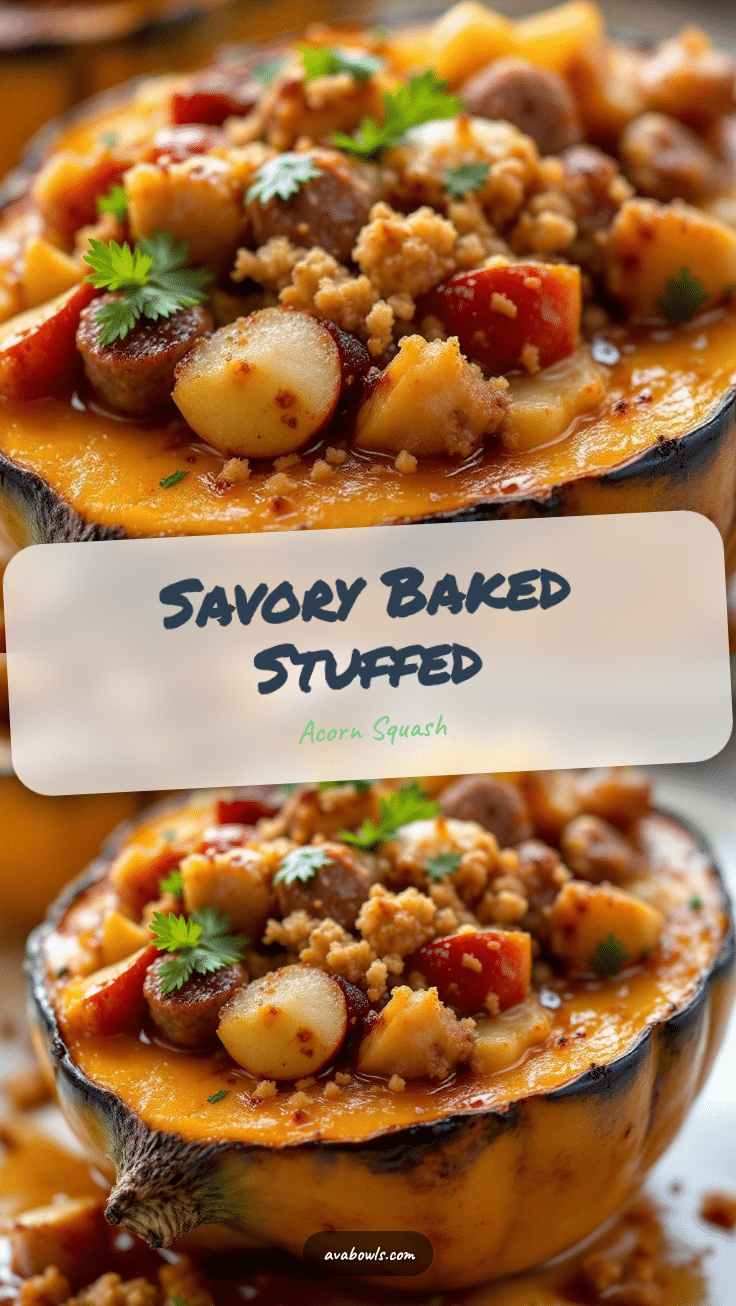
Best Savory Stuffed Acorn Squash with Sausage and Apples
This savory baked stuffed acorn squash with sausage and apples is tender, juicy, and packed with fall flavors. A forgiving recipe that looks beautiful on a plate without any fuss.
- Prep Time: 15 minutes
- Cook Time: 45 minutes
- Total Time: 1 hour
- Yield: 4 servings 1x
- Category: Main Course
- Cuisine: American
Ingredients
- 2 medium acorn squash, halved and seeded
- 1 pound sweet Italian sausage, casings removed
- 1 large Granny Smith apple, diced small
- 1 medium yellow onion, diced
- 1 tablespoon fresh sage, chopped
- 3 cloves garlic, minced
- 1/3 cup dried cranberries
- 1/2 cup panko breadcrumbs
- 1/4 cup chicken broth
- 2 tablespoons olive oil, divided
- Salt and black pepper to taste
- 1/4 cup grated Parmesan cheese (optional for topping)
Instructions
- Preheat your oven to 400°F (200°C).
- Prepare the squash: Cut each acorn squash in half from stem to tip. Scoop out seeds and stringy bits. Brush cut sides and cavities with 1 tablespoon olive oil, then season lightly with salt and pepper.
- Start the pre-roast: Place squash halves cut-side down on a baking dish. Roast for 20 minutes.
- While squash roasts, make the filling: Heat remaining 1 tablespoon olive oil in a large skillet over medium-high heat. Add sausage, breaking it up, and cook until browned and cooked through, about 6-8 minutes.
- Reduce heat to medium. Add diced onion to skillet and cook for 3-4 minutes until softened. Add minced garlic and chopped sage, cook for 1 minute until fragrant.
- Stir in diced apple and dried cranberries. Cook for 2 minutes until apple starts to soften.
- Remove skillet from heat. Stir in panko breadcrumbs and chicken broth. Season with salt and pepper to taste. Let cool slightly.
- After 20 minutes, carefully flip squash halves cut-side up. Let cool for a couple of minutes.
- Divide filling evenly among the four squash halves. Press down gently. If using Parmesan, sprinkle over tops.
- Return stuffed squash to oven and bake for another 20-25 minutes until squash is fork-tender and filling is golden brown. Tent with foil if browning too quickly.
- Let squash rest for 5 minutes before serving.
Notes
Don’t skip the pre-roast—it ensures tender squash. Use room temperature ingredients for better browning. Watch oven temperature and adjust timing as needed. Let squash rest after cutting for easier handling.
Nutrition
- Serving Size: 1 stuffed squash hal
- Calories: 475
- Sugar: 16
- Sodium: 800
- Fat: 23
- Saturated Fat: 7
- Carbohydrates: 47
- Fiber: 8
- Protein: 23
Keywords: stuffed acorn squash, sausage and apples, fall dinner, savory squash, baked squash


