Third batch of black cat cookie cake batter in two days, and I finally figured out why the whiskers kept melting into the frosting. It was two in the morning, my kitchen looked like a cocoa powder crime scene, and I was standing there with a toothpick in one hand and a half-eaten ear in the other—completely thrilled. That’s the kind of energy this spooky black cat Halloween cookie cake demands. Not perfection. Just a willingness to laugh at the wonky whiskers and eat the evidence.
I didn’t set out to make a black cat cookie cake, honestly. I was testing a new chocolate cookie base for something else entirely, and somewhere between the third fold of dark cocoa and a rogue splash of vanilla, I looked at the glossy black dough and thought—that’s a cat. Not a profound moment. Just a tired baker seeing shapes in chocolate. But once the idea stuck, I couldn’t shake it. Three rounds later, I had a cookie cake that actually looked like a little Halloween gremlin, and it tasted even better than it looked.
This recipe isn’t about perfect piping or fondant sculpting. It’s about a soft, fudgy chocolate cookie cake that happens to have ears and a tail. The kind of thing you make for a Halloween party when you want to impress people without spending three hours on a cake. The black cat shape is just the bonus. The real win is that chewy, crackly, deeply chocolate center that stays soft for days.
I’ve made this recipe six times now. Twice with friends, once for a neighbor’s kid who wanted a “spooky dessert,” and three times just because I couldn’t stop tweaking the ear shape. Every version got devoured. And honestly? That’s the only metric that matters.
Why You’ll Love This Recipe
Let me tell you why this spooky black cat Halloween cookie cake is about to become your new favorite October tradition. I’ve tested this thing into the ground, and every single time, it delivers.
- Quick & Easy: From mixing bowl to oven in under 20 minutes. No chilling, no complicated shaping. Just scoop, pat, and bake.
- Simple Ingredients: You probably have everything already. Butter, sugar, eggs, flour, cocoa powder—the usual suspects. No weird extracts or hard-to-find decorations.
- Perfect for Halloween Parties: This is the centerpiece that makes people say “oh my god, did you make that?” without you having to admit you spent all day on it. It’s a conversation starter and a dessert in one.
- Crowd-Pleaser: Kids love the cat face. Adults love the fudgy texture. Everyone loves that it’s a giant cookie they can just tear pieces off.
- Unbelievably Delicious: The texture is what gets me every time. Crispy edges, soft center, and that deep chocolate flavor that comes from using both cocoa powder and melted chocolate. It’s not a dry cookie cake. It’s practically brownie-like in the middle.
What makes this recipe different from all the other Halloween desserts out there? It’s the technique. I use a combination of melted butter and a touch of instant espresso powder to deepen the chocolate flavor without making it taste like coffee. And I shape the cat before baking, not after, so the ears actually stay attached. No cutting, no assembling. Just one big, beautiful black cat cookie cake that bakes up in one piece.
This isn’t just a Halloween recipe. It’s the kind of dessert that makes you feel like a kitchen wizard, even when you’re just following simple steps. Perfect for a spooky movie night, a classroom treat, or a low-stress party dessert that still looks impressive.
What Ingredients You Will Need
This recipe uses straightforward ingredients, but the way they work together is what makes the magic happen. Here’s what you’ll need to bring your spooky black cat Halloween cookie cake to life.
- Unsalted butter, melted (1 cup / 226g): Melted butter gives the cookie cake a chewier texture and richer flavor than creamed butter. Let it cool slightly before mixing so it doesn’t cook the eggs.
- Granulated sugar (1 cup / 200g): Standard white sugar adds sweetness and helps create those crispy, crackly edges. Don’t substitute with brown sugar here—it changes the texture too much.
- Light brown sugar, packed (½ cup / 100g): Brown sugar brings moisture and a hint of molasses that deepens the chocolate flavor. I like Domino brand for consistent results.
- Large eggs (2, room temperature): Room temperature eggs mix more evenly into the batter. If you’re in a rush, place them in a bowl of warm water for five minutes.
- Vanilla extract (2 teaspoons): Pure vanilla extract makes a difference. Imitation vanilla works in a pinch, but pure adds a warmth that complements the dark cocoa.
- All-purpose flour (2 cups / 250g): Standard AP flour gives the cookie cake structure without making it tough. Spoon and level your flour—don’t scoop directly from the bag or you’ll end up with a dry cake.
- Unsweetened cocoa powder (½ cup / 50g): I use Dutch-process cocoa for a darker color and smoother flavor. Natural cocoa works too, but the color will be less black and more brown. For maximum spookiness, try black cocoa powder if you can find it.
- Baking soda (1 teaspoon): Helps the cookie cake spread and rise just enough. Make sure it’s fresh—test it by dropping a pinch into vinegar; it should bubble immediately.
- Salt (½ teaspoon): Salt balances the sweetness and enhances the chocolate. I use fine sea salt for even distribution.
- Instant espresso powder (1 teaspoon, optional): This doesn’t make the cookie cake taste like coffee. It just makes the chocolate taste more chocolatey. Trust me on this one.
- Semi-sweet chocolate chips (1 cup / 175g): Folded into the batter for pockets of melted chocolate. You can use dark chocolate chips for a less sweet result, or milk chocolate if you prefer a sweeter cookie cake.
- Black gel food coloring (optional, 1-2 teaspoons): If you want that deep, true-black color for your cat, add a little gel coloring. Liquid food coloring won’t work as well and can throw off the batter consistency.
- For decoration: Candy eyes (I use Wilton brand), black licorice strings for whiskers, and a small amount of white icing or melted white chocolate for details.
For the best texture, make sure your eggs are at room temperature and your butter is melted but not hot. If you’re looking for a dairy-free option, you can substitute the butter with a high-quality vegan butter stick (not margarine) and use dairy-free chocolate chips.
Equipment Needed
You don’t need a lot of fancy equipment for this spooky black cat Halloween cookie cake. Here’s what I use:
- Large mixing bowl: Any bowl works, but a wide one makes mixing easier.
- Whisk and rubber spatula: A whisk for the wet ingredients, a spatula for folding in the dry stuff and chocolate chips.
- Baking sheet: A standard half-sheet pan (18×13 inches) is perfect. Line it with parchment paper or a silicone baking mat for easy removal.
- Parchment paper or silicone mat: Parchment is cheaper and disposable. Silicone mats are reusable and non-stick. Both work great.
- Small offset spatula or butter knife: For shaping the cat’s ears and tail on the baking sheet before baking.
- Cooling rack: Lets the cookie cake cool evenly so the bottom doesn’t get soggy.
- Toothpicks or skewers: For adjusting the shape of the ears and tail right after baking, while the cookie is still warm.
If you don’t have an offset spatula, a butter knife works just fine. I’ve also used the back of a spoon in a pinch. The key is just having something to gently push the dough into shape. A silicone baking mat is my personal favorite—nothing sticks, and cleanup is a breeze. Budget-friendly option? Parchment paper all the way.
Preparation Method
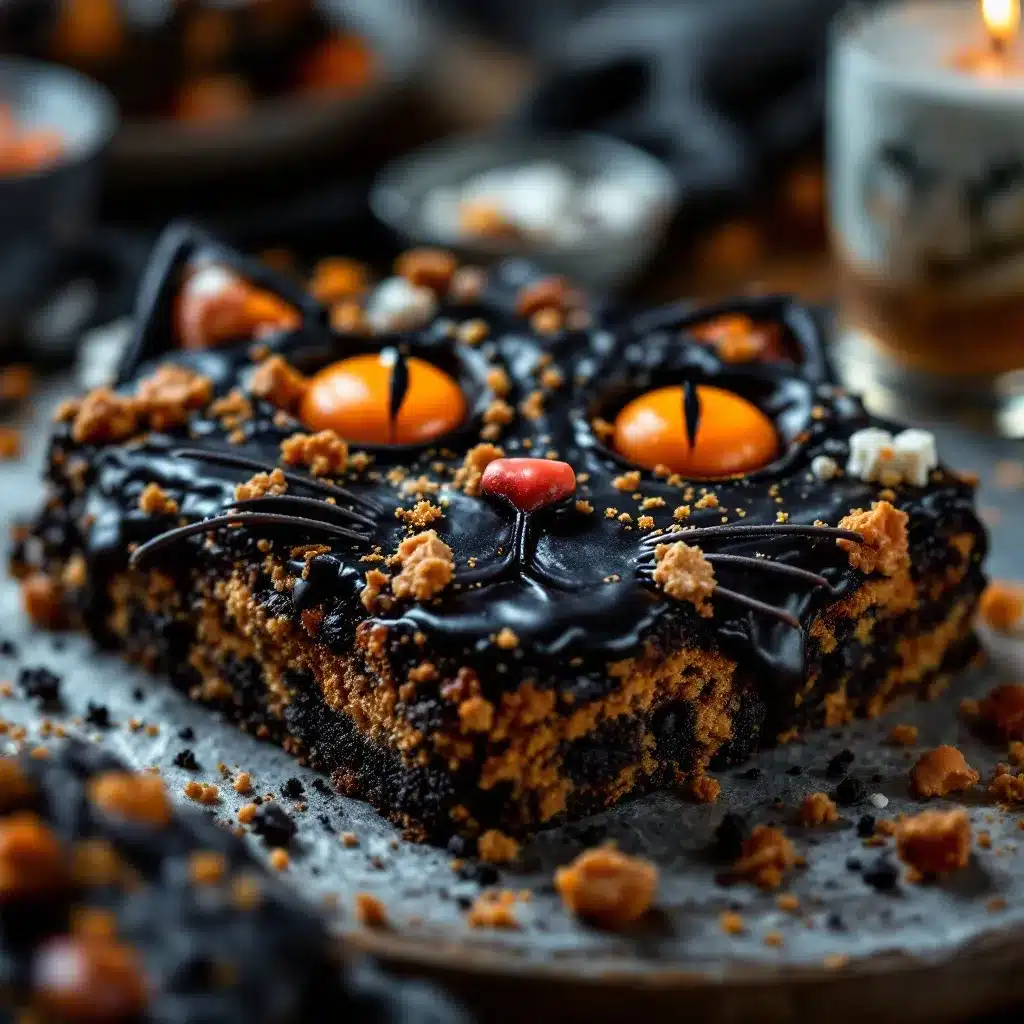
Let’s make this spooky black cat Halloween cookie cake. I’ll walk you through every step so you don’t end up with a cat that looks more like a blob. (Been there. Still tasted good though.)
Step 1: Preheat and Prep
Preheat your oven to 350°F (175°C). Line your baking sheet with parchment paper or a silicone mat. Set it aside while you make the dough.
Step 2: Mix the Wet Ingredients
In a large bowl, whisk together the melted butter (cooled slightly), granulated sugar, and brown sugar until smooth. It should look like wet sand—grainy but combined. Add the eggs one at a time, whisking well after each addition. Stir in the vanilla extract and the black gel food coloring if you’re using it. The mixture will look dark and glossy.
Step 3: Combine the Dry Ingredients
In a separate bowl, whisk together the flour, cocoa powder, baking soda, salt, and instant espresso powder (if using). Make sure there are no lumps—cocoa powder loves to clump. If you see any, press them through with the back of a spoon.
Step 4: Bring It Together
Gradually add the dry ingredients to the wet mixture, stirring with a rubber spatula until just combined. Don’t overmix—stop as soon as you don’t see any more flour streaks. Fold in the chocolate chips gently. The dough will be thick, slightly sticky, and very dark.
Step 5: Shape the Cat
Transfer the dough to your prepared baking sheet. Use your hands or the spatula to shape it into a rough cat head shape—a large circle about 8 inches (20 cm) in diameter. Don’t worry about perfection. Gently pull out two triangular ears from the top of the circle, and a small tail shape from the bottom or side. The dough should be about ½ inch (1.25 cm) thick throughout. If it’s too sticky, lightly wet your fingers.
Step 6: Bake
Bake for 18-22 minutes, rotating the pan halfway through. The edges should look set and slightly cracked, but the center will still look soft and slightly underdone. That’s exactly what you want—it will continue to set as it cools. A toothpick inserted in the center should come out with a few moist crumbs, not raw batter.
Step 7: Shape While Warm
Remove the baking sheet from the oven and let it cool for 5 minutes. While the cookie cake is still warm, use a toothpick or skewer to gently redefine the ears and tail if they’ve spread during baking. Press the edges in slightly with the spatula if you want a cleaner shape.
Step 8: Cool Completely
Let the cookie cake cool on the baking sheet for another 10 minutes, then transfer it (parchment and all) to a wire rack to cool completely. Don’t try to decorate it while it’s warm—the candy eyes will slide right off.
Step 9: Decorate
Once completely cool, press candy eyes into the center of the face. Use a small dot of white icing or melted white chocolate to attach them if needed. Arrange black licorice strings for whiskers—three on each side. You can also pipe a small pink or white nose with a bit of frosting. Let the decorations set for 10 minutes before serving.
Cooking Tips & Techniques
I’ve made this spooky black cat Halloween cookie cake enough times to know exactly where things can go wrong. Here’s what I’ve learned:
Don’t overmix the dough. This is the number one mistake. Overmixing develops gluten, which makes the cookie cake tough instead of tender. Mix until the flour just disappears. A few streaks are fine.
Shape the ears thick. Thin ears burn. Make them at least ½ inch thick, same as the rest of the cookie. They’ll spread a little during baking, so make them slightly larger than you want the final result to be.
Use the toothpick trick. Right after baking, while the cookie is still warm, use a toothpick to gently pull the ears into a sharper point if they’ve rounded out. This little adjustment makes the difference between a cat and a potato.
Check your cocoa powder. Dutch-process cocoa gives a darker, more “black cat” color. Natural cocoa will give you a brown cat, which is still cute but less spooky. Black cocoa powder is even better if you can find it—it’s what gives Oreos their color.
Don’t skip the espresso powder. I know it sounds weird, but it doesn’t add coffee flavor. It just amplifies the chocolate. Think of it as a flavor booster, not a flavor changer.
Let it cool completely. I decorated one while it was still warm and the candy eyes melted into little white smears. Wait the full time. It’s worth it.
Bake on the center rack. The bottom of the cookie cake can burn if it’s too close to the heating element. Center rack, always.
Variations & Adaptations
This spooky black cat Halloween cookie cake is flexible. Here are some ways to make it your own:
- Gluten-Free Version: Substitute the all-purpose flour with a 1:1 gluten-free baking flour blend. I’ve used King Arthur Measure for Measure with great results. The texture will be slightly more tender, but it still holds together beautifully.
- Vegan Adaptation: Use melted vegan butter (I like Miyoko’s), flax eggs (2 tablespoons ground flaxseed mixed with 6 tablespoons water, let sit for 5 minutes), and dairy-free chocolate chips. The texture will be a bit more cake-like, but the flavor is still fantastic.
- White Chocolate Cat: Swap the semi-sweet chocolate chips for white chocolate chips and add 2 tablespoons of orange zest for a “pumpkin spice” black cat. The white chocolate contrasts beautifully with the dark cookie.
- Peanut Butter Twist: Swirl in ¼ cup of creamy peanut butter before shaping the cat. It creates a marbled effect and adds a salty-sweet contrast that’s absolutely addictive.
- Mini Cat Cookies: Instead of one big cookie cake, shape the dough into smaller cat heads (about 3 inches each) and bake for 10-12 minutes. Perfect for party favors or lunchbox surprises.
- Spider Web Decoration: Instead of a cat face, shape the dough into a large circle and pipe white icing in a spiral pattern, then drag a toothpick from the center outward to create a web effect. Same great cookie, different look.
I tried the peanut butter version last Halloween and it was gone before the party even started. Just a heads up—it’s dangerously good.
Serving & Storage Suggestions
This spooky black cat Halloween cookie cake is best served at room temperature. The texture is perfectly soft and chewy, and the chocolate flavor really shines when it’s not cold.
Presentation: Place the cookie cake on a dark plate or a wooden board to make the black cat pop. Add a few candy corn or Halloween sprinkles around the edges for extra spooky vibes. If you’re serving it at a party, let people break off pieces with their hands—it’s a cookie cake, after all.
Pairings: A cold glass of milk is the classic choice. For an adult twist, try it with a scoop of vanilla ice cream or a drizzle of warm caramel sauce. It also pairs surprisingly well with a hot cup of coffee or a creamy matcha latte—the bitterness of the matcha balances the sweetness of the cookie.
Storage: Store leftover cookie cake in an airtight container at room temperature for up to 5 days. Place a piece of bread in the container to keep it soft—the cookie will absorb moisture from the bread. Change the bread every other day.
Freezing: You can freeze the baked and cooled cookie cake (undecorated) for up to 3 months. Wrap it tightly in plastic wrap, then foil. Thaw at room temperature for about an hour, then decorate. The decorations (candy eyes, licorice) don’t freeze well, so add those after thawing.
Reheating: If you want that just-baked warmth, pop a piece in the microwave for 10-15 seconds. Or place it in a 300°F (150°C) oven for 5 minutes. Don’t overheat it or the chocolate chips will melt into a puddle.
Flavor Development: Honestly, this cookie cake tastes even better on day two. The flavors meld together and the texture becomes even more fudgy. So don’t stress if you make it a day ahead—it’s actually ideal.
Nutritional Information & Benefits
Let’s be real—this is a treat. But here’s the estimated nutritional breakdown per serving (assuming 8 servings):
- Calories: Approximately 420 per serving
- Fat: 22g
- Carbohydrates: 54g
- Protein: 6g
- Fiber: 3g
- Sugar: 34g
That said, there are some redeeming qualities. Dark cocoa powder is rich in antioxidants called flavonoids, which can support heart health. The eggs provide high-quality protein and essential vitamins like B12 and D. And if you use dark chocolate chips (70% cocoa or higher), you’re getting even more antioxidants and less sugar.
This recipe is vegetarian-friendly. For gluten-free or vegan adaptations, see the variations section above. It contains dairy, eggs, and gluten in its standard form, so keep that in mind if you’re serving guests with dietary restrictions.
Is this a health food? No. Is it a soul food? Absolutely. Sometimes you need a dessert that just makes you happy, and this spooky black cat Halloween cookie cake delivers on that front every single time.
Conclusion
This spooky black cat Halloween cookie cake is everything I want in a Halloween dessert—fun to make, impressive to serve, and absolutely delicious to eat. It’s not fussy or complicated. It’s just a really good chocolate cookie cake shaped like a cat, and honestly, that’s all you need.
I love that this recipe lets you be creative without requiring artistic skills. Your cat doesn’t have to look perfect. In fact, the slightly wonky ones are the most charming. I’ve made cats with lopsided ears, cats with too many whiskers, and cats that looked more like bears—and every single one got devoured with smiles.
So go ahead and make this for your Halloween party, your kid’s classroom, or just for a Tuesday night when you want something spooky and sweet. Customize the decorations, experiment with the variations, and don’t stress about perfection. The only rule is that you have to eat at least one piece while it’s still warm.
I’d love to see your black cat creations! Drop a comment below and tell me how yours turned out—did you add a witch hat? Make it a ghost? Or keep it classic with candy eyes and licorice whiskers? Share your photos and tag me on social media. Happy Halloween, and happy baking!
Frequently Asked Questions
Can I make this black cat cookie cake ahead of time?
Absolutely. You can bake the cookie cake up to two days in advance and store it in an airtight container at room temperature. Wait to add the decorations until right before serving so the candy eyes stay bright and the licorice stays crisp.
Why did my cookie cake spread too much?
If your cookie cake turned into a flat blob, the butter was probably too warm when you mixed it, or the dough wasn’t thick enough. Make sure your melted butter has cooled slightly before adding the eggs. Also, measure your flour correctly—spoon it into the measuring cup and level it off. Too little flour leads to excess spreading.
Can I use a different shape for this recipe?
Yes! The dough works great for any shape you want. Try a pumpkin, a ghost, a bat, or even a spider. Just keep the dough about ½ inch thick and adjust the baking time if the shape is significantly larger or smaller. A smaller shape might need only 12-15 minutes.
How do I get the cookie cake to be completely black?
For a true black color, use black cocoa powder (available at specialty baking stores or online) and add black gel food coloring. Dutch-process cocoa will give you a very dark brown, which still looks great for a cat. Natural cocoa will result in a brown cat—still cute, just less spooky.
Can I freeze the dough instead of the baked cookie?
Yes. Shape the dough into the cat shape on a parchment-lined baking sheet and freeze until solid (about 2 hours). Wrap it tightly in plastic wrap and then foil, and freeze for up to 3 months. Bake from frozen, adding 5-7 minutes to the baking time. No need to thaw first.
Pin This Recipe!
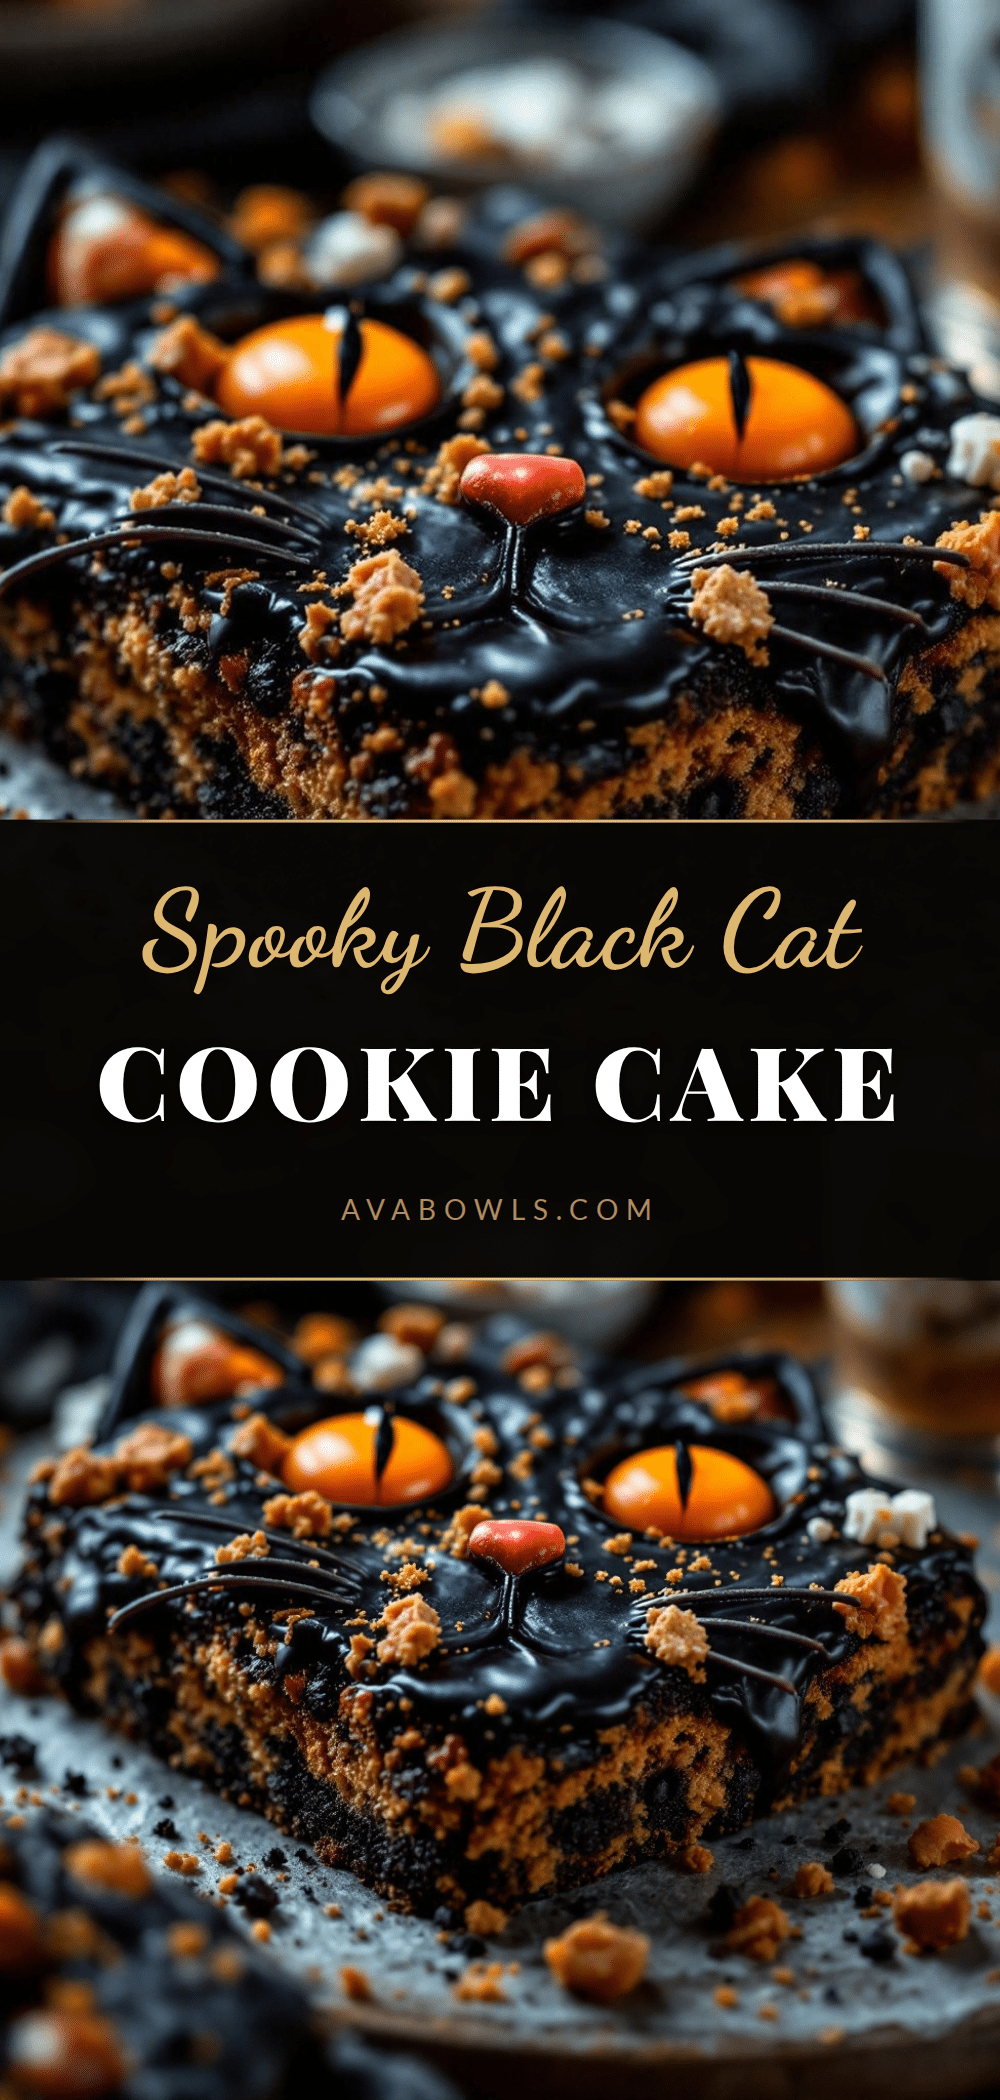
Best Easy Black Cat Halloween Cookie Cake Recipe

A soft, fudgy chocolate cookie cake shaped like a black cat, perfect for Halloween parties. Quick to make with simple ingredients, this spooky dessert is as delicious as it is fun to decorate.
- Prep Time: 20 minutes
- Cook Time: 20 minutes
- Total Time: 40 minutes
- Yield: 8 servings 1x
- Category: Dessert
- Cuisine: American
Ingredients
- 1 cup (226g) unsalted butter, melted
- 1 cup (200g) granulated sugar
- ½ cup (100g) light brown sugar, packed
- 2 large eggs, room temperature
- 2 teaspoons vanilla extract
- 2 cups (250g) all-purpose flour
- ½ cup (50g) unsweetened cocoa powder (Dutch-process preferred)
- 1 teaspoon baking soda
- ½ teaspoon fine sea salt
- 1 teaspoon instant espresso powder (optional)
- 1 cup (175g) semi-sweet chocolate chips
- 1–2 teaspoons black gel food coloring (optional)
- Candy eyes (e.g., Wilton brand)
- Black licorice strings for whiskers
- White icing or melted white chocolate for details
Instructions
- Preheat oven to 350°F (175°C). Line a baking sheet with parchment paper or a silicone mat.
- In a large bowl, whisk together melted butter (cooled slightly), granulated sugar, and brown sugar until smooth.
- Add eggs one at a time, whisking well after each. Stir in vanilla extract and black gel food coloring (if using).
- In a separate bowl, whisk together flour, cocoa powder, baking soda, salt, and instant espresso powder (if using).
- Gradually add dry ingredients to wet mixture, stirring with a rubber spatula until just combined. Fold in chocolate chips.
- Transfer dough to prepared baking sheet. Shape into a rough cat head (about 8 inches/20 cm diameter) with two triangular ears and a small tail. Keep dough about ½ inch (1.25 cm) thick.
- Bake for 18-22 minutes, rotating pan halfway through. Edges should be set and slightly cracked; center will look soft.
- Remove from oven and let cool for 5 minutes. While warm, use a toothpick to redefine ears and tail if needed.
- Cool on baking sheet for 10 minutes, then transfer to a wire rack to cool completely.
- Once cool, press candy eyes into the face. Attach with white icing if needed. Arrange licorice strings for whiskers (3 per side). Pipe a small nose if desired. Let decorations set for 10 minutes before serving.
Notes
For a true black color, use black cocoa powder and black gel food coloring. Dutch-process cocoa gives a darker color than natural cocoa. Don’t overmix the dough to keep it tender. Shape ears thick (at least ½ inch) to prevent burning. Let cookie cool completely before decorating to prevent candy eyes from melting. Cookie tastes even better on day two.
Nutrition
- Serving Size: 1 slice (1/8 of cook
- Calories: 420
- Sugar: 34
- Sodium: 280
- Fat: 22
- Saturated Fat: 13
- Carbohydrates: 54
- Fiber: 3
- Protein: 6
Keywords: black cat cookie cake, Halloween cookie cake, chocolate cookie cake, spooky dessert, easy Halloween dessert, black cat dessert


