I pulled the tray out of the oven and the kitchen went quiet. My husband, who was mid-conversation on the phone, stopped talking. He just pointed at the cookies and mouthed, “What is that smell?” That’s the thing about brown butter—it has a way of making people stop and pay attention. And when you add pumpkin and a cloud of cinnamon sugar on top? You’ve got a cookie that doesn’t just disappear from the plate; it gets talked about for days.
These Brown Butter Pumpkin Snickerdoodle Cookies started as a happy accident. I was trying to make a regular snickerdoodle, but it was a chilly October afternoon and I had a half-can of pumpkin sitting in the fridge from a batch of soup. I figured, why not? I browned the butter because, honestly, I think it makes everything better. The first batch came out a little flat, so I tweaked the flour and added a touch more pumpkin spice. The second batch? Those were the ones that made my husband forget he was on a phone call.
What I love most about this recipe is how it captures fall without being complicated. You don’t need a stand mixer or any fancy equipment. You don’t need to chill the dough for hours. You just need a skillet for the butter, a bowl for the dough, and about twenty minutes of patience while they bake. The result is a cookie that’s soft in the middle, slightly crisp at the edges, and absolutely drowning in that warm cinnamon-sugar coating. They taste like autumn in a single bite.
So if you’re looking for a cookie that feels special but doesn’t require a whole production, this is it. I’ve made these for potlucks, for lazy Sunday afternoons, and for no reason at all. Every time, someone asks for the recipe. And honestly? I’m happy to share.
Why You’ll Love This Recipe
I’ve tested this recipe more times than I can count, and every batch has taught me something. Here’s why I keep coming back to it—and why I think you will too.
- Quick & Easy : From start to finish, these cookies come together in about 30 minutes. No chilling time, no complicated steps. Perfect for when you want fresh cookies now.
- Simple Ingredients : You probably already have most of these in your pantry. Butter, sugar, flour, eggs, pumpkin puree, and a few spices. Nothing weird or hard to find.
- Perfect for Fall Gatherings : Whether it’s a Halloween party, Thanksgiving dessert table, or just a cozy night in, these cookies fit right in. They’re also great for pairing with a warm bowl of butternut squash soup for the ultimate autumn meal.
- Crowd-Pleaser : I’ve brought these to work, to family dinners, and to neighbor meet-and-greets. Kids love them. Adults love them. They disappear fast.
- Unbelievably Delicious : The brown butter adds a nutty, toasty depth that regular snickerdoodles just don’t have. The pumpkin keeps them soft and tender. And that cinnamon-sugar coating? Pure magic.
What makes these different from every other pumpkin cookie out there? It’s the brown butter. Most recipes just use softened butter or melted butter. Browning it first unlocks a whole new layer of flavor—it’s like the difference between a plain cookie and one that tastes like it came from a bakery. Plus, the texture is spot-on: soft, chewy, and just a little bit puffy. I’ve had friends tell me these are the best cookies they’ve ever eaten. Not the best pumpkin cookies. The best cookies, period.
This isn’t just another fall recipe. It’s the one you’ll make every year, the one people will start asking about in September. It’s comfort food at its finest—simple, warm, and absolutely unforgettable.
What Ingredients You Will Need
This recipe uses straightforward ingredients, but each one plays an important role. Here’s what you’ll need and why.
- Unsalted butter (1 cup / 2 sticks) — You’ll brown this, so start with unsalted to control the salt level. I prefer using a good-quality European-style butter like Kerrygold for extra richness, but any unsalted butter works.
- Granulated sugar (1 cup / 200g for the dough, plus 1/3 cup / 65g for rolling) — Regular white sugar gives the cookies structure and helps with that signature snickerdoodle crackle on top.
- Pumpkin puree (1/2 cup / 120g) — Make sure you’re using 100% pumpkin puree, not pumpkin pie filling. The filling has added sugar and spices that will throw off the recipe. Canned pumpkin is totally fine here—I use Libby’s most of the time.
- Large egg (1) — Bring it to room temperature before using. It helps the dough come together more smoothly.
- Vanilla extract (2 teaspoons) — Pure vanilla extract adds warmth and depth. If you only have imitation vanilla, it’ll still work, but the flavor won’t be as rich.
- All-purpose flour (2 cups + 2 tablespoons / 270g) — The extra 2 tablespoons help balance the moisture from the pumpkin. Don’t skip them or your cookies might spread too much.
- Cream of tartar (2 teaspoons) — This is the secret to that classic snickerdoodle tang and soft texture. Don’t substitute it—baking powder won’t give you the same result.
- Baking soda (1 teaspoon) — Helps the cookies rise and stay fluffy.
- Salt (1/2 teaspoon) — Balances the sweetness and enhances the brown butter flavor. I use fine sea salt.
- Pumpkin pie spice (1 1/2 teaspoons) — You can use store-bought or make your own with cinnamon, nutmeg, ginger, and cloves. I’ve done both and honestly, the store-bought blends work great here.
- Cinnamon (2 teaspoons for the coating, plus 1 teaspoon for the dough) — You’ll mix some into the dough and use the rest for rolling. Fresh cinnamon makes a big difference—try to get a good brand like McCormick or Simply Organic.
- Nutmeg (1/4 teaspoon, freshly grated if possible) — Adds a warm, slightly sweet note that pairs beautifully with the pumpkin.
Ingredient Substitutions: If you’re gluten-free, you can use a 1:1 gluten-free baking flour blend. I’ve tried it with King Arthur Measure for Measure and the texture was very close to the original. For a dairy-free version, use vegan butter—just make sure it’s a block-style butter, not a spread. The brown butter flavor won’t be as pronounced, but it’ll still be delicious. And if you don’t have cream of tartar, you can use 1 teaspoon of lemon juice or white vinegar mixed into the dough, though the texture will be slightly different.
Equipment Needed
You don’t need a lot of fancy tools for this recipe, which is one of the reasons I love it. Here’s what you’ll need:
- A light-colored skillet or saucepan — Browning butter is easier when you can see the color change. Dark pans make it hard to tell when the butter is done. A stainless steel or light-colored nonstick skillet works best.
- Mixing bowls (2 medium-sized) — One for the wet ingredients, one for the dry.
- Whisk — For mixing the dry ingredients and for whisking the brown butter with sugar.
- Rubber spatula — For folding everything together without overmixing.
- Cookie scoop (about 1.5 tablespoons) — Not required, but it makes the cookies uniform in size. I use a small scoop from OXO and it works perfectly.
- Baking sheets (2) — Line them with parchment paper or a silicone baking mat. Parchment is cheaper and works just as well.
- Cooling rack — Letting the cookies cool on a rack prevents them from getting soggy on the bottom.
If you don’t have a cookie scoop, you can use two spoons or just roll the dough into balls by hand. The cookies won’t be perfectly round, but they’ll taste the same. I’ve made these in a friend’s kitchen with a cheap baking sheet and a fork, and they still came out great. Don’t let equipment hold you back.
Preparation Method
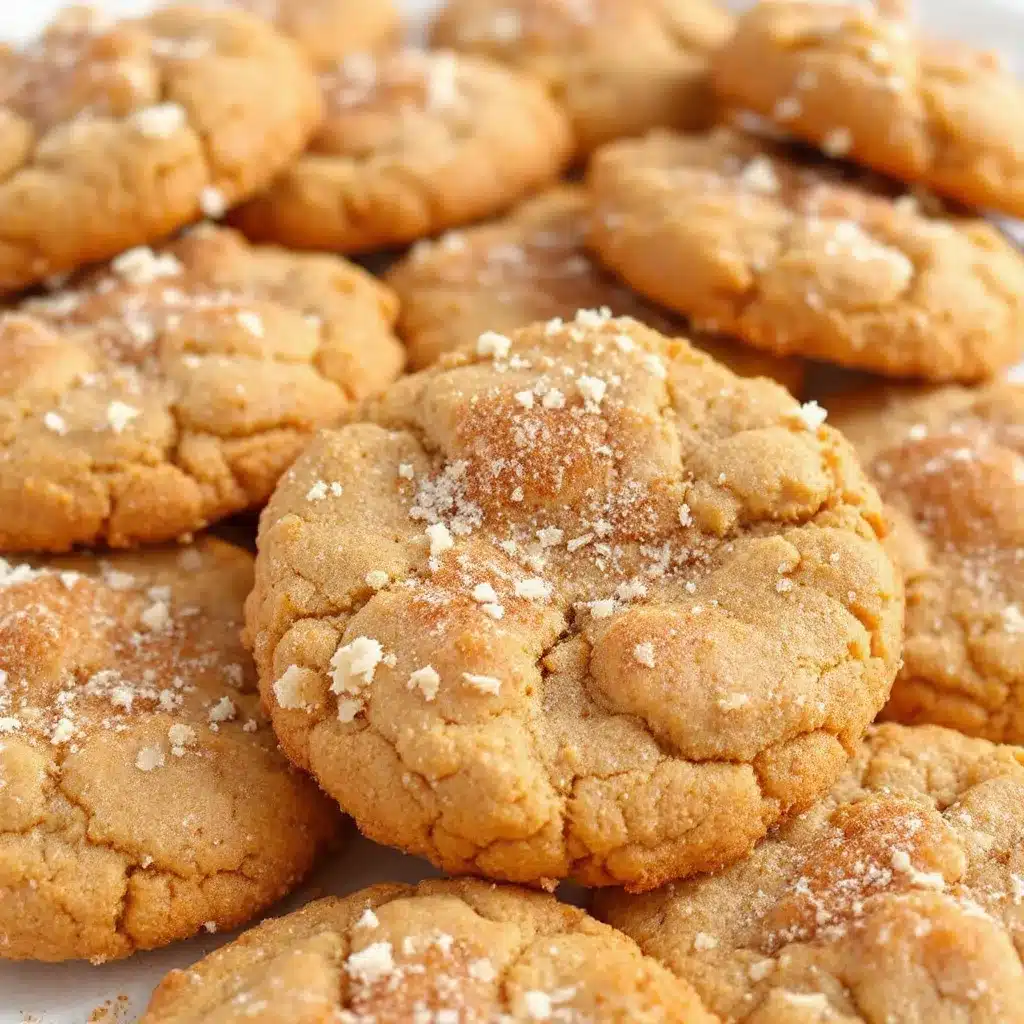
Let’s get into the actual making of these cookies. I’ll walk you through every step, including what to look for and what to avoid.
Step 1: Brown the butter
Place the 1 cup (2 sticks) of unsalted butter in a light-colored skillet over medium heat. Stir constantly with a rubber spatula or wooden spoon. After about 5-7 minutes, the butter will start to foam and turn golden. You’ll notice little brown specks forming at the bottom—that’s the milk solids toasting. Once the butter smells nutty and looks amber-colored (think the color of honey), remove it from the heat immediately. Pour it into a heatproof bowl to stop the cooking process. Let it cool for 10-15 minutes. Don’t skip this cooling step—if you add the sugar to hot butter, it’ll melt the sugar and change the texture of the cookies.
Step 2: Mix the wet ingredients
In a large mixing bowl, whisk the cooled brown butter with 1 cup (200g) of granulated sugar until well combined. It won’t be fluffy like creamed butter, but it should look smooth and glossy. Add the 1/2 cup (120g) of pumpkin puree, 1 large egg (room temperature), and 2 teaspoons of vanilla extract. Whisk until everything is fully incorporated. The mixture will look slightly separated at first—that’s normal. Keep whisking until it comes together into a uniform, slightly thick batter.
Step 3: Combine the dry ingredients
In a separate bowl, whisk together 2 cups + 2 tablespoons (270g) of all-purpose flour, 2 teaspoons of cream of tartar, 1 teaspoon of baking soda, 1/2 teaspoon of salt, 1 1/2 teaspoons of pumpkin pie spice, 1 teaspoon of cinnamon, and 1/4 teaspoon of nutmeg. Make sure there are no lumps, especially with the cream of tartar—it can clump up if you’re not careful.
Step 4: Combine wet and dry
Add the dry ingredients to the wet ingredients in two additions, folding gently with a rubber spatula after each addition. Mix just until no streaks of flour remain. Overmixing at this stage will make the cookies tough. The dough will be soft and slightly sticky, but it should hold together when pressed. If it feels too wet, add 1-2 tablespoons more flour. If it feels dry, add 1 tablespoon of milk or water.
Step 5: Prepare the cinnamon-sugar coating
In a small bowl, mix 1/3 cup (65g) of granulated sugar with 2 teaspoons of cinnamon. Stir until evenly combined.
Step 6: Shape and coat the cookies
Preheat your oven to 350°F (175°C). Line two baking sheets with parchment paper. Using a cookie scoop or your hands, portion out about 1.5 tablespoons of dough per cookie. Roll each portion into a smooth ball. Drop each ball into the cinnamon-sugar mixture and roll around until fully coated. Place the coated dough balls on the prepared baking sheets, spacing them about 2 inches apart. They will spread, so give them room.
Step 7: Bake
Bake one sheet at a time on the middle rack of the oven for 10-12 minutes. The cookies should look puffed and slightly cracked on top. The edges will be set, but the centers will still look soft and slightly underdone. That’s exactly what you want. Overbaking will make them dry. Let the cookies cool on the baking sheet for 5 minutes—they’ll continue to set as they cool. Then transfer them to a wire rack to cool completely.
Step 8: Repeat
If you’re baking in batches, let the baking sheet cool completely between batches. Placing dough on a hot sheet will cause the cookies to spread too much. You can speed this up by running the sheet under cold water and drying it off.
Pro tip: For extra-soft cookies, pull them out at the 10-minute mark. For slightly crispier edges, go to 12 minutes. I personally like them at 11 minutes—best of both worlds.
Cooking Tips & Techniques
I’ve made these cookies at least a dozen times, and I’ve learned a few things the hard way. Here are my best tips for getting them perfect every time.
Don’t over-brown the butter. The first time I made these, I let the butter go too far and it turned almost black. The cookies tasted burnt and bitter. You want the butter to be amber-colored, not dark brown. As soon as you see golden specks and smell that nutty aroma, pull it off the heat. Also, pour it into a cool bowl immediately—the residual heat in the pan will keep cooking it otherwise.
Measure your flour correctly. This is a big one. If you scoop flour directly from the bag with your measuring cup, you’ll end up with too much flour, and the cookies will be dry and crumbly. Instead, spoon the flour into the measuring cup and level it off with a knife. Or better yet, use a kitchen scale. 270 grams is the sweet spot.
Don’t skip the cream of tartar. I know it’s not a common pantry staple for everyone, but it’s what gives snickerdoodles their signature tang and soft texture. If you don’t have it, the cookies will still taste good, but they won’t have that classic snickerdoodle character. You can substitute 1 teaspoon of lemon juice or white vinegar, but the texture will be slightly different.
Chill the dough if needed. The dough is soft and sticky, which makes it easy to work with. But if your kitchen is warm or your butter was too warm, the dough might be too soft to roll. If that happens, pop the bowl in the fridge for 15-20 minutes. It’ll firm up nicely.
Bake one sheet at a time. I know it’s tempting to cram both sheets in the oven to save time, but the heat circulation won’t be even. One sheet will overbake while the other underbakes. Trust me, it’s worth the extra few minutes to bake them separately.
Variations & Adaptations
One of the best things about this recipe is how easy it is to adapt. Here are some variations I’ve tried and loved.
Gluten-Free Version: Substitute the all-purpose flour with a 1:1 gluten-free baking flour blend. I’ve used King Arthur Measure for Measure and Bob’s Red Mill 1:1, and both worked well. The cookies will be slightly more delicate, so handle them gently when transferring to the cooling rack.
Dairy-Free Version: Use vegan butter instead of regular butter. I’ve tried this with Earth Balance and Miyoko’s, and while the brown butter flavor isn’t as intense, the cookies are still delicious. Just make sure the vegan butter is a block-style product, not a spread.
Extra Pumpkin Spice: If you’re a pumpkin spice fanatic (no judgment here), increase the pumpkin pie spice to 2 teaspoons and add an extra 1/2 teaspoon of cinnamon to the dough. The flavor will be more pronounced, but it won’t overpower the brown butter.
Chocolate Chip Addition: Fold in 1/2 cup (90g) of white chocolate chips or butterscotch chips before shaping the cookies. The sweetness of the chips pairs beautifully with the nutty brown butter and warm spices. I’ve done this for holiday cookie exchanges and they were a huge hit.
Maple Glaze Drizzle: For an extra-special touch, whisk together 1/2 cup (60g) of powdered sugar, 2 tablespoons of maple syrup, and 1 tablespoon of milk. Drizzle over the cooled cookies. It adds a beautiful finish and a touch of maple flavor that complements the pumpkin perfectly.
Serving & Storage Suggestions
These cookies are best served slightly warm, when the edges are still a little soft and the cinnamon-sugar coating is at its most fragrant. Let them cool for about 5-10 minutes after baking, then dig in. I like to serve them with a cold glass of milk or a warm cup of chai tea. For a more indulgent treat, sandwich a scoop of vanilla ice cream between two cookies for an impromptu ice cream sandwich.
Storage: Store the cookies in an airtight container at room temperature for up to 5 days. I usually layer them with parchment paper between each layer to keep them from sticking together. They’ll stay soft and chewy for the first 2-3 days, then start to firm up a bit. If they get too firm, pop one in the microwave for 10 seconds—it’ll soften right up.
Freezing: These cookies freeze beautifully. You can freeze the baked cookies in a single layer on a baking sheet, then transfer them to a freezer-safe bag or container. They’ll keep for up to 3 months. Thaw at room temperature for about 30 minutes, or microwave for 15-20 seconds. You can also freeze the unbaked dough balls. Roll them into balls, coat them in the cinnamon-sugar mixture, and place them on a parchment-lined baking sheet. Freeze until solid, then transfer to a freezer bag. When you’re ready to bake, just pop them directly into the oven—no need to thaw. Add 1-2 minutes to the baking time.
One thing I’ve noticed: the flavors actually deepen after a day or two. The brown butter gets more pronounced, and the spices meld together beautifully. So if you can resist eating them all on day one, you’re in for a treat on day two.
Nutritional Information & Benefits
These cookies are a treat, so I won’t pretend they’re health food. But they’re made with real ingredients, and that counts for something. Here’s the estimated nutritional breakdown per cookie (based on 24 cookies):
| Nutrient | Amount per Cookie |
|---|---|
| Calories | 165 |
| Total Fat | 9g |
| Saturated Fat | 5g |
| Cholesterol | 30mg |
| Sodium | 95mg |
| Total Carbohydrates | 21g |
| Dietary Fiber | 1g |
| Sugars | 12g |
| Protein | 2g |
Pumpkin is a good source of vitamin A and fiber, which supports eye health and digestion. Cinnamon has anti-inflammatory properties and may help regulate blood sugar. And while brown butter isn’t exactly a health food, it does contain conjugated linoleic acid (CLA), which has been linked to some health benefits in moderation. Of course, the sugar and butter content means these should be enjoyed as part of a balanced diet. But honestly? Life is too short to skip cookies.
These cookies are not gluten-free, dairy-free, or vegan as written, but I’ve included substitution options above for those with dietary restrictions. They do contain eggs and dairy, so keep that in mind if you’re baking for someone with allergies.
Conclusion
These Brown Butter Pumpkin Snickerdoodle Cookies are everything I want in a fall dessert. They’re soft, chewy, and packed with warm, cozy flavors. The brown butter adds a nutty richness that makes them feel special, while the pumpkin keeps them tender and moist. And that cinnamon-sugar coating? It’s the kind of thing that makes you close your eyes after the first bite.
I’ve made these for holiday parties, for lazy Sunday afternoons, and for no reason at all. Every time, they disappear fast. And every time, someone asks for the recipe. That’s the highest compliment a cookie can get, if you ask me.
I’d love to hear how yours turn out. Leave a comment below and let me know if you tried any variations or if you have a favorite fall cookie recipe of your own. And if you share a photo on social media, tag me—I love seeing your baking adventures. Happy fall baking, friends!
Frequently Asked Questions
Can I use pumpkin pie filling instead of pumpkin puree?
No, I don’t recommend it. Pumpkin pie filling has added sugar and spices that will throw off the sweetness and texture of the cookies. Stick with 100% pure pumpkin puree for the best results.
Why did my cookies spread too much?
There are a few possible reasons. Your butter might have been too warm when you mixed the dough, or your baking sheet might have been hot when you placed the dough on it. Make sure the butter is cooled to room temperature before mixing, and let the baking sheet cool completely between batches. Also, check that you measured your flour correctly—too little flour can cause spreading.
Can I make these cookies ahead of time?
Absolutely. You can make the dough up to 2 days in advance and keep it covered in the fridge. Let it sit at room temperature for 10-15 minutes before shaping and baking. You can also freeze the baked cookies or unbaked dough balls for up to 3 months.
What if I don’t have cream of tartar?
You can substitute 1 teaspoon of lemon juice or white vinegar mixed into the wet ingredients. The cookies won’t have quite the same tangy flavor, but they’ll still be delicious. Alternatively, you can use 1 teaspoon of baking powder and skip the cream of tartar, but the texture will be slightly different.
Can I double this recipe?
Yes, this recipe doubles beautifully. Just make sure you have enough baking sheets and space in your oven. You might need to brown the butter in two batches to avoid overcrowding the pan. The baking time should stay the same, but keep an eye on the cookies—ovens can vary.
Pin This Recipe!
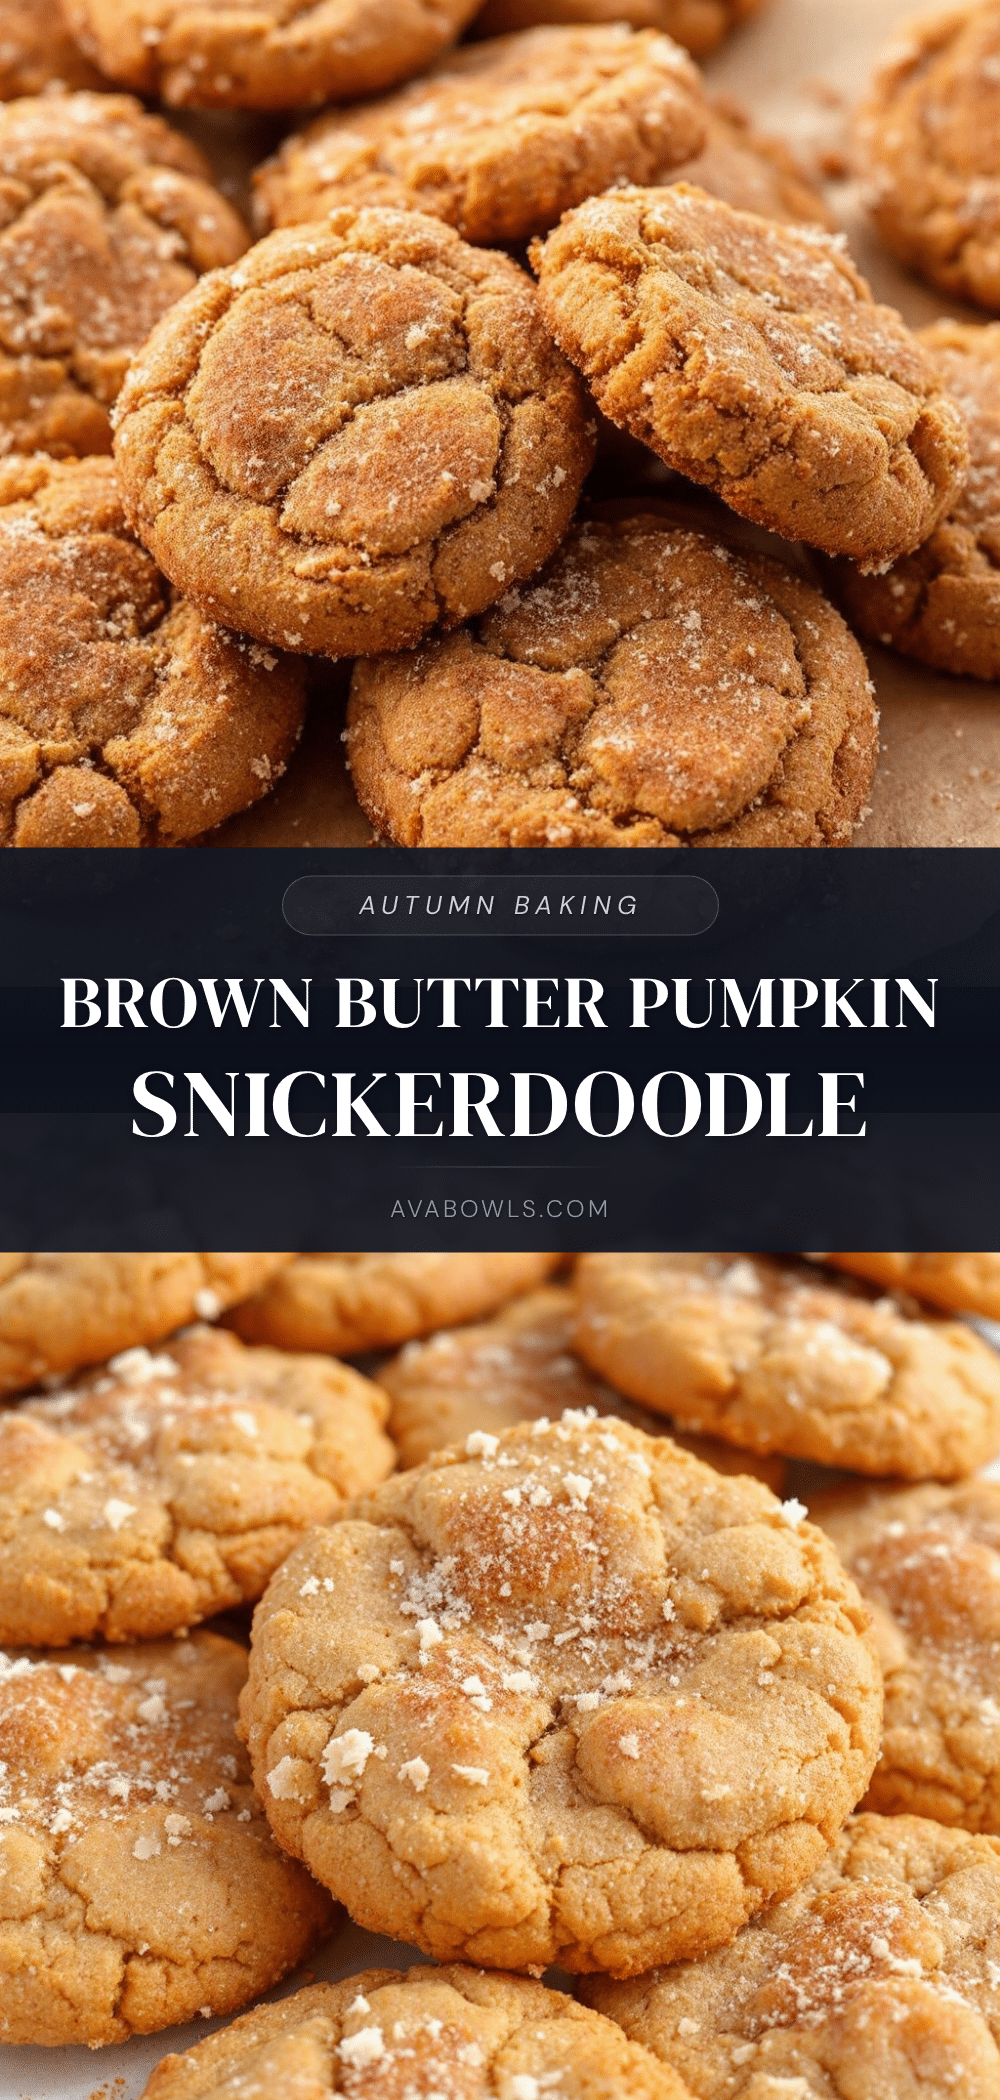
Best Brown Butter Pumpkin Snickerdoodle Cookies – Easy Fall Recipe
These Brown Butter Pumpkin Snickerdoodle Cookies are soft, chewy, and packed with warm fall flavors. The brown butter adds a nutty richness, while the pumpkin keeps them tender, all coated in a cloud of cinnamon sugar.
- Prep Time: 15 minutes
- Cook Time: 12 minutes
- Total Time: 27 minutes
- Yield: 24 cookies 1x
- Category: Dessert
- Cuisine: American
Ingredients
- 1 cup (2 sticks) unsalted butter
- 1 cup (200g) granulated sugar (for dough)
- 1/3 cup (65g) granulated sugar (for rolling)
- 1/2 cup (120g) pumpkin puree (100% pure, not pie filling)
- 1 large egg, room temperature
- 2 teaspoons vanilla extract
- 2 cups + 2 tablespoons (270g) all-purpose flour
- 2 teaspoons cream of tartar
- 1 teaspoon baking soda
- 1/2 teaspoon salt (fine sea salt)
- 1 1/2 teaspoons pumpkin pie spice
- 1 teaspoon cinnamon (for dough)
- 2 teaspoons cinnamon (for coating)
- 1/4 teaspoon nutmeg (freshly grated if possible)
Instructions
- Brown the butter: Place 1 cup (2 sticks) unsalted butter in a light-colored skillet over medium heat. Stir constantly for 5-7 minutes until the butter foams, turns golden, and smells nutty. Remove from heat immediately and pour into a heatproof bowl. Let cool for 10-15 minutes.
- Mix wet ingredients: In a large bowl, whisk the cooled brown butter with 1 cup (200g) granulated sugar until smooth and glossy. Add 1/2 cup (120g) pumpkin puree, 1 large egg (room temperature), and 2 teaspoons vanilla extract. Whisk until fully incorporated and slightly thick.
- Combine dry ingredients: In a separate bowl, whisk together 2 cups + 2 tablespoons (270g) all-purpose flour, 2 teaspoons cream of tartar, 1 teaspoon baking soda, 1/2 teaspoon salt, 1 1/2 teaspoons pumpkin pie spice, 1 teaspoon cinnamon, and 1/4 teaspoon nutmeg. Ensure no lumps.
- Combine wet and dry: Add dry ingredients to wet in two additions, folding gently with a rubber spatula after each addition. Mix just until no streaks of flour remain. Dough should be soft and slightly sticky.
- Prepare cinnamon-sugar coating: In a small bowl, mix 1/3 cup (65g) granulated sugar with 2 teaspoons cinnamon until evenly combined.
- Shape and coat cookies: Preheat oven to 350°F (175°C). Line two baking sheets with parchment paper. Using a cookie scoop or hands, portion about 1.5 tablespoons of dough per cookie. Roll into smooth balls, then coat each ball in the cinnamon-sugar mixture. Place on prepared baking sheets, spacing 2 inches apart.
- Bake: Bake one sheet at a time on the middle rack for 10-12 minutes. Cookies should look puffed and slightly cracked on top, with edges set but centers still soft. Let cool on baking sheet for 5 minutes, then transfer to a wire rack to cool completely.
- Repeat: Let baking sheet cool completely between batches. For extra-soft cookies, bake at 10 minutes; for crispier edges, go to 12 minutes.
Notes
Don’t over-brown the butter; it should be amber-colored, not dark brown. Measure flour correctly by spooning into the cup and leveling off. Don’t skip cream of tartar for the classic snickerdoodle tang. If dough is too soft, chill for 15-20 minutes. Bake one sheet at a time for even results. For gluten-free, use a 1:1 gluten-free flour blend. For dairy-free, use block-style vegan butter. Cookies can be stored in an airtight container at room temperature for up to 5 days, or frozen for up to 3 months.
Nutrition
- Serving Size: 1 cookie
- Calories: 165
- Sugar: 12
- Sodium: 95
- Fat: 9
- Saturated Fat: 5
- Carbohydrates: 21
- Fiber: 1
- Protein: 2
Keywords: brown butter, pumpkin, snickerdoodle, cookies, fall recipe, easy, cinnamon sugar


