Introduction
“You really think those colors will work?” my friend asked, eyeing the messy blobs of red, white, and blue batter I had just swirled together on the counter. Honestly, I wasn’t so sure either. I’d been fiddling with cake pops for weeks, trying to craft something festive yet simple enough for a last-minute backyard barbecue. The idea of perfect red white and blue cake pops with white chocolate drizzle was born out of sheer desperation on a chaotic July afternoon when the local fireworks show was just hours away, and I’d promised a patriotic dessert.
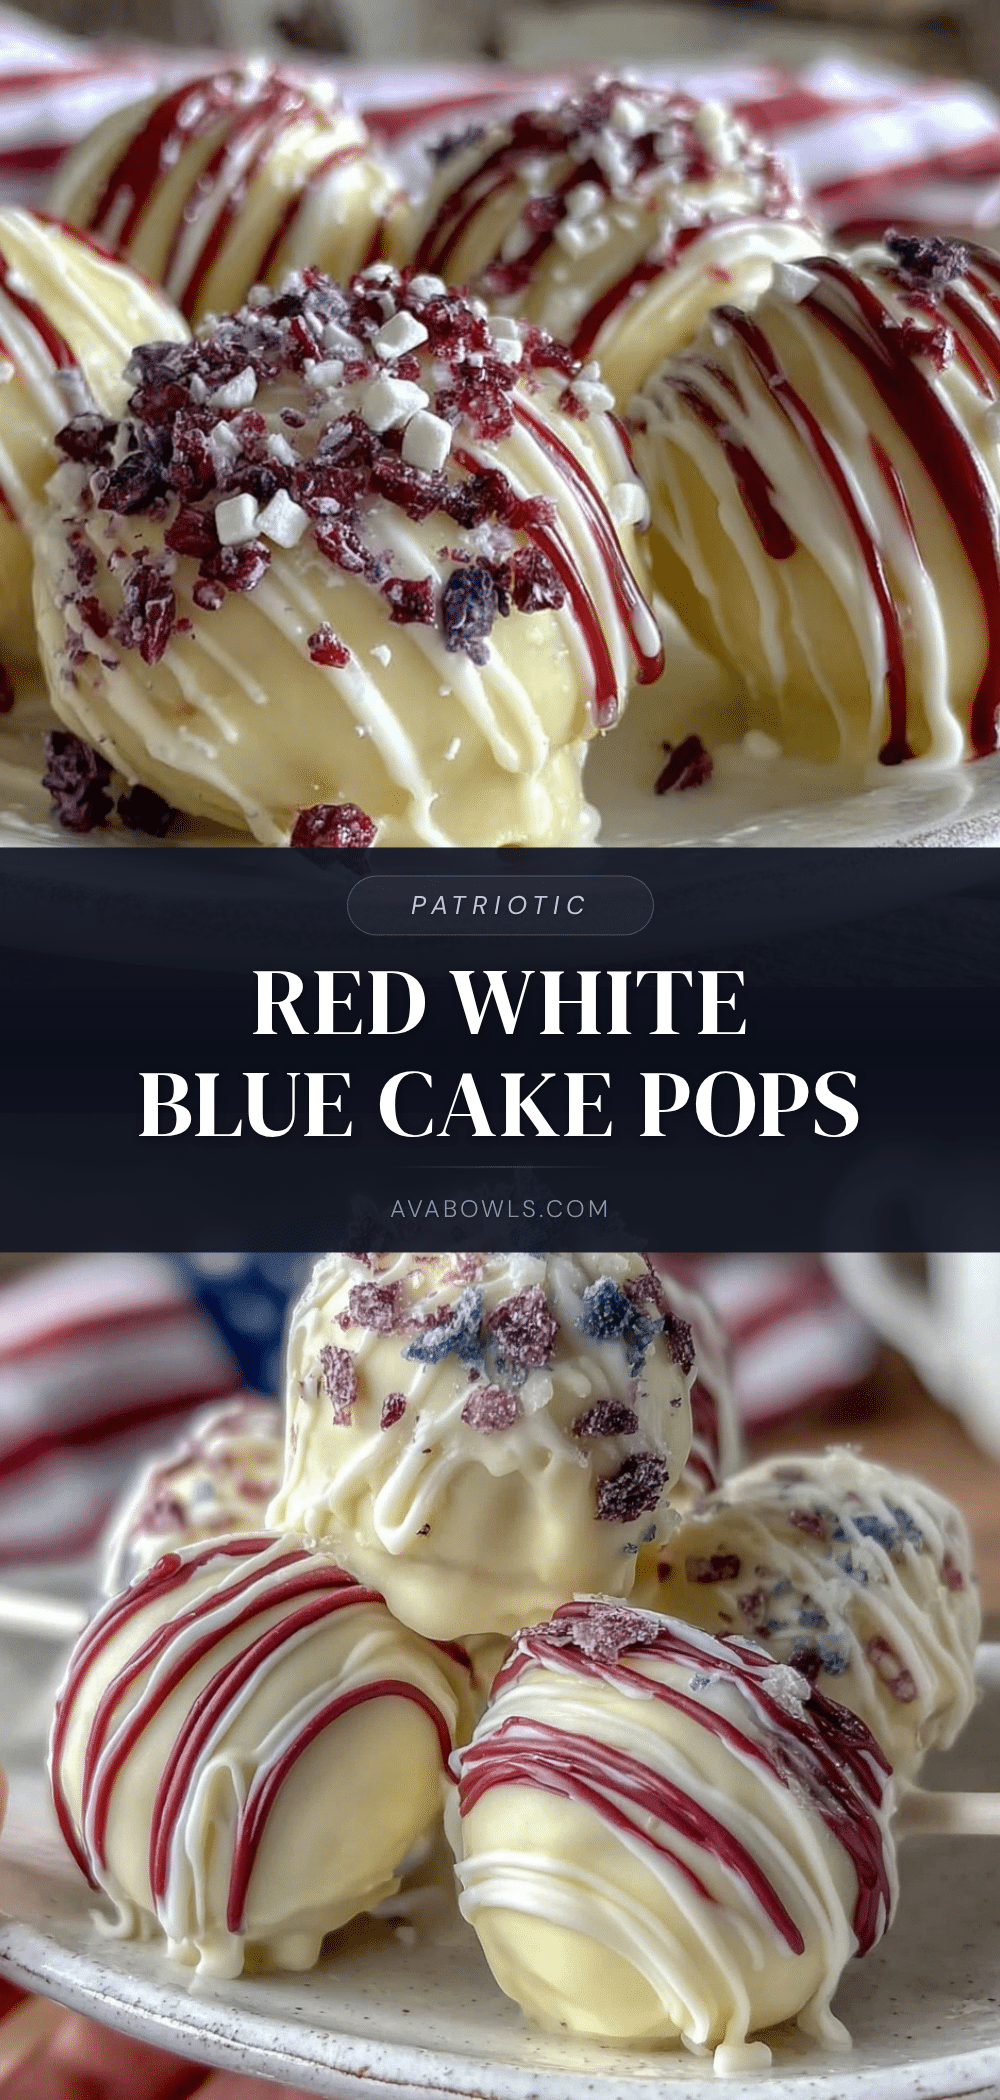
What started as a haphazard experiment with leftover cake crumbs and some food coloring quickly turned into my go-to party treat. I remember the first bite — that sweet hit of vanilla cake mixed with smooth white chocolate, the slight crunch of sprinkles, and the burst of color making it feel like a celebration in my mouth. No fancy tools, no complicated steps, just a simple, fun recipe that anyone can whip up with minimal fuss. It stuck with me not because it was flawless, but because it felt like a personal victory, a little edible flag waving proudly after a hectic day.
These cake pops are more than just a dessert; they’re a small moment of joy, a reminder that sometimes the simplest ideas turn into the best memories. If you’re looking for a festive treat that doesn’t require hours in the kitchen, you might find yourself making these red white and blue cake pops again and again — just like I did.
Why You’ll Love This Recipe
After testing this recipe countless times, I can honestly say it’s a winner for so many reasons. Whether you’re new to cake pops or a seasoned snack maker, these festive treats bring a bit of easy charm to any occasion.
- Quick & Easy: Ready in under 45 minutes, making it perfect for those spontaneous celebrations or last-minute dessert cravings.
- Simple Ingredients: All pantry staples — no need to hunt down anything fancy, just basics you probably already have hanging around.
- Perfect for Summer Parties: These cake pops are ideal for Fourth of July barbecues, Memorial Day picnics, or any red, white, and blue-themed event.
- Crowd-Pleaser: Kids and adults alike can’t get enough of these bite-sized treats. The white chocolate drizzle adds a touch of elegance that feels special without being fussy.
- Unbelievably Delicious: The balance of moist vanilla cake with rich white chocolate and a hint of crunch from sprinkles makes for a comforting yet festive bite.
What sets this recipe apart is the easy white chocolate drizzle technique, which I perfected after a few messy tries. It creates a delicate web of sweetness that looks impressive but is surprisingly simple to do. Plus, I swapped out the usual artificial food colorings for natural options that keep the flavors clean and the colors vibrant. Honestly, this isn’t just another cake pop recipe — it’s the one I reach for whenever I want to impress without the stress.
These cake pops aren’t just desserts; they’re little celebrations on a stick. They invite smiles, compliments, and a few quiet moments of indulgence — exactly what we all need sometimes.
What Ingredients You Will Need
This recipe relies on straightforward ingredients that come together to deliver that classic cake pop taste with a festive twist. Most of these items live in any well-stocked kitchen, and substitutions are easy if you need them.
- Vanilla Cake Mix (one standard box, about 15.25 oz or 432 g) – I like to use Betty Crocker for consistent texture.
- Eggs (2 large, room temperature) – helps bind the cake batter.
- Vegetable Oil (1/3 cup or 79 ml) – keeps the cake moist; you can swap with melted coconut oil for a subtle twist.
- Water (1 cup or 240 ml) – for mixing the cake batter.
- White Chocolate Chips (12 oz or 340 g) – for coating and drizzle; I recommend Ghirardelli for smooth melting.
- Red and Blue Gel Food Coloring – a couple of drops each to tint portions of cake crumbs (Wilton brand works great for vibrant color).
- Vanilla Frosting (about 1 cup or 240 g) – to bind the cake crumbs; homemade or store-bought both work.
- Sprinkles – red, white, and blue mix for decoration; optional but adds a festive crunch.
- Lollipop Sticks – standard size, about 4.5 inches (11.5 cm).
If you prefer a gluten-free option, grab a gluten-free vanilla cake mix and ensure your frosting is also gluten-free. For dairy-free, swap white chocolate for a dairy-free melting candy and use a frosting alternative like coconut cream frosting. In summer, fresh blueberries can be folded into the cake crumbs for a natural pop of flavor and color.
Equipment Needed
- Mixing Bowls: At least two medium-sized bowls for cake mix and frosting blending.
- Baking Sheet: Lined with parchment paper or a silicone mat for easy cleanup and cooling cake pops.
- Electric Mixer or Stand Mixer: Helpful for mixing cake batter smoothly, though a whisk and elbow grease can work in a pinch.
- Microwave-Safe Bowl: For melting white chocolate chips gently.
- Lollipop Sticks: Essential for holding the cake pops; reusable silicone sticks are a budget-friendly, eco-conscious option.
- Styrofoam Block or Cake Pop Stand: For drying dipped pops upright; a cardboard box with holes poked through works fine if you don’t want to buy a specialized stand.
Personally, I’ve tried using cake pop pans before, but I find shaping by hand gives better control over size and shape, especially when adding colors like in this recipe. For melting chocolate, avoid overheating — low power bursts in the microwave with stirring in between are the way to go. It keeps your coating silky and prevents burning.
Preparation Method
- Preheat your oven: to 350°F (175°C). Prepare a 9×13 inch (23×33 cm) baking pan by greasing lightly or lining with parchment paper.
- Mix the cake batter: In a large bowl, combine the cake mix, eggs, oil, and water. Beat on medium speed for about 2 minutes until smooth. Scrape down sides to ensure even mixing.
- Bake the cake: Pour batter into the prepared pan and bake for 30-35 minutes, or until a toothpick inserted into the center comes out clean. Let cool completely, about 1 hour.
- Divide and color the cake: Once cooled, crumble the cake finely into a large bowl. Separate into three equal portions. Add a few drops of red gel food coloring to one portion and mix well; repeat with blue gel on another portion. Leave the last one plain for white.
- Add frosting: To each colored crumb portion, add about 1/3 cup (80 g) of vanilla frosting. Mix with your hands or a spoon until the mixture holds together when pressed. Adjust frosting amount if too dry or wet.
- Form cake balls: Roll each portion into small balls about 1 inch (2.5 cm) in diameter. Place on a lined baking sheet and chill in the fridge for at least 30 minutes to firm up.
- Prepare the white chocolate coating: Melt white chocolate chips in a microwave-safe bowl at 50% power in 30-second intervals, stirring between, until smooth.
- Assemble cake pops: Dip one end of a lollipop stick into melted chocolate, then insert halfway into a cake ball. Repeat with all cake balls. Chill again for 15 minutes to set.
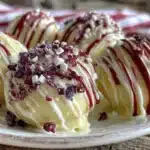
- Coat cake pops: Dip each cake pop into white chocolate, letting excess drip off. Immediately decorate with red, white, and blue sprinkles. Place upright in a styrofoam block or cake pop stand.
- Add the white chocolate drizzle: Thin the remaining white chocolate by adding a teaspoon of vegetable oil. Use a fork or a piping bag to drizzle over the cake pops in a zigzag pattern. Let set completely at room temperature or in the fridge.
Watch out for chocolate that’s too thick — it can clump and obscure your colors. Also, don’t skip chilling steps; they’re key for sturdy pops that don’t fall apart when dipped.
Cooking Tips & Techniques
Handling cake pops can be a bit tricky if you haven’t made them before. Here are some tips I’ve picked up along the way:
- Crumb texture matters: The cake crumbs should be fine but not powdery. If the crumbs are too coarse, your pops might be crumbly and fall apart.
- Frosting balance: Too little frosting and the mixture won’t bind; too much makes it gummy. Aim for a dough-like consistency that sticks but isn’t sticky.
- Chill, chill, chill: Don’t rush the chilling steps — firm cake balls are much easier to dip and less likely to fall off the sticks.
- Melting chocolate: Use short bursts in the microwave and stir often to avoid scorching. Adding a small amount of oil thins the chocolate for smooth dipping or drizzling.
- Drizzle technique: For neat drizzles, let the chocolate cool a bit after melting so it’s not too runny. Use a fork or a piping bag with a small tip for precise lines.
- Decoration timing: Add sprinkles immediately after dipping so they stick well. Waiting too long can cause them to fall off.
I once skipped chilling because I was in a hurry — disaster. The pops were limp and messy. Now I’m religious about that step. Also, I multitask by melting chocolate while cake balls chill, saving precious minutes.
Variations & Adaptations
You can easily tweak this recipe to suit different tastes or dietary needs:
- Flavor twists: Swap vanilla cake mix for chocolate or lemon for a new base flavor. Adding a teaspoon of almond extract to the frosting is a fun change.
- Dietary swaps: Use gluten-free cake mix and dairy-free frosting to make these cake pops allergy-friendly. For vegan versions, try vegan cake mix and coconut-based white chocolate chips.
- Seasonal colors: Instead of red, white, and blue, try pastel colors for Easter or orange and black for Halloween.
- Alternative coatings: Use colored candy melts instead of white chocolate for a different texture and flavor.
- Personal favorite: I once added crushed freeze-dried strawberries to the red crumbs for an extra fruity punch — it was a hit at a summer picnic.
Serving & Storage Suggestions
Serve these cake pops chilled or at room temperature for the best texture. They make a fun centerpiece on a dessert table or a grab-and-go party snack. For a patriotic gathering, pair them with a cool lemonade or iced tea to keep things light.
Store cake pops in an airtight container in the refrigerator for up to 5 days. If you want to keep them longer, they freeze well for up to a month — just thaw in the fridge before serving. Reheat gently by letting them sit at room temperature for 10-15 minutes; avoid microwaving as it can melt the coating.
Flavors actually meld nicely after a day in the fridge, so if you can make them ahead, they’ll taste even better the next day!
Nutritional Information & Benefits
Each cake pop contains approximately 150-180 calories, depending on size and frosting amount. The white chocolate adds fat and sweetness, so these are definitely a treat to enjoy in moderation.
Key ingredients like eggs provide protein, and choosing natural food colorings can reduce additives. Using a light frosting option can cut down on sugar content slightly. These cake pops are gluten-containing unless you use a gluten-free mix.
From my experience, these pops strike a nice balance between indulgence and portion control, making them a satisfying yet manageable dessert option.
Conclusion
These perfect red white and blue cake pops with white chocolate drizzle are a fun, festive way to celebrate any patriotic occasion or add a splash of color to your dessert table. I love how they bring smiles and little moments of delight with every bite. The recipe’s adaptability means you can easily make it your own — whether that’s switching up flavors, colors, or dietary preferences.
Making these cake pops reminded me that sometimes the simplest ideas, born from a hurried afternoon, end up being the ones we cherish most in the kitchen. I hope you’ll find the same joy in creating and sharing them. Feel free to share your twists or questions below — I’d love to hear how your cake pops turn out!
FAQs
How do I prevent cake pops from falling off the sticks?
Make sure to chill the cake balls before inserting sticks and dip the stick tip in melted chocolate before inserting it into the cake ball. This acts like glue to hold it in place.
Can I make cake pops without a box cake mix?
Absolutely! You can bake a homemade vanilla cake using your favorite recipe, then crumble and bind it with frosting just the same.
What’s the best way to melt white chocolate without it seizing?
Melt in short bursts at 50% microwave power, stirring frequently. Adding a teaspoon of vegetable oil helps keep it smooth and pourable.
Can I prepare cake pops a day ahead?
Yes, cake pops can be made and decorated a day ahead. Store them in the fridge in an airtight container and bring to room temperature before serving.
How do I color cake crumbs evenly?
Add gel food coloring a drop at a time and mix gently until the desired shade is reached. Avoid liquid colors as they can make the crumbs soggy.
For a light pasta side that pairs wonderfully with your festive cake pops, you might enjoy the creamy lemon ricotta pasta with fresh peas and mint. It’s a fresh, vibrant dish that balances sweetness beautifully.
If you’re throwing a party with multiple snacks, the loaded nachos supreme recipe is a fantastic savory counterpoint to these sweet cake pops, offering a full flavor experience to your guests.
Pin This Recipe!
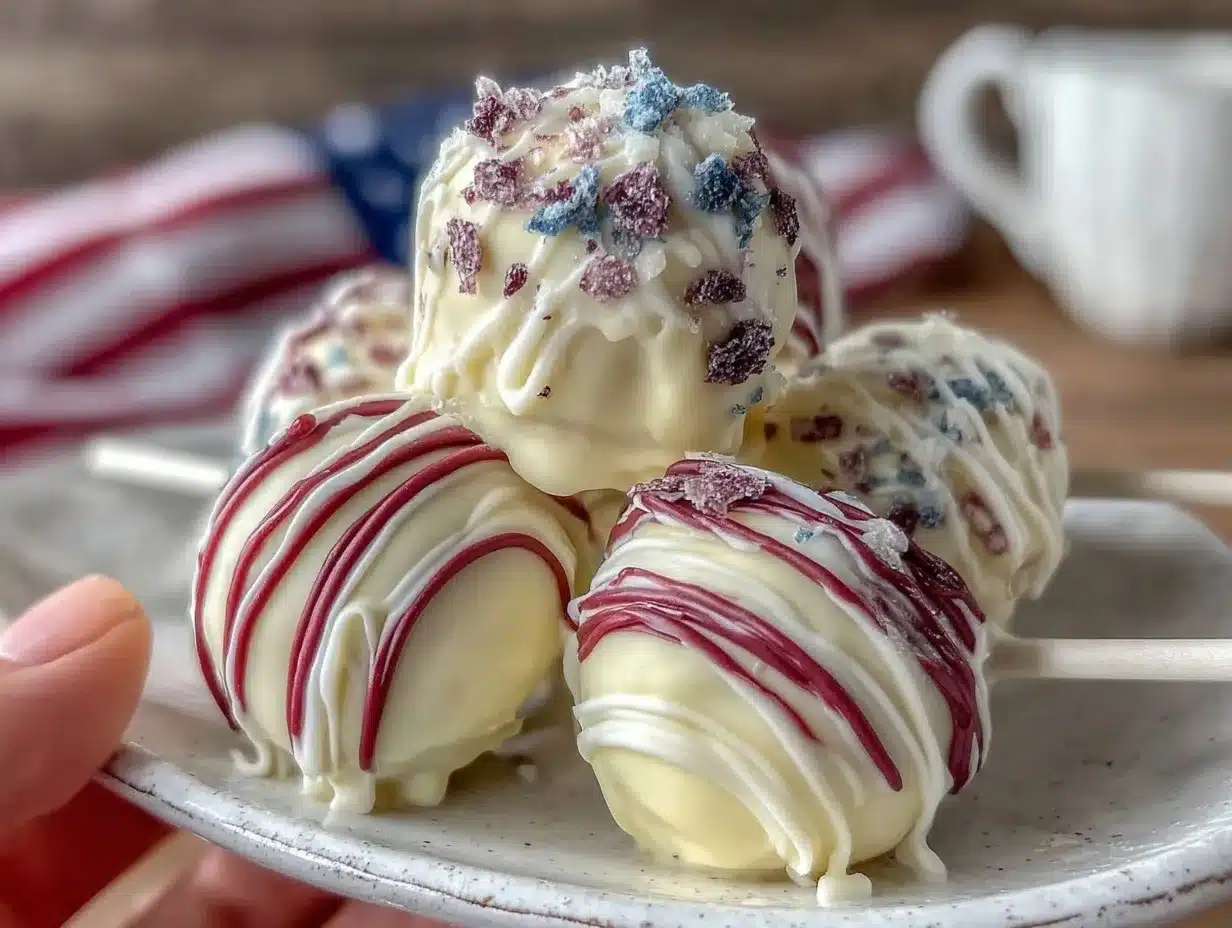
Perfect Red White and Blue Cake Pops
Festive and easy-to-make cake pops featuring red, white, and blue colors with a smooth white chocolate drizzle. Perfect for patriotic celebrations and quick dessert cravings.
- Prep Time: 20 minutes
- Cook Time: 35 minutes
- Total Time: 1 hour 55 minutes
- Yield: 24 cake pops 1x
- Category: Dessert
- Cuisine: American
Ingredients
- 1 box vanilla cake mix (about 15.25 oz or 432 g)
- 2 large eggs, room temperature
- 1/3 cup vegetable oil (79 ml)
- 1 cup water (240 ml)
- 12 oz white chocolate chips (340 g)
- Red gel food coloring, a few drops
- Blue gel food coloring, a few drops
- 1 cup vanilla frosting (about 240 g)
- Red, white, and blue sprinkles (optional)
- Lollipop sticks, about 4.5 inches (11.5 cm)
Instructions
- Preheat oven to 350°F (175°C). Grease or line a 9×13 inch baking pan with parchment paper.
- In a large bowl, combine cake mix, eggs, oil, and water. Beat on medium speed for 2 minutes until smooth. Scrape sides as needed.
- Pour batter into prepared pan and bake for 30-35 minutes or until a toothpick inserted in the center comes out clean. Let cool completely, about 1 hour.
- Crumble cooled cake finely into a large bowl. Divide into three equal portions.
- Add red gel food coloring to one portion and mix well; add blue gel food coloring to another portion and mix; leave the last portion plain for white.
- Add about 1/3 cup vanilla frosting to each colored portion. Mix until the mixture holds together when pressed, adjusting frosting as needed.
- Roll each portion into 1-inch diameter balls. Place on a lined baking sheet and chill in the refrigerator for at least 30 minutes.
- Melt white chocolate chips in a microwave-safe bowl at 50% power in 30-second intervals, stirring between until smooth.
- Dip one end of a lollipop stick into melted chocolate, then insert halfway into a cake ball. Repeat for all cake balls. Chill for 15 minutes to set.
- Dip each cake pop into white chocolate coating, letting excess drip off. Immediately decorate with red, white, and blue sprinkles. Place upright in a styrofoam block or cake pop stand.
- Thin remaining white chocolate with 1 teaspoon vegetable oil. Drizzle over cake pops using a fork or piping bag in a zigzag pattern. Let set completely at room temperature or in the fridge.
Notes
Chill cake balls thoroughly before dipping to prevent them from falling off sticks. Melt white chocolate in short bursts at 50% power and stir frequently to avoid burning. Add a teaspoon of vegetable oil to thin chocolate for smooth dipping and drizzling. Add sprinkles immediately after dipping for best adhesion. Use natural gel food coloring for vibrant colors without sogginess. Store cake pops in an airtight container in the fridge up to 5 days or freeze up to 1 month.
Nutrition
- Serving Size: 1 cake pop
- Calories: 165
- Sugar: 15
- Sodium: 110
- Fat: 9
- Saturated Fat: 5
- Carbohydrates: 20
- Fiber: 0.5
- Protein: 2
Keywords: cake pops, red white and blue, patriotic dessert, white chocolate drizzle, easy cake pops, party treats, summer dessert