Introduction
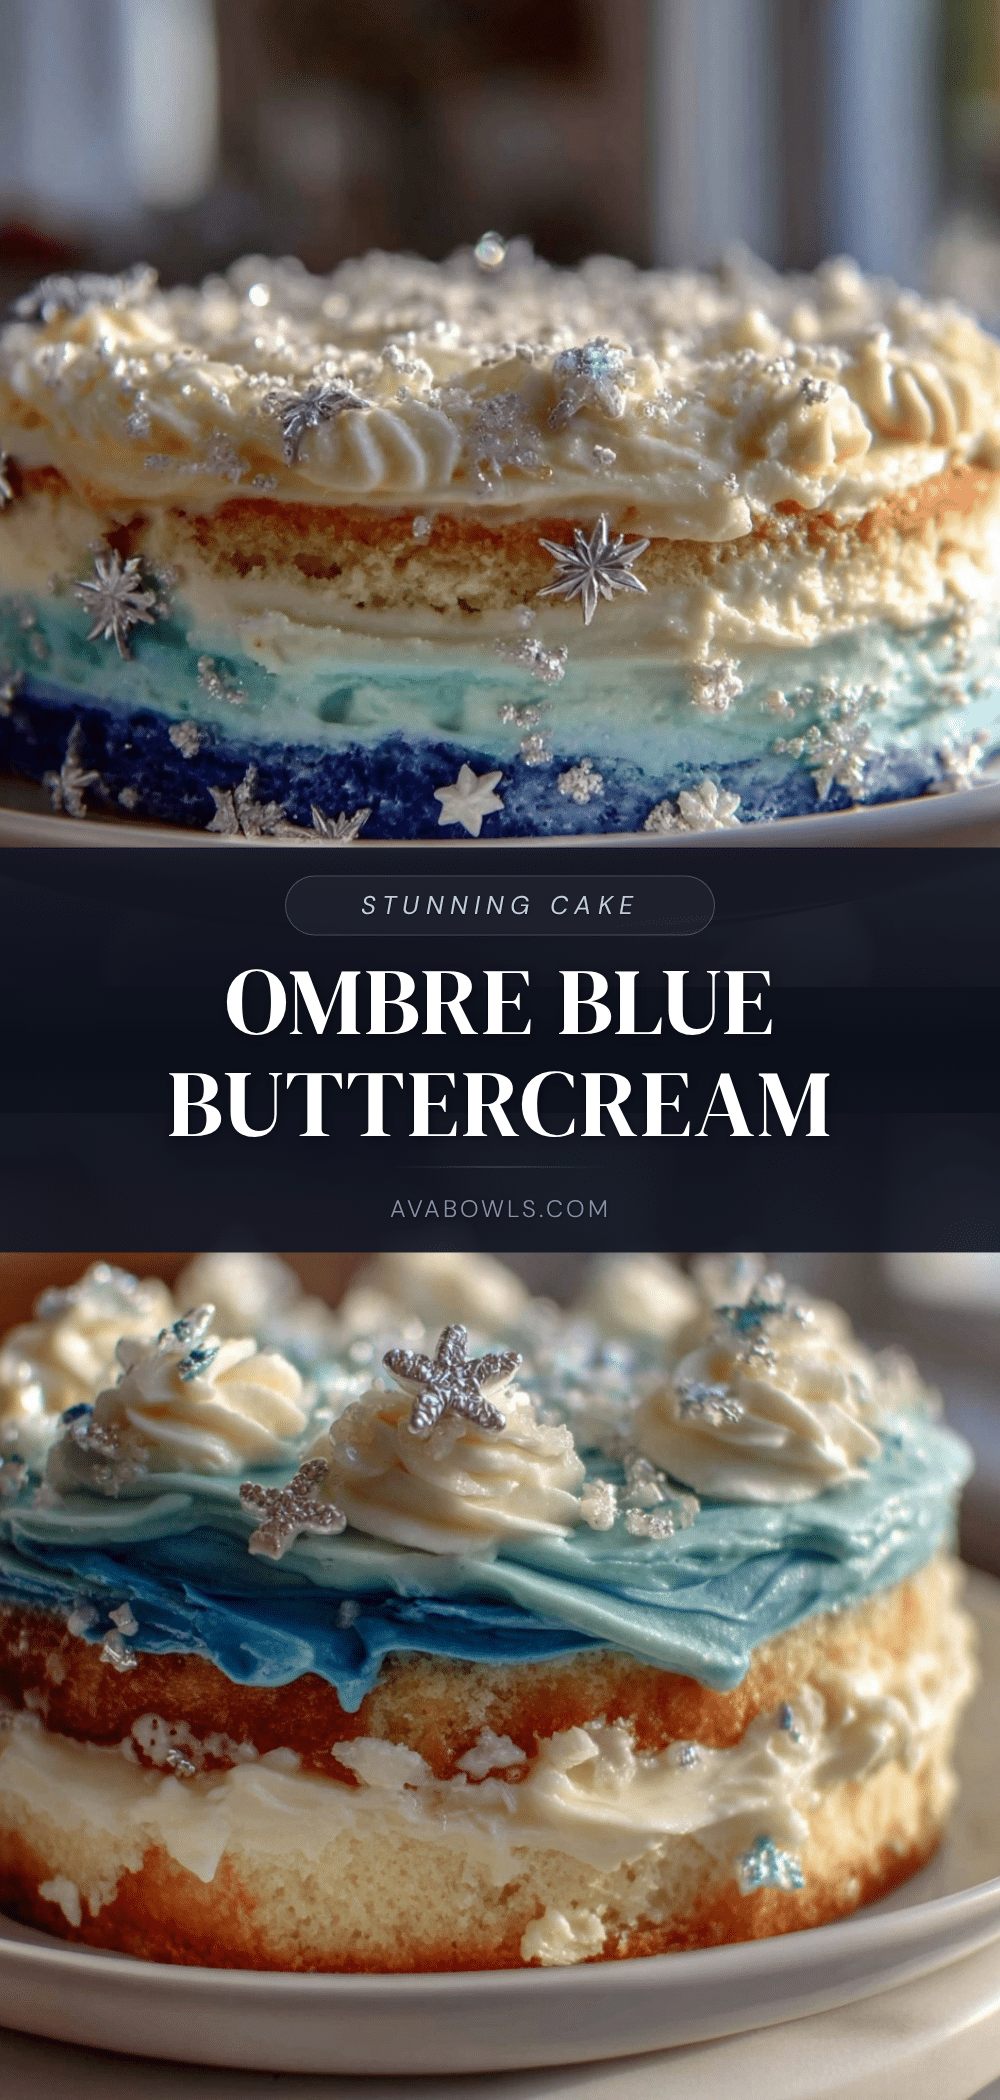
“You think you can just slap blue frosting on a cake and call it a day?” That was my friend’s skeptical text as I was mid-flurry in the kitchen, armed with piping bags and shades of blue food coloring. Honestly, I was just trying to put together something simple for my niece’s graduation party, but I got carried away with the idea of an ombre blue buttercream cake decorated with stars. I’d never really tried anything fancy like this before, but the moment I started blending those soft blues from pale sky to deep navy, it felt like painting with frosting.
The kitchen smelled like vanilla and butter, and the quiet hum of the mixer filled the room while my mind wandered to how this cake might turn out. It wasn’t supposed to be perfect—just memorable. But then, as I piped delicate buttercream stars across the top, something clicked. This cake wasn’t just a dessert; it was a little celebration on its own, the kind you pause to admire before slicing.
What surprised me most was how many people asked for the recipe afterward, not just because it looked pretty, but because the balance of smooth buttercream and moist layers felt genuinely special. That’s why this Perfect Ombre Blue Buttercream Graduation Layer Cake with Stars has stuck around in my baking rotation—it’s simple enough to make with some patience, yet stunning enough to make any grad feel like a star.
Why You’ll Love This Recipe
Making a cake that looks this good without feeling overwhelmed is a rare find, you know? After testing this recipe a few times (and yes, tweaking the buttercream for that perfect spreadability), I can say it’s a win for several reasons:
- Quick & Easy: The cake comes together in under 2 hours, perfect for last-minute celebrations or when you suddenly remember a graduation party is tomorrow.
- Simple Ingredients: No exotic stuff here—just pantry staples like butter, sugar, eggs, and flour, plus a little food coloring. You probably have everything already.
- Perfect for Graduation Parties: The blue ombre theme and star decorations feel festive and meaningful, reflecting the proud moment without being over the top.
- Crowd-Pleaser: Everyone—from kids to adults—loves the creamy, buttery frosting paired with the tender cake layers. It’s been requested for birthday parties and baby showers, too!
- Unbelievably Delicious: The buttercream’s smoothness and the cake’s moist crumb combine for that comfort-food feeling with a fancy twist.
What makes this cake stand out? It’s the layering of colors that gently fade into each other, achieved by careful blending of the buttercream. Plus, I use a simple star piping technique that gives it an elegant, handmade look without needing professional skills. Honestly, it’s one of those cakes where the look and taste both impress, and you don’t have to stress about perfection.
And hey, if you want to add a bit of savory flavor to your party spread alongside this beauty, the creamy spring vegetable fettuccine alfredo pairs beautifully—its fresh, comforting notes balance the sweetness just right.
What Ingredients You Will Need
This recipe uses simple, wholesome ingredients to deliver bold flavor and that iconic ombre look without fuss. Most are pantry staples, and you can swap a few if needed.
- For the Cake Layers:
- All-purpose flour – 2 ½ cups (315g), sifted for a lighter crumb
- Baking powder – 2 ½ teaspoons (10g), to keep the cake fluffy
- Salt – ½ teaspoon (3g)
- Unsalted butter – 1 cup (227g), softened (I like using Land O’ Lakes for rich flavor)
- Granulated sugar – 2 cups (400g), for sweetness and moisture
- Large eggs – 4, room temperature (helps with better mixing)
- Vanilla extract – 1 tablespoon (15ml), for classic warm notes
- Whole milk – 1 cup (240ml), room temperature (can swap with almond milk if dairy-free)
- For the Ombre Blue Buttercream:
- Unsalted butter – 1 cup (227g), softened (use fresh, good-quality butter for smoothness)
- Powdered sugar – 4 cups (480g), sifted to avoid lumps
- Vanilla extract – 1 teaspoon (5ml)
- Heavy cream – 2-3 tablespoons (30-45ml), to thin as needed
- Blue gel food coloring – varying amounts for each shade (gel food coloring works best for vibrant, smooth color)
- For Decoration:
- Small star-shaped sprinkles or sugar stars (optional, for extra sparkle)
- Edible glitter dust (optional, for a subtle shimmer)
Ingredient tips: When choosing your flour, a trusted brand like King Arthur gives consistent results. For the buttercream, always soften the butter but avoid melting it—that balance is key to piping smooth stars. If you prefer a dairy-free version, almond or coconut milk works in the cake, and use a vegan butter substitute for the frosting.
Equipment Needed
- Three 8-inch (20 cm) round cake pans – If you don’t have three, bake in batches and cool between bakes.
- Electric mixer – Stand mixer preferred, but a hand mixer works fine for the buttercream and batter.
- Mixing bowls – Several, for batter and frosting color mixing.
- Offset spatula and bench scraper – For smooth frosting application and leveling layers.
- Piping bags and star piping tips (like Wilton 1M or 2D) – For creating the signature star decorations.
- Cooling racks – To cool cakes evenly and avoid sogginess.
- Measuring cups and spoons – Accurate measurements make or break the cake.
If you’re on a budget, silicone baking mats can replace parchment paper, and plastic piping bags are a fine substitute for reusable ones. I once tried decorating without an offset spatula—let’s say patience was tested, but it’s worth investing in one for neat results. Also, keeping your pans well-greased and floured helps the layers pop out cleanly.
Preparation Method
- Prep your pans and ingredients: Preheat your oven to 350°F (175°C). Grease and flour the three 8-inch pans or line them with parchment paper. Bring your eggs, milk, and butter to room temperature for better mixing (about 30 minutes on the counter).
- Mix dry ingredients: In a medium bowl, sift together 2 ½ cups flour, 2 ½ teaspoons baking powder, and ½ teaspoon salt. Set aside.
- Cream butter and sugar: In your mixer bowl, beat 1 cup softened butter and 2 cups sugar on medium speed until light and fluffy—about 4-5 minutes. The texture should be pale and airy; this step is crucial for a tender crumb.
- Add eggs and vanilla: Beat in eggs one at a time, scraping down the sides after each addition. Mix in 1 tablespoon vanilla extract until combined.
- Alternate dry ingredients and milk: Reduce mixer speed to low. Add the dry mixture in three parts, alternating with the 1 cup milk, beginning and ending with flour. Mix until just combined; overmixing can toughen the cake.
- Divide batter evenly: Pour batter into the three pans, smoothing the tops with an offset spatula. If you want perfectly even layers, weigh the batter in each pan (around 450g each).
- Bake: Place pans in the preheated oven for 25-30 minutes or until a toothpick inserted in the center comes out clean. Rotate pans halfway through baking for even color.
- Cool layers: Let cakes cool in pans for 10 minutes, then turn out onto cooling racks. Cool completely before frosting.
- Make the buttercream: Beat 1 cup softened butter on medium speed until creamy. Gradually add 4 cups powdered sugar, beating on low first to avoid a sugar cloud, then increase speed. Add 1 teaspoon vanilla and 2 tablespoons heavy cream, adjusting cream for consistency. Beat until light and fluffy.
- Create ombre shades: Divide buttercream into four bowls. Add blue gel coloring incrementally to three bowls to get light, medium, and dark blue shades; leave one bowl white or very pale blue for the lightest shade. Stir well to blend color evenly.
- Assemble the cake: Place the darkest blue layer on your cake plate. Spread a thin layer of buttercream over the top. Add the medium blue layer and repeat. Continue with the light blue layer, then the palest shade for the top and sides.
- Apply crumb coat: Use the pale buttercream to cover the entire cake in a thin layer. Chill for 20-30 minutes to set.
- Final frosting and decoration: Frost the cake smoothly with the pale buttercream. Fill piping bags with each blue shade and pipe small star shapes around the cake, starting from the bottom with dark blue stars and fading to light blue at the top. Sprinkle with edible stars or glitter for a finishing touch.
Pro tip: If your buttercream feels too stiff to pipe stars, add a teaspoon more cream and re-whip. The stars should hold shape but still look soft and inviting.
Cooking Tips & Techniques
Getting that perfect ombre effect is all about patience and layering. I learned early on that rushing the color mixing or frosting application leads to messy gradients that don’t look as intentional.
- Beat the butter and sugar well: This step traps air and creates a light crumb. If skipped, the cake feels dense.
- Use gel food coloring: It blends better and doesn’t thin the buttercream like liquid colors sometimes do.
- Chill between coats: Setting crumb coats ensures you avoid crumbs mixing into your final frosting layer, giving you that smooth finish.
- Test piping pressure: Before piping stars on the cake, try a few on parchment paper. The pressure and angle make a big difference in star shape.
- Don’t overmix batter: Overworking the flour develops gluten, making the cake tough. Mix just until combined!
I remember the first time I skipped chilling the crumb coat—crumbs everywhere! Now, I always pop the cake in the fridge for a bit before the final frosting. Also, multi-task by prepping the buttercream shades while your cakes bake; it saves time.
Variations & Adaptations
This cake is flexible enough to fit different tastes and dietary needs. Here are a few ideas I’ve tried or recommend:
- Flavor twists: Add lemon zest to the cake batter for a fresh note or fold in a teaspoon of almond extract for a nutty hint.
- Dairy-free option: Swap butter with vegan butter sticks and use coconut or almond milk in the cake to make it fully dairy-free. Use dairy-free creamers to thin the frosting.
- Different color themes: While blue suits graduations perfectly, this ombre technique works great with pinks for baby showers or yellows and oranges for summer birthdays.
- Decorating styles: Instead of stars, try small rosettes or dots with the piping bag for a different texture. You can even add edible gold leaf for a fancy touch.
One time, I swapped the star sprinkles for tiny silver dragées, and it gave the cake a chic, modern vibe that people loved. Adapt the amount of food coloring if you want a more subtle or bold gradient. Also, if you want a quick version, try a single-layer cake with the same buttercream technique.
Serving & Storage Suggestions
Serve this cake at room temperature to get the full buttery flavor and creamy texture. I find it pairs wonderfully with a light fruit salad or a cup of tea to balance the sweetness. For a more indulgent spread, offer alongside a batch of creamy strawberry cream cheese stuffed French toast for a breakfast celebration vibe.
Store the cake covered in the refrigerator if not serving immediately, ideally in a cake box or covered with plastic wrap to keep it moist. Bring it to room temperature before slicing for the best texture. Leftovers keep well for up to 3 days refrigerated or can be frozen, wrapped tightly, for up to 2 months. When reheating frozen slices, thaw overnight in the fridge and rest at room temperature for an hour.
Over time, the star decorations might soften slightly but the ombre effect remains just as stunning. I’ve noticed the flavors meld nicely after a day, making the cake taste even better the next day.
Nutritional Information & Benefits
Per slice (estimate, based on 12 servings): approximately 350-400 calories, 18g fat, 45g carbohydrates, 3g protein.
While this cake is definitely a treat, it uses real butter and simple ingredients without preservatives or artificial additives. The butter provides vitamin A and essential fatty acids, while the eggs add protein and nutrients.
This recipe can be adapted for gluten-free diets by swapping in a gluten-free flour blend, and for dairy-free needs as mentioned earlier. Just be mindful of potential allergens like eggs and nuts if you customize.
From a wellness perspective, I like that this cake feels homemade and fresh, which often means fewer chemicals and more control over sweetness compared to store-bought options.
Conclusion
The Perfect Ombre Blue Buttercream Graduation Layer Cake with Stars is one of those recipes that makes you feel proud without the fuss. It’s a balance of beauty and simplicity that anyone can pull off with a little patience and love. Whether it’s your first time trying ombre frosting or you’re looking for that show-stopping graduation centerpiece, this cake delivers.
Feel free to make it your own with color tweaks or flavor twists—trust me, it’s fun to experiment! I love this recipe because it’s a memory-maker, every time, a little sweet tradition in buttercream and cake layers.
If you try it, I’d love to hear how your version turns out or what decorating ideas you added. Sharing that joy makes all the mixing and piping worth it. Here’s to making celebrations extra special, one star at a time.
Frequently Asked Questions
How do I get a smooth ombre effect on the cake?
Divide your buttercream into separate bowls and tint each with a different intensity of blue. Apply the darkest shade at the bottom and gradually lighter colors as you move up. Use a bench scraper to smooth the sides and gently blend where colors meet.
Can I make this cake ahead of time?
Yes, you can bake the layers a day or two in advance and keep them wrapped in the fridge. The buttercream can also be made ahead and stored covered in the fridge. Assemble and decorate the day of your event for best freshness.
What if I don’t have star piping tips?
No worries! You can use any open star tip or even a round tip for dots and rosettes. Alternatively, spread the buttercream smoothly and top with star-shaped sprinkles or edible decorations.
How can I make this cake gluten-free?
Replace the all-purpose flour with a 1:1 gluten-free baking flour blend. You might need to add a teaspoon of xanthan gum for structure if your blend doesn’t contain it. Baking times usually stay the same, but keep an eye on doneness.
What’s the best way to store leftover cake?
Cover the cake tightly with plastic wrap or store in an airtight container in the fridge. Bring to room temperature before serving to enjoy the buttercream’s creamy texture. For longer storage, freeze slices wrapped in foil and thaw overnight in the fridge.
Pin This Recipe!
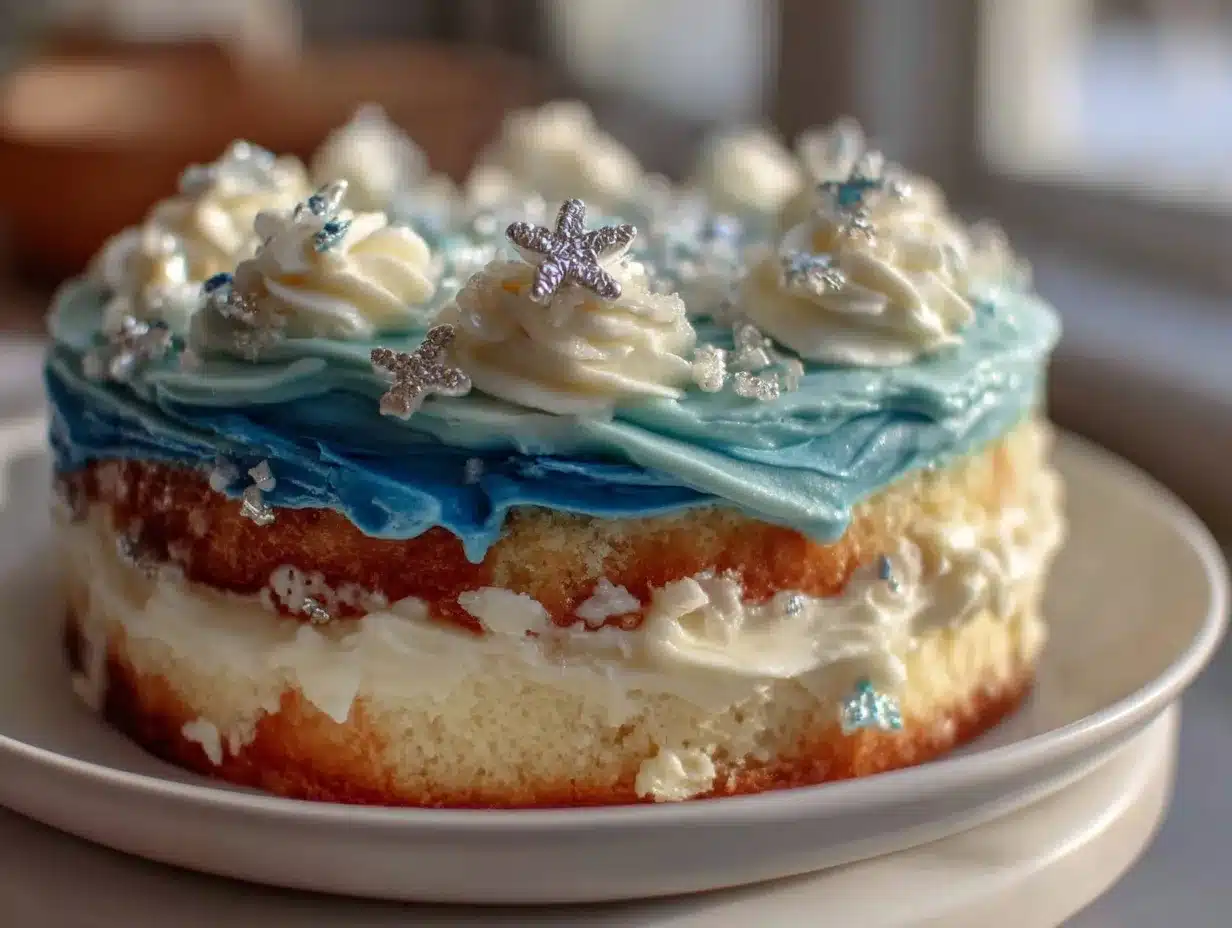
Perfect Ombre Blue Buttercream Graduation Cake
A stunning ombre blue buttercream layer cake decorated with stars, perfect for graduation parties. This cake combines moist layers with smooth, creamy buttercream for a memorable celebration dessert.
- Prep Time: 30 minutes
- Cook Time: 30 minutes
- Total Time: 1 hour
- Yield: 12 servings 1x
- Category: Dessert
- Cuisine: American
Ingredients
- 2 ½ cups (315g) all-purpose flour, sifted
- 2 ½ teaspoons (10g) baking powder
- ½ teaspoon (3g) salt
- 1 cup (227g) unsalted butter, softened (for cake layers)
- 2 cups (400g) granulated sugar
- 4 large eggs, room temperature
- 1 tablespoon (15ml) vanilla extract
- 1 cup (240ml) whole milk, room temperature (can substitute almond milk for dairy-free)
- 1 cup (227g) unsalted butter, softened (for buttercream)
- 4 cups (480g) powdered sugar, sifted
- 1 teaspoon (5ml) vanilla extract
- 2–3 tablespoons (30-45ml) heavy cream
- Blue gel food coloring (varying amounts for shades)
- Small star-shaped sprinkles or sugar stars (optional)
- Edible glitter dust (optional)
Instructions
- Preheat oven to 350°F (175°C). Grease and flour three 8-inch round cake pans or line with parchment paper. Bring eggs, milk, and butter to room temperature.
- In a medium bowl, sift together flour, baking powder, and salt. Set aside.
- In a mixer bowl, beat 1 cup softened butter and 2 cups sugar on medium speed until light and fluffy, about 4-5 minutes.
- Add eggs one at a time, beating well after each addition. Mix in vanilla extract.
- Reduce mixer speed to low. Alternately add dry ingredients and milk in three parts, beginning and ending with flour. Mix until just combined.
- Divide batter evenly among pans, smoothing tops with an offset spatula. Bake 25-30 minutes or until a toothpick inserted in the center comes out clean. Rotate pans halfway through baking.
- Cool cakes in pans for 10 minutes, then turn out onto cooling racks to cool completely.
- For buttercream, beat 1 cup softened butter on medium speed until creamy. Gradually add powdered sugar, starting on low speed, then increase speed. Add vanilla and 2 tablespoons heavy cream, adjusting for consistency. Beat until light and fluffy.
- Divide buttercream into four bowls. Tint three bowls with blue gel food coloring to create light, medium, and dark blue shades; leave one bowl pale or white.
- Assemble cake by placing darkest blue layer on plate. Spread thin layer of buttercream on top. Repeat with medium blue, light blue, and pale blue layers.
- Apply a thin crumb coat with pale buttercream over entire cake. Chill 20-30 minutes to set.
- Frost cake smoothly with pale buttercream. Using piping bags filled with each blue shade, pipe small star shapes around cake from dark blue at bottom to light blue at top.
- Optionally, sprinkle with edible stars or glitter dust for decoration.
Notes
Use gel food coloring for vibrant colors without thinning buttercream. Soften butter but do not melt for smooth piping. Chill crumb coat before final frosting for best results. Test piping pressure on parchment paper before decorating. For dairy-free, substitute vegan butter and plant milk. For gluten-free, use a 1:1 gluten-free flour blend and consider xanthan gum.
Nutrition
- Serving Size: 1 slice (1/12th of c
- Calories: 375
- Fat: 18
- Carbohydrates: 45
- Protein: 3
Keywords: ombre cake, blue buttercream, graduation cake, star decorations, layered cake, easy cake recipe, buttercream frosting