My husband looked at the bowl on the counter and said, “What exactly are those supposed to be?” He was pointing at the first batch of peanut butter protein balls I’d just rolled, and honestly, his tone wasn’t promising. I’d spent the last twenty minutes mixing and rolling, and now I was getting the side-eye from my own kitchen audience.
He’s not wrong to be suspicious. I have a history of “healthy snacks” that taste like cardboard and regret. There was that kale chip disaster that left us both picking green bits out of our teeth for hours. And the “clean” brownies that somehow tasted like sadness and dirt. So when I told him I was making no-bake peanut butter protein balls with just five ingredients, he had every reason to doubt.
I didn’t blame him. I was kind of skeptical myself. Protein snacks from the store cost a small fortune and usually have ingredients I can’t pronounce. But I needed something portable for my afternoon slump—that dangerous hour between lunch and dinner when I start eyeing the leftover cake from last night’s dinner. So I grabbed what I had in the pantry and started mixing. Old-fashioned oats, creamy peanut butter, a drizzle of honey, some mini chocolate chips (because life is short), and a scoop of vanilla protein powder. That’s it. Five things. No food processor required, no baking, no fuss.
He finally tried one after I threatened to eat the whole batch myself. One bite. Then another. Then he asked me if I could make a double batch next time. That’s when I knew these little energy balls were something special. They’re not just edible—they’re actually good. Like, crave-worthy good. The kind of snack that makes you forget you’re eating something with protein powder in it.
These easy no-bake peanut butter protein balls have become my secret weapon for busy weeks. They keep me from hitting the vending machine at work, they satisfy my sweet tooth without sending me into a sugar coma, and they come together in less time than it takes to find a clean Tupperware lid. I think you’re going to love them as much as we do.
Why You’ll Love This Recipe
Let me tell you why these no-bake peanut butter protein balls have earned a permanent spot in my weekly meal prep routine. I’ve tested this recipe at least a dozen times—tweaking the ratios, trying different protein powders, even experimenting with add-ins—and this version is the one that works every single time.
- Quick & Easy: These come together in under 15 minutes. No oven, no stove, no complicated techniques. Just mix, roll, and eat. Perfect for those days when you need a snack now.
- Simple Ingredients: You probably have most of these in your kitchen right now. No trips to specialty stores or weird health food aisles. I use basic pantry staples that won’t break the bank.
- Perfect for Busy Days: Whether you need a pre-workout boost, an afternoon pick-me-up, or something to toss in your bag before running out the door, these little balls deliver. They’re my go-to for long work days and weekend hikes.
- Crowd-Pleaser: I’ve brought these to parties, shared them with coworkers, and even packed them in my kids’ lunchboxes. Everyone loves them. Even the skeptics. Especially the skeptics.
- Unbelievably Delicious: The texture is soft and chewy, the peanut butter flavor is front and center, and the mini chocolate chips add little bursts of sweetness. You won’t believe they’re actually good for you.
What makes this recipe different from all those other protein ball recipes floating around the internet? It’s the texture. I’ve tried versions that were too dry, too sticky, or just plain weird. This one hits that sweet spot—firm enough to hold together without crumbling, but soft enough to be satisfying. The ratio of peanut butter to oats is perfectly balanced, and the honey adds just enough sweetness without making them cloying.
These no-bake peanut butter protein balls are the kind of snack that makes you feel good about what you’re eating. They’re not a compromise. They’re a legitimately delicious treat that happens to have protein in them. And honestly? That’s the best kind of snack to have in your back pocket.
What Ingredients You Will Need
This recipe uses simple, wholesome ingredients that work together to create a snack that’s both satisfying and nutritious. No weird stuff, no obscure superfoods—just real food that tastes great.
- Old-Fashioned Rolled Oats – 1 cup (90g). These provide the base and give the balls their chewy texture. I prefer old-fashioned oats over quick oats because they hold up better and don’t turn mushy. If you’re gluten-sensitive, make sure to grab certified gluten-free oats.
- Creamy Peanut Butter – ½ cup (128g). This is the glue that holds everything together. I use natural creamy peanut butter with no added sugar or weird oils. Just peanuts and salt. The natural kind works best because it’s not too stiff. If your peanut butter is super thick, you might need to warm it up a bit before mixing. I personally love the Kirkland brand from Costco—it’s affordable and has the perfect consistency.
- Honey – ¼ cup (85g). This adds natural sweetness and helps bind the mixture. You can substitute maple syrup if you prefer, but honey gives a nicer texture in my experience. Local honey is great if you can find it—bonus points for supporting local beekeepers.
- Vanilla Protein Powder – ¼ cup (30g). I use a vanilla whey protein powder, but plant-based options work too. Just make sure it’s a brand you actually like the taste of, because that flavor will come through. I’ve tried this with chocolate protein powder too, and it’s amazing—just know the final color will be darker. My current favorite is Orgain vanilla plant-based protein—it mixes well and doesn’t have that chalky aftertaste.
- Mini Chocolate Chips – ¼ cup (45g). These are optional but highly recommended. They add little pockets of chocolate that make every bite exciting. I use semi-sweet mini chips, but dark chocolate or milk chocolate work too. If you’re watching your sugar intake, you can skip these or use sugar-free chocolate chips.
Optional Add-ins: Sometimes I throw in a tablespoon of chia seeds or flax seeds for extra fiber and omega-3s. A pinch of sea salt on top before refrigerating is also lovely—it really makes the peanut butter flavor pop.
Substitution Guidance: If you have a nut allergy, sunflower seed butter works beautifully in place of peanut butter. For a vegan version, use maple syrup instead of honey and a plant-based protein powder. If you don’t have protein powder, you can add an extra ¼ cup of oats and a tablespoon of cocoa powder for flavor—they won’t be as protein-packed, but they’ll still taste great.
Equipment Needed
You don’t need much for this recipe, which is part of its charm. Here’s what you’ll need:
- Large Mixing Bowl – Any medium-to-large bowl will work. I use my favorite ceramic mixing bowl that’s wide enough to get my hands in there for mixing.
- Measuring Cups and Spoons – Standard set will do. I like having a ¼ cup measure handy for the oats and protein powder.
- Spatula or Wooden Spoon – For the initial mixing before you get your hands dirty.
- Baking Sheet or Plate – To hold the rolled balls while they chill. Line it with parchment paper for easy cleanup.
- Parchment Paper – Not strictly necessary, but it makes cleanup so much easier. I buy the pre-cut sheets from Costco—they’re a game changer.
- Refrigerator – You’ll need space to chill the balls for at least 30 minutes. They firm up nicely in the fridge.
That’s it. No food processor, no mixer, no special equipment. Just your hands and a few basic kitchen tools. If you have a cookie scoop, it can help make evenly-sized balls, but I usually just eyeball it with my hands. I’ve made these in a tiny apartment kitchen with zero counter space and they turned out perfect.
Preparation Method
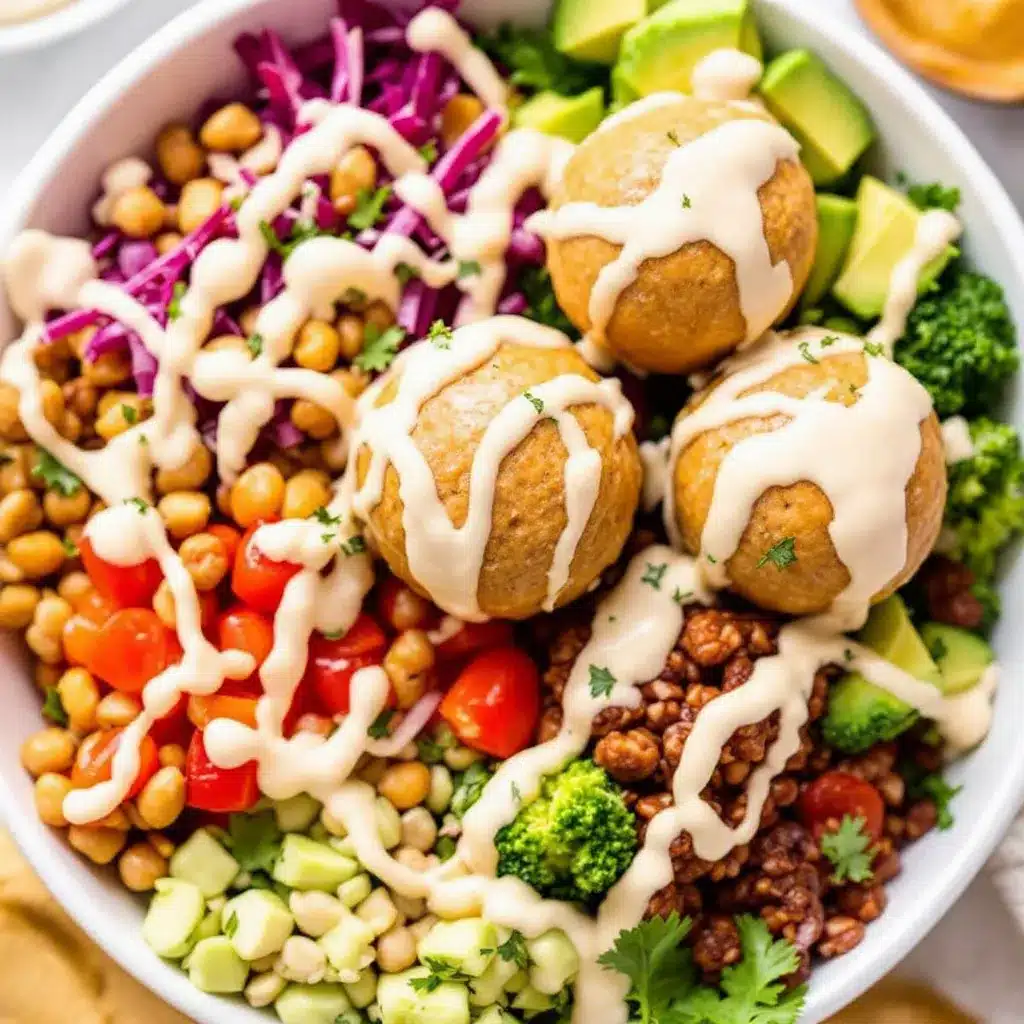
Making these no-bake peanut butter protein balls is almost too easy. But I’ll walk you through it step by step, because the details matter.
- Combine the dry ingredients. In your large mixing bowl, add 1 cup of old-fashioned rolled oats and ¼ cup of vanilla protein powder. Give them a quick stir with your spatula to distribute the protein powder evenly. This prevents clumps later. If your protein powder is particularly clumpy, you can sift it—but I rarely bother and it turns out fine.
- Add the wet ingredients. Scoop in ½ cup of creamy peanut butter and drizzle in ¼ cup of honey. Don’t worry if it looks messy at this point—it’s supposed to. The peanut butter will be stubborn at first, but keep stirring.
- Mix everything together. Start stirring with your spatula, pressing the peanut butter against the sides of the bowl to incorporate it into the oats. After about a minute of stirring, switch to using your hands. Yes, get in there. It’s the most effective way to make sure everything is evenly combined. Squeeze and fold the mixture until it forms a cohesive dough. This should take about 2-3 minutes. The mixture should feel slightly sticky but not wet. If it’s too dry and crumbly, add a teaspoon more honey or peanut butter. If it’s too sticky, add a tablespoon more oats.
- Fold in the chocolate chips. Once the base mixture is well combined, sprinkle in ¼ cup of mini chocolate chips. Fold them in with your hands or spatula until they’re evenly distributed. Try not to overmix—you want distinct pockets of chocolate, not a chocolate-colored mess.
- Roll into balls. Using your hands, pinch off about 1 tablespoon of the mixture and roll it between your palms to form a ball. Aim for uniform size so they chill evenly. I usually get about 16-18 balls from this recipe. If the mixture starts sticking to your hands too much, lightly wet your palms with cold water—it helps tremendously.
- Chill and set. Place the rolled balls on a parchment-lined baking sheet or plate. Pop them in the refrigerator for at least 30 minutes. This step is crucial—it firms them up so they hold their shape. If you try to eat one right away, it’ll be soft and a bit messy. Still delicious, but not as satisfying texture-wise.
- Store and enjoy. Once chilled, transfer the balls to an airtight container. They’ll keep in the fridge for up to two weeks, though I doubt they’ll last that long. You can also freeze them for up to three months—just thaw for a few minutes at room temperature before eating.
Sensory Cues: At step 3, the mixture should look like a slightly sticky, uniform dough. It should smell strongly of peanut butter with a hint of honey. When you squeeze a handful, it should hold together without crumbling. If it falls apart, add a touch more honey. If it’s too sticky to handle, add oats a tablespoon at a time.
My Personal Tip: I like to chill the mixing bowl for 10 minutes before I start rolling. It might sound silly, but cold hands make for cleaner rolling. Also, keep a damp paper towel nearby to wipe your hands between batches—it prevents the mixture from building up on your palms.
Cooking Tips & Techniques
After making these no-bake peanut butter protein balls more times than I can count, I’ve learned a few things the hard way. Let me save you some trouble.
Don’t overmix the oats. I made this mistake early on—I kept stirring and stirring, thinking I needed to break down the oats into a finer texture. Nope. The oats are supposed to stay whole. They provide that satisfying chewiness that makes these balls so good. Overmixing just turns everything into a weird paste.
Temperature matters. If your peanut butter has been sitting in the fridge, it’s going to be rock hard and impossible to mix. Let it come to room temperature first, or microwave it for 10-15 seconds until soft but not hot. Same goes for honey—if it’s crystallized, warm it up gently. Room temperature ingredients mix much more evenly.
Protein powder can be tricky. Not all protein powders are created equal. Some are super absorbent and will make your mixture dry and crumbly. Others are less absorbent and might leave you with a sticky mess. If you’re using a new brand, start with 3 tablespoons instead of ¼ cup and add more if needed. I learned this lesson after a particularly dry batch that refused to stick together.
Chill before you judge. I cannot stress this enough. These balls need time in the fridge to set up properly. If you taste the mixture right after mixing, it’ll be soft and almost gooey. After 30 minutes in the fridge, the texture transforms into something firm and perfectly chewy. Don’t skip this step.
Multitasking strategy. While your peanut butter is coming to room temperature, measure out your dry ingredients. While the balls are chilling, clean up your workspace. This recipe moves fast, so having everything prepped makes the process smooth and stress-free.
Variations & Adaptations
One of the best things about this recipe is how customizable it is. Here are some variations I’ve tried and loved:
Chocolate Peanut Butter Version: Swap the vanilla protein powder for chocolate protein powder and add an extra tablespoon of cocoa powder. The result is like eating a healthy Reese’s cup in ball form. I made these for a Super Bowl party and they disappeared in minutes.
Vegan Option: Use maple syrup instead of honey and a plant-based protein powder. I’ve tried this with pea protein and with brown rice protein—both work, though the texture is slightly different. The maple syrup adds a lovely subtle flavor that pairs beautifully with the peanut butter.
Nut-Free Alternative: Replace the peanut butter with sunflower seed butter and use certified oat-based protein powder. These are perfect for school lunches or nut-free workplaces. Just note that sunflower seed butter can react with baking soda if you ever bake with it, but since these are no-bake, you’re totally fine.
Add Some Crunch: Toss in 2 tablespoons of chopped peanuts, crushed pretzels, or even crispy rice cereal. It adds a wonderful textural contrast that makes each bite interesting. I love adding crushed pretzels for that sweet-salty-crunchy combo.
Seasonal Twist: In the fall, I add ½ teaspoon of pumpkin pie spice and swap the chocolate chips for dried cranberries. In the summer, I use white chocolate chips and add a teaspoon of lemon zest. The possibilities are endless.
Serving & Storage Suggestions
These no-bake peanut butter protein balls are best served cold, straight from the fridge. The texture is firm and satisfying, and the flavors are more pronounced when they’re chilled. I like to grab one as a quick breakfast on busy mornings, or as a post-workout snack that actually tastes good.
Presentation Ideas: If you’re serving these at a party or gathering, arrange them on a nice plate and sprinkle a little sea salt on top. They look beautiful next to other snacks like fresh Greek yogurt veggie dip with herbs or a platter of fresh fruit. For a fun twist, you can roll them in shredded coconut, cocoa powder, or crushed nuts before serving.
What to Serve With Them: These pair beautifully with a cold glass of almond milk, a cup of coffee, or even a creamy matcha latte for an afternoon pick-me-up. If you’re packing them for a lunchbox, throw in some apple slices or carrot sticks for a balanced snack.
Storage Instructions: Keep the balls in an airtight container in the refrigerator for up to two weeks. They actually get better after a day or two—the flavors meld together and the texture becomes perfectly uniform. If you’re meal prepping, you can double or triple the recipe and freeze the extras.
Freezer Tips: To freeze, place the balls on a baking sheet in a single layer and freeze for 1 hour. Then transfer them to a freezer-safe bag or container. They’ll keep for up to three months. To thaw, just let them sit at room temperature for 5-10 minutes, or pop one in your lunchbox in the morning and it’ll be ready by snack time.
Reheating Note: These are meant to be eaten cold, but if you prefer a softer texture, let them sit at room temperature for 10-15 minutes before eating. I wouldn’t recommend microwaving them—the chocolate chips can get melty and messy.
Nutritional Information & Benefits
Here’s the approximate nutritional breakdown per ball (based on 16 servings):
| Nutrient | Amount Per Ball |
|---|---|
| Calories | 135 |
| Protein | 6g |
| Carbohydrates | 16g |
| Fiber | 2g |
| Sugar | 9g |
| Fat | 6g |
| Saturated Fat | 1.5g |
| Sodium | 75mg |
These numbers will vary depending on your specific ingredients, but it gives you a general idea. These balls are a great source of plant-based protein from the oats and peanut butter, plus healthy fats that keep you full and satisfied.
Health Benefits: The oats provide slow-release energy and fiber that supports digestive health. Peanut butter is packed with protein, healthy monounsaturated fats, and vitamin E. Honey offers natural antioxidants and can help soothe a sore throat. And the protein powder gives you that extra boost for muscle recovery and satiety.
Dietary Considerations: This recipe is naturally vegetarian and can easily be made vegan, gluten-free, and dairy-free with simple substitutions. It’s a great option for anyone looking for a clean, whole-food snack that doesn’t taste like a compromise.
Allergen Note: This recipe contains peanuts and may contain gluten depending on your oat choice. If you have allergies, please check all ingredient labels carefully and use certified gluten-free oats if needed.
Conclusion
These easy no-bake peanut butter protein balls have become a staple in my kitchen for good reason. They’re quick, they’re delicious, and they actually deliver on the promise of being both healthy and satisfying. No cardboard texture, no weird aftertaste, no complicated techniques—just five simple ingredients that come together in minutes.
I love that I can make a batch on Sunday and have snacks ready for the entire week. I love that my kids actually ask for them instead of begging for cookies. And I love that I feel good about eating them—which is more than I can say for most of my snack choices.
If you’re looking for a snack that fits into your busy life without derailing your health goals, give these a try. Customize them with your favorite add-ins, make a double batch, and see how quickly they disappear. And if you come up with a killer variation, I’d love to hear about it in the comments.
Go ahead, grab a handful of ingredients and get rolling. Your future self—the one who’s hungry and needs something good in five minutes—will thank you.
Frequently Asked Questions
Can I use quick oats instead of old-fashioned oats?
Yes, you can, but the texture will be different. Quick oats are more finely chopped, so they absorb moisture faster and can make the balls softer and less chewy. If you only have quick oats, reduce the honey slightly and add a tablespoon more peanut butter to compensate.
How do I keep the mixture from being too sticky?
If your mixture is too sticky to roll, add more oats one tablespoon at a time until it reaches a workable consistency. Also, make sure your peanut butter isn’t too runny—natural peanut butters can separate, so stir them well before measuring. If all else fails, wet your hands with cold water before rolling.
Can I make these without protein powder?
Absolutely! If you don’t have protein powder, simply replace it with an additional ¼ cup of oats. The balls won’t have as much protein, but they’ll still taste great. You can also add a tablespoon of cocoa powder or flaxseed meal for extra flavor and nutrition.
How long do these last at room temperature?
These balls are best stored in the refrigerator, but they can sit at room temperature for a few hours without issue—perfect for packing in a lunchbox or taking on a road trip. If you’re keeping them out for longer than 4-5 hours, I’d recommend using an insulated bag with an ice pack.
Can I double this recipe for meal prep?
Yes! This recipe doubles beautifully. Just make sure you have a large enough mixing bowl—you’ll need room to get your hands in there. I often make a triple batch and freeze half for later. They thaw quickly and taste just as good as fresh.
Pin This Recipe!
Easy No-Bake Peanut Butter Protein Balls: Best 5-Ingredient Recipe
These easy no-bake peanut butter protein balls are made with just five simple ingredients and come together in under 15 minutes. They’re the perfect healthy snack for busy days, pre-workout fuel, or a quick afternoon pick-me-up.
- Prep Time: 15 minutes
- Cook Time: 0 minutes
- Total Time: 45 minutes
- Yield: 16-18 balls 1x
- Category: Snack
- Cuisine: American
Ingredients
- 1 cup (90g) old-fashioned rolled oats
- ½ cup (128g) creamy peanut butter
- ¼ cup (85g) honey
- ¼ cup (30g) vanilla protein powder
- ¼ cup (45g) mini chocolate chips
Instructions
- Combine the dry ingredients: In a large mixing bowl, add 1 cup of old-fashioned rolled oats and ¼ cup of vanilla protein powder. Stir to distribute evenly.
- Add the wet ingredients: Scoop in ½ cup of creamy peanut butter and drizzle in ¼ cup of honey. Stir with a spatula, pressing the peanut butter against the sides of the bowl.
- Mix everything together: After about a minute of stirring, use your hands to squeeze and fold the mixture until it forms a cohesive dough (about 2-3 minutes). The mixture should be slightly sticky but not wet.
- Fold in the chocolate chips: Sprinkle in ¼ cup of mini chocolate chips and fold them in until evenly distributed.
- Roll into balls: Pinch off about 1 tablespoon of the mixture and roll between your palms to form a ball. Repeat until all mixture is used (about 16-18 balls).
- Chill and set: Place the rolled balls on a parchment-lined baking sheet or plate. Refrigerate for at least 30 minutes to firm up.
- Store and enjoy: Transfer chilled balls to an airtight container. Store in the refrigerator for up to two weeks or freeze for up to three months.
Notes
For best texture, chill the balls for at least 30 minutes before eating. If the mixture is too dry, add a teaspoon more honey or peanut butter. If too sticky, add a tablespoon more oats. Wet your hands with cold water to prevent sticking while rolling. These balls can be frozen for up to three months.
Nutrition
- Serving Size: 1 ball
- Calories: 135
- Sugar: 9
- Sodium: 75
- Fat: 6
- Saturated Fat: 1.5
- Carbohydrates: 16
- Fiber: 2
- Protein: 6
Keywords: no-bake peanut butter protein balls, easy protein balls, 5-ingredient protein balls, healthy snack, no-bake snack, peanut butter balls, energy balls


