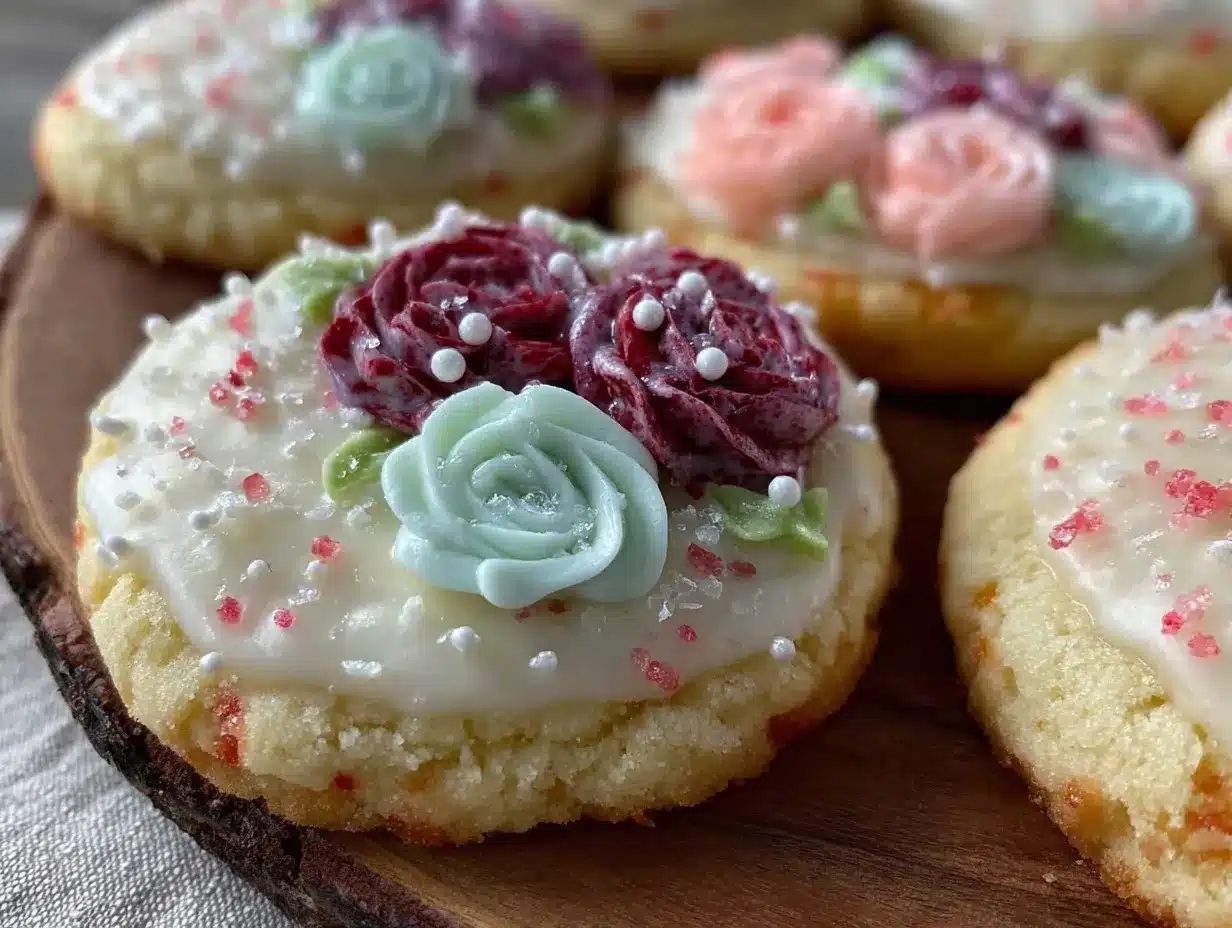
There’s this one Saturday morning that sticks with me — the kitchen filled with the faint scent of vanilla and sugar, my hands dusted with flour, and a quiet hum of the radio in the background. I was aiming for a simple batch of sugar cookies to brighten up a gloomy weekend, honestly expecting just an average result. But then, as I fumbled with a piping bag for the first time, a small, imperfect flower emerged on my cookie. It looked… surprisingly charming. That little floral design sparked something I hadn’t anticipated: a full-blown weekend obsession with perfect hand-decorated floral sugar cookies with royal icing.
The whole process felt oddly soothing, a break from the usual chaos. I kept tweaking the icing consistency, experimenting with petal shapes, and yes, occasionally smearing a design or two. But that’s part of the fun, right? These cookies aren’t just about being picture-perfect—they’re about the moments spent crafting them, the little victories in mastering royal icing, and the joy of sharing something handmade with people who truly appreciate the effort.
Now, every time I prepare these floral sugar cookies, I’m reminded why this recipe stuck with me: it’s not just baking; it’s a quiet art form that invites you to slow down and enjoy the process. Plus, they make the sweetest gifts or table decorations, sparking delight without fuss. If you’ve ever hesitated to try hand-decorating because it seems too tricky, this recipe will gently prove you wrong, one petal at a time.
Why You’ll Love This Recipe
Trust me, I’ve tested countless sugar cookie recipes and royal icing techniques, and this one stands out because it balances simplicity with stunning results. I’m not a professional baker, but I’ve learned a few tricks that make these cookies feel like they came straight from a boutique bakery — minus the stress.
- Quick & Easy: The dough comes together in about 15 minutes, and the royal icing is straightforward to mix. You can have your cookies ready to decorate within an hour.
- Simple Ingredients: You probably already have everything in your pantry, from powdered sugar to vanilla extract. No need for fancy or hard-to-find items.
- Perfect for Gifting & Celebrations: Whether it’s a bridal shower, tea party, or just a cozy afternoon treat, these floral sugar cookies add a delicate, homemade touch.
- Crowd-Pleaser: The classic buttery flavor combined with the sweet, smooth icing makes these irresistible to both kids and adults alike.
- Unbelievably Delicious: The texture is just right — crisp edges with a tender center, while the royal icing dries with a lovely matte finish that’s perfect for detailed piping.
What sets this recipe apart is the icing technique I’ve honed — it’s all about finding the right balance so your flowers look smooth but hold their shape. Plus, I share a little secret on how to get that soft pastel palette without buying a ton of food coloring. Honestly, this isn’t just another cookie recipe; it’s a way to make your baking feel a little more special.
And hey, if you ever want to switch things up, these cookies pair beautifully with a pot of tea or even alongside a creamy lemon ricotta pasta for a sweet and savory twist at a brunch gathering. I once brought a batch to a friend’s dinner party featuring her creamy lemon ricotta pasta, and it was a hit!
What Ingredients You Will Need
This recipe uses simple, wholesome ingredients that come together to create a cookie base that’s buttery and tender, topped with royal icing that’s smooth and perfect for detailed floral designs. Most are pantry staples, and there are easy swaps if you need them.
- For the Sugar Cookies:
- All-purpose flour – 2 ¾ cups (345 g), sifted (I like King Arthur for consistent texture)
- Baking powder – 1 tsp (4 g)
- Salt – ½ tsp (3 g)
- Unsalted butter – 1 cup (227 g), softened (room temperature is key here)
- Granulated sugar – 1 cup (200 g)
- Large egg – 1, room temperature
- Pure vanilla extract – 1 tsp (5 ml)
- For the Royal Icing:
- Powdered sugar – 4 cups (480 g), sifted (helps avoid lumps)
- Meringue powder – 3 tbsp (21 g) (I use Wilton brand, but pasteurized egg whites work too)
- Warm water – 6 tbsp (90 ml), adjust for consistency
- Vanilla extract or lemon juice – 1 tsp (5 ml) for subtle flavor
- Gel food coloring – in pastel shades (optional, a tiny dab goes a long way)
Seasonal tip: In spring, I sometimes swap plain vanilla for a hint of almond extract to complement the floral theme. For a gluten-free version, use a 1:1 gluten-free baking flour blend instead of all-purpose.
If you want to make the icing vegan, swap meringue powder for aquafaba powder or a trusted vegan egg replacer and use a dairy-free vanilla extract. It works surprisingly well!
Equipment Needed
- Mixing bowls – medium and large
- Electric mixer – stand or hand-held (makes creaming butter and mixing icing so much easier)
- Measuring cups and spoons – precise measurement is important, especially for the icing
- Rolling pin – lightly floured to roll dough evenly
- Cookie cutters – floral shapes or simple circles for decorating (I recommend investing in a few sizes for layering designs)
- Baking sheets – lined with parchment paper or silicone mats
- Cooling racks – to cool cookies completely before icing
- Piping bags and tips – small round tips (#1 or #2) and leaf tips (#67) for flowers and leaves
- Toothpicks or fine brushes – helpful for detailing and fixing tiny mistakes
If you don’t have piping bags, disposable ones work just fine, or you can use a small ziplock bag with a corner snipped off. Also, I found that a simple turntable can make decorating easier but isn’t necessary if you’re patient.
Preparation Method
- Make the Cookie Dough (15 minutes): In a medium bowl, whisk together 2 ¾ cups (345 g) of sifted flour, 1 tsp (4 g) baking powder, and ½ tsp (3 g) salt. In a separate large bowl, cream 1 cup (227 g) softened unsalted butter with 1 cup (200 g) granulated sugar using an electric mixer on medium speed until light and fluffy (about 3-4 minutes). Beat in 1 large egg and 1 tsp (5 ml) vanilla extract until combined.
- Combine and Chill (1 hour): Gradually add the dry ingredients to the wet, mixing on low speed until just combined. Wrap the dough tightly in plastic wrap and refrigerate for at least 1 hour to firm up — this helps maintain the cookie shapes while baking.
- Roll and Cut (20 minutes): Preheat your oven to 350°F (175°C). On a lightly floured surface, roll the dough to about ¼ inch (6 mm) thickness. Use your floral or circle cookie cutters to cut out shapes, and place them 1 inch (2.5 cm) apart on parchment-lined baking sheets.
- Bake and Cool (12-15 minutes): Bake cookies for 12-15 minutes or until edges are just beginning to turn golden. Keep an eye on them — you want tender centers, not hard edges. Transfer cookies to cooling racks and let cool completely before decorating.
- Prepare Royal Icing (10 minutes): In a clean bowl, combine 4 cups (480 g) sifted powdered sugar and 3 tbsp (21 g) meringue powder. Add 6 tbsp (90 ml) warm water and 1 tsp (5 ml) vanilla extract. Beat on low until ingredients are combined, then increase speed to high for about 5 minutes until stiff peaks form. Adjust consistency by adding small amounts of water to thin or powdered sugar to thicken.
- Color and Fill Piping Bags (10 minutes): Divide icing into small bowls and tint with gel food coloring to pastel shades. Use separate piping bags fitted with small round and leaf tips for each color.
- Decorate (30-45 minutes): Pipe outlines on each cookie first, then flood the center with thinned icing using a toothpick to spread evenly. While the base icing is still wet, pipe floral details like petals and leaves on top for dimension. Let cookies dry uncovered at room temperature for 6-8 hours or overnight for the best finish.
Pro tip: If your piping bag clogs or icing hardens, dip the tip in warm water and wipe clean before continuing. Also, don’t rush the drying process — patience pays off with crisp, beautiful designs.
Cooking Tips & Techniques
Royal icing can be intimidating, but a few tricks made all the difference for me. First, always sift powdered sugar to avoid gritty icing. I learned the hard way that skipping this step leads to frustrating lumps.
Second, watch your icing consistency closely. For outlining, it should be thick enough to hold its shape but still pipe smoothly. Flooding calls for thinner icing that spreads evenly but doesn’t run over the edges. I usually test on parchment before applying to cookies.
One mistake I made repeatedly was decorating too soon. Cookies must be fully cooled — even a slightly warm cookie melts the icing and ruins the design.
When piping flowers, keep a steady hand and don’t overfill your bag; it’s easier to control flow with smaller amounts. Using a toothpick to gently nudge icing into place or fix tiny errors saved many cookies from the trash bin.
Timing-wise, I break decorating into sessions if I have a big batch: outline all cookies first, then flood, then add details once the base is set. This multitasking approach keeps things manageable without feeling rushed.
Finally, practice makes perfect. I started simple, then gradually added more intricate flower shapes, inspired by the delicate decorations on fluffy heart-shaped red velvet pancakes I once tried to replicate.
Variations & Adaptations
These sugar cookies are a versatile canvas. Here are a few ways I’ve switched things up:
- Flavor Variations: Add lemon zest or orange extract to the dough for a citrus twist that pairs beautifully with the floral theme.
- Dietary Adaptations: Use almond flour instead of all-purpose for a gluten-free option, or swap butter with coconut oil for a dairy-free take (though texture will be slightly different).
- Seasonal Colors & Shapes: For autumn, try warm tones like burnt orange and deep red for your icing. In winter, icy blues and whites create a frosty effect. Floral cutters can be swapped for snowflakes or stars for holiday vibes.
- Decorating Techniques: Try adding edible glitter or pearl dust to your royal icing for a subtle shimmer. Another fun twist is layering petals with different shades to give depth to your flowers.
- Personal Variation: Once, I combined these cookies with a batch of creamy strawberry cream cheese stuffed French toast for a brunch spread. The floral cookies brought a delicate sweetness that perfectly balanced the richness of the toast.
Serving & Storage Suggestions
These cookies are best served at room temperature, allowing the royal icing to retain its smooth, matte finish. For presentation, arrange them on a pretty platter with fresh flowers or greenery to echo the floral theme — it’s a simple touch that impresses.
They pair wonderfully with a cup of tea or a light lemonade, making them ideal for afternoon gatherings or bridal showers. If you like, serve alongside a batch of creamy spring vegetable fettuccine alfredo for a savory-sweet combo that delights guests.
To store, place cookies in an airtight container layered with parchment paper between each row to prevent sticking. They keep well at room temperature for up to 5 days. For longer storage, freeze undecorated cookies wrapped tightly for up to 3 months and decorate after thawing.
When reheating, avoid microwaving as it can melt the icing. Instead, let frozen cookies thaw fully at room temperature to preserve texture and decoration.
Interestingly, after a day or two, the flavors deepen, and the icing hardens just enough to get a satisfying snap when you bite in — a small, lovely surprise.
Nutritional Information & Benefits
Estimated per cookie (based on 24 cookies per batch): approximately 150 calories, 6g fat, 22g carbohydrates, and 1g protein. These floral sugar cookies are a treat best enjoyed in moderation.
The main ingredients like butter and eggs provide some protein and essential fats, while the powdered sugar gives that sweet punch. Vanilla extract adds aroma without calories.
For those managing gluten or dairy, the recipe’s flexibility helps accommodate dietary needs. Using almond flour or dairy-free butter substitutes makes these cookies accessible to more people.
While not a health food, these cookies bring joy and a sense of accomplishment, which honestly counts as a wellness benefit in my book.
Conclusion
Perfect hand-decorated floral sugar cookies with royal icing are a wonderful blend of simple ingredients and creative expression. Whether you’re a seasoned baker or just starting, this recipe offers a manageable way to create stunning treats that feel special.
Feel free to personalize colors, flavors, and shapes to suit your style — that’s what makes baking truly yours. I love how these cookies bring a bit of calm and joy to my kitchen, turning a basic baking session into an artistic moment.
If you try this recipe, I’d love to hear how your floral designs turned out or what variations you came up with. Baking is better when shared (even if it’s just through stories)!
So grab your piping bags, and get ready to make some truly sweet memories.
FAQs
What’s the best way to store decorated sugar cookies?
Store them in an airtight container at room temperature with parchment paper between layers. They keep fresh for about 5 days. Avoid refrigeration to prevent icing from sweating.
Can I use regular egg whites instead of meringue powder for royal icing?
Yes, but make sure they are pasteurized for safety. Meringue powder is more convenient and shelf-stable, which is why it’s often preferred.
How do I prevent my royal icing from cracking?
Keep your icing covered with a damp cloth when not in use to prevent drying out. Also, avoid making the icing too stiff and allow cookies to dry slowly at room temperature.
Can I make the dough ahead of time?
Absolutely! The dough can be refrigerated for up to 3 days or frozen for up to 3 months. Just thaw completely before rolling and cutting.
What if my icing is too thick or too thin?
Adjust consistency by adding small amounts of water to thin or powdered sugar to thicken. Test by dragging a spoon through the icing — it should slowly settle back.
Pin This Recipe!
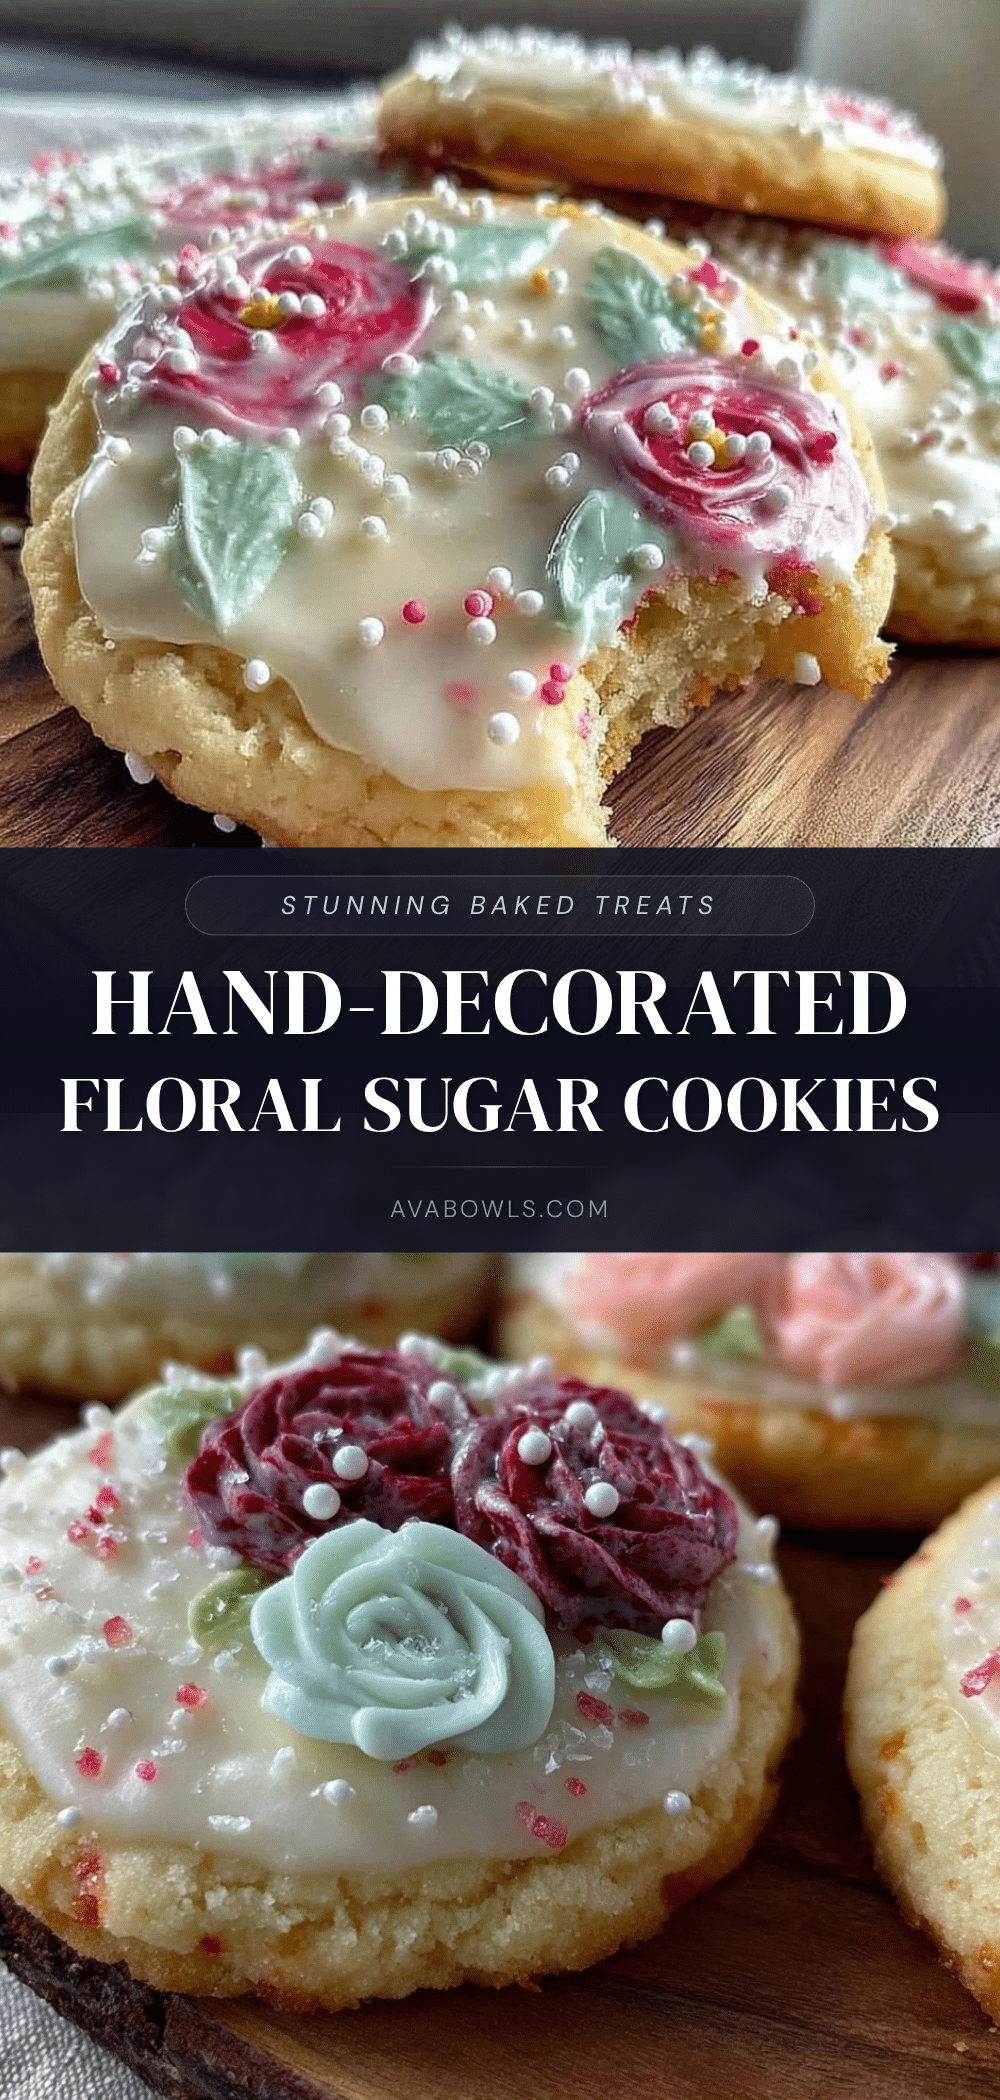
Perfect Hand-Decorated Floral Sugar Cookies Easy Royal Icing Tutorial
A simple and delightful recipe for buttery sugar cookies decorated with smooth royal icing, perfect for hand-decorated floral designs that make beautiful gifts and treats.
- Prep Time: 15 minutes
- Cook Time: 12-15 minutes
- Total Time: 2 hours 15 minutes
- Yield: 24 cookies 1x
- Category: Dessert
- Cuisine: American
Ingredients
- 2 ¾ cups (345 g) all-purpose flour, sifted
- 1 tsp (4 g) baking powder
- ½ tsp (3 g) salt
- 1 cup (227 g) unsalted butter, softened (room temperature)
- 1 cup (200 g) granulated sugar
- 1 large egg, room temperature
- 1 tsp (5 ml) pure vanilla extract
- 4 cups (480 g) powdered sugar, sifted
- 3 tbsp (21 g) meringue powder
- 6 tbsp (90 ml) warm water, adjust for consistency
- 1 tsp (5 ml) vanilla extract or lemon juice
- Gel food coloring in pastel shades (optional)
Instructions
- Make the Cookie Dough (15 minutes): In a medium bowl, whisk together flour, baking powder, and salt. In a separate large bowl, cream softened butter with granulated sugar using an electric mixer on medium speed until light and fluffy (about 3-4 minutes). Beat in egg and vanilla extract until combined.
- Combine and Chill (1 hour): Gradually add dry ingredients to wet, mixing on low speed until just combined. Wrap dough tightly in plastic wrap and refrigerate for at least 1 hour to firm up.
- Roll and Cut (20 minutes): Preheat oven to 350°F (175°C). Roll dough on a lightly floured surface to about ¼ inch (6 mm) thickness. Cut out shapes with cookie cutters and place 1 inch apart on parchment-lined baking sheets.
- Bake and Cool (12-15 minutes): Bake cookies until edges just begin to turn golden. Transfer to cooling racks and cool completely before decorating.
- Prepare Royal Icing (10 minutes): Combine powdered sugar and meringue powder in a clean bowl. Add warm water and vanilla extract. Beat on low until combined, then on high for about 5 minutes until stiff peaks form. Adjust consistency as needed.
- Color and Fill Piping Bags (10 minutes): Divide icing into small bowls and tint with gel food coloring to pastel shades. Fill piping bags fitted with small round and leaf tips.
- Decorate (30-45 minutes): Pipe outlines on cookies, flood centers with thinned icing using a toothpick to spread evenly. Pipe floral details on top while base icing is wet. Let dry uncovered at room temperature for 6-8 hours or overnight.
Notes
Sift powdered sugar to avoid lumps. Adjust icing consistency for outlining and flooding. Cool cookies completely before decorating to prevent melting icing. Use a toothpick to fix small icing mistakes. Let decorated cookies dry for 6-8 hours or overnight for best results. Dough can be refrigerated up to 3 days or frozen up to 3 months. For vegan icing, substitute meringue powder with aquafaba powder and use dairy-free vanilla extract.
Nutrition
- Serving Size: 1 cookie
- Calories: 150
- Fat: 6
- Carbohydrates: 22
- Protein: 1
Keywords: sugar cookies, royal icing, floral cookies, hand-decorated cookies, easy sugar cookies, cookie decorating, baking tutorial