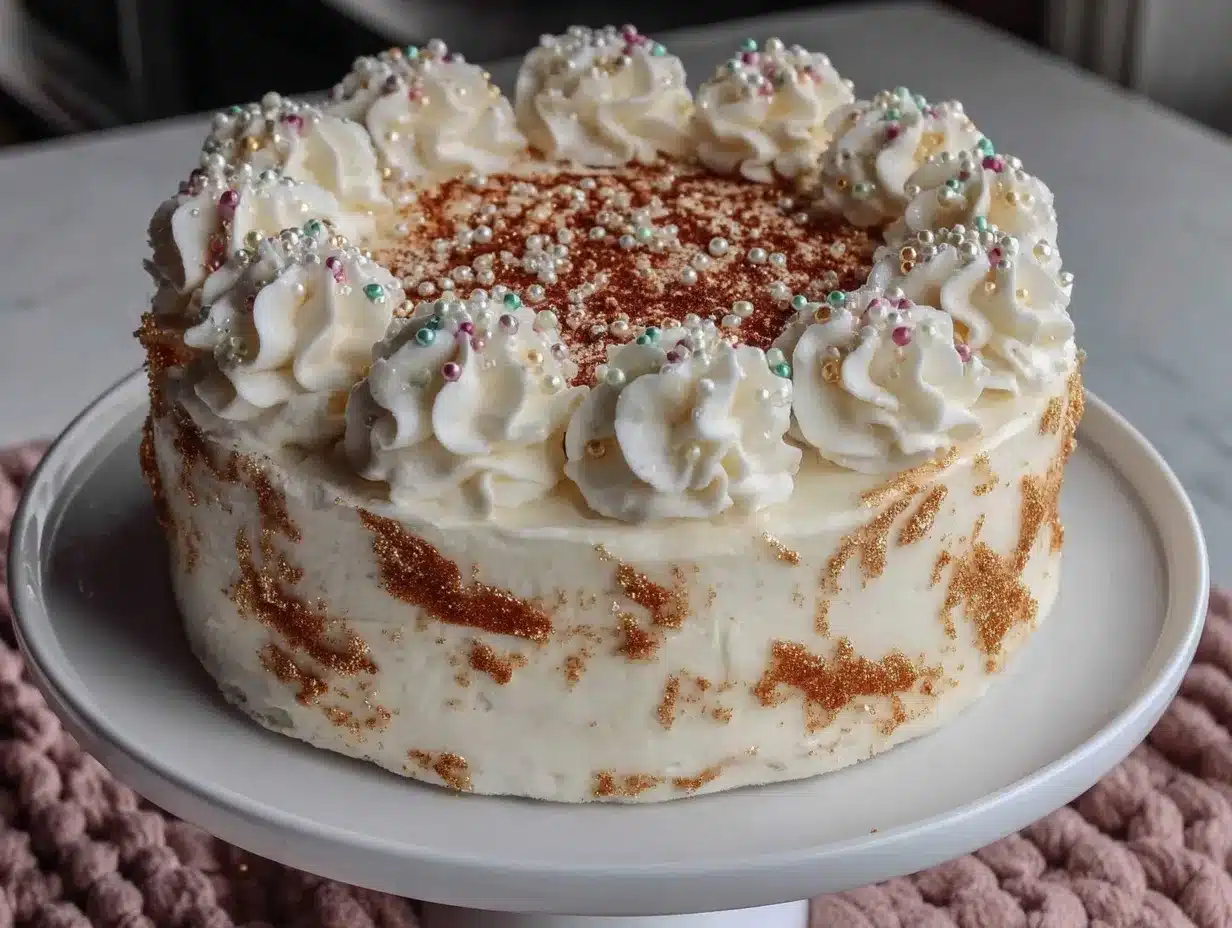
Let me tell you, the sight of a perfectly baked gold and white celebration cake sitting on the table is enough to stop anyone in their tracks. The golden crumb peeking through the smooth white frosting is like a little piece of edible sunshine, promising sweet moments ahead. The first time I baked this celebration cake, it was for my sister’s milestone birthday, and honestly, I was instantly hooked. It was one of those moments where you pause, take a deep breath, and just smile because you know you’ve created something truly special.
Years ago, when I was knee-high to a grasshopper, my grandma used to whip up the most stunning cakes for every family gathering, and they were always the highlight. I wished I’d discovered this gold and white celebration cake recipe back then—it’s dangerously easy but carries all that pure, nostalgic comfort. My family couldn’t stop sneaking slices off the cooling rack (and I can’t really blame them). This cake has since become a staple for every birthday, anniversary, and holiday, perfect for brightening up your Pinterest cake board or adding that wow factor to any special occasion.
You know what? After testing this recipe multiple times in the name of research, of course, it feels like a warm hug on a plate. If you’re after a beautiful, crowd-pleasing cake that looks as amazing as it tastes, you’re going to want to bookmark this one.
Why You’ll Love This Recipe
This perfect gold and white celebration cake is one I trust completely, and here’s why you’ll love it as much as I do:
- Quick & Easy: Comes together in under 90 minutes, perfect for busy celebrators or last-minute party plans.
- Simple Ingredients: No need for fancy or hard-to-find items—you likely already have most of these in your pantry.
- Perfect for Special Occasions: Whether it’s a birthday, anniversary, or holiday, this cake fits right in with the festivities.
- Crowd-Pleaser: Kids, adults, picky eaters—everyone always asks for seconds.
- Unbelievably Delicious: The moist golden crumb paired with smooth white buttercream is like comfort food with a classy twist.
What sets this recipe apart is the balance of its buttery richness and light crumb, thanks to a special technique of carefully creaming the butter and sugar together for just the right amount of air. The frosting is whipped to a silky smoothness that feels indulgent without being overly sweet. This isn’t just another vanilla cake—it’s the one that makes you close your eyes after the first bite, savoring every mouthful.
Honestly, this cake turns a simple celebration into something memorable without the stress or fuss. It’s the kind of recipe that will impress your guests and make you look like you’ve got cake-baking skills for days.
What Ingredients You Will Need
This recipe uses simple, wholesome ingredients to deliver bold flavor and a satisfying texture without the fuss. Most are pantry staples, and you can swap a few items to suit your needs.
- For the Cake Batter:
- All-purpose flour, 2 ½ cups (315g) – I recommend King Arthur for consistent texture
- Baking powder, 2 ½ teaspoons – for that perfect rise
- Salt, ½ teaspoon – balances sweetness
- Unsalted butter, 1 cup (227g), softened – adds richness and moisture
- Granulated sugar, 1 ¾ cups (350g) – for sweetness and structure
- Large eggs, 4, room temperature – helps bind and enrich
- Whole milk, 1 cup (240ml), room temperature – keeps crumb tender
- Pure vanilla extract, 2 teaspoons – for that classic flavor
- For the White Buttercream Frosting:
- Unsalted butter, 1 cup (227g), softened – the base of the frosting
- Powdered sugar, 4 cups (480g), sifted – for smooth sweetness
- Pure vanilla extract, 1 ½ teaspoons – flavor enhancer
- Whole milk or heavy cream, 2-4 tablespoons (30-60ml) – to adjust consistency
- Pinch of salt – balances sweetness
Ingredient Tips: For gluten-free options, swap the all-purpose flour with a gluten-free blend. Use dairy-free butter and plant-based milk if you need a vegan twist. Look for high-quality vanilla extract—it makes a noticeable difference.
Equipment Needed
- Two 8-inch (20 cm) round cake pans – non-stick or lined with parchment paper
- Electric mixer (stand or hand-held) – for creaming butter and whipping frosting
- Mixing bowls – preferably one large and one medium-sized
- Measuring cups and spoons – for accurate ingredient portions
- Cooling racks – to cool cakes evenly without sogginess
- Offset spatula or butter knife – perfect for smooth frosting application
- Rubber spatula – for folding and scraping batter
If you don’t have a stand mixer, a good hand mixer works just fine (I’ve used both). For budget-friendly pans, I like simple aluminum ones lined with parchment paper to avoid sticking. Keep your mixer’s beaters clean and dry for the best results when whipping the frosting.
Preparation Method
- Preheat and Prepare Pans: Preheat your oven to 350°F (175°C). Grease two 8-inch (20 cm) cake pans and line the bottoms with parchment paper. This ensures the cakes release easily after baking. (5 minutes)
- Mix Dry Ingredients: In a medium bowl, sift together 2 ½ cups (315g) flour, 2 ½ teaspoons baking powder, and ½ teaspoon salt. Set aside. This step helps distribute leavening agents evenly. (3 minutes)
- Cream Butter and Sugar: In a large bowl, use an electric mixer to beat 1 cup (227g) softened butter and 1 ¾ cups (350g) granulated sugar on medium speed until light and fluffy—about 4-5 minutes. This aerates the batter, giving the cake a tender crumb. (7 minutes)
- Add Eggs: Add 4 large eggs, one at a time, beating well after each addition. Make sure each egg is fully incorporated before adding the next. This prevents curdling and ensures a smooth batter. (4 minutes)
- Incorporate Dry Ingredients and Milk: Alternately add the dry ingredients and 1 cup (240ml) room temperature milk to the butter mixture, beginning and ending with the dry mix. Add 2 teaspoons vanilla extract here too. Mix on low speed until just combined—don’t overmix or the cake may be dense. (6 minutes)
- Divide Batter and Bake: Evenly pour the batter into the prepared pans. Tap pans gently on the counter to release air bubbles. Bake for 30-35 minutes, or until a toothpick inserted in the center comes out clean. (30-35 minutes)
- Cool Cakes: Let the cakes cool in the pans for 10 minutes, then turn out onto cooling racks to cool completely before frosting. This prevents frosting from melting. (1 hour)
- Make the Buttercream Frosting: Beat 1 cup (227g) softened butter on medium speed until creamy (about 2 minutes). Gradually add 4 cups (480g) sifted powdered sugar, mixing on low speed. Add 1 ½ teaspoons vanilla extract, a pinch of salt, and 2-4 tablespoons (30-60ml) milk or cream to reach your desired frosting consistency. Beat on high for a fluffy finish. (10 minutes)
- Assemble and Frost: Place one cake layer on your serving plate. Spread a generous amount of frosting on top. Place the second layer on top and frost the entire cake evenly. Use an offset spatula for smooth edges. Chill cake briefly if needed to set frosting. (15 minutes)
Pro Tip: If your cake domes too much while baking, level it with a serrated knife before frosting. If frosting feels too soft, chill it for 15 minutes and then re-whip before spreading.
Cooking Tips & Techniques
Getting this celebration cake just right isn’t rocket science, but a few tricks make all the difference. First, always use room temperature ingredients. Cold eggs or milk will slow down the creaming process and can make the batter curdle (I learned this the hard way!).
When creaming butter and sugar, patience is key. Beat until the mixture is pale and fluffy—this traps air which helps the cake rise beautifully. Resist the urge to rush this step.
Alternating dry and wet ingredients during mixing keeps the batter smooth and prevents overworking the flour, which can toughen the crumb. Trust me, less is more here.
For frosting, sift your powdered sugar to avoid lumps. Beat the butter first, then add sugar gradually to keep the frosting silky. If it feels too thick, a splash of milk or cream thins it out perfectly.
Finally, timing is everything. Let your cakes cool completely before frosting. If you’re in a hurry, pop them in the fridge for 20 minutes to speed things up without melting the buttercream.
Oh, and don’t forget to clean your mixer beaters and spatulas before frosting—they can introduce crumbs or moisture that mess with texture.
Variations & Adaptations
- Flavor Swaps: Add a teaspoon of almond extract or lemon zest to the batter for a subtle twist. I once made this with orange zest and it was a refreshing change!
- Dietary Adjustments: Use gluten-free flour blend for a gluten-free cake. Swap butter with vegan butter and milk with almond or oat milk for a dairy-free version.
- Frosting Alternatives: Try cream cheese frosting for a tangy contrast or whipped coconut cream for a light, tropical vibe.
- Decorative Touches: Add edible gold leaf accents or fresh white flowers to amp up the celebration look.
- Cooking Method: This cake can also be baked in three smaller pans for a taller layer cake or even baked as cupcakes for easy serving.
One personal favorite was swapping the vanilla for chai spice and topping with cinnamon buttercream—that cozy twist stole the show one chilly winter party.
Serving & Storage Suggestions
Serve this gold and white celebration cake at room temperature for the best texture and flavor. Pair it with a cup of fragrant tea, fresh berries, or a scoop of vanilla ice cream to round out the experience.
Leftovers? Wrap the cake tightly with plastic wrap and store in the refrigerator for up to 4 days. For longer storage, slice and freeze individual pieces in airtight containers for up to 3 months.
When reheating refrigerated slices, let them sit at room temperature for 30 minutes or warm gently in the microwave for 15 seconds—just enough to bring back that soft, buttery feel without melting the frosting.
Pro tip: The flavors actually deepen a bit after a day, so if you can wait, this cake tastes even better the next day!
Nutritional Information & Benefits
This celebration cake is a treat, but it’s made with simple ingredients that you can feel good about enjoying in moderation. Each slice (about 1/12th of the cake) contains approximately:
| Calories | 350 |
|---|---|
| Fat | 18g |
| Carbohydrates | 45g |
| Protein | 4g |
Key ingredients like eggs provide protein and essential nutrients, while butter adds richness and vitamin A. Using whole milk contributes to a creamy texture and some calcium.
If you need a lighter option, you can reduce sugar slightly or swap butter for lighter spreads, but honestly, this cake’s charm lies in its decadent balance.
Note: Contains gluten, dairy, and eggs. Perfect for most diets but not suitable for those with allergies to these ingredients.
Conclusion
So there you have it—the perfect gold and white celebration cake that’s easy to make, stunning to look at, and downright delicious to eat. Whether you’re baking for a birthday, anniversary, or just because, this cake hits all the right notes.
Feel free to tweak the flavors and frosting to match your style. I love how versatile it is and how it brings people together around the table. Honestly, it’s become one of my go-to recipes when I want something that feels like a warm hug but looks like a showstopper.
Give it a try and share your experience! I’d love to hear how you make it your own or any fun twists you come up with. Don’t be shy—drop a comment, share with friends, and let’s keep the celebration going!
Happy baking and celebrating!
Frequently Asked Questions
Can I make this cake in advance?
Yes! You can bake the cake layers up to two days ahead and store them wrapped tightly in the refrigerator. Frost the cake the day you plan to serve for the freshest look and taste.
What’s the best way to level cake layers?
Use a serrated knife to slice off the dome gently or a cake leveler if you have one. This helps the layers stack evenly and prevents the cake from leaning.
Can I freeze the cake after it’s frosted?
It’s best to freeze the cake layers unfrosted and then thaw and frost when ready. If you freeze a frosted cake, wrap it tightly and thaw overnight in the fridge to avoid condensation on the frosting.
How can I make the frosting less sweet?
Add a pinch of salt or a little cream cheese to balance the sweetness, or reduce powdered sugar slightly. Using high-quality butter also helps the flavor shine without needing extra sugar.
Is this cake suitable for beginners?
Absolutely! The recipe is straightforward and forgiving. Just follow the steps, and you’ll end up with a beautiful cake that tastes like you spent hours on it.
Pin This Recipe!
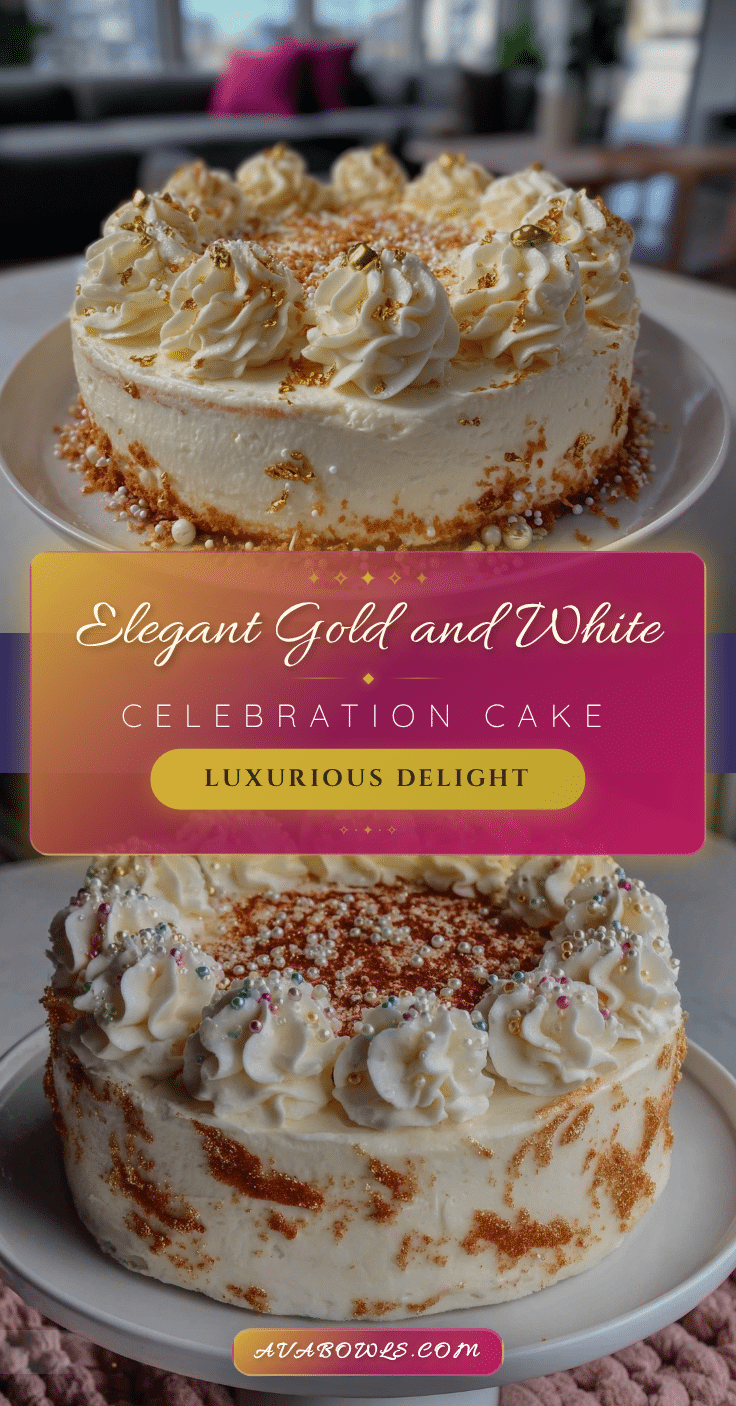
Perfect Gold and White Celebration Cake Recipe for Special Occasions Easy and Beautiful

A quick and easy celebration cake with a moist golden crumb and smooth white buttercream frosting, perfect for birthdays, anniversaries, and holidays.
- Prep Time: 20 minutes
- Cook Time: 35 minutes
- Total Time: 1 hour 55 minutes
- Yield: 12 servings 1x
- Category: Dessert
- Cuisine: American
Ingredients
- 2 ½ cups (315g) all-purpose flour
- 2 ½ teaspoons baking powder
- ½ teaspoon salt
- 1 cup (227g) unsalted butter, softened
- 1 ¾ cups (350g) granulated sugar
- 4 large eggs, room temperature
- 1 cup (240ml) whole milk, room temperature
- 2 teaspoons pure vanilla extract
- For the Frosting:
- 1 cup (227g) unsalted butter, softened
- 4 cups (480g) powdered sugar, sifted
- 1 ½ teaspoons pure vanilla extract
- 2–4 tablespoons (30-60ml) whole milk or heavy cream
- Pinch of salt
Instructions
- Preheat your oven to 350°F (175°C). Grease two 8-inch (20 cm) cake pans and line the bottoms with parchment paper.
- In a medium bowl, sift together flour, baking powder, and salt. Set aside.
- In a large bowl, beat softened butter and granulated sugar on medium speed until light and fluffy, about 4-5 minutes.
- Add eggs one at a time, beating well after each addition.
- Alternately add dry ingredients and milk to the butter mixture, beginning and ending with dry ingredients. Add vanilla extract. Mix on low speed until just combined.
- Divide batter evenly into prepared pans. Tap pans gently to release air bubbles.
- Bake for 30-35 minutes or until a toothpick inserted in the center comes out clean.
- Cool cakes in pans for 10 minutes, then turn out onto cooling racks to cool completely.
- For the frosting, beat softened butter on medium speed until creamy, about 2 minutes.
- Gradually add powdered sugar on low speed. Add vanilla extract, salt, and milk or cream to reach desired consistency. Beat on high for a fluffy finish.
- Place one cake layer on serving plate. Spread frosting on top. Place second layer on top and frost entire cake evenly.
- Use an offset spatula for smooth edges. Chill briefly if needed to set frosting.
Notes
Use room temperature ingredients for best results. Cream butter and sugar until pale and fluffy to trap air for a tender crumb. Alternate dry and wet ingredients to avoid overmixing. Sift powdered sugar for smooth frosting. Chill frosting if too soft before spreading. Level cake layers if domed before frosting.
Nutrition
- Serving Size: 1 slice (1/12th of c
- Calories: 350
- Fat: 18
- Carbohydrates: 45
- Protein: 4
Keywords: celebration cake, gold and white cake, buttercream frosting, easy cake recipe, birthday cake, special occasion cake