Let me tell you, the sweet, buttery aroma of melting marshmallows combined with crispy puffed rice wafting through the kitchen is enough to make anyone’s mouth water. The first time I whipped up these easy perfectly chewy Rice Krispie treats, I was instantly hooked. It was one of those moments where you pause, take a deep breath, and just smile because you know you’re onto something truly special. I remember being knee-high to a grasshopper, helping my mom in the kitchen, and those sticky, gooey squares were always a crowd favorite. Years ago, I never imagined I’d find a recipe that nails the chewy texture just right without any complicated steps or fancy ingredients.
Honestly, these treats have become a staple in my family gatherings. My kids can’t stop sneaking them off the cooling rack (and I can’t really blame them). You know what? Let’s face it — nothing beats a snack that’s dangerously easy to make and provides pure, nostalgic comfort. Whether you’re looking for a sweet treat for your kids, a quick potluck snack, or just a way to brighten up your Pinterest cookie board, these Rice Krispie treats fit the bill perfectly. After testing the recipe multiple times (in the name of research, of course), I can say this is the best chewy version you’ll find anywhere.
Why You’ll Love This Recipe
Having played around with Rice Krispie treats for years, I can confidently say this recipe stands out for a bunch of reasons. It’s been tested, tweaked, and family-approved, making it a go-to for any snack emergency.
- Quick & Easy: Comes together in under 15 minutes — perfect for busy weeknights or last-minute cravings.
- Simple Ingredients: No need for fancy trips to specialty stores; you probably have all the ingredients right in your pantry.
- Perfect for Any Occasion: Whether it’s a birthday party, school event, or just a cozy afternoon snack, these treats deliver every time.
- Crowd-Pleaser: Kids and adults alike rave about the chewy texture and buttery flavor.
- Unbelievably Delicious: The texture is just right — not too sticky, not too dry — a perfect chewy bite that melts in your mouth.
What makes this recipe different? It’s all about the balance — a little extra butter for richness, marshmallows melted slowly over low heat to avoid burning, and careful folding to keep the cereal crispy yet chewy. You won’t find a clumpy, hard-to-bite treat here. Instead, you get a soft, chewy texture that feels like comfort food made right. I love that it’s simple enough for beginners but satisfying enough for seasoned snack lovers. After one bite, you might just close your eyes and savor the moment — that’s how good it gets.
What Ingredients You Will Need
This recipe uses simple, wholesome ingredients to deliver bold flavor and that signature chewy texture without any fuss. Most of these are pantry staples, so no fancy hunting required!
- Marshmallows: 10 ounces (about 40 regular marshmallows) — I prefer jet-puffed for their smooth melt.
- Unsalted Butter: 6 tablespoons (85 grams), cut into pieces and softened — adds richness and helps with chewiness.
- Rice Krispies Cereal: 6 cups (about 180 grams) — the classic crispy rice cereal; I recommend Kellogg’s for best texture.
- Vanilla Extract: 1 teaspoon — boosts flavor with a subtle warmth.
- Salt: A pinch — balances sweetness and brings out the other flavors perfectly.
Optional additions:
- Mini Chocolate Chips: ½ cup for a melty chocolate twist.
- Sprinkles: For a fun, colorful finish — perfect for kids’ parties.
- Peanut Butter: Swap 2 tablespoons of butter with peanut butter for a nutty flavor.
If you want a gluten-free version, just double-check the cereal label since some brands contain gluten. For a dairy-free twist, swap the butter with coconut oil and use vegan marshmallows. These swaps keep the chewiness intact!
Equipment Needed
- Large Saucepan: For melting the butter and marshmallows together — a heavy-bottomed pan helps prevent burning.
- Wooden Spoon or Silicone Spatula: Essential for stirring marshmallows; silicone spatulas work great for scraping every bit off the sides.
- 9×13 Inch Baking Pan: To press and set the treats — I line mine with parchment paper for easy removal and cleanup.
- Measuring Cups and Spoons: Accuracy is key, especially for the marshmallows and butter.
- Non-stick Spray or Butter: To grease the pan lightly, preventing sticking.
You can also use a candy thermometer if you want to be extra precise melting the marshmallows but honestly, I never bother. Just melt slowly on low heat and stir often — that’s the hack! If you don’t have a 9×13 pan, a slightly smaller or larger pan works, just adjust the thickness of the treats accordingly.
Preparation Method
- Prepare your pan. Lightly grease a 9×13 inch (23×33 cm) baking pan with butter or non-stick spray, or line it with parchment paper. This helps with easy removal later.
- Melt the butter. In a large saucepan over low heat, melt 6 tablespoons (85 grams) of unsalted butter. This should take about 2-3 minutes. Stir occasionally to prevent browning.
- Add marshmallows. Once the butter is melted and bubbling slightly, add 10 ounces (about 40) regular marshmallows. Stir gently but continuously to avoid scorching. It should take around 5-7 minutes until the marshmallows are completely melted and smooth. Watch for a glossy, thick liquid texture.
- Mix in vanilla and salt. Remove the pan from heat. Stir in 1 teaspoon of vanilla extract and a pinch of salt to balance the sweetness. This little step makes a big flavor difference.
- Add the cereal. Pour in 6 cups (180 grams) of Rice Krispies cereal all at once. Quickly but gently fold the cereal into the marshmallow mixture using a spatula or wooden spoon. Be careful not to over-stir — you want to coat the cereal evenly without crushing it.
- Transfer to pan and press. Immediately pour the mixture into your prepared pan. Using a buttered spatula or wax paper, press the mixture evenly and firmly into the pan. The key here is gentle pressure — too hard and the treats become dense; too light and they fall apart. It should take about 2-3 minutes.
- Cool completely. Let the treats cool at room temperature for at least 30 minutes to set. You can speed this up by placing the pan in the fridge for 15 minutes but beware — chilling too long can make them harder to cut.
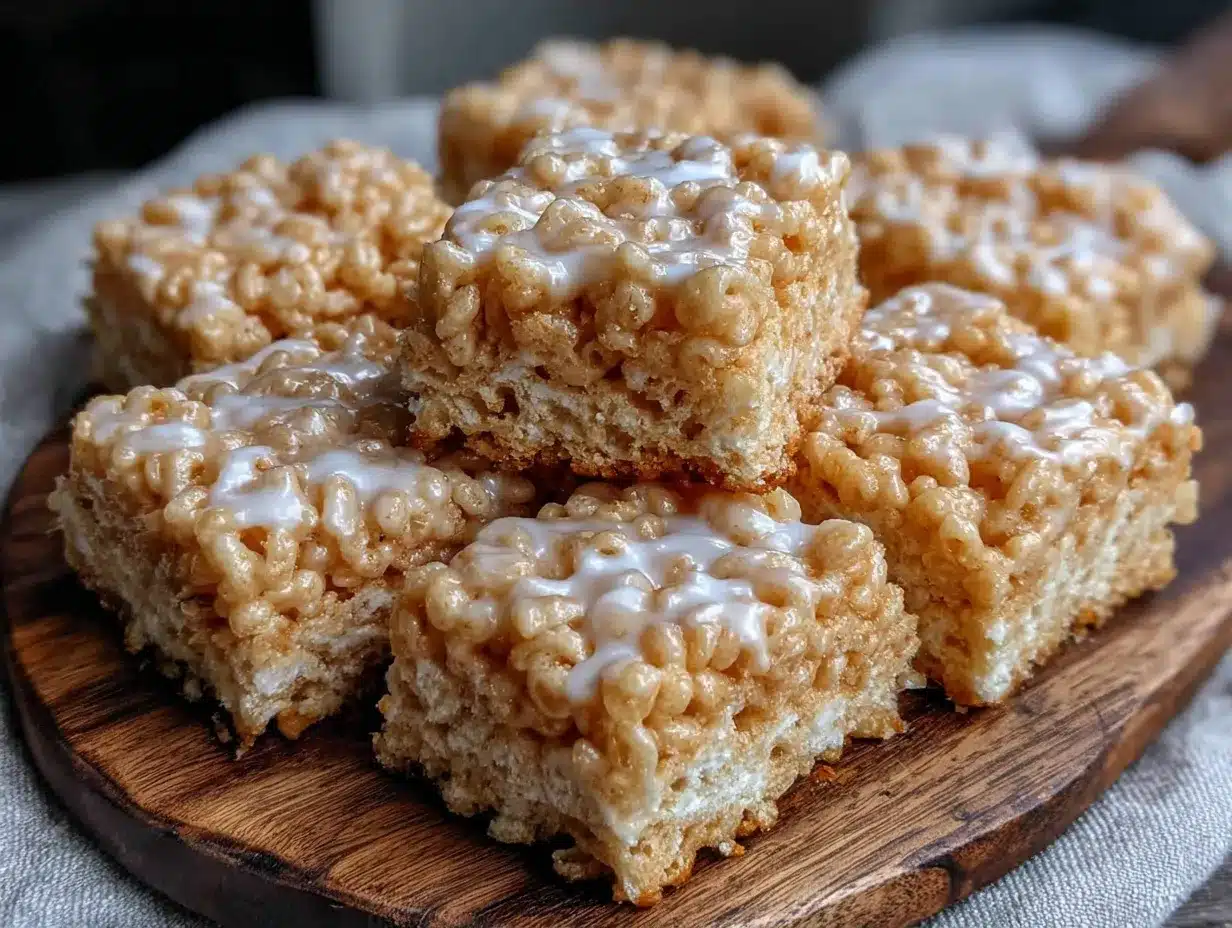
- Cut and serve. Once set, lift the treats from the pan using the parchment paper (if used) and cut into squares or rectangles with a sharp knife. I like to wipe the knife with a warm, damp cloth between cuts for clean edges.
Pro tip: If your marshmallows start to stiffen before you fold in the cereal, just warm the pan briefly over low heat to soften again. Patience is key here to get that perfectly chewy texture.
Cooking Tips & Techniques
Honestly, making chewy Rice Krispie treats is all about timing and temperature. The marshmallows must melt slowly over low heat to keep the texture smooth and prevent burning. I’ve learned the hard way that rushing this step means gummy, uneven treats.
When folding in the cereal, go easy — you want to keep the crispy texture intact. Overmixing will crush the cereal and make the treats dense and heavy.
Pressing the mixture evenly and just firm enough is another trick. I use wax paper or a buttered spatula to avoid sticking. Pressing too hard? The treats turn rock-solid. Too light? They crumble when cut.
Also, using unsalted butter lets you control the salt level better, so don’t swap it with salted without adjusting. And always add a pinch of salt — it’s the secret to balancing sweetness.
Last but not least, don’t skip the vanilla extract. It lifts the flavor from ordinary to something that keeps you reaching for more. After a few batches, you’ll get a feel for the marshmallow melt and pressing technique — trust me, it’s worth the practice.
Variations & Adaptations
- Chocolate Lovers’ Delight: Add ½ cup mini chocolate chips after folding in the cereal for melty pockets of chocolate goodness.
- Peanut Butter Twist: Swap 2 tablespoons of butter with peanut butter for a nutty, rich flavor. You can even drizzle melted peanut butter on top once cooled.
- Fruity Fun: Fold in dried cranberries or chopped dried apricots for bursts of tart sweetness that complement the chewiness.
- Gluten-Free Option: Use a certified gluten-free puffed rice cereal to keep it safe for sensitive diets.
- Vegan Version: Use dairy-free butter or coconut oil and vegan marshmallows to make this treat totally plant-based.
One personal favorite variation I tried? Tossing in rainbow sprinkles right before pressing the mixture into the pan. It adds a festive pop that my kids adore, especially for birthdays or holidays.
Serving & Storage Suggestions
These treats are best served at room temperature, right after they’ve set. The chewy texture shines when they’re not too cold or too warm. For a fun presentation, cut into bite-sized squares and serve on a colorful plate or wrapped individually for lunchboxes.
Pair with a cold glass of milk or a cup of hot cocoa for a cozy snack time. They also travel well, making them ideal for picnics or potlucks.
To store, keep the treats in an airtight container at room temperature for up to 3 days. If you want to keep them longer, freeze them wrapped tightly in plastic wrap and foil — they thaw quickly at room temp and maintain their texture.
Reheating isn’t usually necessary, but if you want them softer, a quick 10-second zap in the microwave works wonders. Just don’t overdo it or they’ll melt into a sticky mess.
Interestingly, the flavor deepens slightly after a day as the marshmallow and butter meld together, so sometimes I make them a day ahead and let them sit. Honestly, patience pays off!
Nutritional Information & Benefits
Estimated per serving (based on 12 servings): 150 calories, 3 grams fat, 28 grams carbohydrates, 1 gram protein.
While these treats are a sweet indulgence, they do provide a quick energy boost thanks to the simple carbs in the cereal and marshmallows. The butter adds a bit of richness and fat for satiety.
For those watching dietary needs, you can make these gluten-free by choosing the right cereal and vegan by swapping butter and marshmallows as mentioned. Just be mindful of allergens like dairy and gluten if serving to friends or family.
From a wellness perspective, I see these treats as a joyful snack — a little reminder that sometimes comfort food is just what we need to brighten the day. Moderation is key, but the smile they bring is priceless.
Conclusion
So, why try this easy perfectly chewy Rice Krispie treats recipe? Because it’s a tried-and-true classic that feels like a warm hug in every bite. It’s simple enough for last-minute snack emergencies but delicious enough to impress the pickiest snackers.
Feel free to tweak it to your taste — whether that’s adding chocolate, peanut butter, or sprinkles. I love this recipe because it brings back childhood memories while fitting right into today’s busy lifestyle.
Give it a shot, and let me know how your batch turns out. Share your favorite variations or any tips you discover! Trust me, you’re going to want to bookmark this one for years to come.
FAQs About Easy Perfectly Chewy Rice Krispie Treats
How do I make my Rice Krispie treats more chewy?
Slowly melt the marshmallows over low heat with butter, and press the mixture gently but firmly into the pan. Avoid overmixing the cereal to keep the texture just right.
Can I use mini marshmallows instead of regular ones?
Yes! Use about 4 cups of mini marshmallows to replace 10 ounces of regular marshmallows. The melting time may be shorter, so watch closely.
How long do Rice Krispie treats stay fresh?
Stored in an airtight container at room temperature, they stay fresh for up to 3 days. Freezing extends the shelf life up to 2 months.
Can I add mix-ins to the treats?
Absolutely! Chocolate chips, peanut butter, sprinkles, or dried fruit all work well. Just fold them in gently after mixing the cereal with marshmallows.
What’s the best way to cut Rice Krispie treats?
Use a sharp knife and wipe it clean between cuts. You can warm the knife under hot water and dry it for easier slicing and cleaner edges.
Pin This Recipe!
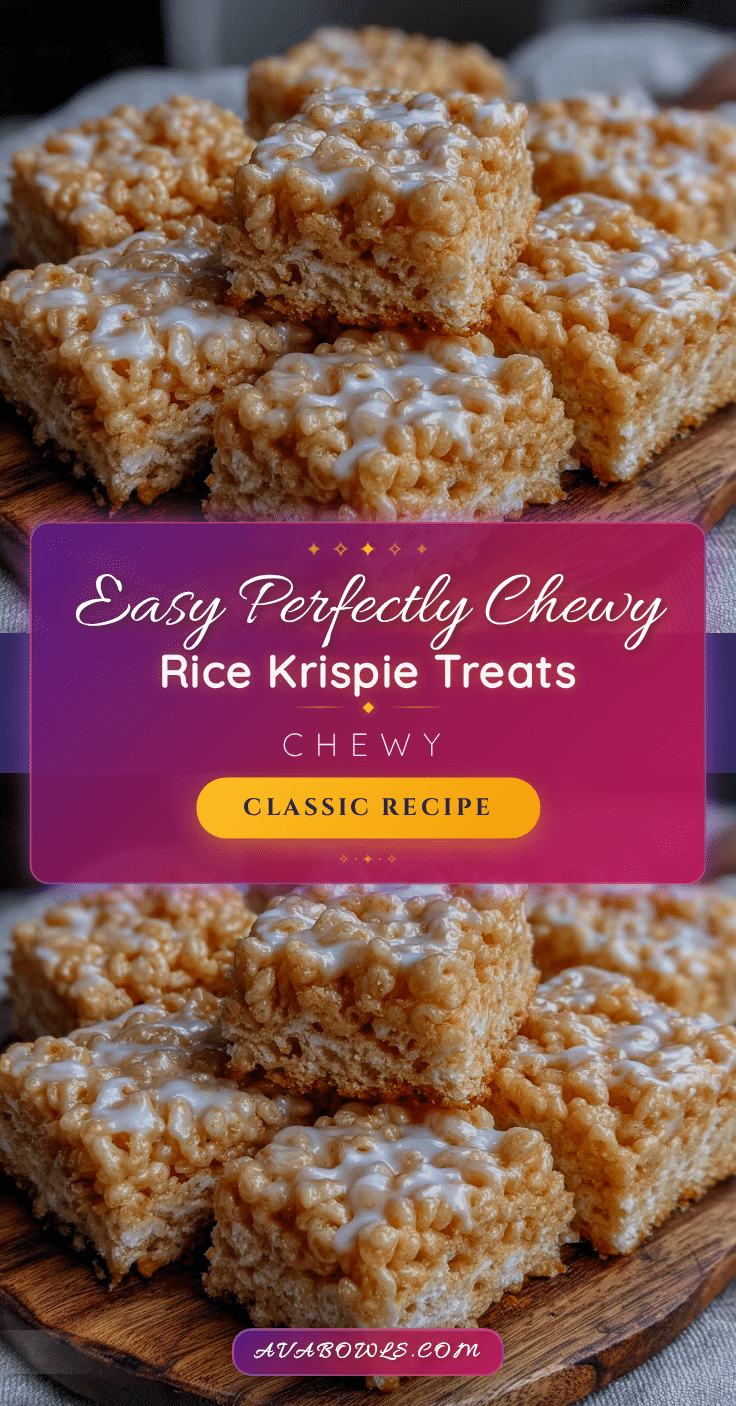
Easy Perfectly Chewy Rice Krispie Treats Recipe for Ultimate Snack Delight
A quick and easy recipe for chewy Rice Krispie treats with a perfect balance of buttery richness and marshmallow sweetness. Ideal for snacks, parties, and nostalgic comfort food.
- Prep Time: 10 minutes
- Cook Time: 10 minutes
- Total Time: 40 minutes
- Yield: 12 servings 1x
- Category: Snack
- Cuisine: American
Ingredients
- 10 ounces (about 40 regular marshmallows) Jet-Puffed marshmallows
- 6 tablespoons (85 grams) unsalted butter, softened and cut into pieces
- 6 cups (about 180 grams) Rice Krispies cereal (Kellogg’s recommended)
- 1 teaspoon vanilla extract
- A pinch of salt
Instructions
- Lightly grease a 9×13 inch baking pan with butter or non-stick spray, or line it with parchment paper.
- In a large saucepan over low heat, melt 6 tablespoons of unsalted butter, stirring occasionally for 2-3 minutes.
- Add 10 ounces of marshmallows to the melted butter and stir gently but continuously until completely melted and smooth, about 5-7 minutes.
- Remove the pan from heat and stir in 1 teaspoon vanilla extract and a pinch of salt.
- Pour in 6 cups of Rice Krispies cereal all at once and quickly but gently fold the cereal into the marshmallow mixture without over-stirring.
- Immediately transfer the mixture to the prepared pan and press evenly and firmly using a buttered spatula or wax paper for 2-3 minutes.
- Let the treats cool at room temperature for at least 30 minutes to set (or refrigerate for 15 minutes to speed up).
- Once set, lift the treats from the pan using parchment paper if used, and cut into squares or rectangles with a sharp knife.
Notes
Melt marshmallows slowly over low heat to avoid burning and achieve a smooth texture. Press the mixture gently but firmly into the pan to maintain chewiness without making treats too dense. Use unsalted butter to control salt levels and always add a pinch of salt to balance sweetness. For gluten-free, use certified gluten-free cereal; for dairy-free, substitute butter with coconut oil and use vegan marshmallows.
Nutrition
- Serving Size: 1 treat (1/12th of t
- Calories: 150
- Fat: 3
- Carbohydrates: 28
- Protein: 1
Keywords: Rice Krispie treats, chewy Rice Krispie treats, easy snack, marshmallow treats, buttery Rice Krispies, quick dessert, kid-friendly snack