“You’ve got to see this,” my niece texted me one Saturday afternoon, accompanied by a photo of tiny, golden nests filled with pastel candy eggs. I was skeptical—Rice Krispie treats are a dime a dozen, right? But then I remembered how these mini egg nest Rice Krispie treats had somehow stolen the spotlight at last year’s Easter brunch, charming everyone from toddlers to my picky uncle who usually sticks to his black coffee and toast. Honestly, I wasn’t expecting much when I first tried making these quick little delights, but they turned out to be a surprise hit. The crisp marshmallow base combined with the playful candy eggs perched on top felt like spring in every bite.
What’s funny is that this recipe started as a last-minute rescue when the usual bakery was closed, and I needed something festive that wouldn’t have me wrestling with complicated dough or fancy decorations. I whipped these up with whatever was in the pantry, and the result was a fun, fuss-free treat that made the whole table smile. Since then, I’ve found myself making them multiple times during the season, adjusting the candy, and even sneaking in some extra textures here and there.
There’s something quietly satisfying about these mini egg nest Rice Krispie treats—like a little celebration that’s easy to share and just sweet enough to bring back that childhood excitement. If you want a snack that’s as playful and lighthearted as a spring day, these treats might just become your new go-to.
Why You’ll Love This Recipe
After many rounds of testing and tweaking, these Easy Mini Egg Nest Rice Krispie Treats have earned a special place in my recipe box. Here’s why I think you’ll find them as irresistible as we do:
- Quick & Easy: Ready in about 20 minutes, these treats are perfect for last-minute holiday prep or an impromptu sweet fix.
- Simple Ingredients: No need for fancy or obscure items—just marshmallows, cereal, butter, and your favorite mini candy eggs.
- Perfect for Festive Occasions: Whether it’s Easter, spring parties, or a fun classroom snack, these mini nests add a cheerful touch.
- Crowd-Pleaser: Both kids and adults can’t get enough of the crunchy, chewy texture combined with the colorful candy eggs.
- Unbelievably Delicious: The buttery marshmallow coating hugs the cereal for a satisfying bite that’s sweet but not overwhelming.
What makes this recipe stand out? It’s the little touches—like pressing the marshmallow mixture into perfectly sized nests and carefully arranging the candy eggs to look like tiny treasures. I also love swapping out the classic Rice Krispies for a mix of cereals to add some surprise textures. If you fancy a softer, more melt-in-your-mouth treat, gently warming the butter and marshmallows longer makes all the difference.
Honestly, these treats bring a kind of joy that’s simple and genuine. They’re the kind of recipe that invites you to slow down and enjoy the moment, whether you’re sharing them at a brunch or sneaking a few when no one’s looking. If you like playful desserts that are fuss-free, these mini egg nests are definitely worth your time.
What Ingredients You Will Need
This recipe keeps things straightforward with familiar pantry staples that come together to create a classic, comforting treat. Nothing complicated here—just good old-fashioned ingredients that bring sweet, crispy joy.
For the Mini Egg Nest Rice Krispie Treats:
- 6 cups Rice Krispies cereal (or any crispy rice cereal you prefer; I’ve sometimes mixed in a cup of cornflakes for extra crunch)
- 4 tablespoons unsalted butter, softened (I usually go for Land O’Lakes because of the rich flavor)
- 10 ounces mini marshmallows (you can use regular size marshmallows, cut into smaller pieces)
- 1 teaspoon pure vanilla extract (optional, but it adds a lovely warmth)
- Mini candy eggs (like Cadbury Mini Eggs or any pastel-colored chocolate eggs; about 30-40 for decorating)
Pro tip: If you want a gluten-free option, make sure to choose a gluten-free crispy rice cereal. Also, swapping butter with coconut oil works well for a dairy-free twist.
Optional Toppings or Mix-Ins:

- Colored sugar sprinkles or edible glitter for extra festive sparkle
- Chopped nuts (like toasted almonds or pecans) mixed in for texture
- Mini chocolate chips for a double chocolate hit
These ingredients keep the treats light and sweet, and you can easily tweak the candies or toppings to suit your taste or what’s in your pantry. For example, in spring, I’ve swapped candy eggs for jelly beans or pastel M&Ms, depending on the mood and the crowd.
Equipment Needed
- Large mixing bowl: For combining the cereal and marshmallow mixture. I find a big bowl with high sides helps avoid messes when stirring.
- Medium saucepan: To melt the butter and marshmallows together. A non-stick pan makes cleanup easier.
- Spatula or wooden spoon: For stirring the marshmallows and folding in the cereal. I prefer a silicone spatula since it’s gentle and flexible.
- Mini muffin tin or silicone molds: These are perfect for shaping the nests and keeping them uniform. If you don’t have one, forming nests by hand on parchment paper works too.
- Parchment paper or non-stick spray: To prevent sticking when shaping the nests.
If you don’t have a mini muffin tin, don’t sweat it—using your hands lightly greased with butter is a quick way to shape nests. I once made a batch on a baking sheet lined with parchment, pressing the mixture flat and cutting out circles with a cookie cutter. It worked fine, but the mini muffin tin really gives that perfect nest shape with minimal effort. Also, cleaning the pan right after use makes all the difference—marshmallow residue can be stubborn if left to harden!
Preparation Method
- Prepare your workspace: Lightly grease a mini muffin tin or line a baking sheet with parchment paper. This will make removing the nests easier later. Have your mini candy eggs ready nearby.
- Melt the butter: In a medium saucepan over low heat, melt 4 tablespoons of unsalted butter. This usually takes about 2-3 minutes. Watch carefully so it doesn’t brown or burn.
- Add marshmallows: Once the butter is melted, add 10 ounces of mini marshmallows. Stir constantly with a spatula until completely melted and smooth. This step should take about 4-5 minutes. If you want, stir in 1 teaspoon of vanilla extract at this point.
- Combine with cereal: Remove the pan from heat and immediately add 6 cups of Rice Krispies cereal. Fold gently but thoroughly until every piece is coated with the marshmallow mixture.
- Shape the nests: Working quickly (before the mixture hardens), press about 2 tablespoons of the mixture into each cup of the muffin tin. Use your fingers or the back of a spoon to create a little indentation in the center, forming a nest shape. If shaping by hand, form small rounds on parchment paper and press an indentation in each.
- Add candy eggs: While the nests are still warm and soft, arrange 3-4 mini candy eggs in the center of each nest. Press gently so they stick but don’t flatten the eggs.
- Let cool: Allow the nests to cool and set at room temperature for about 30 minutes. They will firm up and hold their shape.
- Serve or store: Once cooled, carefully remove the nests from the muffin tin or parchment paper and arrange on a serving platter.
Quick tip: If the marshmallow mixture starts to harden while shaping, pop it back on very low heat for a few seconds to soften again. Also, don’t rush the cooling step—these treats hold together best when fully set.
Cooking Tips & Techniques
Making mini egg nest Rice Krispie treats feels straightforward, but a few tricks learned the hard way really help get them just right.
- Low and slow: Melting the butter and marshmallows over low heat prevents scorching and keeps the mixture silky smooth. Rushing this part will result in lumps or burnt bits.
- Timing is everything: Marshmallow mixture hardens fast once off the heat, so have all your tools ready before combining with the cereal. Quick shaping yields neat nests that hold together well.
- Don’t overmix: Stir just enough to coat the cereal. Overmixing can crush the cereal and make the treats dense instead of light and crispy.
- Shape with care: If nests are too thin, they may break apart. Use enough mixture to create sturdy bases and gentle indentations for the candy eggs.
- Experiment with cereals: I once swapped in a mix of Rice Krispies and Cocoa Pebbles for a chocolate twist. It added fun flavor and color!
- Storage note: Keep treats in an airtight container to maintain their crispness. Avoid refrigerating as it can make them sticky.
One time, I forgot to grease the muffin tin and ended up with half the nests stuck fast—lesson learned! Also, if you want perfectly even-sized nests, using a cookie scoop to portion the mixture works wonders. For a festive presentation, sprinkle a tiny pinch of colored sugar on top just before setting.
Variations & Adaptations
This recipe is pretty flexible—feel free to make it your own based on dietary needs or flavor preferences.
- Dairy-Free Version: Replace butter with coconut oil and use dairy-free marshmallows. The flavor shifts slightly but stays delicious and creamy.
- Chocolate Lover’s Nest: Stir in 1/4 cup mini chocolate chips or drizzle melted chocolate over the finished nests for a richer treat.
- Nutty Twist: Add 1/2 cup chopped toasted almonds or pecans to the cereal mix for crunch and extra flavor.
- Seasonal Candy Swap: Instead of mini eggs, try small gummy candies or pastel-colored jelly beans for Easter or spring celebrations.
- Gluten-Free Option: Choose certified gluten-free crispy rice cereal to keep the treats safe for gluten-sensitive eaters.
Personally, I love to mix these treats up by adding a handful of toasted coconut flakes for a tropical vibe. For a playful spin, I even made a batch using the cereal base from the healthy energy balls recipe I tried recently—though it was a bit softer, it gave a nice chewy contrast that some friends really liked.
Serving & Storage Suggestions
These mini egg nest Rice Krispie treats are best served at room temperature, so the marshmallow coating stays chewy and the candy eggs remain firm.
They make a cheerful addition to any festive spread—try pairing them with light spring beverages like iced tea or a fresh lemonade. For brunch, they can sit alongside the creamy richness found in dishes like the creamy spring vegetable fettuccine alfredo, balancing savory and sweet beautifully.
To store, place the nests in an airtight container lined with wax paper between layers to prevent sticking. They keep well for up to 3 days at room temperature. Avoid refrigeration—it tends to make marshmallow treats sticky and chewy in a less pleasant way.
If you need to store them longer, freezing works nicely. Wrap individual nests in plastic wrap and place them in a freezer-safe container. Thaw at room temperature for about 30 minutes before serving.
Flavors actually mellow nicely after a day, making these treats even more enjoyable if you can resist eating them immediately!
Nutritional Information & Benefits
While these mini egg nest Rice Krispie treats are definitely a sweet indulgence, they’re made with simple ingredients and portioned small to keep things light.
| Per Mini Nest (approx.) | Calories | Carbs | Fat | Protein |
|---|---|---|---|---|
| 1 Nest | 90 kcal | 16 g | 2.5 g | 0.5 g |
Key ingredients like butter provide some fat for satiety, while marshmallows and cereal are mostly carbohydrates—so enjoy these as a treat rather than a meal. The mini candy eggs add sugar and a bit of chocolate, which naturally ups the indulgence factor.
For those watching allergens, this recipe contains dairy and gluten unless you substitute accordingly. Using gluten-free cereal and dairy-free butter alternatives can make these treats safe for many dietary needs.
From my perspective, having a small sweet that feels like a celebration but doesn’t wreck the pantry or require complicated prep makes it easier to enjoy treats mindfully. It’s the kind of recipe that fits into a balanced approach to eating, where pleasure and simplicity meet.
Conclusion
These Easy Mini Egg Nest Rice Krispie Treats have become a little tradition I look forward to every spring. They’re fun to make, easy to share, and bring a bit of festive cheer without fuss or stress. Whether you’re baking with friends, surprising the kids, or just need a quick festive fix, these treats hit the spot.
Feel free to tweak the ingredients to suit your taste or dietary needs—there’s a lot of room for creativity with such a simple base. And honestly, the best part is watching those candy eggs nestle perfectly into the crispy, chewy base.
If you try this recipe, I’d love to hear how you make it your own! Share your twists or favorite candy swaps in the comments below. Let’s make festive fun that’s easy and truly delicious.
Frequently Asked Questions
Can I use a different cereal instead of Rice Krispies?
Yes! You can swap in cornflakes, Cheerios, or even a mix of cereals for different textures and flavors. Just make sure the cereal is relatively light and crunchy to hold the nests well.
How long will these mini egg nest treats keep fresh?
Stored in an airtight container at room temperature, they stay fresh for about 3 days. Avoid refrigeration as it can make them sticky.
Can I make these nests ahead of time?
Absolutely. You can prepare them a day or two in advance and store them properly. For longer storage, freeze individually wrapped nests and thaw before serving.
What can I use if I don’t have mini candy eggs?
Try small jelly beans, pastel M&Ms, or even tiny chocolate chips. Seasonal gummy candies also work well and add a colorful touch.
Are these treats gluten-free?
The recipe is gluten-free if you use certified gluten-free crispy rice cereal. Always check the packaging to be sure.
Pin This Recipe!
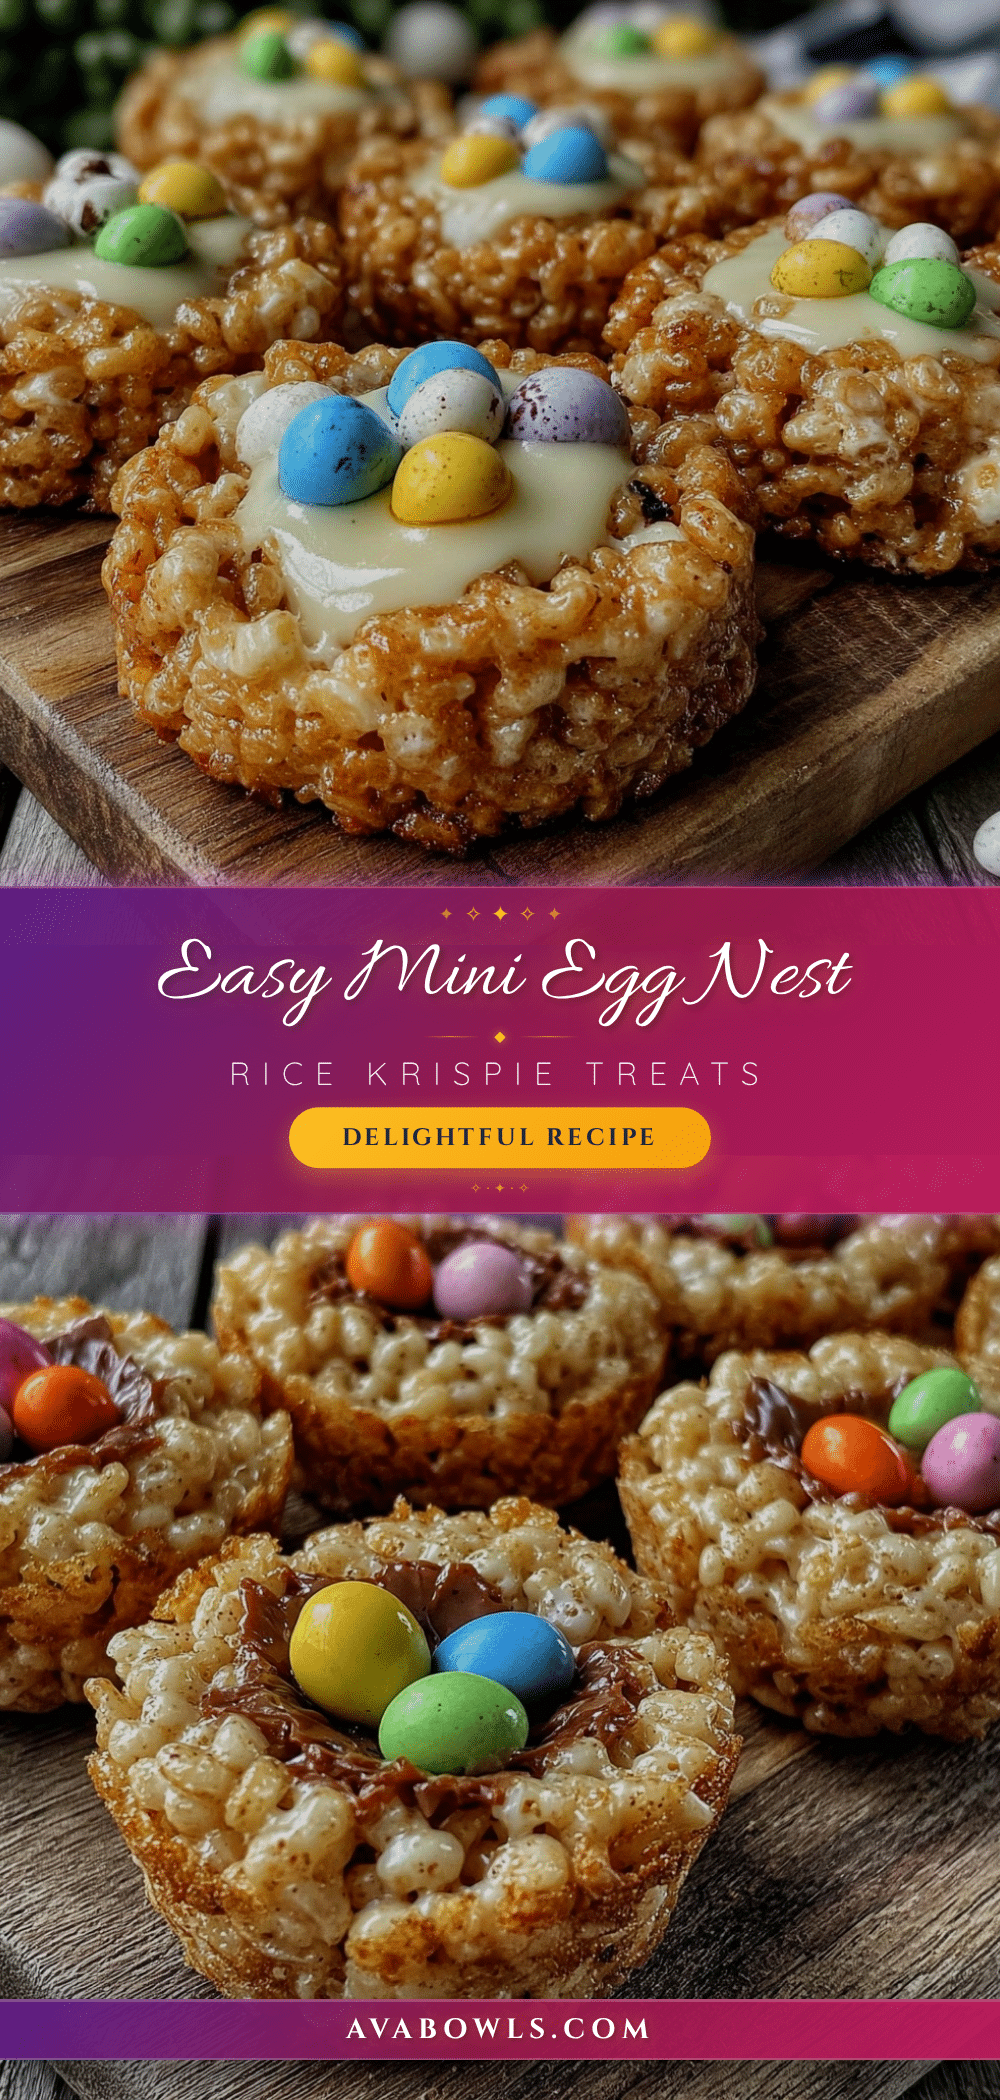
Easy Mini Egg Nest Rice Krispie Treats Recipe for Festive Fun

These mini egg nest Rice Krispie treats are quick, easy, and perfect for festive occasions like Easter. They combine a buttery marshmallow base with colorful candy eggs for a playful and lighthearted snack.
- Prep Time: 10 minutes
- Cook Time: 10 minutes
- Total Time: 20 minutes
- Yield: 24 mini nests 1x
- Category: Dessert
- Cuisine: American
Ingredients
- 6 cups Rice Krispies cereal (or any crispy rice cereal; optionally mix in 1 cup cornflakes for extra crunch)
- 4 tablespoons unsalted butter, softened
- 10 ounces mini marshmallows (or regular marshmallows cut into smaller pieces)
- 1 teaspoon pure vanilla extract (optional)
- 30–40 mini candy eggs (such as Cadbury Mini Eggs or pastel-colored chocolate eggs)
Instructions
- Lightly grease a mini muffin tin or line a baking sheet with parchment paper. Have mini candy eggs ready nearby.
- In a medium saucepan over low heat, melt 4 tablespoons of unsalted butter, about 2-3 minutes. Avoid browning or burning.
- Add 10 ounces of mini marshmallows to the melted butter. Stir constantly with a spatula until completely melted and smooth, about 4-5 minutes. Stir in 1 teaspoon vanilla extract if using.
- Remove from heat and immediately add 6 cups of Rice Krispies cereal. Fold gently but thoroughly until every piece is coated.
- Quickly press about 2 tablespoons of the mixture into each muffin tin cup, creating a nest shape with an indentation in the center. If shaping by hand, form small rounds on parchment paper and press an indentation.
- While nests are still warm and soft, arrange 3-4 mini candy eggs in the center of each nest. Press gently to stick without flattening the eggs.
- Allow nests to cool and set at room temperature for about 30 minutes until firm.
- Carefully remove nests from the muffin tin or parchment paper and arrange on a serving platter.
Notes
Use low heat to melt butter and marshmallows slowly to avoid burning. Shape nests quickly before mixture hardens. Store in an airtight container at room temperature for up to 3 days; avoid refrigeration to prevent stickiness. For longer storage, freeze individually wrapped nests and thaw before serving. Gluten-free and dairy-free variations are possible by substituting ingredients.
Nutrition
- Serving Size: 1 mini nest
- Calories: 90
- Fat: 2.5
- Carbohydrates: 16
- Protein: 0.5
Keywords: Rice Krispie treats, mini egg nests, Easter treats, easy dessert, festive snacks, marshmallow treats, candy eggs