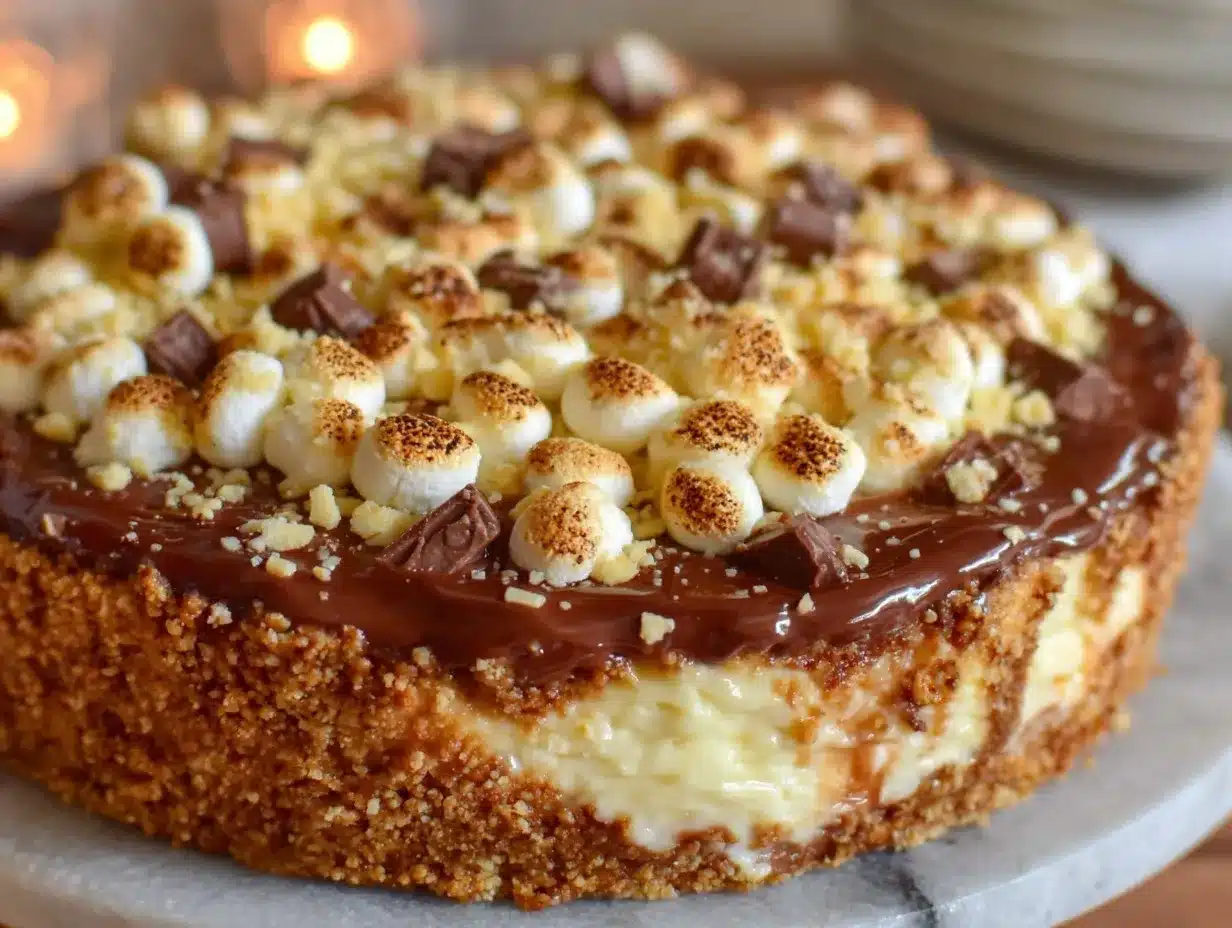
“Wait, you want to freeze marshmallows?” That was my first thought when a friend casually suggested making a frozen s’mores pie last summer. Honestly, I was skeptical. S’mores are all about that warm, gooey marshmallow hug around chocolate and graham crackers, right? But after one sweltering afternoon spent fiddling with ingredients—and more than a few taste tests—I couldn’t deny it. This creamy frozen s’mores pie with toasted marshmallow topping turned out to be a total game-changer.
I remember sitting on my porch, the sun dipping low, trying to find relief from the heat without reaching for another slice of ice cream. This pie felt like a cool, nostalgic hug that didn’t melt into a sticky mess in the heat. The toasted marshmallow topping, lightly torched to a golden-brown blush, brought that campfire magic alive without the smoke or fuss.
What stuck with me, beyond its dreamy texture and that perfect balance of sweet and smoky, was how effortlessly it came together—no baking involved, just a bit of patience to let it set. It’s the kind of dessert that quietly steals the show at gatherings, and yes, I found myself making it multiple times that week (not complaining). This pie wasn’t just a treat; it was a little pause button on the chaos, a reminder that sometimes, simple ingredients and a little chill can create magic.
So here’s the story behind this creamy frozen s’mores pie with toasted marshmallow topping—a recipe born from curiosity, a bit of heat, and a craving for something both cool and comforting. I’m pretty sure it’ll find a cozy spot in your dessert lineup, too.
Why You’ll Love This Creamy Frozen S’mores Pie Recipe
This creamy frozen s’mores pie isn’t your average dessert. After a few rounds of trial and error (and some “oops” moments with melting marshmallows), I landed on this version that nails both flavor and ease. Here’s why it’s become a favorite:
- Quick & Easy: You can whip this up in about 20 minutes, then just let it chill. Perfect for busy evenings or those spontaneous dessert cravings.
- Simple Ingredients: No need for fancy or hard-to-find items—just classic pantry staples like graham crackers, chocolate, cream cheese, and marshmallows.
- Perfect for Summer Gatherings: This no-bake dessert is a cool alternative to traditional s’mores, ideal for backyard barbecues or lazy weekend get-togethers.
- Crowd-Pleaser: The combination of creamy pie filling and that toasted marshmallow top always gets compliments from kids and adults alike.
- Unbelievably Delicious: The silky texture of the cream cheese and whipped cream filling, paired with crunchy graham cracker crust and smoky marshmallow, is honestly next-level comfort food.
What sets this recipe apart is the toasted marshmallow topping—it’s carefully torched just enough to add that authentic campfire flavor without melting the pie. Plus, blending cream cheese into the filling gives it a smooth richness that just can’t be beat. It’s like a s’mores refresh, cool and creamy but still full of nostalgia.
It’s a dessert that makes you pause for a moment, savoring every bite, and that’s why it’s stuck around in my rotation. If you like desserts like the creamy lemon ricotta pasta for its balance of richness and brightness, you’ll appreciate how this pie hits that same sweet spot—only chilled and indulgent.
What Ingredients You Will Need for Creamy Frozen S’mores Pie
This recipe uses simple, wholesome ingredients to create a rich, creamy texture with that classic s’mores flavor—no fuss, no fancy shopping trips. Most of these are pantry staples, and you might already have them sitting around.
- Graham Cracker Crust:
- 1 ½ cups graham cracker crumbs (about 10 full sheets, finely crushed)
- 5 tablespoons unsalted butter, melted (adds richness and helps bind)
- 2 tablespoons granulated sugar (balances the buttery crust)
- Creamy Pie Filling:
- 8 oz (225 g) cream cheese, softened (for that smooth, tangy creaminess; I like Philadelphia brand)
- 1 cup powdered sugar (for sweetness without grittiness)
- 1 ½ cups heavy whipping cream, cold (whipped to soft peaks for lightness)
- 1 teaspoon pure vanilla extract (a must for depth of flavor)
- ½ cup mini chocolate chips (or chopped semi-sweet chocolate, for melty pockets)
- Toasted Marshmallow Topping:
- 2 cups mini marshmallows (use fresh, not stale, for the best torching effect)
Ingredient tips: For a gluten-free option, swap graham crackers with gluten-free alternatives or crushed gluten-free cookies. If you want a dairy-free version, use coconut cream in place of heavy cream and a vegan cream cheese substitute. When I made this last fall, I swapped mini chocolate chips for chopped dark chocolate chunks to give it a slightly richer flavor, and it was a hit.
Equipment Needed
- 9-inch (23 cm) pie pan or springform pan – I use a glass pie dish because it’s easy to see the layers and cleans up well.
- Mixing bowls – at least two, one for the crust and one for the filling.
- Electric mixer or stand mixer – whipping the cream and cream cheese by hand is possible but takes effort!
- Measuring cups and spoons – for accuracy.
- Spatula – for folding in chocolate chips gently.
- Culinary torch – this is key for getting that perfect toasted marshmallow topping. If you don’t have one, a broiler works too, but watch carefully to avoid burning.
- Food processor or rolling pin – to crush graham crackers finely.
Personally, I started with a hand mixer but upgraded to a stand mixer over time, and it definitely makes whipping cream much easier. If you’re on a budget, a simple handheld mixer works just fine. For the torch, a small kitchen torch is affordable and lasts forever—plus, it’s handy for other recipes like caramelizing sugar.
Preparation Method
- Prepare the crust (10 minutes): Start by crushing graham crackers into fine crumbs using a food processor or by placing them in a zip-top bag and smashing with a rolling pin. Mix the crumbs with melted butter and sugar until the mixture feels like wet sand.
- Press the crust: Transfer the crumb mixture into your 9-inch pie pan. Use the back of a spoon or a flat-bottomed glass to press the crumbs firmly and evenly across the bottom and slightly up the sides. Chill in the fridge while you make the filling.
- Make the filling (15 minutes): In a large bowl, beat the softened cream cheese with powdered sugar and vanilla extract until smooth and creamy. In a separate chilled bowl, whip the heavy cream until soft peaks form.
- Fold whipped cream: Gently fold the whipped cream into the cream cheese mixture, taking care not to deflate the airiness. This step is what gives the pie that light, creamy texture.
- Add chocolate chips: Fold in the mini chocolate chips evenly through the filling.
- Assemble the pie: Pour the creamy filling over the chilled graham cracker crust, smoothing the top with a spatula.
- Freeze: Place the assembled pie in the freezer for at least 4 hours, preferably overnight. This lets the filling firm up into a sliceable, creamy dessert.
- Toast the marshmallows (5-10 minutes): When ready to serve, sprinkle mini marshmallows evenly over the top of the frozen pie. Using a culinary torch, carefully toast the marshmallows until golden brown and slightly puffed. If you don’t have a torch, use the broiler but watch closely—the marshmallows toast quickly and can burn in seconds.
- Serve immediately: The toasted marshmallow topping is best enjoyed fresh, so slice and serve right away. If you’re not serving right away, keep the pie in the freezer and toast the marshmallows just before eating.
Pro tip: If your cream cheese isn’t soft enough, pop it in the microwave for 10 seconds to make mixing easier. Also, I learned the hard way that toasting marshmallows while the pie is still frozen prevents them from melting the filling underneath.
Cooking Tips & Techniques for Success
Getting the right texture for this creamy frozen s’mores pie requires some attention, but nothing too complicated. Here are some tips from my kitchen experiments:
- Softened cream cheese is key: If it’s too cold, lumps happen. I usually leave it out for 30 minutes before starting or zap in 10-second bursts.
- Whip cream to soft peaks: Over-whipping can turn it grainy or even into butter, while under-whipping makes the filling too dense. Soft peaks mean the cream holds shape but still moves gently.
- Folding technique: Use a spatula to fold whipped cream gently into the cream cheese mix—no vigorous stirring. You want to keep as much air as possible.
- Freezing time: Don’t rush this. At least 4 hours gives the filling time to set properly. Overnight is even better if you can wait.
- Toasting marshmallows: Move the torch in slow circles and keep it a few inches away from the marshmallows to avoid burning. If using the broiler, keep the oven door slightly open and stay close.
- Serving tip: Let the pie sit out for 5 minutes after torching the marshmallows so they soften just a touch—this adds to that authentic campfire feel.
One time, I toasted the marshmallows too long and ended up with a charred top that wasn’t as sweet. Lesson learned: patience and a light hand make all the difference here.
Variations & Adaptations
This recipe is quite flexible, so feel free to play around with these ideas:
- Flavor swaps: Add a tablespoon of espresso powder to the filling for a mocha twist, or swirl in peanut butter for a chocolate-peanut butter combo.
- Seasonal fruit topping: For summer, try fresh strawberries or raspberries on top before freezing—they add a tart contrast to the sweet filling.
- Vegan option: Use dairy-free cream cheese and coconut cream, plus vegan marshmallows, and swap graham crackers for gluten-free vegan ones.
- Crunch boost: Stir in chopped toasted nuts (like pecans or almonds) into the crust or filling for extra texture and flavor.
- Cooking method tweak: Instead of torching marshmallows, you can make a marshmallow fluff topping and spread it over the pie before freezing, then lightly brown it with the broiler for a smoother finish.
I once tried adding a layer of melted dark chocolate between the crust and filling, which made the pie feel even more indulgent—definitely worth a try if you want to impress guests.
Serving & Storage Suggestions
This creamy frozen s’mores pie is best served chilled but not rock hard—let it sit at room temperature for about 5 minutes after removing from the freezer so it slices easily. Cutting it while too frozen can crack the crust.
Pair it with a cup of rich coffee or a glass of cold milk for that classic combo. It also goes well with lighter snacks, like a fresh fruit salad, to balance the sweetness.
To store, keep the pie tightly wrapped in plastic wrap or an airtight container in the freezer. It maintains best quality for up to 5 days. When reheating, avoid microwaving—it’s meant to be enjoyed cold. Instead, thaw in the fridge overnight then toast the marshmallows fresh before serving.
Flavors actually deepen after a day or two in the freezer, so if you’re planning ahead, this pie plays well with time.
Nutritional Information & Benefits
Estimated per slice (1/8 of pie):
| Calories | 320 |
|---|---|
| Fat | 22g |
| Sugar | 24g |
| Protein | 4g |
This dessert is rich and indulgent, thanks to cream cheese and heavy cream, which provide a satisfying source of fat and protein. The graham cracker crust adds a bit of fiber and carbs for energy.
Because it’s gluten-containing, it’s not suitable for gluten-free diets unless you swap the crust. Also, marshmallows contain gelatin, so it’s not vegan unless you use vegan marshmallows.
From a wellness perspective, this pie is a treat to enjoy in moderation; its creamy texture and balanced sweetness make it a comforting dessert after a long day.
Conclusion
This creamy frozen s’mores pie with toasted marshmallow topping has become one of those easy, crowd-pleasing desserts that I keep returning to—especially when I want something nostalgic but refreshing. It’s simple enough to whip up on a whim but layered enough in flavor to feel special.
Feel free to make this recipe your own by trying different chocolate types or adding a personal twist like nuts or fruit. Honestly, the toasted marshmallow topping is what seals the deal—it brings that campfire warmth without the heat.
Whether you’re hosting friends or just treating yourself, I hope this pie brings a little chill and a lot of smiles to your table. If you try it, I’d love to hear how you customize it or any fun moments it inspires!
FAQs about Creamy Frozen S’mores Pie
Can I make this pie ahead of time?
Yes! It’s perfect for making a day or two in advance. Just keep it tightly covered in the freezer and toast the marshmallow topping right before serving.
What if I don’t have a kitchen torch?
You can use your oven’s broiler to toast the marshmallows. Place the pie on the top rack and watch very closely—it only takes a minute or two to brown.
Can I use regular-sized marshmallows for the topping?
Mini marshmallows work best for even coverage and quick, controlled toasting. If you only have large ones, chop them into smaller pieces first.
Is there a way to make this dessert dairy-free?
Definitely. Use dairy-free cream cheese and coconut cream for the filling, and make sure to pick vegan marshmallows and gluten-free crust if needed.
How do I slice the pie without it falling apart?
Let the pie sit at room temperature for 5–10 minutes before slicing. Use a sharp, warm knife (run under hot water and dry) for clean cuts.
Pin This Recipe!
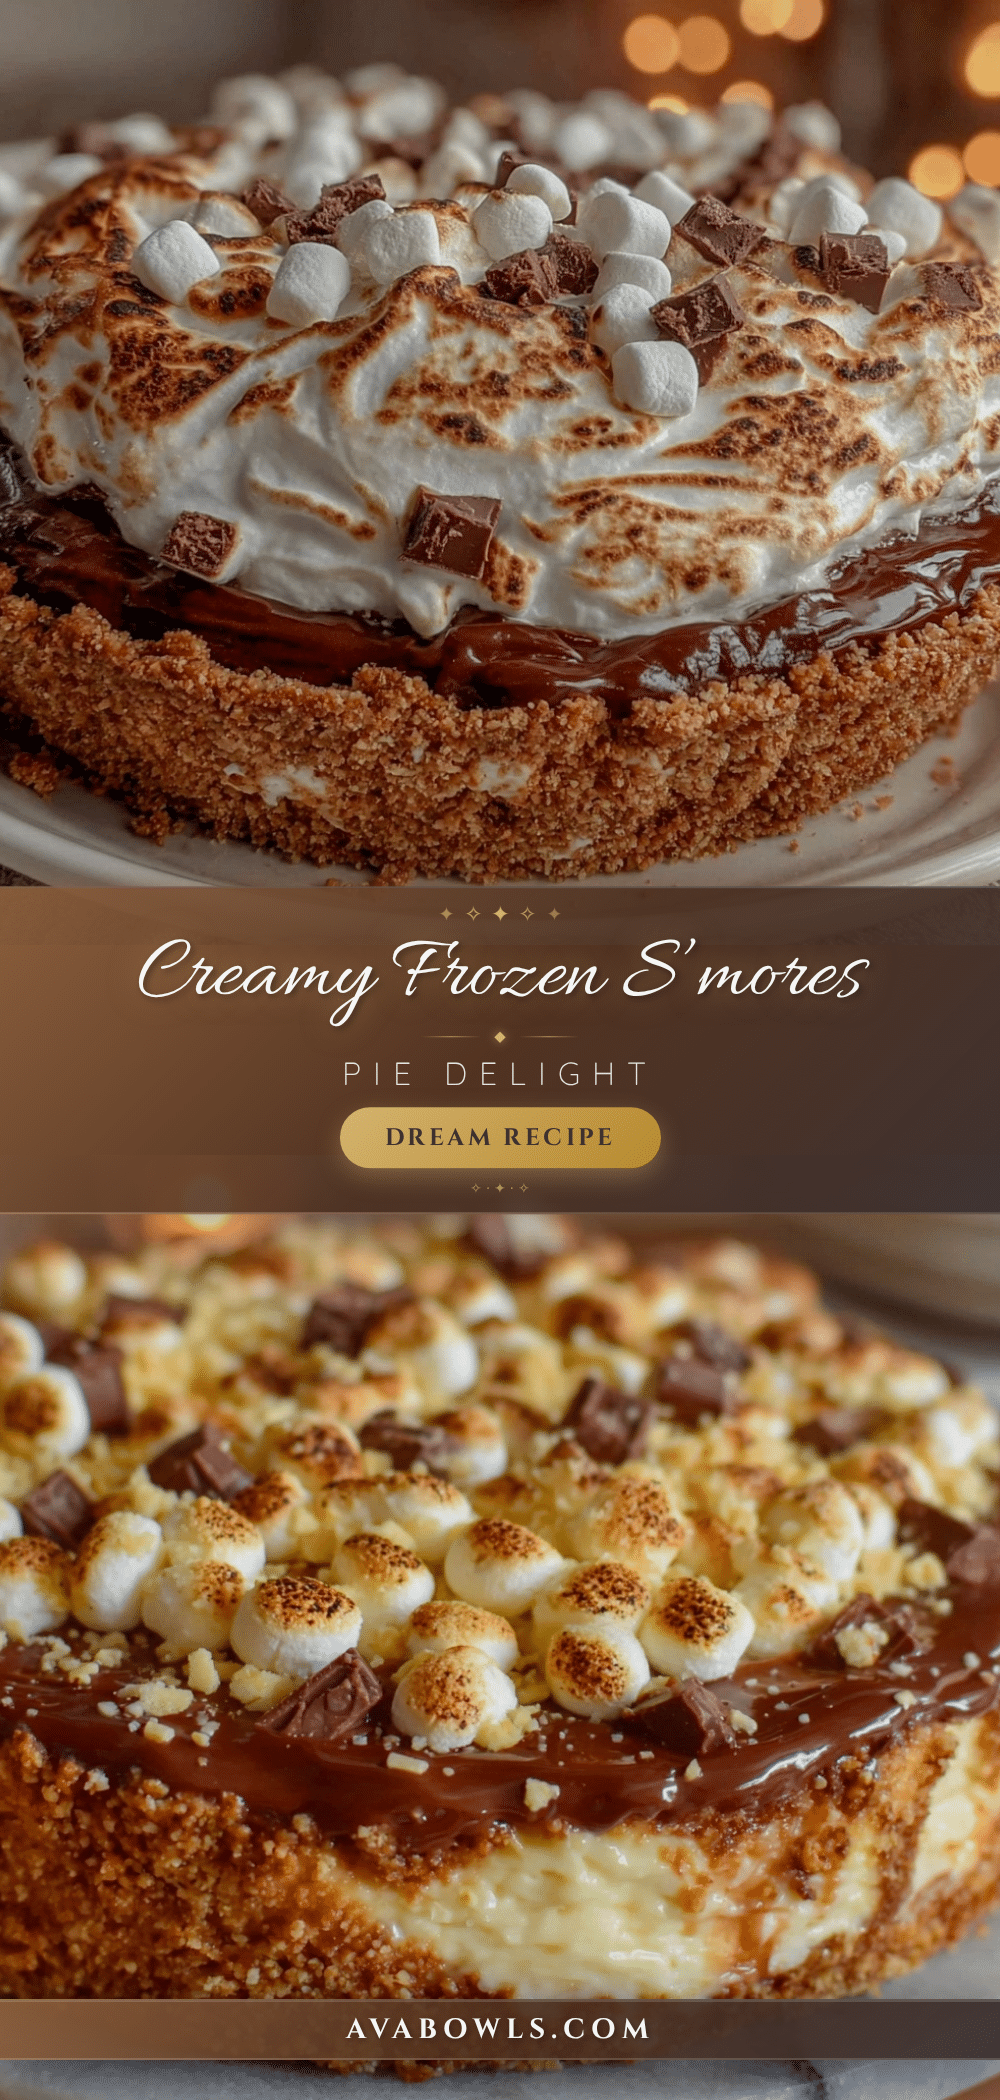
Creamy Frozen S’mores Pie Recipe Easy No-Bake Dessert with Toasted Marshmallow Topping

A creamy, no-bake frozen s’mores pie featuring a crunchy graham cracker crust, smooth cream cheese filling, and a toasted marshmallow topping that brings campfire magic without the heat.
- Prep Time: 20 minutes
- Cook Time: 0 minutes
- Total Time: 4 hours 20 minutes
- Yield: 8 servings 1x
- Category: Dessert
- Cuisine: American
Ingredients
- 1 ½ cups graham cracker crumbs (about 10 full sheets, finely crushed)
- 5 tablespoons unsalted butter, melted
- 2 tablespoons granulated sugar
- 8 oz (225 g) cream cheese, softened
- 1 cup powdered sugar
- 1 ½ cups heavy whipping cream, cold
- 1 teaspoon pure vanilla extract
- ½ cup mini chocolate chips (or chopped semi-sweet chocolate)
- 2 cups mini marshmallows
Instructions
- Crush graham crackers into fine crumbs using a food processor or by smashing in a zip-top bag with a rolling pin.
- Mix graham cracker crumbs with melted butter and sugar until mixture feels like wet sand.
- Press crumb mixture firmly and evenly into the bottom and slightly up the sides of a 9-inch pie pan. Chill in the fridge.
- Beat softened cream cheese with powdered sugar and vanilla extract until smooth and creamy.
- Whip heavy cream in a separate chilled bowl until soft peaks form.
- Gently fold whipped cream into the cream cheese mixture to keep it airy.
- Fold in mini chocolate chips evenly through the filling.
- Pour filling over chilled crust and smooth the top with a spatula.
- Freeze pie for at least 4 hours or overnight until firm.
- Before serving, sprinkle mini marshmallows evenly over the frozen pie.
- Toast marshmallows with a culinary torch until golden brown and slightly puffed, or use the broiler watching closely to avoid burning.
- Serve immediately after toasting. If not serving right away, keep pie frozen and toast marshmallows just before eating.
Notes
Use softened cream cheese for smooth filling; whip cream to soft peaks to avoid graininess; fold whipped cream gently to keep airiness; freeze at least 4 hours or overnight; toast marshmallows carefully to avoid burning; let pie sit 5 minutes after torching for best texture. For gluten-free, swap graham crackers; for dairy-free, use coconut cream and vegan cream cheese and marshmallows.
Nutrition
- Serving Size: 1 slice (1/8 of pie)
- Calories: 320
- Sugar: 24
- Fat: 22
- Protein: 4
Keywords: frozen s’mores pie, no-bake dessert, toasted marshmallow topping, creamy pie, summer dessert, easy dessert, graham cracker crust