Let me tell you, the smell of smoky spices mingling with tender chunks of beef simmering in a Dutch oven over crackling campfire coals is something that sticks with you. The first time I made this hearty campfire chili, I was knee-high to a grasshopper camping with my family years ago. We’d spent the afternoon fishing and hiking, and as the sun dipped low, I set the Dutch oven over the fire. The moment the chili began bubbling, I paused, took a deep breath, and just smiled because, honestly, it felt like pure comfort wrapped in a cast-iron pot.
You know what’s funny? My family couldn’t stop sneaking spoonfuls off the side, and I can’t really blame them. The blend of spices, the richness of the meat, and those tender beans made it a hit around the campfire, perfect for chilly nights under the stars. This hearty campfire chili Dutch oven recipe has since become a staple for our outdoor adventures — the kind of meal that feels like a warm hug after a day in the wild. I wish I’d discovered just how dangerously easy it is to make this recipe years ago.
Whether you’re looking for a crowd-pleaser for your next camping trip, a sweet treat for your hungry hikers, or just want to brighten up your outdoor cooking game, this recipe hits the spot every time. After testing it multiple times in the name of research, of course, I’m confident you’re going to want to bookmark this one. Let’s face it, nothing beats the magic of a Dutch oven chili cooked slow and steady over wood coals.
Why You’ll Love This Hearty Campfire Chili Dutch Oven Recipe
Honestly, this chili isn’t just any campfire meal — it’s a tried-and-true recipe that brings together comfort, ease, and flavor in one pot. Here’s why it’s a winner:
- Quick & Easy: Comes together in about an hour, perfect for busy campers or last-minute outdoor dinners.
- Simple Ingredients: Uses pantry staples and fresh produce you can easily pack or grab at any grocery store.
- Perfect for Camping: Designed specifically for Dutch oven cooking, making it ideal for campfire setups.
- Crowd-Pleaser: Loved by kids and adults alike, this chili satisfies even the pickiest eaters.
- Unbelievably Delicious: The slow simmer melds spices, meat, and beans into a rich, hearty stew that warms you from the inside out.
This recipe stands apart because it balances bold smoky flavors with a comforting texture — no overpowering heat, just the right kick. The secret? Browning the meat well before adding the beans and letting it bubble gently in the Dutch oven, allowing flavors to meld beautifully. It’s comfort food reimagined for the outdoors — filling, nourishing, and surprisingly easy to pull off without a fancy kitchen.
After many cookouts and family trips, I can say this chili is the kind that makes you close your eyes after the first bite. It’s the perfect way to impress guests without breaking a sweat or turning your campsite into a complicated kitchen. Give it a try, and you’ll see why this recipe keeps making its way to our campfire tables.
What Ingredients You Will Need
This recipe uses simple, wholesome ingredients to deliver bold flavor and satisfying texture without the fuss. Most of these are pantry staples or easy to source fresh items, making it perfect for packing up and heading outdoors.
- Ground beef (1.5 pounds / 680 grams) – I prefer 80/20 for the perfect balance of flavor and juiciness.
- Onion (1 large, diced) – adds sweetness and depth.
- Garlic cloves (3, minced) – the base aromatics that pack a punch.
- Green bell pepper (1 medium, diced) – for a fresh, slightly sweet crunch.
- Tomato paste (2 tablespoons) – concentrates that rich tomato flavor.
- Diced tomatoes (1 can, 14.5 ounces / 411 grams) – I like fire-roasted for that smoky touch.
- Kidney beans (1 can, drained and rinsed) – classic chili staple, adds hearty texture.
- Black beans (1 can, drained and rinsed) – optional but adds nice variety.
- Beef broth (1 cup / 240 ml) – I use low sodium to control saltiness.
- Chili powder (2 tablespoons) – the star seasoning.
- Cumin (1 tablespoon) – brings that earthy warmth.
- Smoked paprika (1 teaspoon) – for subtle smoky depth.
- Oregano (1 teaspoon, dried) – adds herbaceous notes.
- Salt and pepper (to taste) – essential seasoning.
- Olive oil (2 tablespoons) – for sautéing aromatics.
- Optional toppings: shredded cheddar, sour cream, chopped green onions, or fresh cilantro.
For substitutions: Use ground turkey or plant-based crumbles to lighten the recipe. Kidney and black beans can be swapped for pinto or cannellini beans based on preference. If you want to go gluten-free, double-check your tomato paste and broth labels, but the recipe is naturally gluten-free otherwise.
Equipment Needed
- Dutch oven: The heart of this recipe. Cast iron is best for even heat distribution and durability over campfire coals.
- Heat-resistant gloves or mitts: To handle that Dutch oven safely (trust me, you don’t want to burn your fingers!).
- Wooden spoon or sturdy spatula: For stirring the chili as it simmers.
- Campfire or charcoal grill: The heat source — if you don’t have a campfire, a charcoal grill works great too.
- Can opener: For those beans and tomatoes.
- Knife and cutting board: For prepping your veggies and garlic.
If you’re on a budget, you can find affordable Dutch ovens at most outdoor stores or online. I’ve used both seasoned and unseasoned cast iron — seasoning your Dutch oven well before use makes cleanup easier and prevents sticking. A tip I learned the hard way: always place the Dutch oven on a stable surface or tripod over your fire to avoid tipping.
Preparation Method

- Prep your ingredients: Dice the onion, bell pepper, and mince garlic. Drain and rinse the beans. Set aside.
- Heat the Dutch oven: Place your Dutch oven over medium heat on the campfire or grill. Add 2 tablespoons olive oil, swirling to coat the bottom.
- Brown the beef: Add ground beef (1.5 pounds / 680 grams). Break it up with your spoon. Cook until browned and no longer pink, about 7-10 minutes. Season with salt and pepper as it cooks.
- Sauté aromatics: Add diced onion, bell pepper, and minced garlic. Cook, stirring occasionally, until softened and fragrant, about 5 minutes. You’ll notice the smell start to make your stomach rumble here.
- Add tomato paste and spices: Stir in 2 tablespoons tomato paste, 2 tablespoons chili powder, 1 tablespoon cumin, 1 teaspoon smoked paprika, and 1 teaspoon dried oregano. Cook for 2 minutes to toast the spices and deepen the flavor.
- Add liquids and beans: Pour in 1 can (14.5 oz / 411 g) diced tomatoes and 1 cup (240 ml) beef broth. Stir in drained kidney beans and black beans. Mix everything well.
- Simmer the chili: Reduce heat to low, cover the Dutch oven with its lid, and let the chili simmer gently for 30-40 minutes. Stir occasionally to prevent sticking. You want it thick and hearty, with flavors melded just right.
- Final taste test: Taste and adjust salt, pepper, or chili powder if you want more heat. If chili seems too thick, add a splash of water or broth.
- Serve: Ladle the chili into bowls and top with your favorite garnishes like shredded cheddar or sour cream.
Cooking over a campfire means temperatures can fluctuate, so keep an eye on your chili and adjust coals or grill heat as needed. If you notice the chili sticking or burning, adding a bit more broth and stirring often helps. The smell and the bubbling sounds will tell you when it’s ready — rich, thick, and beautifully spiced.
Cooking Tips & Techniques
Here’s what I’ve learned from many campfire chili sessions:
- Brown your meat well: This step adds deep flavor and texture. Don’t rush it, and break up clumps for even cooking.
- Toast the spices: Stirring spices with tomato paste in the hot oil unlocks their full aroma. It’s a small step that makes a big difference.
- Control your heat: Campfires aren’t ovens—coals can flare up. Keep some extra coals ready to add or remove to maintain a gentle simmer.
- Stir often: Dutch ovens can get hot spots. Stirring prevents burning and keeps the chili even-textured.
- Use a lid: Trapping steam helps the chili thicken and flavors blend beautifully.
- Don’t skip resting: After cooking, let the chili sit covered for 10 minutes off the heat. It makes a noticeable difference in flavor meld and texture.
Early on, I learned the hard way that rushing or high flames can scorch the bottom and ruin the batch. Taking your time, stirring, and watching the heat are key. Honestly, the patience pays off in that perfectly hearty, thick chili that tastes like you spent all day on it.
Variations & Adaptations
This hearty campfire chili Dutch oven recipe is super flexible. Here are some tasty ways to make it your own:
- Vegetarian option: Swap ground beef for diced mushrooms or plant-based crumbles and use vegetable broth. Add extra beans or lentils for protein.
- Spicy twist: Add diced jalapeños or a dash of cayenne pepper to the spice mix if you like heat. A splash of hot sauce at the end works wonders too.
- Seasonal veggies: In summer, toss in fresh corn kernels or diced zucchini for extra texture and sweetness.
- Slow cooker adaptation: Brown meat and sauté aromatics on the stove, then transfer to a slow cooker and cook on low for 4-6 hours if you want to prep ahead or cook indoors.
- Low-carb version: Skip the beans and add extra veggies like bell peppers and mushrooms for a hearty meal with fewer carbs.
Personally, I once tried adding a few squares of dark chocolate near the end for a subtle richness that surprised everyone in the best way. Don’t be afraid to tweak it — that’s part of the fun of campfire cooking!
Serving & Storage Suggestions
This chili is best served hot, straight from the Dutch oven, with your favorite toppings. It pairs wonderfully with crusty bread, cornbread, or even tortilla chips for a satisfying crunch. If you’re camping, a sprinkle of shredded cheddar and a dollop of sour cream add a nice creamy contrast.
To store leftovers, let the chili cool completely and transfer to an airtight container. It keeps in the fridge for up to 4 days or freezes beautifully for up to 3 months. When reheating, warm gently on the stove or in a microwave, adding a splash of broth if it’s too thick.
Flavors often deepen after a day or two, so leftovers can taste even better. Just give it a good stir before serving. This makes it a great make-ahead meal for busy camping schedules or busy weeknights at home too.
Nutritional Information & Benefits
Estimated per serving (based on 6 servings):
| Calories | 350 kcal |
|---|---|
| Protein | 28g |
| Carbohydrates | 25g |
| Fiber | 8g |
| Fat | 15g |
This chili is packed with protein and fiber thanks to the beef and beans. The beans also provide essential minerals like iron and magnesium. Using lean ground beef helps keep fat content reasonable, and the tomatoes offer vitamins A and C. It’s naturally gluten-free and can be adapted for low-carb or vegetarian diets with simple swaps.
From a wellness perspective, this recipe hits the comfort food mark without the heaviness of fast food or processed options. It’s a filling, satisfying meal that fuels your outdoor adventures while keeping you grounded with wholesome ingredients.
Conclusion
If you’re craving a meal that’s hearty, flavorful, and perfectly suited for campfire cooking, this hearty campfire chili Dutch oven recipe is your new best friend. It’s simple enough for beginners but rich and satisfying enough to impress the whole family. I love this recipe because it brings people together — around a fire, sharing stories, and enjoying a meal that feels like home no matter where you are.
Feel free to make it your own with different spices or add-ins, and don’t be shy about sharing your own twists in the comments below. Seriously, I can’t wait to hear how your campfire chili turns out! Give it a try, and you might just find yourself reaching for this recipe every time you hit the great outdoors.
Frequently Asked Questions
Can I make this chili without a Dutch oven?
Yes! You can use a heavy-bottomed pot or slow cooker on a stovetop or grill. Just adjust cooking times and heat as needed.
How do I know when the chili is done?
It’s ready when the flavors have melded, the sauce thickens, and the meat is tender—usually after about 30-40 minutes simmering.
Can I prepare this chili ahead of time?
Absolutely. You can brown the meat and sauté the veggies ahead, then finish cooking at your campsite or reheat leftovers at home.
What’s the best way to store leftovers?
Cool completely, then refrigerate in an airtight container for up to 4 days or freeze for up to 3 months.
How spicy is this chili, and can I adjust the heat?
This recipe has a mild to medium heat level. You can easily dial it up with extra chili powder, cayenne, or fresh chilies, or tone it down by reducing spices.
Pin This Recipe!
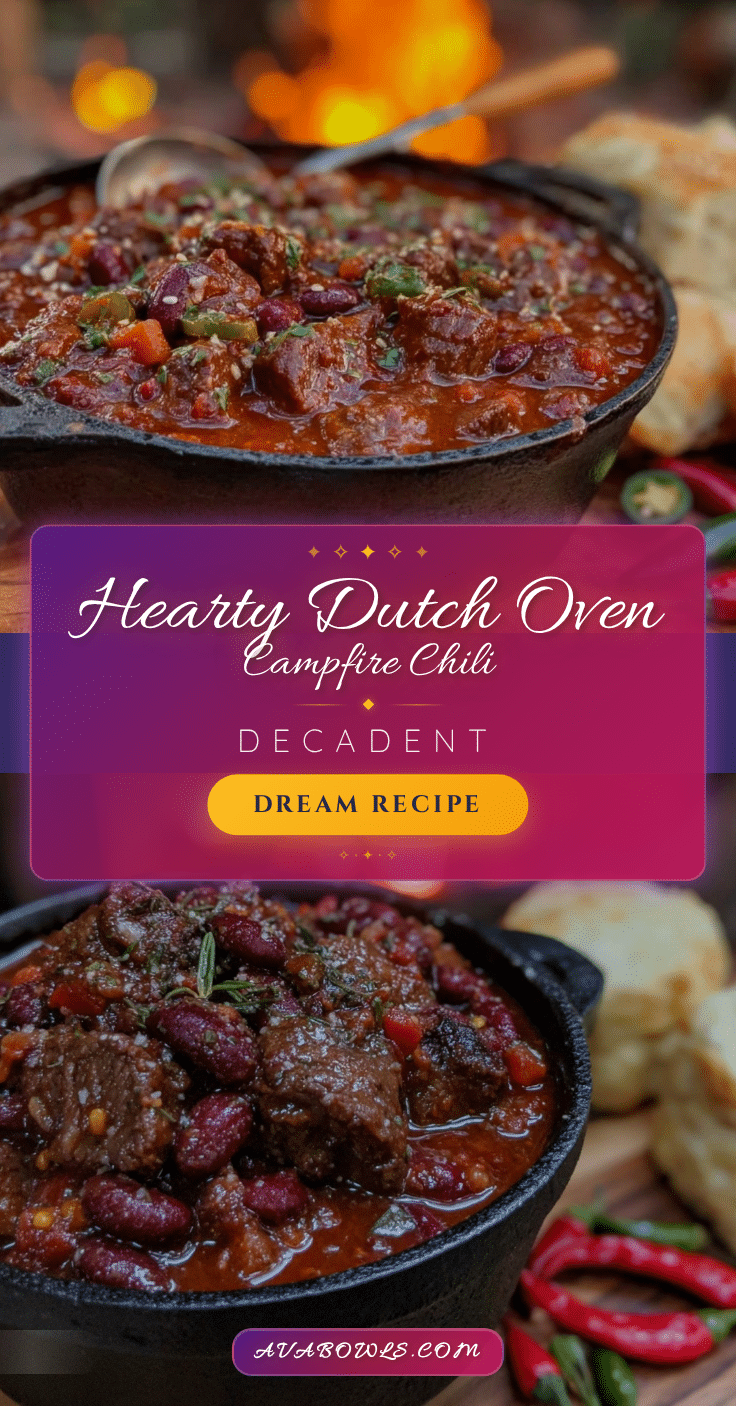
Hearty Campfire Chili Dutch Oven Recipe Easy Perfect for Outdoor Cooking
A smoky, hearty chili cooked slow and steady in a Dutch oven over a campfire, perfect for outdoor cooking and chilly nights under the stars.
- Prep Time: 15 minutes
- Cook Time: 40 minutes
- Total Time: 55 minutes
- Yield: 6 servings 1x
- Category: Main Course
- Cuisine: American
Ingredients
- 1.5 pounds ground beef (80/20)
- 1 large onion, diced
- 3 garlic cloves, minced
- 1 medium green bell pepper, diced
- 2 tablespoons tomato paste
- 1 can (14.5 ounces) diced tomatoes (fire-roasted preferred)
- 1 can kidney beans, drained and rinsed
- 1 can black beans, drained and rinsed (optional)
- 1 cup beef broth (low sodium)
- 2 tablespoons chili powder
- 1 tablespoon cumin
- 1 teaspoon smoked paprika
- 1 teaspoon dried oregano
- Salt and pepper to taste
- 2 tablespoons olive oil
- Optional toppings: shredded cheddar, sour cream, chopped green onions, fresh cilantro
Instructions
- Dice the onion, bell pepper, and mince garlic. Drain and rinse the beans. Set aside.
- Place your Dutch oven over medium heat on the campfire or grill. Add 2 tablespoons olive oil, swirling to coat the bottom.
- Add ground beef. Break it up with your spoon. Cook until browned and no longer pink, about 7-10 minutes. Season with salt and pepper as it cooks.
- Add diced onion, bell pepper, and minced garlic. Cook, stirring occasionally, until softened and fragrant, about 5 minutes.
- Stir in tomato paste, chili powder, cumin, smoked paprika, and dried oregano. Cook for 2 minutes to toast the spices and deepen the flavor.
- Pour in diced tomatoes and beef broth. Stir in drained kidney beans and black beans. Mix everything well.
- Reduce heat to low, cover the Dutch oven with its lid, and let the chili simmer gently for 30-40 minutes. Stir occasionally to prevent sticking.
- Taste and adjust salt, pepper, or chili powder if desired. Add a splash of water or broth if chili is too thick.
- Ladle the chili into bowls and top with your favorite garnishes like shredded cheddar or sour cream.
Notes
Brown the meat well for deep flavor. Toast spices with tomato paste to unlock aroma. Control heat carefully to avoid burning. Stir often to prevent sticking. Let chili rest covered for 10 minutes after cooking for better flavor melding. Can be adapted for vegetarian, spicy, or low-carb versions. Leftovers keep well refrigerated or frozen.
Nutrition
- Serving Size: 1 bowl (approximatel
- Calories: 350
- Fat: 15
- Carbohydrates: 25
- Fiber: 8
- Protein: 28
Keywords: campfire chili, Dutch oven chili, outdoor cooking, hearty chili, camping recipe, easy chili, smoky chili