Let me tell you, the smell of rich cocoa and vanilla mingling together from my oven is enough to make anyone’s mouth water. The first time I baked this classic sheet cake with school colors, I was instantly hooked — the kind of moment where you pause, take a deep breath, and just smile because you know you’re onto something truly special. Years ago, when I was knee-high to a grasshopper, my grandma used to whip up simple, crowd-pleasing desserts for every school event and family gathering. This cake recipe is like a nod to those golden memories, only with a fun twist that lets you celebrate your favorite team or school spirit in the most delicious way.
You know what? My family couldn’t stop sneaking pieces off the cooling rack (and honestly, I can’t really blame them). This classic sheet cake isn’t just any dessert — it’s dangerously easy to make, bursts with nostalgic comfort, and looks fantastic dressed up in vibrant school colors. Whether it’s for a spirited potluck, a sweet treat for your kids’ big game day, or just to brighten up your Pinterest cookie board, this recipe has quickly become a staple in my recipe box. Oh, and I’ve tested it more times than I can count — in the name of research, of course!
Why You’ll Love This Recipe
Honestly, this classic sheet cake recipe is a winner for so many reasons. Having baked it over and over, I can say it’s one of those recipes you’ll turn to time and again without hesitation. Here’s why it stands out:
- Quick & Easy: Comes together in under 45 minutes, perfect for busy weeknights or last-minute celebrations.
- Simple Ingredients: No need for fancy grocery trips — the pantry staples you need are probably already on hand.
- Perfect for Celebrations: Great for school events, birthdays, or just showing team spirit in style.
- Crowd-Pleaser: Always gets rave reviews from kids and adults alike; it’s that comforting, classic taste everyone loves.
- Unbelievably Delicious: The balance between the moist, tender crumb and the creamy frosting is truly next-level.
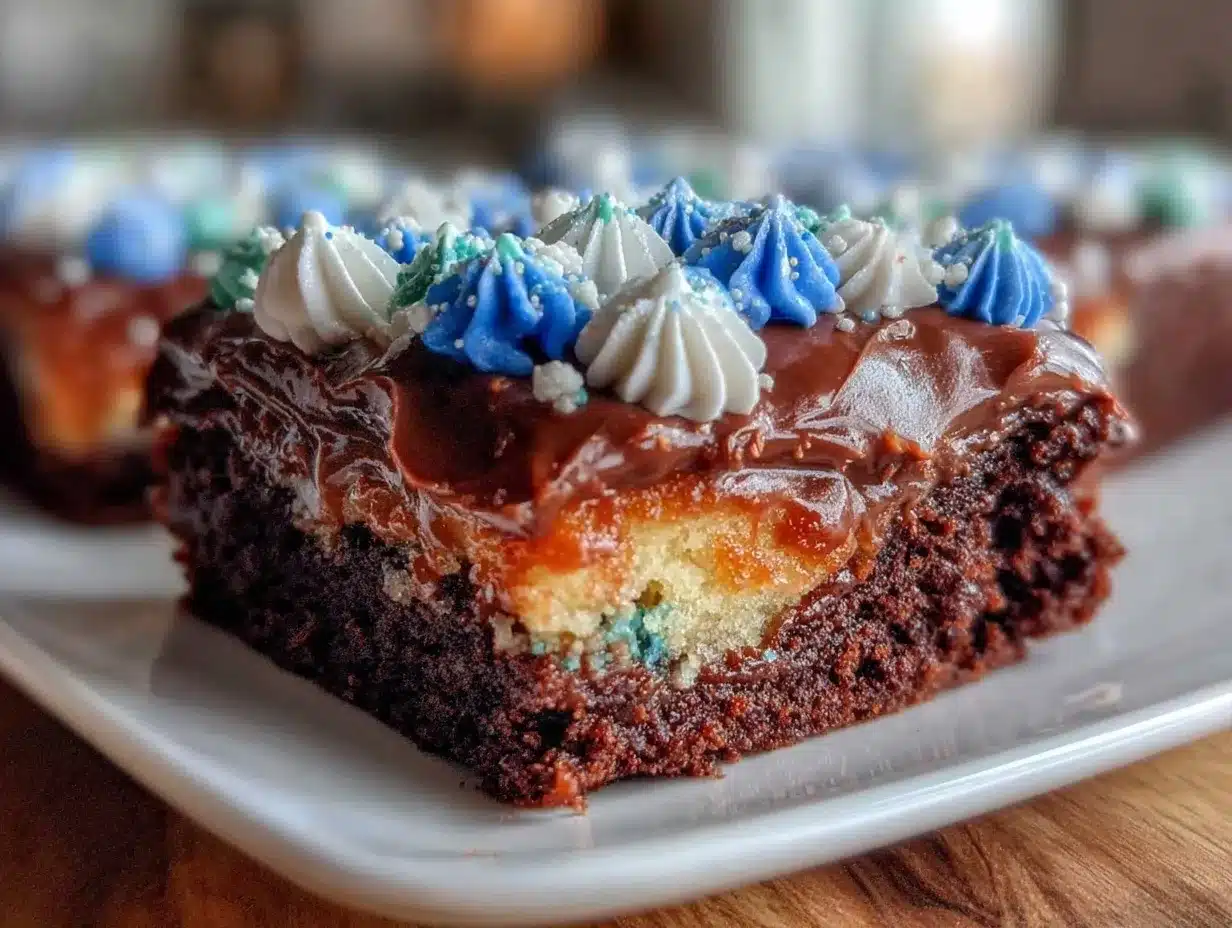
What really sets this classic sheet cake apart is the way it embraces the school colors in the frosting — colorful, fun, and totally festive without being over the top. Plus, the cake has just the right amount of crumb softness and a rich flavor that feels like a warm hug every time you bite into it. This isn’t your average box mix knockoff; it’s a thoughtfully crafted recipe that feels homemade but impresses like a pro.
What Ingredients You Will Need
This recipe uses simple, wholesome ingredients to deliver bold flavor and satisfying texture without the fuss. Most of these are kitchen staples, and you can easily swap a few to suit your needs or preferences.
- For the Cake:
- 2 cups (240g) all-purpose flour (for a tender crumb)
- 2 cups (400g) granulated sugar
- 3/4 cup (65g) unsweetened cocoa powder (I prefer Hershey’s for rich flavor)
- 1 ½ teaspoons baking powder
- 1 ½ teaspoons baking soda
- 1 teaspoon salt
- 1 cup (240ml) buttermilk, room temperature (adds moisture and tang)
- 1/2 cup (120ml) vegetable oil (keeps cake moist)
- 2 large eggs, room temperature
- 2 teaspoons vanilla extract
- 1 cup (240ml) hot water (helps bloom the cocoa for intense chocolate flavor)
- For the Frosting:
- 1 cup (230g) unsalted butter, softened
- 3 ½ cups (420g) powdered sugar, sifted
- 1/2 cup (50g) unsweetened cocoa powder
- 1/3 cup (80ml) whole milk or heavy cream
- 2 teaspoons vanilla extract
- Food coloring gels in your school colors (I recommend AmeriColor gels for vibrant hues)
If you need to make it gluten-free, swapping in a gluten-free flour blend works well here. For a dairy-free version, use almond milk or coconut milk and a vegan butter substitute — the cake still turns out moist and tasty.
Equipment Needed
- 9×13-inch (23x33cm) sheet cake pan — non-stick or well-greased works best
- Mixing bowls (medium and large)
- Electric mixer or stand mixer — I find this speeds up the process and gives the best texture
- Measuring cups and spoons — accuracy matters!
- Rubber spatula for folding and scraping
- Wire rack for cooling the cake evenly
- Offset spatula or butter knife for smooth frosting application
If you don’t have a stand mixer, no worries — a good hand mixer or even a sturdy whisk will do, though it might take a little more elbow grease. For budget-friendly options, silicone spatulas and metal measuring cups are reliable and last forever.
Preparation Method
- Preheat and Prep: Preheat your oven to 350°F (175°C). Grease your 9×13-inch pan with butter or non-stick spray and lightly flour it to prevent sticking. This step is key — trust me, no one wants their celebration cake stuck to the pan!
- Mix Dry Ingredients: In a large bowl, sift together the flour, sugar, cocoa powder, baking powder, baking soda, and salt. Whisk them until combined. The cocoa powder should be free of lumps — this gives the cake its deep chocolate color and flavor.
- Combine Wet Ingredients: In a separate bowl, whisk together the buttermilk, vegetable oil, eggs, and vanilla extract until smooth and well combined. Using room temperature eggs helps everything blend more evenly.
- Blend Wet & Dry: Slowly pour the wet ingredients into the dry ingredients while mixing on medium speed with your mixer. Blend until just combined — don’t overmix or the cake might turn out dense.
- Add Hot Water: Carefully stir in the hot water (about 1 cup/240ml). The batter will be thin — that’s normal! This step helps the cocoa bloom and results in an ultra-moist crumb.
- Bake: Pour the batter evenly into the prepared pan. Bake for 30-35 minutes, or until a toothpick inserted in the center comes out clean. You’ll notice the cake springs back gently when pressed — that’s your cue it’s done.
- Cool: Let the cake cool in the pan on a wire rack for at least 20 minutes before frosting. This pause keeps the frosting from melting into the cake.
- Make Frosting: Beat the softened butter until creamy. Gradually add powdered sugar and cocoa powder, then mix in vanilla and milk (start with 1/3 cup and add more if needed for spreadable consistency). Divide the frosting into separate bowls and tint with your chosen food coloring gels.
- Frost the Cake: Spread the frosting evenly over the cooled cake with an offset spatula. You can create stripes, swirls, or blocks of your school colors — get creative! Just remember to work quickly before the frosting sets.
- Serve & Celebrate: Slice into squares and watch the smiles light up the room. This cake is best enjoyed the same day but stays moist for up to 3 days stored in an airtight container.
Cooking Tips & Techniques
Here’s the scoop from my years of baking this sheet cake (and a few mishaps too):
- Room Temperature Ingredients: Using eggs and buttermilk at room temp really makes a difference in texture. Cold ingredients can cause the batter to seize or bake unevenly.
- Don’t Skip Sifting: Cocoa powder and flour tend to clump. Sifting ensures a silky smooth batter and prevents pockets of dry ingredients.
- Thin Batter is Normal: The hot water thins the batter — don’t panic! It’s exactly what gives the cake its moist crumb.
- Watch Your Bake Time: Ovens vary, so start checking around 30 minutes. Overbaking dries the cake out, and who wants that?
- Frost While Cake is Cool: If the cake is warm, frosting will melt and get messy. Patience pays off!
- Coloring Tips: Use gel food coloring for vibrant, saturated school colors that don’t water down the frosting.
- Multitasking: While the cake bakes, whip up the frosting to save time — just remember to keep it covered until ready.
Variations & Adaptations
Want to switch things up? Here are some fun ways to customize this classic sheet cake:
- Flavor Boost: Add a teaspoon of espresso powder to the batter for a mocha twist that deepens the chocolate flavor.
- Fruity Flair: Swirl in some raspberry jam under the frosting or add fresh berries on top for a pop of color and tartness.
- Diet-Friendly: Substitute coconut oil for vegetable oil and use almond milk for a dairy-free version. Use gluten-free flour blend for gluten sensitivity.
- Alternative Frosting: Swap chocolate frosting for cream cheese frosting tinted in school colors for a tangy, creamy finish.
- Personal Touch: I once added crushed peppermint candies around the edges for a winter school celebration — it was a hit!
Serving & Storage Suggestions
This classic sheet cake shines best served at room temperature. The frosting is creamy and flavorful, so no need for chill time before serving (though a quick chill firms it up nicely for slicing cleanly).
Pair it with a cold glass of milk, a cup of coffee, or even a scoop of vanilla ice cream for an extra indulgent touch. It’s perfect for sharing at school events, birthday parties, or cozy family get-togethers.
Store leftover cake in an airtight container at room temperature for up to 2 days. For longer storage, wrap tightly and freeze for up to 3 months. Thaw overnight in the fridge and bring to room temp before serving.
Flavors actually deepen a bit after a day or two, so if you can wait, that’s a nice bonus!
Nutritional Information & Benefits
Each slice (about 1/12th of the cake) contains approximately 350 calories, with moderate fat and sugar content balanced by protein from eggs and calcium from butter and milk. This cake is a treat — but made with real ingredients and no artificial preservatives.
Using buttermilk adds a bit of tang and tender crumb, while the cocoa powder brings antioxidants. For those watching carbs, swapping sugar for natural sweeteners or using almond flour can lighten the load.
As a home cook and nutrition enthusiast, I love that this recipe offers comfort without complicated ingredients — it’s a dessert that feels wholesome enough to share with the whole family.
Conclusion
All in all, this classic sheet cake with school colors is a winner in every way — easy to make, visually festive, and downright delicious. Whether you’re cheering on your favorite team or just want a sweet, nostalgic dessert that everyone will love, this recipe’s got your back.
Feel free to tweak the colors, add your own twist, or keep it classic — it’s all about making the cake your own. Honestly, this cake holds a special place in my heart and kitchen, and I think you’re going to want to bookmark it, too.
Give it a try, share your creations, and let me know how you celebrate with this recipe. Happy baking and go team!
Frequently Asked Questions
Can I make this classic sheet cake ahead of time?
Absolutely! You can bake it a day ahead and frost it the next day. Just keep the unfrosted cake wrapped tightly to maintain moisture.
What if I don’t have buttermilk?
No problem! Stir 1 tablespoon of lemon juice or white vinegar into 1 cup of milk, let it sit for 5 minutes, then use as a buttermilk substitute.
How do I get vibrant school colors in the frosting?
Use gel food coloring instead of liquid—it provides intense color without thinning the frosting.
Can I freeze this cake?
Yes, wrap the cooled cake tightly in plastic wrap and freeze for up to 3 months. Thaw overnight in the fridge before frosting and serving.
Is this recipe suitable for gluten-free diets?
You can swap in a gluten-free flour blend 1:1 for all-purpose flour and it works quite well, though texture may vary slightly.
Pin This Recipe!
Classic Sheet Cake Recipe Easy School Colors Celebration Dessert Ideas

A rich, moist classic chocolate sheet cake perfect for school events and celebrations, featuring vibrant school color frostings and simple pantry ingredients.
- Prep Time: 15 minutes
- Cook Time: 35 minutes
- Total Time: 50 minutes
- Yield: 12 servings 1x
- Category: Dessert
- Cuisine: American
Ingredients
- 2 cups (240g) all-purpose flour
- 2 cups (400g) granulated sugar
- 3/4 cup (65g) unsweetened cocoa powder
- 1 ½ teaspoons baking powder
- 1 ½ teaspoons baking soda
- 1 teaspoon salt
- 1 cup (240ml) buttermilk, room temperature
- 1/2 cup (120ml) vegetable oil
- 2 large eggs, room temperature
- 2 teaspoons vanilla extract
- 1 cup (240ml) hot water
- 1 cup (230g) unsalted butter, softened
- 3 ½ cups (420g) powdered sugar, sifted
- 1/2 cup (50g) unsweetened cocoa powder
- 1/3 cup (80ml) whole milk or heavy cream
- 2 teaspoons vanilla extract
- Food coloring gels in your school colors
Instructions
- Preheat your oven to 350°F (175°C). Grease your 9×13-inch pan with butter or non-stick spray and lightly flour it to prevent sticking.
- In a large bowl, sift together the flour, sugar, cocoa powder, baking powder, baking soda, and salt. Whisk until combined.
- In a separate bowl, whisk together the buttermilk, vegetable oil, eggs, and vanilla extract until smooth and well combined.
- Slowly pour the wet ingredients into the dry ingredients while mixing on medium speed with your mixer. Blend until just combined.
- Carefully stir in the hot water (about 1 cup/240ml). The batter will be thin.
- Pour the batter evenly into the prepared pan. Bake for 30-35 minutes, or until a toothpick inserted in the center comes out clean.
- Let the cake cool in the pan on a wire rack for at least 20 minutes before frosting.
- Beat the softened butter until creamy. Gradually add powdered sugar and cocoa powder, then mix in vanilla and milk (start with 1/3 cup and add more if needed for spreadable consistency).
- Divide the frosting into separate bowls and tint with your chosen food coloring gels.
- Spread the frosting evenly over the cooled cake with an offset spatula. Decorate with school colors as desired.
- Slice into squares and serve. Best enjoyed the same day but stays moist for up to 3 days stored in an airtight container.
Notes
[‘Use room temperature eggs and buttermilk for better texture.’, ‘Sift cocoa powder and flour to avoid lumps.’, ‘Thin batter is normal due to hot water addition.’, ‘Check cake starting at 30 minutes to avoid overbaking.’, ‘Frost cake only when completely cool to prevent melting.’, ‘Use gel food coloring for vibrant frosting colors.’, ‘You can make the cake a day ahead and frost the next day.’, ‘Substitute gluten-free flour blend for gluten-free version.’, ‘Use almond or coconut milk and vegan butter for dairy-free version.’]
Nutrition
- Serving Size: 1 slice (1/12th of c
- Calories: 350
- Sugar: 35
- Sodium: 300
- Fat: 16
- Saturated Fat: 8
- Carbohydrates: 50
- Fiber: 3
- Protein: 4
Keywords: classic sheet cake, chocolate cake, school colors cake, celebration dessert, easy chocolate cake, moist chocolate cake, crowd-pleaser dessert