For a while, I just accepted that red velvet cake wasn’t going to taste like the soft, velvety dreams I had as a kid. You know that specific crumb? The one that melts on your tongue without being dry or overly sweet? I tried box mixes, I tried fancy bakery recipes, and honestly, most of them ended up tasting like dyed sugar water with a hint of cocoa. It was frustrating because the color was always right, but the soul was missing. I needed something that felt festive but didn’t require a degree in pastry arts to assemble. The gap was real: I wanted holiday cheer in a bite-sized format that didn’t leave me with a mess of frosting on my fingers for an hour.
Then I figured out the ratio. It wasn’t about adding more red dye; it was about the balance of buttermilk and vinegar reacting with the cocoa. Once I got that chemistry right, the cake popped out of the oven moist and tender. Rolling it into balls was the next hurdle. I used to make them too big, and they’d crack when I dipped them. Now, I keep them small, like bite-sized ornaments. It’s a quiet satisfaction, really. Just watching them turn from crumbly messes into shiny, festive treats. It’s not a grand culinary achievement, but it’s the kind of thing that makes the kitchen smell like Christmas without the stress.
Why You’ll Love This Recipe
Let’s face it, holiday baking can be a lot of work. These cake pops are different because they’re forgiving. I’ve tested this recipe so many times that I can tell you exactly when the cake is done just by looking at the edges. It’s not just about convenience, though. It’s about that perfect balance of flavors. The cream cheese frosting inside adds a tangy richness that cuts through the sweet chocolate coating. Here is why this recipe stands out from the crowd:
- Quick & Easy: If you bake the cake ahead of time, assembling these takes less than an hour. Perfect for busy weeknights or last-minute holiday parties.
- Simple Ingredients: You likely have most of these in your pantry. Flour, sugar, cocoa, and cream cheese are staples, not fancy specialty items.
- Perfect for Gifting: They look professional and taste homemade. They’re great for teacher gifts, office parties, or just treating yourself.
- Crowd-Pleaser: Kids love the fun shape, and adults appreciate the subtle coffee flavor that enhances the chocolate without overpowering it.
- Unbelievably Delicious: The texture is airy yet dense enough to hold together. It’s comfort food reimagined in a festive package.
What makes this recipe my best version is the addition of a little instant coffee. It doesn’t make them taste like coffee; it just makes the chocolate taste more like chocolate. It’s a trick I learned years ago, and it never fails. It’s the kind of detail that makes people ask for the recipe, even if they can’t quite place why it tastes better than the store-bought kind.
What Ingredients You Will Need
This recipe uses simple, wholesome ingredients to deliver bold flavor and satisfying texture without the fuss. The key is quality where it counts, especially with the chocolate coating. Here is what you’ll need to get started.
For the Cake Base
- Red Velvet Cake Mix: One standard box (15.25 oz). I prefer Duncan Hines for its consistent moisture, but any brand works.
- Vegetable Oil: 1/3 cup. This keeps the cake tender. Olive oil might add a flavor you don’t want here.
- Water: 1 cup. Room temperature is fine.
- Eggs: 2 large eggs. Room temperature helps them emulsify better with the oil.
- Instant Coffee: 1 teaspoon. This is optional but highly recommended for depth of flavor.
For the Frosting & Binding
- Cream Cheese: 4 oz, softened. Full-fat is non-negotiable here. Light cream cheese won’t bind the crumbs properly.
- Butter: 2 tablespoons, softened. Adds richness and helps with the consistency.
- Powdered Sugar: 1 cup. Sifted to avoid lumps in your frosting.
For the Coating
- White Chocolate Chips: 12 oz. I use Ghirardelli for a smoother melt.
- Coconut Oil: 1 tablespoon. This thins the chocolate so it coats evenly without being too thick.
- Red Sprinkles: For that classic holiday look. Nonpareils work best.
If you want to substitute, you can use a homemade red velvet cake recipe instead of the mix, but you’ll need to adjust the liquid ratios. For a dairy-free option, swap the cream cheese and butter for vegan alternatives, though the texture will be slightly different. Keep an eye on your chocolate chips; cheap brands can seize up easily.
Equipment Needed
You don’t need a fancy kitchen to make these. A standard mixer is helpful but not required. A hand mixer works fine if you’re strong. The most important tool is a baking sheet lined with parchment paper. Don’t use foil; the cake pops will stick. I also recommend using a small cookie scoop or an ice cream scoop to portion the cake balls. It ensures they are all the same size, which helps them dip evenly. A deep, narrow mug or bowl is great for dipping. It holds the chocolate around the pop so you don’t need as much coating. If you don’t have a thermometer, just watch the chocolate closely. It should be smooth and fluid, not bubbling. If it gets too hot, it will burn the chocolate. Keep a paper towel nearby for wiping drips.
Preparation Method
- Bake the Cake: Preheat your oven to 350°F (175°C). Grease a 9×13 inch baking pan. In a large bowl, combine the cake mix, oil, water, eggs, and instant coffee. Mix on medium speed for 2 minutes. Pour the batter into the prepared pan. Bake for 25-30 minutes, or until a toothpick inserted in the center comes out clean. Let it cool completely. This step takes about 1 hour total if you include cooling time.
- Crumble the Cake: Once the cake is cool, break it into large chunks. Place them in a food processor or a large bowl. If using a food processor, pulse until you have fine crumbs. If using a bowl, use your hands or a fork to crush the cake into fine, sandy crumbs. Be careful not to over-process if using a machine, or it will turn into a paste.
- Make the Frosting: In a separate bowl, beat the softened cream cheese, butter, and powdered sugar until smooth and creamy. This should take about 2-3 minutes. The mixture should be thick but spreadable.
- Combine Cake and Frosting: Add the frosting to the cake crumbs. Start with half the frosting and mix. Add more as needed. You want a mixture that holds together when squeezed but isn’t greasy. If it’s too dry, add more frosting. If it’s too wet, add more crumbs. This usually takes about 5 minutes of mixing.
- Form the Balls: Roll the mixture into 1-inch balls. Place them on a parchment-lined baking sheet. If the mixture is sticky, wet your hands slightly. Freeze the balls for at least 30 minutes. This step is crucial for dipping.
- Melt the Chocolate: In a microwave-safe bowl, combine the white chocolate chips and coconut oil. Microwave in 30-second intervals, stirring in between, until smooth. Do not overheat. The mixture should be thin and fluid.
- Dip the Pops: Insert a lollipop stick into the top of each frozen cake ball. Dip each ball into the melted chocolate, coating it completely. Tap the back of the spoon against the bowl to remove excess chocolate. Place back on the parchment paper. Immediately add sprinkles if desired.
- Set: Let the cake pops set at room temperature or in the fridge for 15-20 minutes until the chocolate is hard.
Why do my cake pops crack when I dip them?
This usually happens if the cake balls aren’t frozen solid enough. The temperature shock between the cold cake and the warm chocolate causes cracking. Make sure they are firm in the freezer before dipping. Also, don’t dip them for too long. A quick dip is better than a soak.
Can I use dark chocolate instead?
Absolutely. Dark chocolate works great with red velvet. You might need to add a tiny bit more coconut oil if the dark chocolate is thicker than white chocolate. The flavor combination is rich and sophisticated.
Cooking Tips & Techniques
I’ve made a lot of mistakes with cake pops, so you don’t have to. The biggest mistake people make is using too much frosting. It makes the center too soft, and the pop will fall off the stick. Start with less frosting than you think you need. You can always add more, but you can’t take it out. Another tip is to keep your workspace clean. Chocolate sets quickly, so wipe your sticks and hands frequently. If the chocolate starts to thicken while you’re dipping, add a tiny drop of oil and stir. It will loosen up again. Don’t try to speed up the setting process by putting them in the freezer. The condensation can ruin the finish. Room temperature or fridge is best. Also, make sure your cake is completely cool before crumbling it. Warm cake will melt the frosting and create a greasy mess.
Variations & Adaptations
While the classic red velvet is my favorite, you can tweak this recipe in many ways. For a gluten-free version, use a gluten-free cake mix and ensure your chocolate chips are certified gluten-free. If you want a peppermint twist, add a few drops of peppermint extract to the frosting and use red and white sprinkles. For a nutty flavor, mix chopped toasted pecans into the cake crumbs. You can also swap the white chocolate coating for a red-tinted white chocolate or even a dark chocolate with red sprinkles. I once tried adding a layer of peanut butter to the center of the ball before dipping. It was delicious but made the center quite dense. For a lighter option, you can use a strawberry cake mix instead of red velvet. It changes the flavor profile completely but keeps the same technique. These adaptations make the recipe versatile for different tastes and dietary needs.
Serving & Storage Suggestions
These cake pops are best served at room temperature. If they are too cold, the chocolate can taste waxy. Store them in an airtight container at room temperature for up to 3 days. If you live in a hot or humid climate, keep them in the fridge. They will last up to 5 days there. To reheat, let them sit out for 15 minutes. Do not microwave them, or the chocolate will melt. For longer storage, you can freeze the unwrapped cake balls for up to 3 months. Thaw them in the fridge before dipping. They make a great gift when packaged in a cellophane bag with a ribbon. Pair them with a hot cocoa or coffee for a complete holiday treat. The flavors develop over time, so they often taste even better the next day.
Nutritional Information & Benefits
Each cake pop contains approximately 150-180 calories, depending on the size. They provide a good balance of carbohydrates from the cake and fat from the chocolate and cream cheese. While they are a treat, they don’t have to be a guilt-inducing one. The cream cheese adds a bit of protein, and the cocoa offers some antioxidants. For those watching their sugar intake, you can reduce the powdered sugar in the frosting by half. Just note that the texture might be slightly less creamy. They are not gluten-free unless you use a GF cake mix. They do contain dairy and eggs. Enjoy them in moderation as part of a balanced holiday diet. It’s about balance, not deprivation.
Conclusion
Making festive red velvet Christmas cake pops is a fun way to get into the holiday spirit. It’s a recipe that brings joy to both the maker and the eater. I love how they look on a platter, all bright and red. They are a testament to the fact that baking can be simple and still be spectacular. I encourage you to try this recipe and make it your own. Add your favorite sprinkles or try a different chocolate coating. Share them with friends and family. I’d love to hear how they turn out for you. Leave a comment below with your tips or variations. Happy baking, and enjoy the sweet moments of the season.
Frequently Asked Questions
Can I bake the cake ahead of time?
Yes, you can bake the cake up to 2 days in advance. Store it in an airtight container at room temperature. Just make sure it is completely cool before crumbling it.
Why do my cake pops sink?
Sinking usually happens if the cake is underbaked. Make sure you test it with a toothpick. Also, ensure the frosting isn’t too wet. Too much frosting adds moisture that can cause sinking.
How do I prevent the sticks from falling out?
Dip the end of the stick into the melted chocolate before inserting it into the cake ball. This acts as glue. Also, make sure the cake balls are firm and cold before inserting the sticks.
Can I use a different type of chocolate?
Yes, you can use dark chocolate, milk chocolate, or even tinted white chocolate. Just adjust the amount of oil needed to get the right consistency.
Do I need a food processor?
No, you can crumble the cake by hand. It just takes a bit more time and effort. Use your hands or a fork to break the cake into fine crumbs.
If you’re looking for more festive treats, you might enjoy these fluffy heart-shaped red velvet pancakes for a breakfast twist. For a savory option to balance the sweets, try these creamy beer cheese pretzel dip at your next gathering.
Pin This Recipe!

Festive Red Velvet Christmas Cake Pops: 5 Easy Holiday Treats

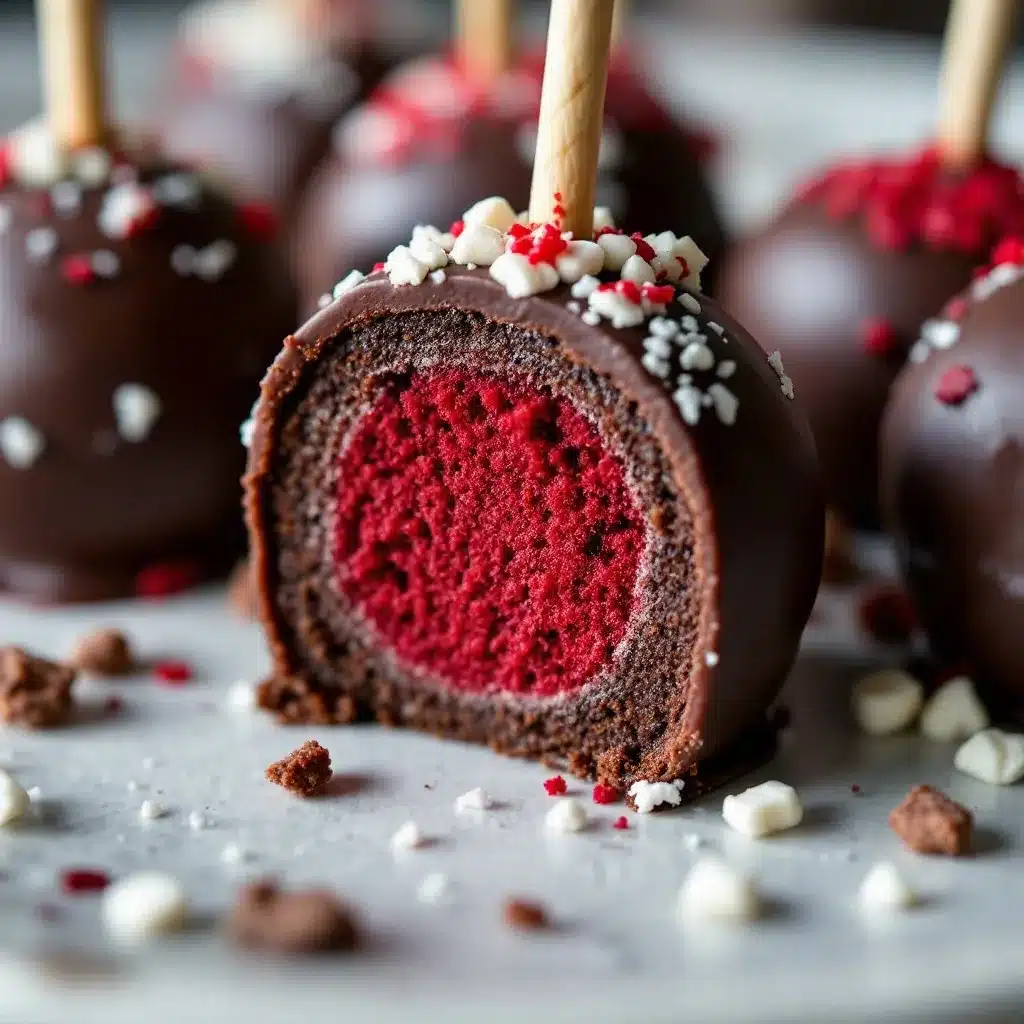
These bite-sized red velvet cake pops are a festive, easy-to-make holiday treat. Using a simple cake mix base and a rich cream cheese frosting, they are dipped in white chocolate and decorated with sprinkles for a perfect gift or party snack.
- Prep Time: 45 minutes
- Cook Time: 30 minutes
- Total Time: 1 hour 15 minutes
- Yield: 20-24 cake pops 1x
- Category: Dessert
- Cuisine: American
Ingredients
- 1 box (15.25 oz) Red Velvet Cake Mix
- 1/3 cup Vegetable Oil
- 1 cup Water
- 2 large Eggs
- 1 teaspoon Instant Coffee
- 4 oz Cream Cheese, softened
- 2 tablespoons Butter, softened
- 1 cup Powdered Sugar, sifted
- 12 oz White Chocolate Chips
- 1 tablespoon Coconut Oil
- Red Sprinkles
Instructions
- Preheat oven to 350°F (175°C) and grease a 9×13 inch baking pan.
- In a large bowl, combine cake mix, oil, water, eggs, and instant coffee. Mix on medium speed for 2 minutes.
- Pour batter into the prepared pan and bake for 25-30 minutes, or until a toothpick inserted in the center comes out clean.
- Let the cake cool completely.
- Crumble the cooled cake into fine crumbs using a food processor or by hand.
- In a separate bowl, beat cream cheese, butter, and powdered sugar until smooth and creamy.
- Add the frosting to the cake crumbs, mixing until the mixture holds together when squeezed but isn’t greasy.
- Roll the mixture into 1-inch balls and place them on a parchment-lined baking sheet.
- Freeze the cake balls for at least 30 minutes.
- Melt white chocolate chips and coconut oil in a microwave-safe bowl in 30-second intervals, stirring until smooth.
- Insert a lollipop stick into the top of each frozen cake ball.
- Dip each ball into the melted chocolate, coating completely, and tap off excess.
- Immediately add sprinkles if desired.
- Let the cake pops set at room temperature or in the fridge for 15-20 minutes until the chocolate is hard.
Notes
Ensure cake is completely cool before crumbling to prevent melting the frosting. Freeze cake balls solid before dipping to prevent cracking. Do not microwave chocolate too long or it will seize. Store in an airtight container at room temperature for up to 3 days, or in the fridge for up to 5 days.
Nutrition
- Serving Size: 1 cake pop
- Calories: 165
- Sugar: 14
- Sodium: 150
- Fat: 10
- Saturated Fat: 6
- Carbohydrates: 18
- Fiber: 1
- Protein: 2
Keywords: red velvet cake pops, holiday baking, christmas treats, easy cake pops, white chocolate dipping, cream cheese frosting, holiday gifts


