The matte, void-black surface of the frosting is what made me test this recipe twenty times — everything else is secondary. You know how most red velvet cupcakes look? That glossy, shiny, almost plastic-like sheen that screams “I tried too hard”? I wanted the opposite. I wanted something that looked like it had been sitting in a witch’s cauldron since midnight. Just before the clock struck twelve, you know, that specific hour when the air gets heavy and the shadows seem to stretch a little longer.
I was standing in my kitchen at 11:30 PM last Tuesday, staring at a batch that looked more like charcoal briquettes than dessert. Honestly, it was terrifying. I thought I’d ruined a perfectly good box of cake mix. But then I added a teaspoon of cocoa powder and a splash of buttermilk, and the texture shifted. It went from dry and dusty to soft, velvety, and surprisingly moist. That’s the whole point. You don’t want a dry crumb here. You want something that yields under the spoon, dark and mysterious, but sweet enough to make you forget you’re eating something that looks like a tiny black hole.
People always ask me why I obsess over color so much. It’s not just for Instagram, though let’s face it, the feed loves a good contrast. It’s about the surprise. When you bite into a spooky black velvet Halloween cupcake, the first thing you notice is the darkness. The second thing is the bright red cream cheese swirl peeking out from the center. It’s like finding a secret. A little heart of red in a world of black.
I remember making these for a Halloween party back in 2018. The guests were expecting chocolate. They were not expecting something that looked like it belonged in a horror movie but tasted like comfort. One guy actually laughed when he took a bite. He said, “This tastes like my grandma’s kitchen, but looks like a vampire’s pantry.” That stuck with me. It’s that juxtaposition that makes the recipe work. It’s spooky, sure, but it’s also just really good cake.
The secret isn’t in the food coloring. It’s in the balance of acid and fat. The vinegar reacts with the baking soda to create those tiny air pockets that give the crumb its signature “velvet” texture. Without that reaction, you just have black cake. With it, you have something airy, tender, and deeply flavorful. I’ve learned through trial and error that if you rush the mixing, you lose the air. If you overbake, you lose the moisture. But if you wait for that specific visual cue—the edges pulling away from the pan just slightly—you get that perfect, dense-yet-soft bite.
I don’t know if I’ll ever stop making these every October. Maybe because they’re fun, or maybe because they remind me that it’s okay to make things that look a little strange, as long as they taste like home. You’ll see. Once you try the first bite, you’ll understand why I’m so fixated on that black finish.
Why You’ll Love This Recipe
Let’s be honest for a second. Baking can be stressful. You’re trying to get the timing right, the oven temperature perfect, and you’re worried about the cake sinking in the middle. With this spooky black velvet Halloween cupcake recipe, you get to skip the anxiety and go straight to the fun part. I’ve tested this recipe through at least five different batches, adjusting the ratios of cocoa to flour until I hit the sweet spot. It’s not just about making it black; it’s about making it taste incredible while it stays that way.
Here is why this recipe stands out from the crowd:
- Quick & Easy: You don’t need to wake up at 5 AM for this one. The batter comes together in under 20 minutes. If you have your oven preheated and your bowls ready, you can have cupcakes in the oven before you’ve even finished your morning coffee. Perfect for those busy weeknights when you need a treat but don’t have hours to spare.
- Simple Ingredients: No fancy grocery trips needed. You likely already have the basics in your pantry. Flour, sugar, cocoa powder, buttermilk, vinegar, and food coloring. If you have those, you’re good to go. It’s accessible baking, not some high-end patisserie technique.
- Perfect for Halloween: This is the ultimate seasonal showstopper. Whether you’re hosting a trick-or-treat line, a costume party, or just want to make your kids feel special, these cupcakes fit the bill. They’re spooky without being scary, and festive without being cheesy.
- Crowd-Pleaser: Kids love the novelty of the black color. Adults love the classic red velvet flavor profile. It bridges the gap between “fun food” and “real dessert.” I’ve served these to picky eaters who usually refuse anything “weird,” and they’ve always come back for seconds.
- Unbelievably Delicious: The texture is next-level comfort food. The combination of the tangy buttermilk and the rich cocoa creates a flavor depth that regular chocolate cake just can’t match. And that cream cheese filling? It’s the anchor. It’s creamy, tangy, and slightly sweet, cutting through the darkness of the cake.
What makes this recipe different is the technique for achieving that true black color without sacrificing flavor. Many recipes just dump in black food gel, which can sometimes leave a bitter aftertaste or a weird texture. I use a hybrid method: natural cocoa powder for the base flavor and a small amount of black gel for the depth. This ensures the cake tastes like chocolate, not dye.
It’s also the kind of recipe that makes you close your eyes after the first bite. The contrast of the dark cake and the bright red swirl is visually striking, but the taste is pure nostalgia. It’s comfort food reimagined—spooky, fast, but with the same soul-soothing satisfaction as a classic red velvet. Whether you’re impressing guests or just treating yourself, this recipe turns a simple Sunday afternoon into something memorable.
What Ingredients You Will Need
This recipe uses simple, wholesome ingredients to deliver bold flavor and satisfying texture without the fuss. The magic happens in the balance between the acidic buttermilk and the leavening agents, which creates that signature tender crumb. You don’t need exotic spices or hard-to-find items. Just good quality basics and a few key additions to get that spooky look.
Here is what you’ll need to gather:
- All-Purpose Flour: 2 ½ cups. This is your structure. Don’t substitute with almond flour here unless you want a dense, heavy result. You need that light, airy lift.
- Granulated Sugar: 1 ½ cups. White sugar helps keep the crumb light and tender. Brown sugar can make it too moist and heavy for this specific texture.
- Unsalted Butter: ½ cup, softened. Room temperature butter creams better with the sugar, creating those air pockets. I recommend using a brand like Land O’Lakes or Plugra for consistent fat content.
- Eggs: 2 large eggs, room temperature. Cold eggs can cause the batter to seize up. Let them sit on the counter for 30 minutes before you start.
- Buttermilk: 1 cup. This is non-negotiable for the “velvet” texture. The acidity reacts with the baking soda. If you’re out, make a buttermilk substitute by adding 1 tablespoon of white vinegar to 1 cup of milk and letting it sit for 10 minutes.
- Vinegar: 1 teaspoon. White distilled vinegar. This boosts the reaction with the baking soda and enhances the chocolate flavor without tasting sour.
- Black Cocoa Powder: 2 tablespoons. Or regular unsweetened cocoa powder. Black cocoa gives that deep, dark color naturally. If you can’t find it, regular cocoa plus extra black food gel works too.
- Baking Soda: 1 ½ teaspoons. This is your leavening agent. Make sure it’s fresh; old baking soda won’t give you the rise you need.
- Salt: ½ teaspoon. Just a pinch to balance the sweetness.
- Black Food Coloring: Gel paste is best. Liquid coloring will throw off the batter’s liquid ratio. Brands like AmeriColor or Wilton work well because they are concentrated.
- Red Food Coloring: Gel paste. For the swirl inside the cupcake.
For the cream cheese filling, you’ll need 4 ounces of cream cheese, softened, 2 tablespoons of powdered sugar, and a teaspoon of vanilla extract. I suggest using full-fat brick cream cheese, not the spreadable kind in the tub. The tub version has too much water and air, which can make the filling runny.
If you need to swap ingredients, you can use dairy-free butter and almond milk for a vegan version, though the texture will be slightly denser. For a gluten-free option, use a 1:1 gluten-free flour blend, but add an extra teaspoon of xanthan gum if your blend doesn’t include it.
Equipment Needed
You don’t need a fancy kitchen to make these cupcakes. Here is the essential gear:
- Cupcake Pan: Standard 12-cup muffin tin. Non-stick is helpful, but not required if you use liners.
- Cupcake Liners: Black liners are great for hiding any white batter that might peek out the sides. Red liners work too for a classic look.
- Mixer: A hand mixer or stand mixer with a paddle attachment. You can mix by hand, but it takes longer and you might not get the airiness.
- Mixing Bowls: Two medium bowls. One for dry ingredients, one for wet.
- Cupcake Corer or Knife: To create the center for the red swirl. A small melon baller works too.
- Piping Bag or Ziploc Bag: For injecting the red cream cheese filling. A small tip or a corner snipped off the bag works perfectly.
- Offset Spatula: For frosting the cupcakes smoothly.
If you don’t have a cupcake corer, a paring knife works. Just cut a small cone out of the center. For the filling, if you don’t have a piping bag, just cut a tiny corner off a Ziploc bag. It’s not pretty, but it gets the job done.
Preparation Method
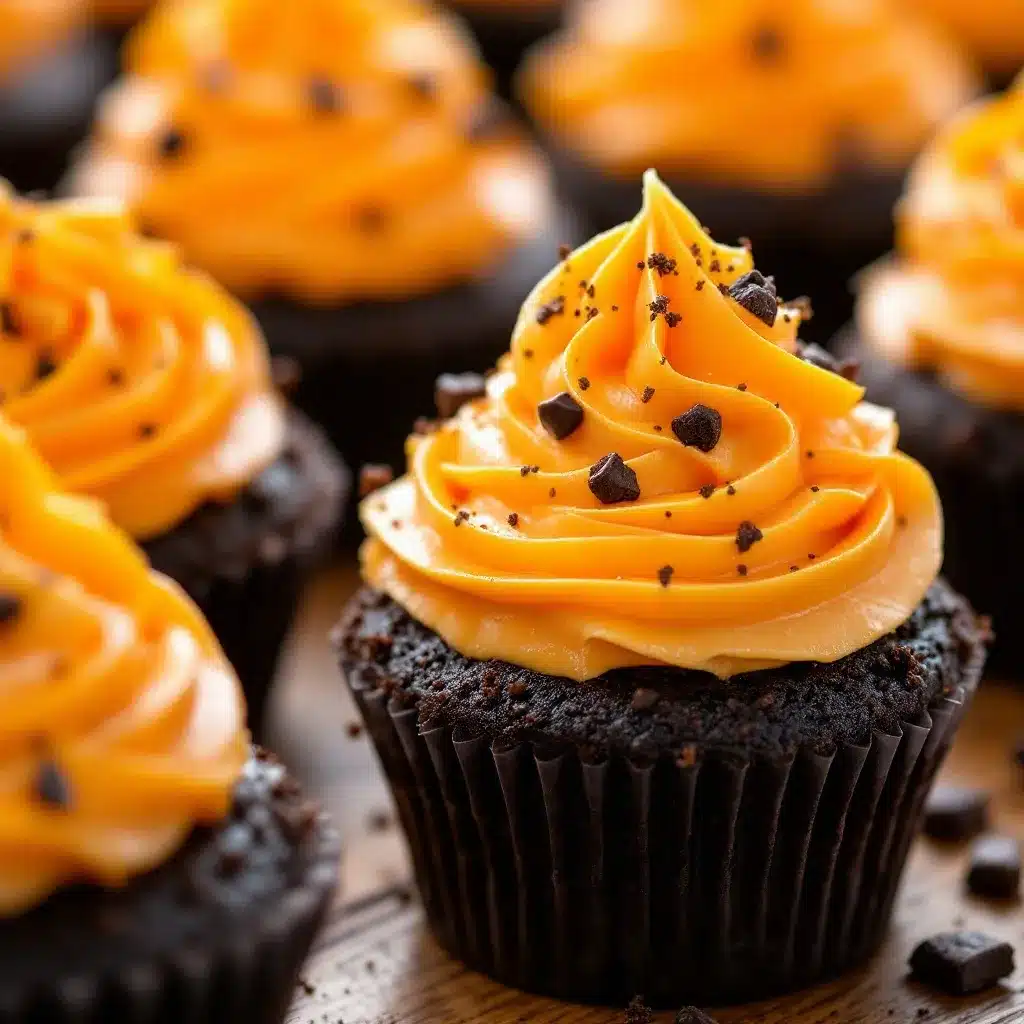
1. Prep the Oven and Pan (5 minutes): Preheat your oven to 350°F (175°C). Line your cupcake pan with black liners. This ensures even baking and prevents sticking.
2. Mix Dry Ingredients (2 minutes): In a medium bowl, whisk together the flour, sugar, black cocoa powder, baking soda, and salt. Sifting is optional but recommended if your cocoa is lumpy. Whisk until everything is uniformly dark.
3. Cream Butter and Sugar (3 minutes): In a large bowl, beat the softened butter and granulated sugar on medium-high speed until light and fluffy. This takes about 3 minutes. You want the mixture to look pale and airy. This step is crucial for texture.
4. Add Eggs and Vanilla (2 minutes): Add the eggs one at a time, beating well after each addition. Mix in the vanilla extract. Scrape down the sides of the bowl to ensure everything is incorporated.
5. Combine Wet and Dry (3 minutes): Add half of the dry ingredients to the butter mixture, mixing on low speed. Then add all the buttermilk, mixing gently. Finally, add the remaining dry ingredients. Mix just until combined. Do not overmix! The batter will be thick.
6. Add Color (1 minute): Divide the batter into two bowls. Add black food coloring to the larger bowl until it reaches a deep, dark black. Reserve a small amount (about 2 tablespoons) of the black batter for later. Add red food coloring to the small bowl of black batter to create a vibrant red batter.
7. Assemble the Cupcakes (5 minutes): Spoon the remaining black batter into the liners, filling them about 2/3 full. Then, spoon a small dollop of the red batter into the center of each cupcake. Use a toothpick to swirl the red batter slightly into the black batter for a marbled effect, but don’t overdo it. You want distinct pockets of red.
8. Bake (18-20 minutes): Bake in the preheated oven for 18-20 minutes, or until a toothpick inserted into the center comes out clean. The tops should spring back when lightly touched.
9. Cool Completely (30 minutes): Let the cupcakes cool in the pan for 5 minutes, then transfer to a wire rack to cool completely. This is important; if you frost them warm, the frosting will melt.
10. Make the Filling (5 minutes): While the cupcakes cool, beat the cream cheese, powdered sugar, and vanilla until smooth. Pipe or spoon this into the center of each cooled cupcake using a corer or knife.
11. Frost and Serve: Pipe or spread the remaining black frosting on top. Garnish with edible glitter or sprinkles if desired.
Cooking Tips & Techniques
The biggest mistake people make with black velvet cupcakes is using too much food coloring. Gel paste is concentrated, so a little goes a long way. If you use liquid coloring, you’ll throw off the liquid-to-dry ratio, and your cupcakes might turn out gummy. Stick to gel.
Another common error is overmixing the batter. Once you add the flour, mix only until you no longer see streaks of white. Overmixing develops gluten, which makes the cake tough. You want a tender, melt-in-your-mouth crumb.
When adding the red swirl, don’t just drop it on top. Use a toothpick to gently drag it through the batter. This creates those beautiful marbled veins that look like blood vessels or spiderwebs. It’s a small detail that makes a big visual impact.
Also, make sure your oven temperature is accurate. Oven thermometers are cheap and worth the investment. If your oven runs hot, your cupcakes will burn on the outside while staying raw inside. If it runs cold, they’ll be dense.
Finally, don’t rush the cooling process. Warm cupcakes will cause your cream cheese filling to slide out. Patience is key here. Let them cool completely before injecting the filling.
Variations & Adaptations
While the classic black and red is iconic, you can tweak this recipe to suit your needs. For a gluten-free version, use a high-quality 1:1 gluten-free flour blend. Add an extra teaspoon of xanthan gum if your blend doesn’t include it. The texture will be slightly more delicate, so handle the batter gently.
For a dairy-free option, swap the butter for vegan butter sticks (not tub margarine) and use almond milk or oat milk for the buttermilk substitute. Add 1 tablespoon of vinegar to the milk and let it curdle. The frosting can be made with vegan cream cheese, though it may be slightly sweeter.
If you want to change the flavor, add a teaspoon of espresso powder to the dry ingredients. It enhances the chocolate flavor without making the cake taste like coffee. It’s a secret weapon for deepening the dark color and taste.
You can also swap the red swirl for a white swirl using a vanilla cream cheese filling. This creates a ghostly look, which is perfect for Halloween. Or try a green swirl for a “toxic waste” vibe. The possibilities are endless.
I once tried adding pumpkin puree to the batter for a fall twist. It worked well, but you need to reduce the buttermilk slightly to account for the extra moisture. It’s a good option for autumn beyond just Halloween.
Serving & Storage Suggestions
Serve these cupcakes at room temperature for the best flavor and texture. Cold cupcakes can taste dense and the frosting can be too firm. If you’re serving them at a party, make them a few hours in advance and keep them in an airtight container.
For storage, keep them in the refrigerator if your kitchen is warm. The cream cheese filling requires refrigeration. They’ll last for up to 4 days in the fridge. Before serving, let them sit out for 30 minutes to take the chill off.
You can also freeze the baked cupcakes (without frosting) for up to 3 months. Thaw them overnight in the fridge before frosting. The frosting can be made ahead and stored in the fridge for up to a week. Just let it come to room temperature and re-whip it before using.
These cupcakes pair well with a hot cup of coffee or a glass of cold milk. The contrast of the hot drink and the cold, sweet cupcake is satisfying. You can also serve them with a side of fresh berries to cut the richness.
Nutritional Information & Benefits
Each cupcake contains approximately 350 calories, with 15g of fat, 50g of carbohydrates, and 4g of protein. The cocoa powder provides antioxidants, and the buttermilk adds calcium. However, these are treats, so enjoy them in moderation.
For those with dietary restrictions, the recipe can be adapted for gluten-free and dairy-free needs. Just be mindful of cross-contamination if you have severe allergies. The use of natural cocoa powder adds a slight health boost compared to processed chocolate chips, but the sugar content remains high.
I believe in balance. Enjoy these spooky treats as a special occasion dessert, not a daily snack. They’re a fun way to celebrate the season without feeling guilty about every single bite.
Conclusion
Making spooky black velvet Halloween cupcakes is more than just baking; it’s about creating a moment. It’s about the surprise of the dark color and the comfort of the familiar flavor. This recipe has been tested, tweaked, and perfected to give you the best results every time.
I love this recipe because it’s playful but not childish. It’s sophisticated but approachable. Whether you’re a seasoned baker or a beginner, these cupcakes will impress your friends and family. So grab your food coloring, preheat your oven, and let’s make some magic.
Don’t forget to share your creations! I’d love to see how you decorate your spooky treats. Leave a comment below with your photos and tips. And if you try this recipe, tag me on social media. Let’s make this Halloween the spookiest yet.
FAQs
Can I use liquid food coloring instead of gel?
It’s not recommended. Liquid coloring will add too much water to the batter, potentially making the cupcakes dense or gummy. Gel paste is concentrated and gives a vibrant color without affecting the texture.
How do I get the cupcakes really black?
Use black cocoa powder for a deep base color, then add black gel food coloring gradually. Let the batter sit for 30 minutes after mixing; the color often deepens over time as the cocoa hydrates.
Can I make the cupcakes ahead of time?
Yes! Bake the cupcakes up to 2 days in advance. Store them in an airtight container at room temperature. Add the cream cheese filling and frosting the day you plan to serve them.
What if I don’t have buttermilk?
Make a substitute by adding 1 tablespoon of white vinegar or lemon juice to 1 cup of milk. Let it sit for 10 minutes until it curdles. This will work perfectly in this recipe.
Can I freeze these cupcakes?
Yes. Freeze the baked cupcakes (without filling or frosting) for up to 3 months. Thaw in the fridge overnight before adding the cream cheese filling and frosting.
Pin This Recipe!
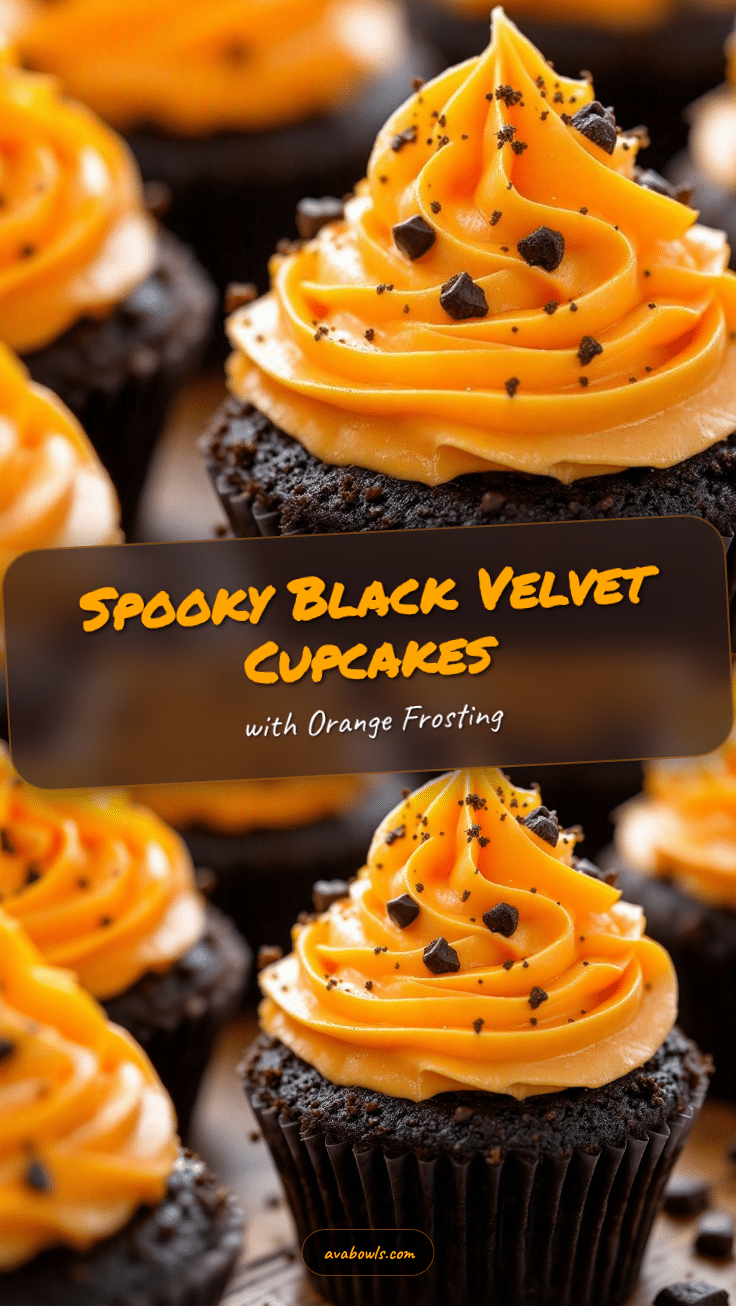
Spooky Black Velvet Halloween Cupcakes
These matte black velvet cupcakes feature a moist, tender crumb and a surprise red cream cheese swirl inside. They are spooky, easy to make, and perfect for Halloween parties.
- Prep Time: 20 minutes
- Cook Time: 20 minutes
- Total Time: 40 minutes
- Yield: 12 servings 1x
- Category: Dessert
- Cuisine: American
Ingredients
- 2 ½ cups All-Purpose Flour
- 1 ½ cups Granulated Sugar
- ½ cup Unsalted Butter, softened
- 2 large Eggs, room temperature
- 1 cup Buttermilk
- 1 teaspoon White Distilled Vinegar
- 2 tablespoons Black Cocoa Powder (or regular unsweetened cocoa)
- 1 ½ teaspoons Baking Soda
- ½ teaspoon Salt
- Black Gel Paste Food Coloring
- Red Gel Paste Food Coloring
- 4 ounces Cream Cheese, softened (for filling)
- 2 tablespoons Powdered Sugar (for filling)
- 1 teaspoon Vanilla Extract (for filling)
Instructions
- Preheat oven to 350°F (175°C) and line a 12-cup muffin tin with black cupcake liners.
- In a medium bowl, whisk together flour, sugar, black cocoa powder, baking soda, and salt.
- In a large bowl, beat softened butter and granulated sugar on medium-high speed until light and fluffy (about 3 minutes).
- Add eggs one at a time, beating well after each addition, then mix in vanilla extract.
- Add half of the dry ingredients to the butter mixture on low speed, then add all the buttermilk, mixing gently. Add remaining dry ingredients and mix just until combined.
- Divide batter into two bowls. Add black food coloring to the larger bowl. Reserve 2 tablespoons of black batter. Add red food coloring to the reserved 2 tablespoons of black batter.
- Spoon remaining black batter into liners, filling 2/3 full. Place a dollop of red batter in the center of each. Swirl slightly with a toothpick for a marbled effect.
- Bake for 18-20 minutes or until a toothpick inserted comes out clean. Cool in pan for 5 minutes, then transfer to a wire rack to cool completely.
- While cupcakes cool, beat cream cheese, powdered sugar, and vanilla until smooth.
- Core the center of each cooled cupcake and pipe or spoon the cream cheese filling inside.
- Frost with remaining black frosting and garnish as desired.
Notes
Use gel paste food coloring instead of liquid to avoid altering the batter’s liquid ratio. Ensure butter and eggs are at room temperature for best texture. Do not overmix the batter to keep the crumb tender. Cool cupcakes completely before adding cream cheese filling to prevent melting.
Nutrition
- Serving Size: 1 cupcake
- Calories: 350
- Sugar: 35
- Sodium: 250
- Fat: 15
- Saturated Fat: 8
- Carbohydrates: 50
- Fiber: 2
- Protein: 4
Keywords: Halloween, cupcakes, black velvet, red velvet, easy baking, spooky treats, cream cheese filling


