My seven-year-old daughter stared at the wooden board for a full minute, her eyebrows knitted tight, before she declared, “This is the best witchcraft you’ve ever performed, Mom.” She didn’t ask for it. She didn’t beg for it. She just saw those little cheese pumpkins sitting next to the black licice “spiders” and knew immediately that this was the main event of the party. I was honestly just trying to make a snack that looked cool for her friend’s sleepover, but her reaction told me something else was happening. The way she carefully picked up a cheese pumpkin, checking for “cursed energy” before taking a bite, made me realize that presentation isn’t just about looking good—it’s about creating a moment.
I’ve made plenty of charcuterie boards before. You know the ones: just a pile of crackers and some cheddar slices that look sad by noon. But this time, I decided to actually put in the work. I wanted something that felt festive without being overly complicated or expensive. The goal was to create a Spooky Halloween Charcuterie Board with Cheese Pumpkins that felt magical but was actually quite simple to assemble. When I handed the first plate to my daughter’s friend, the look of pure delight was worth every minute of carving that cheddar.
It’s funny how much weight we put on “scary” food. Kids love being scared, but they also love eating things that are easy to pick up with their fingers. This board strikes that balance perfectly. It’s not just about the cheese pumpkins, though those are definitely the stars. It’s about the whole vibe—the dark crackers, the bright orange accents, and the little surprises hidden in the corners. Seeing my daughter proud of her “witch’s brew” snack board made me realize that this recipe isn’t just for Halloween night. It’s for anyone who wants to make a simple snack feel special. I’ve been making it ever since, even if it’s just a Tuesday in November.
Why You’ll Love This Spooky Halloween Charcuterie Board
Let’s be honest, most Halloween parties end up with a bowl of candy and some bag of chips. But you know what? People remember the food that looks like it came from a wizard’s kitchen. This Spooky Halloween Charcuterie Board with Cheese Pumpkins is different because it turns a simple snack into an activity. It’s not just sitting there; it’s a puzzle for your guests to solve. And the best part? It’s incredibly forgiving. You don’t need to be a professional chef to make this work. In fact, the more “homemade” it looks, the better it feels.
Here is why this board always gets rave reviews:
- Quick & Easy Assembly: You can build this entire board in under 20 minutes. That’s faster than ordering a pizza. It’s perfect for busy weeknights or last-minute Halloween gatherings when you realize you forgot to buy decorations.
- Simple Ingredients: You likely already have most of this in your fridge and pantry. Cheddar, cream cheese, pretzels, and crackers are staples. No fancy grocery trips needed, which means less stress and more time for costumes.
- Perfect for Parties: This is great for Halloween parties, classroom exchanges, or even a cozy movie night. It’s interactive. Guests love picking their own combinations, which keeps them entertained longer than a static plate of food.
- Crowd-Pleaser for All Ages: Kids love the shapes and the “spooky” theme. Adults love the variety of textures and flavors. It bridges the gap between “fun snack” and “actually delicious food.”
- Unbelievably Delicious Texture Combo: The creamy cheese pumpkin against the crunchy pretzel or cracker is next-level comfort food. It’s salty, savory, and just a little bit fun. It’s the kind of bite that makes you close your eyes and appreciate the simple things.
What makes this recipe different from other Halloween snacks is the cheese pumpkins. They are the centerpiece. They look impressive, like you spent hours sculpting them, but they are really just soft cheese rolled in paprika. It’s a clever twist that feels creative without requiring any special skills. It’s comfort food reimagined—healthy-ish, fast, but with that same soul-soothing satisfaction of a good cheese plate. It’s perfect for impressing guests without the stress of cooking a full meal.
What Ingredients You Will Need
This recipe uses simple, wholesome ingredients to deliver bold flavor and satisfying texture without the fuss. The beauty of a charcuterie board is that it’s a canvas. You can swap things out based on what you like or what’s on sale. However, for the best results, I recommend sticking to the core items that create that classic spooky color palette of orange, black, and white.
For the Cheese Pumpkins (The Stars of the Show)
- Sharp Cheddar Cheese: 1 block (about 8 oz). I recommend using a block of sharp cheddar from a trusted brand like Cabot or Tillamook for the best flavor. Pre-shredded cheese has anti-caking agents that prevent it from melting smoothly, so always buy a block.
- Cream Cheese: 4 oz, softened. This acts as the “glue” for the pumpkin. Room temperature cream cheese is crucial here; if it’s cold, it won’t mix well with the cheddar.
- Paprika: 1-2 teaspoons. This is what gives the pumpkins their orange color. Smoked paprika adds a nice depth, but regular paprika works fine too.
- Garlic Powder: 1/2 teaspoon. Just a pinch to add a savory backbone to the cheese mix.
For the Base and Crunch
- Dark Pretzel Rods or Twists: 1 bag. Pretzels add a salty crunch that pairs perfectly with the cheese. Dark pretzels look more “spooky” than light ones.
- Black Olive Slices: 1 small jar, sliced. These are essential for making spider legs and witch eyes. Look for large, meaty olives for better slices.
- Crackers: Assorted dark crackers (like rye or pumpernickel). These provide a sturdy base for the cheese and look elegant against the orange accents.
- Goldfish Crackers or Pretzel Snacks: 1 box. These are great for adding texture and color. Goldfish are naturally orange, which fits the theme perfectly.
For the “Spooky” Accents
- Black Licorice: 1 small pack. Cut into small pieces to make spider bodies or witch hats. If you don’t like licorice, you can skip this or use dark chocolate pieces.
- Raisins or Dried Cranberries: 1/4 cup. These add a pop of dark color and a chewy texture. Cranberries look a bit more festive than raisins.
- Apple or Pear Slices: 1 apple, sliced thinly. Fruit adds freshness and balances the salty cheeses. Toss them in a little lemon juice to prevent browning.
- Almonds or Walnuts: 1/4 cup. For a nutty crunch. Whole almonds look like little bones or fingers if you leave them in the shell.
Substitution Tips:
If you have guests with dietary restrictions, you can easily adapt this board. Use gluten-free crackers and pretzels if needed. For a dairy-free option, swap the cheddar and cream cheese for your favorite dairy-free alternatives, though the pumpkin shape might be harder to hold. In summer, you might swap the apples for grapes, which are easier to pick up and don’t brown as quickly.
Equipment Needed
You don’t need much to pull this off, which is the best part. Here is what you’ll need:
- Large Wooden Board or Platter: A wooden board is traditional and looks rustic. A large baking sheet works in a pinch, but a board makes it feel more special. If you don’t have one, a large ceramic platter is fine.
- Small Mixing Bowl: For mixing the cream cheese, cheddar, and paprika. A medium-sized bowl works best.
- Microplane or Fine Grater: To grate the cheddar cheese finely. If you don’t have a microplane, a standard box grater works, but make sure the cheese is cold so it doesn’t clump.
- Knife and Cutting Board: For slicing the olives and apples. A sharp knife makes clean cuts, which helps the presentation look neat.
- Pastry Bag or Ziploc Bag: Optional, but helpful if you want to pipe the cheese mixture. I usually just use my hands to roll the pumpkins, but a bag can help keep things tidy.
Maintenance Tip: If you’re using a wooden board, make sure it’s food-safe and sealed. Wash it by hand with warm, soapy water and dry it immediately to prevent warping. A well-maintained board lasts for years and looks better with age.
Preparation Method
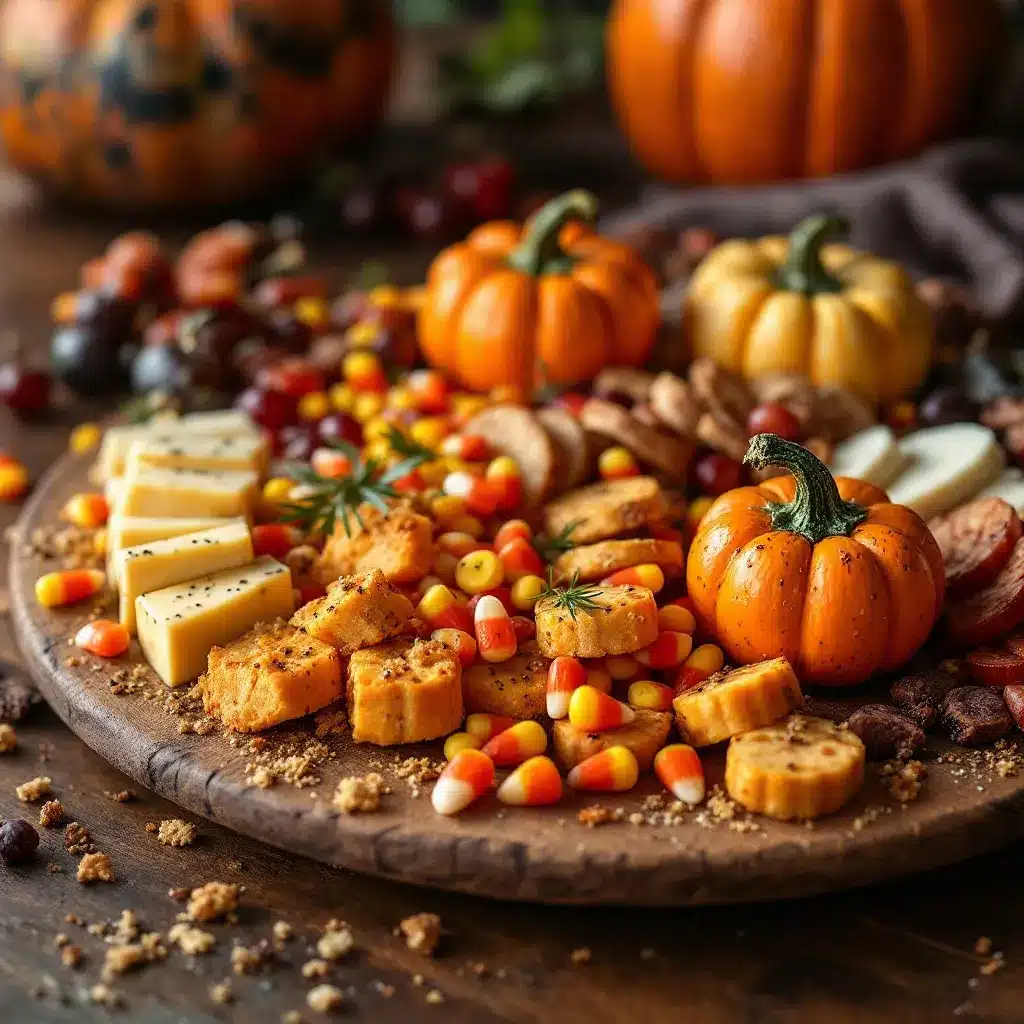
Making this Spooky Halloween Charcuterie Board with Cheese Pumpkins is easier than you think. The key is to prep the cheese pumpkins first, as they need a little time to set up before you arrange the board. Here is how to do it step-by-step.
Step 1: Prep the Cheese Mixture (10 minutes)
Start by grating the sharp cheddar cheese. You want it to be finely grated, almost like sand. This helps it mix smoothly with the cream cheese. In your small mixing bowl, combine the grated cheddar, softened cream cheese, paprika, and garlic powder. Mix it all together with a fork or your hands until it forms a uniform orange dough. If the mixture is too dry, add a tiny bit more cream cheese. If it’s too wet, add a little more cheddar. You want a consistency that holds its shape when rolled.
Step 2: Form the Cheese Pumpkins (15 minutes)
Take small portions of the cheese mixture—about the size of a golf ball—and roll them into smooth balls. Then, gently press your fingers into the top and bottom of each ball to create a slight indentation, mimicking the shape of a pumpkin. You don’t need to make perfect ridges; just a few indentations are enough to sell the look. Place the finished pumpkins on a plate lined with parchment paper. Put them in the refrigerator for at least 30 minutes to firm up. This step is crucial because soft cheese will be messy to handle on the board.
Step 3: Prep the Accents (10 minutes)
While the cheese chills, prep your other ingredients. Slice the black olives into rounds. Cut the black licorice into small 1-inch pieces. Slice the apples thinly and toss them with a little lemon juice to keep them fresh. If you’re using almonds, leave them whole. Arrange all these prepped items in small bowls or piles nearby. This makes the final assembly much faster.
Step 4: Assemble the Board (10 minutes)
Take your board out and start placing the larger items first. Arrange the crackers and pretzels in clusters around the board. Leave some empty space for the cheese pumpkins. Place the cheese pumpkins in the center or in groups of three. They are the focal point, so give them room to shine. Add the olive slices near the pumpkins to create “spider legs” or “witch eyes.” Scatter the licorice pieces, raisins, and fruit slices around the board. Fill in any gaps with almonds or extra crackers.
Step 5: Final Touches
Add a small bowl of dip in the center if you like. A creamy ranch or a spicy marinara works well. Garnish with a few fresh herbs like rosemary or thyme for a pop of green. Step back and look at your board. Does it look spooky? Does it look appetizing? Adjust as needed. The goal is to make it look abundant and inviting.
Cooking Tips & Techniques
I’ve made a few mistakes along the way, so you don’t have to. Here are some tips to ensure your board looks professional and tastes great.
Keep the Cheese Cold: The biggest mistake people make is letting the cheese sit out too long before assembling. If the cheese gets warm, it becomes sticky and loses its shape. Keep the cheese pumpkins in the fridge until the very last minute. Assemble the board just before serving to keep everything fresh and firm.
Balance the Flavors: Don’t just fill the board with salty snacks. The cheese pumpkins are rich and savory, so you need something acidic or fresh to cut through that. The apple slices and cranberries provide that balance. It’s a good idea to have a mix of salty, sweet, and savory items to keep your guests interested.
Use Color Contrast: The orange of the pumpkins pops against the black crackers and dark olives. If you’re using light crackers, add some dark chocolate or blackberries to create contrast. Visual appeal is half the battle with a charcuterie board. If it looks good, it tastes better.
Prep Ahead: You can make the cheese mixture and roll the pumpkins up to 24 hours in advance. Just keep them covered in the fridge. This saves you time on the day of the party. I often prep the cheese the night before and just assemble the board in the morning.
Don’t Overcrowd: It’s tempting to fill every inch of the board, but leave some negative space. It makes the food look more intentional and easier for guests to pick from. Cluttered boards can look messy and overwhelming.
Variations & Adaptations
This recipe is very flexible, so feel free to make it your own. Here are a few variations I’ve tried that work well.
Gluten-Free Option: Simply swap the regular crackers and pretzels for gluten-free versions. There are many great gluten-free pretzels and crackers on the market now that taste just as good. This ensures everyone at the party can enjoy the board without worry.
Vegetarian Twist: Add some roasted vegetables like cauliflower florets or Brussels sprouts for a heartier option. Roast them with a little balsamic glaze for a sweet and tangy flavor. This adds a healthy element to the board and appeals to those looking for more veggies.
Spicy Kick: If you like heat, add some pepperoni slices or spicy jalapeño chips. The spice pairs surprisingly well with the creamy cheese pumpkins. It adds a fun twist that adults will appreciate.
Seasonal Fruit Swap: In the fall, you can use pears or figs instead of apples. Pears have a nice texture that complements the cheese well. Figs add a touch of elegance and a natural sweetness that balances the saltiness of the olives.
Personal Variation: I once added some mini marshmallows to the board for a “ghost” effect. They looked cute and added a sweet element that kids loved. It’s a fun little surprise that breaks up the savory flavors.
Serving & Storage Suggestions
Serve this board at room temperature for the best flavor. Cheese tastes best when it’s not ice-cold, so take the pumpkins out of the fridge about 15 minutes before serving. Arrange the board on a table with other Halloween decorations to set the mood. It pairs well with a glass of wine or a spooky cocktail.
Storage: Any leftover cheese pumpkins can be stored in an airtight container in the refrigerator for up to 3 days. They might lose a bit of their shape, but they will still taste great. The crackers and pretzels should be stored in a sealed container to keep them crunchy.
Reheating: You don’t need to reheat the board. Just bring it out and let it sit for a few minutes. If you’re using fruit, it’s best to eat it fresh, so avoid storing sliced fruit for too long.
Nutritional Information & Benefits
This board is a mix of macronutrients, offering a balance of protein, fats, and carbs. The cheese pumpkins provide calcium and protein, while the crackers and pretzels offer carbohydrates for energy. The fruits and vegetables add fiber and vitamins. It’s a great option for a snack that satisfies both savory and sweet cravings.
Allergen Notes: This board contains dairy, gluten, and nuts. Be sure to label these items for guests with allergies. You can easily swap out ingredients to accommodate different dietary needs, as mentioned in the variations section.
Wellness Perspective: I love this recipe because it feels indulgent but is actually quite balanced. It’s a great way to enjoy a snack without feeling guilty. Plus, the fun presentation makes it feel like a treat, which is good for mental wellness too.
Conclusion
This Spooky Halloween Charcuterie Board with Cheese Pumpkins is a fun and easy way to celebrate the season. It’s not just about the food; it’s about the experience. Making the cheese pumpkins is a activity that kids and adults can enjoy together. It’s a recipe that encourages creativity and playfulness in the kitchen.
I hope you try this recipe and enjoy making it as much as I did. Feel free to customize it with your own favorite snacks and ingredients. Don’t forget to share your creations on social media and tag me. I love seeing how everyone puts their own spin on this spooky board.
Happy Halloween, and happy snacking!
Frequently Asked Questions
Can I make the cheese pumpkins ahead of time?
Yes, you can make the cheese mixture and roll the pumpkins up to 24 hours in advance. Just keep them covered in the refrigerator to prevent them from drying out.
What kind of cheese works best for the pumpkins?
Sharp cheddar is the best choice because it has a strong flavor that stands out. You can also use a mix of cheddar and gouda for a different flavor profile.
How do I keep the cheese pumpkins from falling apart?
Make sure the cream cheese is fully softened before mixing. This helps it bind with the cheddar cheese. Also, chill the pumpkins for at least 30 minutes before serving to firm them up.
Can I use other fruits on the board?
Absolutely. Apples, pears, grapes, and figs all work well. Just make sure to toss sliced fruits in lemon juice to prevent browning.
Is this board suitable for kids?
Yes, it’s perfect for kids. The shapes are fun and easy to eat. You can also make smaller cheese pumpkins for little hands. Just supervise young children with hard snacks like pretzels and nuts.
Pin This Recipe!
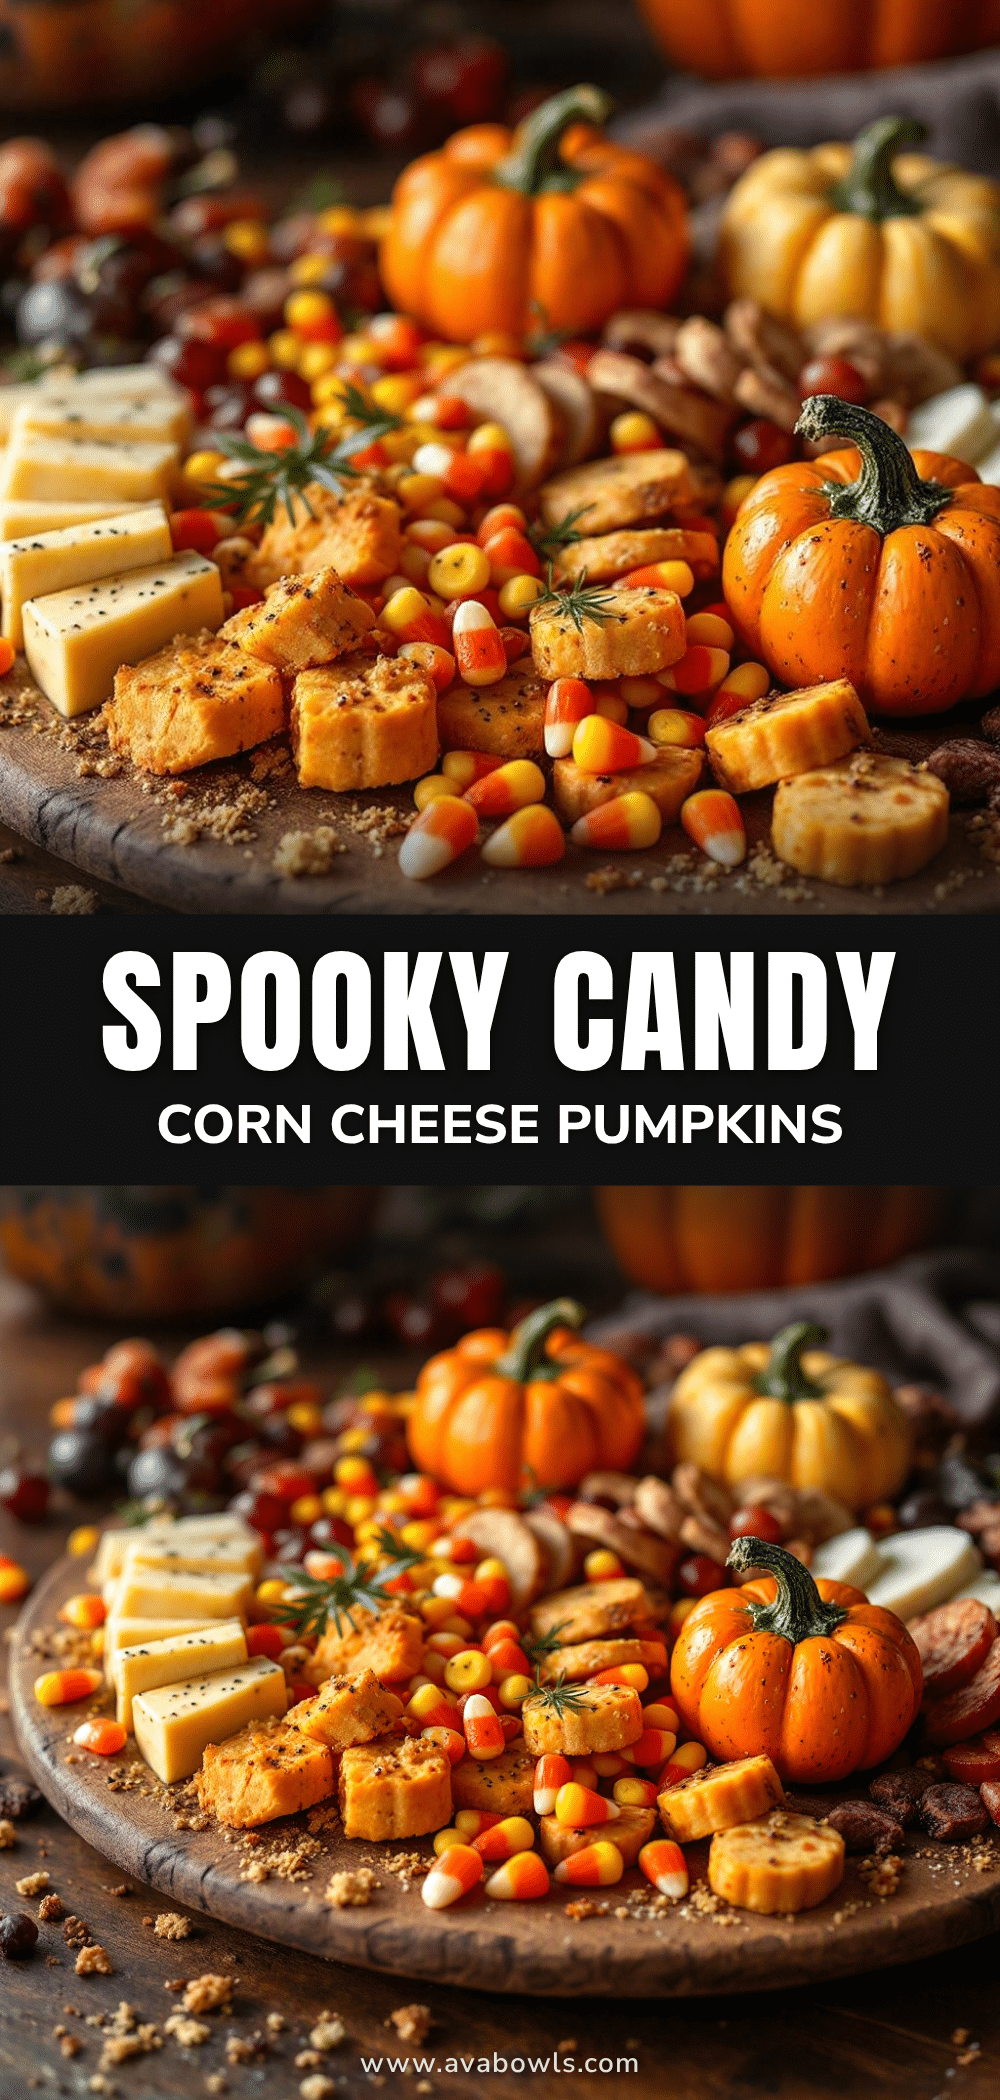
Spooky Halloween Charcuterie Board: 5 Easy Cheese Pumpkins
A festive and easy-to-assemble Halloween snack board featuring homemade cheese pumpkins, dark crackers, pretzels, and spooky accents like black licorice spiders.
- Prep Time: 35 minutes
- Cook Time: 0 minutes
- Total Time: 35 minutes
- Yield: 8 servings 1x
- Category: Appetizer
- Cuisine: American
Ingredients
- 1 block (8 oz) Sharp Cheddar Cheese
- 4 oz Cream Cheese, softened
- 1–2 teaspoons Paprika
- 1/2 teaspoon Garlic Powder
- 1 bag Dark Pretzel Rods or Twists
- 1 small jar Black Olive Slices
- Assorted dark crackers (rye or pumpernickel)
- 1 box Goldfish Crackers or Pretzel Snacks
- 1 small pack Black Licorice
- 1/4 cup Raisins or Dried Cranberries
- 1 Apple, sliced thinly
- 1/4 cup Almonds or Walnuts
Instructions
- Grate the sharp cheddar cheese finely.
- In a small mixing bowl, combine the grated cheddar, softened cream cheese, paprika, and garlic powder. Mix until a uniform orange dough forms.
- Take small portions of the cheese mixture (golf ball size) and roll them into smooth balls.
- Press fingers into the top and bottom of each ball to create indentations mimicking a pumpkin shape.
- Place pumpkins on a parchment-lined plate and refrigerate for at least 30 minutes to firm up.
- Slice black olives into rounds and cut black licorice into 1-inch pieces.
- Slice apples thinly and toss with lemon juice to prevent browning.
- Arrange crackers and pretzels in clusters on a large wooden board or platter.
- Place the chilled cheese pumpkins in the center or in groups of three.
- Add olive slices near pumpkins to create spider legs or witch eyes.
- Scatter licorice pieces, raisins, fruit slices, and almonds around the board to fill gaps.
- Serve at room temperature.
Notes
Keep cheese cold until serving to maintain shape. Cheese pumpkins can be made up to 24 hours in advance. Ensure cream cheese is fully softened for better binding. Use gluten-free crackers/pretzels for GF diets.
Nutrition
- Serving Size: Varied pieces from t
- Calories: 250
- Sugar: 3
- Sodium: 400
- Fat: 18
- Saturated Fat: 10
- Carbohydrates: 15
- Fiber: 1
- Protein: 8
Keywords: Halloween snack, charcuterie board, cheese pumpkins, easy party food, kid-friendly snacks, spooky appetizer


