My six-year-old, Leo, looked up from his plate, marshmallow still clinging to his cheek, and said, “Mom, these are the best things you’ve ever made.” And honestly? He wasn’t wrong. I’d been trying to find a way to make a fall-themed treat that didn’t involve rolling out pie crust or dealing with sticky caramel, and these Easy Candy Corn Rice Krispie Treats were the happy accident I didn’t know I needed. I had a bag of candy corn leftover from a classroom party and a box of cereal that was about to go stale, and a sort of desperate, last-minute kitchen experiment was born.
I wasn’t trying to be clever. I was just trying to use up ingredients. But the moment I folded those little orange and yellow triangles into the gooey marshmallow mixture, I knew I had stumbled onto something special. The colors bled just a little, creating this gorgeous, almost tie-dyed effect that screams October. It’s not fancy, and it’s definitely not complicated, but watching my kid devour one without being asked to finish his snack? That felt like a win. That felt like a recipe worth remembering.
These aren’t just another marshmallow treat. They’re a little bit of nostalgia, a little bit of Halloween magic, and a whole lot of easy. They come together in about fifteen minutes, which is about the length of time you have before a toddler meltdown or a work email demands your attention. And the best part? They actually look like you tried. So if you need a quick dessert for a school party, a tailgate, or just a Tuesday night craving, this is the one. I promise, it’s the kind of recipe that makes you feel like a hero in your own kitchen.
Why You’ll Love This Recipe
I’ve tested this recipe about five times now (purely for quality control, you understand), and here’s why it keeps ending up on our counter:
- Quick & Easy : You are looking at about 15 minutes of active time. From start to finish, you can have these ready and cooling before the kids even finish arguing about what to watch on TV.
- Simple Ingredients : No weird extracts, no specialty flours, no hunting down obscure baking supplies. You need butter, marshmallows, cereal, and a bag of candy corn. That’s it.
- Perfect for Fall Gatherings : These are a huge hit at Halloween parties, pumpkin carving nights, and even Thanksgiving dessert tables when you need something the kids will actually eat. They also make a fun, unexpected addition to a charcuterie board for a playful sweet note.
- Crowd-Pleaser : I brought a batch to a neighborhood potluck and they disappeared before the brownies. Adults love the nostalgic flavor, and kids love the colorful look. It’s a total win-win.
- Unbelievably Delicious : The texture is that perfect balance of chewy and crispy. The candy corn gets a little soft and gooey as it melts into the marshmallow, creating pockets of sweet, creamy flavor in every bite. It’s comfort food in its purest, silliest form.
What makes this recipe different from the million other rice krispie treat recipes out there? It’s the timing. Most recipes have you stir the candy corn in at the very end, which leaves it hard and crunchy. I add it in two stages—half goes in with the marshmallows to melt, and the other half gets folded in at the end. This creates a layered texture that is honestly, next-level. It’s not just another version; it’s the best version. And it’s the kind of treat that makes you close your eyes after the first bite, even if you’re just standing over the kitchen sink eating it.
What Ingredients You Will Need
This recipe uses simple, pantry-friendly ingredients to deliver a bold, sweet, and satisfying treat without any fuss. Here’s what you need to grab:
- 3 tablespoons unsalted butter (plus a little extra for greasing the pan). I prefer salted butter in a pinch, but unsalted lets you control the overall saltiness. If you only have salted, just skip adding any extra salt.
- 1 (10-ounce) bag of mini marshmallows (about 4 cups). The mini ones melt faster and more evenly than the big ones. If you only have jumbo marshmallows, just chop them up a bit before you start.
- 5 cups crispy rice cereal (like Rice Krispies). I’ve tested this with generic store brands, and they work fine, but the name-brand cereal stays crunchier for longer. Just a heads up.
- 1 ½ cups candy corn (about half of a standard 16-ounce bag). You don’t need the whole bag, but you’ll probably eat the rest while you’re waiting for the treats to set. I know I do.
- ¼ teaspoon vanilla extract (optional, but highly recommended). It rounds out the sweetness and adds a little warmth that plays nicely with the candy corn flavor.
- Pinch of flaky sea salt (optional, but trust me on this). A tiny sprinkle on top right after they’re pressed into the pan cuts through the sweetness and makes the whole thing taste way more sophisticated than it has any right to be.
Ingredient Selection Tips: For the best texture, look for fresh candy corn. Stale candy corn gets hard and chalky, and it won’t melt as nicely into the marshmallow. I recommend Brach’s brand for consistent quality. Also, make sure your marshmallows are fresh and soft—stale marshmallows won’t melt into that silky, stretchy glue you need for perfect treats.
Substitution Guidance: You can swap the butter for a dairy-free alternative like Earth Balance if you need these to be vegan. Just make sure to use vegan marshmallows (Dandies brand works great). For a gluten-free option, double-check that your crispy rice cereal is labeled gluten-free, as some brands use malt flavoring. And if you’re not a candy corn fan (I know, I know, it’s controversial), you can swap in chopped-up candy pumpkins or even crushed-up peanut butter cups for a different fall vibe.
Equipment Needed
You don’t need a lot of fancy tools for this one, which is part of the beauty. Here’s what you’ll need:
- A large pot or Dutch oven: You need something big enough to stir everything around without the cereal flying everywhere. A 5-quart pot is perfect. I’ve used a smaller pot before and regretted it—marshmallow got all over the stovetop.
- A silicone spatula or wooden spoon: Silicone is my go-to because it doesn’t scratch the pot and it scrapes the sides clean. A wooden spoon works fine, but it can get a little sticky.
- A 9×13-inch baking dish: This gives you the perfect thickness—not too thin, not too thick. If you want thicker treats, you can use an 8×8-inch pan, but you’ll need to increase the cooking time slightly.
- Parchment paper or wax paper: This is non-negotiable for easy removal. If you skip it, you will be chiseling treats out of the pan with a butter knife. I speak from experience.
- A sharp knife or bench scraper: For cutting clean squares. A pizza cutter also works surprisingly well.
If you don’t have a 9×13 pan, you can use a rimmed baking sheet, just keep an eye on the thickness. And if you don’t have parchment paper, you can grease the pan generously with butter, but it’s not as foolproof. A little investment in parchment paper goes a long way for your sanity.
Preparation Method

Alright, let’s get to it. This is the easy part. Follow these steps, and you’ll have a pan of perfect treats in no time.
- Prep your pan. Line your 9×13-inch baking dish with parchment paper, leaving some overhang on two sides. This creates little handles so you can lift the whole block of treats out later. Lightly grease the parchment with a little butter or non-stick spray. Set it aside.
- Melt the butter. Place your large pot over medium-low heat. Add the 3 tablespoons of butter and let it melt slowly. Don’t rush this—if the heat is too high, the butter will brown and you’ll get a nutty flavor (which isn’t bad, but it’s not what we’re going for here). Swirl the pan occasionally until it’s fully melted.
- Add the marshmallows (and half the candy corn). Once the butter is melted, add the entire bag of mini marshmallows. Stir constantly with your silicone spatula until the marshmallows are about 75% melted. At this point, add ¾ cup of the candy corn (half of your total). Stir until the marshmallows are completely smooth and the candy corn has mostly melted into the mixture. It will look a little streaky with orange and yellow—that’s perfect. Remove the pot from the heat.
- Stir in the vanilla and cereal. Add the ¼ teaspoon of vanilla extract (if using) and give it a quick stir. Then, add the 5 cups of crispy rice cereal all at once. Fold gently until the cereal is evenly coated. You want to be gentle here to avoid crushing the cereal into dust. It should take about 15-20 folds.
- Fold in the remaining candy corn. Add the remaining ¾ cup of candy corn to the pot. Fold it in gently, just a few times. You want some of the candy corn to stay whole and visible, creating little pockets of color and texture. Don’t overmix or they’ll melt completely.
- Press into the pan. Scrape the mixture into your prepared baking dish. Using a piece of wax paper or parchment paper (lightly greased), press the mixture into an even layer. Be firm but gentle—you want it compacted enough to hold together, but not so tight that it becomes rock hard. Pro tip: don’t use your bare hands unless you want to peel marshmallow off your fingers for the next hour.
- Add a finishing touch (optional). While the treats are still warm, sprinkle a tiny pinch of flaky sea salt over the top. This balances the sweetness and adds a little professional touch. Let them cool completely at room temperature, about 30-45 minutes.
- Cut and serve. Once cool, lift the whole block out using the parchment paper handles. Place it on a cutting board. Use a sharp knife (or a pizza cutter) to cut into squares. I like to cut 6 rows by 4 rows to get 24 nice, snack-sized pieces. Wipe the knife clean between cuts for the neatest edges.
Sensory Cues: When the marshmallows are melting, you’ll smell a sweet, buttery aroma. The mixture should look glossy and stretchy when you lift the spatula. When you press the treats into the pan, they should feel warm and pliable but not hot. If they feel too stiff, you’ve overworked them or let them cool too long in the pot.
Troubleshooting Tip: If your mixture is too dry and crumbly, you probably cooked the marshmallows too long or over low heat for too long. Next time, pull the pot off the heat as soon as the marshmallows are smooth. If it’s too sticky and won’t hold its shape, you might have used too much butter or not enough cereal. Add a little more cereal next time, one tablespoon at a time.
Cooking Tips & Techniques
I’ve made these treats about a dozen times now, and I’ve learned a few things the hard way. Here are my best tips for perfect results every time.
Low and slow is the way to go. The biggest mistake people make is cranking up the heat to melt the butter and marshmallows faster. Don’t do it. High heat will scorch the marshmallows, leaving you with a grainy, burnt-tasting mess. Keep it on medium-low and be patient. It takes about 5-7 minutes, and it’s worth every second.
Don’t skip the vanilla. I know it’s optional, but vanilla extract adds a warmth and depth that makes these treats taste more “baked” and less like a science experiment. It rounds out the cloying sweetness of the candy corn and makes them feel more like a real dessert.
Use a wet spatula for pressing. If the mixture is sticking to your spatula or your wax paper, lightly wet it with cold water. The moisture creates a barrier that keeps the marshmallow from clinging. This is a game-changer for getting that perfectly even layer without losing your mind.
Let them cool completely before cutting. I know it’s tempting to cut into them while they’re still warm, but warm treats are a sticky, gooey disaster. They won’t hold their shape, and you’ll end up with ragged edges. Let them sit for at least 30 minutes, or even pop them in the fridge for 15 minutes if you’re impatient. Cold treats cut like a dream.
Wipe your knife between cuts. This is the secret to getting clean, professional-looking squares. Each time you cut, a little bit of marshmallow goo gets on the blade. If you don’t wipe it off, it drags through the next cut and smears everything. Keep a damp paper towel nearby and wipe the blade after every single cut.
I once forgot to add the cereal and just had a pot of melted butter, marshmallows, and candy corn. It was basically a very expensive, very sweet soup. Lesson learned: always measure everything out before you start. Mise en place, baby.
Variations & Adaptations
One of the best things about this recipe is how easy it is to play around with. Here are some of my favorite variations:
- Chocolate Drizzle: Melt about ½ cup of dark chocolate chips with a teaspoon of coconut oil and drizzle it over the cooled treats. The bitterness of the dark chocolate is a perfect foil for the sweet candy corn. It also makes them look really fancy for a party.
- Peanut Butter Swirl: Before you add the cereal, stir in ¼ cup of creamy peanut butter into the melted marshmallow mixture. It adds a savory, nutty depth that’s absolutely killer. If you’re feeling extra, you can also fold in some salted peanuts at the end.
- Pumpkin Spice Version: Add ½ teaspoon of pumpkin pie spice and ¼ teaspoon of ground cinnamon to the marshmallow mixture along with the vanilla. It gives the treats a cozy, autumnal flavor that pairs beautifully with the candy corn. Top with a sprinkle of cinnamon sugar for extra crunch.
- Gluten-Free & Vegan Adaptation: Use a certified gluten-free crispy rice cereal (like One Degree Organics) and vegan marshmallows (Dandies brand is my favorite). Swap the butter for a plant-based alternative. The texture will be slightly different—vegan marshmallows don’t get quite as stretchy—but they’re still delicious.
- Halloween Mix-In: Fold in ½ cup of mini chocolate chips or chopped-up candy bars (like Snickers or Milky Way) along with the remaining candy corn. The chocolate melts slightly and creates little pockets of gooey goodness. It’s a crowd-pleaser for sure.
I personally love the chocolate drizzle version. I made it for a Halloween movie night, and everyone thought I had bought them from a bakery. Little did they know it took me all of five extra minutes.
Serving & Storage Suggestions
These treats are best served at room temperature. The texture is perfectly chewy-crisp, and the candy corn retains a little bit of its snap. If you serve them straight from the fridge, they’ll be a bit firmer, which some people prefer. I say let them sit out for about 10 minutes before serving for the ideal texture.
Presentation ideas: Arrange them on a platter lined with a fall-colored napkin or a piece of burlap. You can also stack them in a mason jar for a cute, rustic look. For a Halloween party, cut them into small squares and serve them on a tray with other treats like creamy slow cooker queso blanco dip for a sweet-and-savory spread. They also pair surprisingly well with a hot cup of iced lavender oat milk latte for a cozy afternoon treat.
Storage: Store leftover treats in an airtight container at room temperature for up to 5 days. Place a piece of parchment paper between layers to prevent them from sticking together. Do not refrigerate them—the fridge dries them out and makes them hard.
Freezer instructions: These freeze beautifully! Wrap individual squares tightly in plastic wrap, then place them in a freezer-safe bag or container. They’ll keep for up to 3 months. To thaw, just let them sit at room temperature for about 20 minutes. The texture comes back almost perfectly. I like to keep a stash in the freezer for last-minute school parties or unexpected guests.
Flavor development: Honestly, these are best the day they’re made. The cereal stays the crunchiest, and the candy corn has that perfect soft-but-not-melted texture. By day two, the treats are a little softer and the candy corn has blended in more, but they’re still delicious. If you’re making them ahead for a party, I recommend making them no more than 24 hours in advance.
Nutritional Information & Benefits
Let’s be real—these are a treat, not a health food. But here’s a rough estimate for one square (based on 24 servings):
- Calories: ~180
- Fat: 4g
- Carbohydrates: 36g
- Sugar: 24g
- Protein: 1g
- Sodium: 115mg
While they’re not exactly nutrient-dense, there are a few small silver linings. The butter provides a little bit of vitamin A, and the crispy rice cereal is fortified with iron and B vitamins. The candy corn is mostly sugar, but hey—sometimes you just need a little joy.
Dietary considerations: These are naturally nut-free (if you don’t add peanut butter), but always check your labels, especially if you’re using a generic cereal brand. They are not vegan or dairy-free unless you make the swaps I mentioned earlier. They are also not low-carb or keto-friendly, so if you’re watching your sugar intake, this might be more of a “special occasion” treat.
I like to think of these as a mental health food. Sometimes you just need a little nostalgia and a lot of sugar, and that’s okay. Balance, right?
Conclusion
These Easy Candy Corn Rice Krispie Treats are proof that you don’t need a complicated recipe to make something memorable. They’re quick, they’re fun, and they’re absolutely perfect for fall. Whether you’re making them for a Halloween party, a school bake sale, or just because you have a bag of candy corn staring at you from the pantry, they deliver every single time.
I love that this recipe is forgiving. You can mess up the timing, use a different cereal, or add your own twist, and they’ll still turn out great. That’s the kind of recipe I want in my back pocket. And honestly? Watching my kids’ faces light up when they see that pan of orange-and-yellow squares is worth every sticky finger and every marshmallow mishap.
So go ahead—give these a try. Customize them to your heart’s content. And when you do, I want to hear about it. Drop a comment below and tell me how they turned out, what variations you tried, or if you managed to not eat the entire pan in one sitting (I certainly didn’t). Happy fall baking, friends!
Frequently Asked Questions
Can I use stale candy corn?
You can, but it won’t melt as nicely. Stale candy corn is harder and drier, so it won’t blend into the marshmallow mixture as smoothly. For the best texture, use fresh candy corn. If you only have stale, try microwaving it for 10 seconds to soften it up before adding it to the pot.
Why did my treats turn out hard?
This usually happens when you overcook the marshmallow mixture. If you cook it too long or over too high heat, the sugar in the marshmallows crystallizes and the mixture becomes hard and brittle. Next time, pull the pot off the heat as soon as the marshmallows are fully melted and smooth. Also, make sure you’re pressing them gently into the pan—over-compacting can also make them dense and hard.
Can I use a different cereal?
Absolutely! You can use any crispy rice cereal, including generic store brands. Just keep in mind that some brands are crunchier than others. If you use a puffed rice cereal (like the kind that comes in a bulk bin), it will be less crunchy and more delicate. You can also try using Cocoa Pebbles or Fruity Pebbles for a fun flavor twist.
How do I prevent the treats from sticking to my knife?
Wipe your knife clean between each cut with a damp paper towel. You can also lightly spray your knife with non-stick cooking spray before you start cutting. For the cleanest cuts, let the treats cool completely (or even chill them in the fridge for 15 minutes) before you attempt to cut them.
Can I double this recipe?
Yes, but you’ll need a bigger pot. A standard 5-quart pot can handle a single batch, but for a double batch, you’ll need at least an 8-quart pot. You can also bake the double batch in a 12×17-inch rimmed baking sheet. Just keep an eye on the thickness—you might need to adjust the pressing time to get an even layer.
Pin This Recipe!
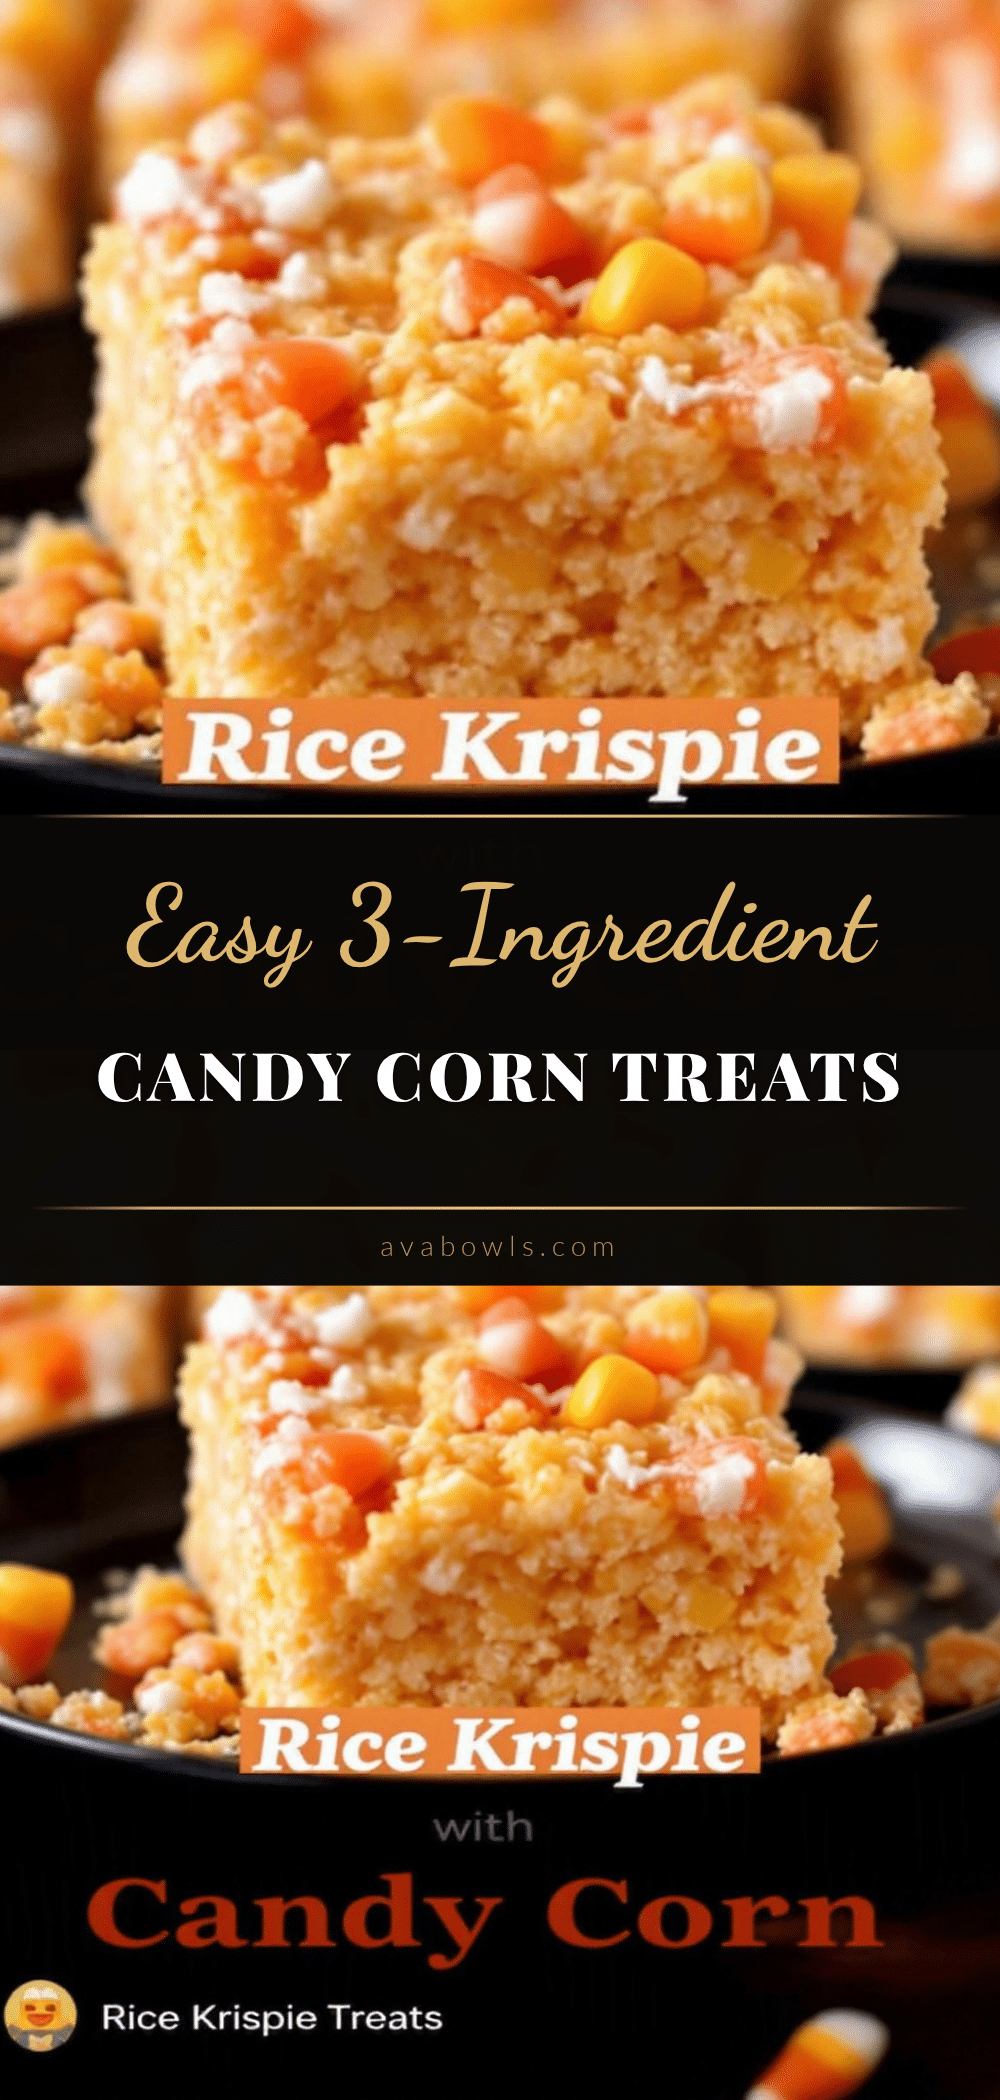
Easy Candy Corn Rice Krispie Treats: Perfect Fall Dessert

These Easy Candy Corn Rice Krispie Treats are a quick, no-fuss fall dessert that combines crispy rice cereal, gooey marshmallows, and candy corn for a nostalgic, crowd-pleasing treat. Ready in about 15 minutes, they’re perfect for Halloween parties, school bake sales, or a cozy night in.
- Prep Time: 15 minutes
- Cook Time: 5 minutes
- Total Time: 20 minutes
- Yield: 24 servings 1x
- Category: Dessert
- Cuisine: American
Ingredients
- 3 tablespoons unsalted butter (plus extra for greasing)
- 1 (10-ounce) bag mini marshmallows (about 4 cups)
- 5 cups crispy rice cereal (like Rice Krispies)
- 1 ½ cups candy corn (about half of a 16-ounce bag)
- ¼ teaspoon vanilla extract (optional)
- Pinch of flaky sea salt (optional)
Instructions
- Line a 9×13-inch baking dish with parchment paper, leaving overhang on two sides. Lightly grease the parchment with butter or non-stick spray. Set aside.
- Place a large pot over medium-low heat. Add 3 tablespoons of butter and melt slowly, swirling occasionally, until fully melted.
- Add the entire bag of mini marshmallows to the melted butter. Stir constantly until marshmallows are about 75% melted. Add ¾ cup of candy corn (half of total) and stir until marshmallows are completely smooth and candy corn is mostly melted. Remove from heat.
- Stir in ¼ teaspoon vanilla extract (if using). Add 5 cups of crispy rice cereal all at once. Fold gently until cereal is evenly coated, about 15-20 folds.
- Add remaining ¾ cup of candy corn. Fold gently a few times, leaving some candy corn whole and visible.
- Scrape mixture into prepared baking dish. Using a piece of lightly greased wax paper or parchment paper, press mixture into an even layer. Be firm but gentle.
- While still warm, sprinkle a pinch of flaky sea salt over the top (optional). Let cool completely at room temperature, about 30-45 minutes.
- Once cool, lift the block out using parchment handles. Place on a cutting board. Cut into squares (6 rows by 4 rows for 24 pieces). Wipe knife clean between cuts for neat edges.
Notes
For best texture, use fresh candy corn and fresh marshmallows. Add candy corn in two stages: half melts into the marshmallow mixture, half stays whole for pockets of color and texture. Let treats cool completely before cutting for clean edges. Store in an airtight container at room temperature for up to 5 days. Freeze individual squares wrapped in plastic wrap for up to 3 months.
Nutrition
- Serving Size: 1 square
- Calories: 180
- Sugar: 24
- Sodium: 115
- Fat: 4
- Saturated Fat: 2
- Carbohydrates: 36
- Protein: 1
Keywords: candy corn rice krispie treats, fall dessert, Halloween treats, easy rice krispie treats, no-bake dessert


