My sister did not trust a no-bake cheesecake. Not even a little bit.
We were standing in her kitchen last October, and she was holding a can of pumpkin puree like it was evidence of something suspicious. “So you’re just going to let it sit in the fridge and hope it sets?” She poked the graham cracker crust I’d just pressed into the pan. “This feels like a science experiment that’s going to fail.”
Honestly, I got it. The idea of a creamy, sliceable cheesecake without a single minute in the oven does sound like a stretch. I’d been burned by wobbly, runny no-bake desserts before—the kind that look beautiful in photos but collapse into a puddle the second you cut into them. So when I started testing this creamy no-bake pumpkin cheesecake with graham cracker crust, I wasn’t trying to prove anything to anyone. I just really wanted fall dessert without turning on the oven.
The first batch was promising but too soft. The second was better, but the pumpkin flavor got lost. The third version? My sister took a bite, paused, and then took another bite without saying anything. That’s her version of a standing ovation. “Okay,” she finally said, scraping the plate. “This is actually good.”
High praise from a skeptic. And honestly, that’s the kind of recipe I want to share with you—one that earned its stripes through trial and error, not just good intentions.
Why You’ll Love This Recipe
This isn’t just another pumpkin dessert you’ll forget about by Thanksgiving. This is the one people ask for by name.
- No oven required. Seriously, zero baking. Your oven can stay off while you whip up something that tastes like it took hours of effort. Perfect for those days when you want dessert but don’t want to heat up the whole house.
- Simple ingredients. Cream cheese, pumpkin puree, whipped topping, and a few pantry staples. Nothing weird, nothing hard to find. You might already have everything.
- Make-ahead friendly. This cheesecake actually gets better after a few hours in the fridge. Make it the night before and forget about it until dessert time.
- Crowd-pleaser. I’ve brought this to Friendsgiving dinners, potlucks, and casual get-togethers. Every single time, someone asks for the recipe. Even the pumpkin skeptics come back for seconds.
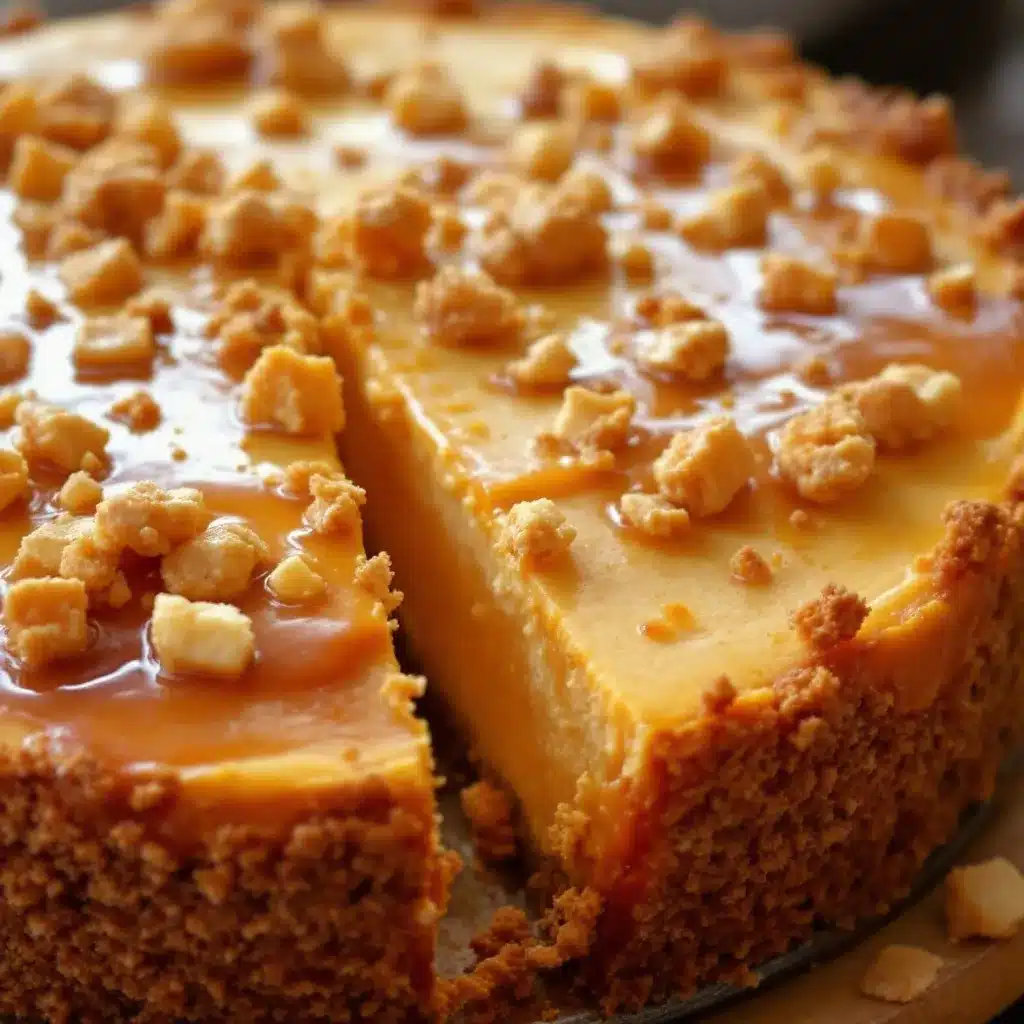
- That perfect texture. It’s creamy without being heavy, firm enough to slice cleanly, and melts on your tongue like the best cheesecake should. No weird gelatin texture here.
What makes this version different from all the other no-bake pumpkin cheesecakes out there? It comes down to technique. I spent weeks testing ratios to get that perfect balance between pumpkin flavor and creamy richness. Most recipes either taste too much like pumpkin pie filling or not enough like cheesecake. This one hits the sweet spot. Plus, the graham cracker crust gets a little upgrade that makes it stay crisp instead of getting soggy.
This is the kind of dessert that makes people close their eyes after the first bite. It’s comfort food at its finest—easy enough for a Tuesday night, impressive enough for a holiday table.
What Ingredients You Will Need
This recipe uses simple, wholesome ingredients to create something that tastes far more complicated than it actually is. Most of these are probably sitting in your kitchen right now.
For the Graham Cracker Crust
- 2 cups graham cracker crumbs (about 14-16 full sheets, crushed finely) — You can buy pre-crushed crumbs to save time, but I prefer crushing my own. The texture is better and you control how fine it gets.
- ½ cup unsalted butter, melted — Salted butter works too, just skip the added salt later. I use Land O’Lakes for consistent results.
- ¼ cup granulated sugar — Adds just enough sweetness to balance the salty butter.
- ¼ teaspoon salt — Only if using unsalted butter. This tiny amount makes a big difference.
For the Pumpkin Cheesecake Filling
- 2 blocks (16 ounces) cream cheese, softened to room temperature — This is non-negotiable. Cold cream cheese will leave you with lumpy filling. Let it sit on the counter for at least an hour. I recommend Philadelphia brand for the smoothest results.
- 1 cup pumpkin puree — Not pumpkin pie filling. Make sure you grab the 100% pure pumpkin. Libby’s is my go-to because it’s consistently thick and not watery.
- ¾ cup powdered sugar — Dissolves more easily than granulated sugar and keeps the filling silky smooth.
- ½ cup packed light brown sugar — Adds depth and that warm, almost caramel-like sweetness that pairs so well with pumpkin.
- 1 teaspoon vanilla extract — Pure vanilla, not imitation. It makes a difference here.
- 2 teaspoons pumpkin pie spice — Store-bought is fine, or make your own with cinnamon, nutmeg, ginger, and cloves. I sometimes add an extra ¼ teaspoon of cinnamon because I love it.
- 1 cup heavy whipping cream — This gets whipped into stiff peaks and folded in. It’s what gives the cheesecake its light, airy texture without needing gelatin.
- 2 tablespoons powdered sugar — For sweetening the whipped cream. Keeps it stable longer.
For the Topping (Optional but Recommended)
- ½ cup heavy whipping cream — For extra whipped cream on top.
- 1 tablespoon powdered sugar — To sweeten the topping.
- ¼ teaspoon vanilla extract — Because vanilla makes everything better.
- Caramel sauce for drizzling — Store-bought or homemade. I’m partial to the jarred kind from the baking aisle.
- Crushed pecans or gingersnap cookies — For crunch and texture.
Equipment Needed
You don’t need fancy equipment for this recipe, but a few key tools make the process much smoother.
- 9-inch springform pan — This is important. A springform pan lets you remove the sides cleanly without destroying your beautiful cheesecake. If you don’t have one, a deep-dish pie plate works, but you won’t get those clean slices.
- Electric hand mixer or stand mixer — You could technically whisk everything by hand, but your arm will hate you. A hand mixer is perfect for this.
- Mixing bowls — At least two medium-sized ones.
- Measuring cups and spoons — For accuracy.
- Rubber spatula — For scraping every last bit of filling into the pan.
- Plastic wrap or aluminum foil — For covering the cheesecake while it chills.
- Small saucepan or microwave-safe bowl — For melting butter.
- Food processor or zip-top bag and rolling pin — For crushing graham crackers. I’ve used both methods and honestly, the bag and rolling pin works just fine.
If you’re new to no-bake desserts, don’t stress about having everything perfect. A 9-inch pie dish works in a pinch, though the slices won’t be as tall and impressive. I’ve made this in a regular glass pie plate before and it still disappeared just as fast.
Preparation Method
Let’s walk through this step by step. Trust the process, and you’ll end up with a cheesecake that looks and tastes like you spent all day on it.
Step 1: Make the Graham Cracker Crust
Start by crushing your graham crackers into fine crumbs. If you’re using a food processor, pulse until you have a uniform sandy texture. If you’re using a bag and rolling pin, seal the crackers in a zip-top bag and go to town on them. Make sure there aren’t any large chunks left—they’ll create weak spots in the crust.
Pour the crumbs into a medium bowl. Add the sugar and salt (if using) and stir to combine. Pour the melted butter over the mixture and stir with a fork until every crumb is coated. It should look like wet sand and hold together when you squeeze a handful.
Press the mixture firmly into the bottom of your springform pan. I use the bottom of a flat measuring cup to get it even and compact. Press about ¼ inch up the sides of the pan if you want a crust that goes up the edge. Place the pan in the refrigerator while you make the filling. This helps the butter set and keeps the crust from getting soggy later.
Step 2: Whip the Cream
In a clean, chilled mixing bowl, pour in 1 cup of heavy whipping cream. Add 2 tablespoons of powdered sugar. Using your hand mixer, beat on medium-high speed until stiff peaks form. This takes about 3-4 minutes. You’ll know it’s ready when you lift the beaters and the cream holds its shape without drooping.
Set the whipped cream aside in the refrigerator. Cold whipped cream holds its structure better when you fold it into the cream cheese mixture later.
Step 3: Make the Pumpkin Cheesecake Filling
In a large mixing bowl, beat the softened cream cheese with your hand mixer until it’s completely smooth. No lumps allowed. This takes about 2 minutes on medium speed. Scrape down the sides and bottom of the bowl with your spatula.
Add the pumpkin puree, powdered sugar, brown sugar, vanilla extract, and pumpkin pie spice. Beat on medium speed until everything is combined and smooth. Again, scrape the bowl well. The mixture should be a beautiful orange color and smell like fall in a bowl.
Here’s where patience matters. You need to make sure the cream cheese is truly smooth before adding anything else. I learned this the hard way after serving a lumpy cheesecake to guests. Not my finest moment.
Step 4: Fold in the Whipped Cream
Take your reserved whipped cream out of the fridge. Add about one-third of it to the pumpkin mixture. Fold it in gently with your rubber spatula—cut through the center, scrape along the bottom, and turn the mixture over. Repeat until it’s mostly combined, then add the next third.
Keep folding until no white streaks remain. The mixture should be light, airy, and uniform in color. Don’t overmix or you’ll deflate all that air you worked to create. A few gentle folds are better than aggressive stirring.
Step 5: Assemble the Cheesecake
Take your springform pan with the chilled crust out of the fridge. Spoon the filling into the pan, spreading it evenly with your spatula. Give the pan a few gentle taps on the counter to release any air bubbles. Smooth the top as best you can.
Cover the pan with plastic wrap or aluminum foil. Place it in the refrigerator for at least 6 hours, but overnight is better. I know waiting is hard, but this is where the magic happens. The cheesecake needs time to set properly so you get clean slices instead of a messy pile.
Step 6: Add the Topping
Once the cheesecake is fully set, it’s time for the fun part. Whip the remaining ½ cup of heavy cream with 1 tablespoon of powdered sugar and ¼ teaspoon of vanilla until soft peaks form. Spread or pipe this over the top of the cheesecake.
Drizzle with caramel sauce and sprinkle crushed pecans or gingersnap cookies on top if you’re feeling fancy. Run a knife around the edge of the pan before releasing the springform clasp. Slice and serve cold.
Cooking Tips & Techniques
I’ve made this recipe more times than I can count, and I’ve messed it up plenty along the way. Here’s what I’ve learned so you don’t have to make the same mistakes.
Room temperature cream cheese is everything. I cannot stress this enough. If your cream cheese is cold, you’ll end up with little white lumps that never go away no matter how long you beat it. Leave it on the counter for at least an hour. If you’re in a hurry, cut it into small cubes and let it sit for 30 minutes.
Don’t skip the crust chilling step. That 10 minutes in the fridge while you make the filling makes a huge difference. It firms up the butter and creates a barrier that keeps the crust from absorbing moisture from the filling. Nobody wants a soggy crust.
Fold, don’t stir. When you’re adding the whipped cream to the pumpkin mixture, use a gentle folding motion. Stirring too aggressively will deflate the whipped cream and leave you with a dense, heavy cheesecake instead of a light, creamy one.
Patience with setting time. I know it’s tempting to cut into the cheesecake after 4 hours, but trust me on this. Give it the full 6-8 hours, or better yet, overnight. The texture improves dramatically. One time I tried to rush it and ended up with a slice that kind of slumped over. Still tasted good, but not pretty.
Use a warm knife for clean slices. Run your knife under hot water, dry it off, then make your cut. Wipe the blade clean between slices. This gives you those beautiful, Instagram-worthy pieces.
Variations & Adaptations
This recipe is forgiving and adaptable. Here are some ways to make it your own.
Gluten-free version: Swap the graham crackers for gluten-free graham crackers or use crushed gluten-free gingersnaps. I’ve tested this with Schär brand graham crackers and it worked beautifully. The texture is slightly different but still delicious.
Dairy-free option: Use dairy-free cream cheese (I like Kite Hill or Violife) and coconut cream instead of heavy whipping cream. Chill the can of coconut cream overnight and scoop out the solid part. The texture won’t be exactly the same—slightly less firm—but the flavor is still wonderful.
Pumpkin spice variation: If you don’t have pumpkin pie spice, make your own. Mix 1 teaspoon cinnamon, ½ teaspoon ginger, ¼ teaspoon nutmeg, and ¼ teaspoon cloves. I actually prefer this blend because I can adjust the cinnamon to my liking.
Chocolate twist: Add ¼ cup melted dark chocolate to the filling before folding in the whipped cream. Chocolate and pumpkin are an underrated combination. I tried this on a whim one Thanksgiving and it was a hit.
Mini cheesecakes: Use a muffin tin with liners instead of a springform pan. Press the crust into the bottom of each liner, fill, and chill. These are perfect for parties or when you want portion control. Reduce chilling time to about 4 hours.
Serving & Storage Suggestions
This cheesecake is best served cold, straight from the fridge. Let it sit at room temperature for about 5-10 minutes before slicing—just enough to take the chill off but not long enough to soften.
For presentation, I like to drizzle caramel sauce in a zigzag pattern across the top and sprinkle crushed gingersnaps around the edges. A dollop of extra whipped cream on each slice never hurts. If you’re feeling extra, add a few candied pecans on top.
This pairs beautifully with a warm cup of coffee or a creamy matcha latte for a cozy fall afternoon treat. The slight bitterness of coffee balances the sweetness of the cheesecake perfectly. For a fun party spread, serve it alongside Philly cheesesteak sliders for a sweet and savory combination that always gets compliments.
Storage: Cover the cheesecake tightly with plastic wrap or store it in an airtight container in the refrigerator. It will keep for up to 5 days, though it rarely lasts that long in my house. The texture stays consistent for the first 3 days, then starts to soften slightly.
Freezer instructions: This cheesecake freezes beautifully. Wrap the entire cheesecake (or individual slices) in plastic wrap, then a layer of aluminum foil. Freeze for up to 3 months. Thaw in the refrigerator overnight before serving. The texture remains creamy and smooth.
Reheating note: Don’t reheat this cheesecake. It’s meant to be served cold. If you want a warm pumpkin dessert, try a different recipe entirely.
Nutritional Information & Benefits
Here’s the estimated nutritional breakdown for one slice (based on 12 servings):
| Nutrient | Amount Per Serving |
|---|---|
| Calories | 385 |
| Total Fat | 28g |
| Saturated Fat | 16g |
| Cholesterol | 85mg |
| Sodium | 290mg |
| Total Carbohydrates | 32g |
| Dietary Fiber | 1g |
| Sugars | 22g |
| Protein | 4g |
Pumpkin is rich in vitamin A and fiber, which makes this dessert slightly more nutritious than your average cheesecake. The cream cheese adds calcium and protein, though let’s be honest—this is still a treat. I like to think of it as a dessert that happens to have some redeeming qualities.
This recipe is vegetarian. For gluten-free, use the variation mentioned above. It contains dairy and gluten in its standard form. If you’re serving this at a gathering with dietary restrictions, it’s worth making a separate version to accommodate everyone.
Frequently Asked Questions
Can I use pumpkin pie filling instead of pumpkin puree?
No, please don’t. Pumpkin pie filling already has sugar and spices added. It will throw off the sweetness and texture of your cheesecake. Stick with 100% pure pumpkin puree for the best results.
Why is my cheesecake not setting?
This usually happens for one of three reasons: the cream cheese wasn’t softened enough, the whipped cream wasn’t whipped to stiff peaks, or you didn’t let it chill long enough. Give it more time in the fridge—sometimes 8 hours is what it needs. If it’s still soft after that, you may have under-whipped the cream.
Can I use Cool Whip instead of homemade whipped cream?
You can, but the texture won’t be as good. Homemade whipped cream gives the cheesecake a lighter, more luxurious texture. Cool Whip contains stabilizers that can make the filling slightly denser. If you’re in a pinch, thawed Cool Whip works, but I recommend making your own.
How far in advance can I make this cheesecake?
You can make it up to 2 days ahead of time. The flavor actually improves after a day in the fridge as the spices meld together. If you’re preparing for a holiday, make it the day before and add the topping just before serving.
Can I skip the crust and make this crustless?
Yes, but you’ll need to grease the pan well and the texture will be softer since there’s no crust to absorb any excess moisture. It’s still delicious—think of it as a pumpkin mousse pie. Just know that slicing will be a bit messier without the structure the crust provides.
Conclusion
This creamy no-bake pumpkin cheesecake with graham cracker crust is the kind of dessert that makes people pause mid-conversation and look down at their plate with genuine surprise. It’s that good.
What I love most about this recipe is how it brings people together. I’ve watched my pumpkin-skeptic sister polish off two slices without a word of complaint. I’ve brought it to gatherings where strangers became friends over a shared love of creamy, spiced perfection. It’s more than just a dessert—it’s a conversation starter, a comfort giver, and honestly, a little bit of fall magic in every bite.
Don’t be afraid to make this your own. Add extra spice if you like things warm. Skip the topping if you want something simpler. Swap in your favorite crust variation. The best recipes are the ones that adapt to your kitchen and your taste.
I’d love to hear how yours turns out. Drop a comment below if you tried a fun variation, or tag me in your photos if you share them online. And if you’re looking for more cozy fall recipes to fill your kitchen with warmth, try this alongside a bowl of creamy butternut squash soup for a meal that feels like a hug.
Happy no-baking, friend. Your oven-free dessert adventure starts now.
Pin This Recipe!
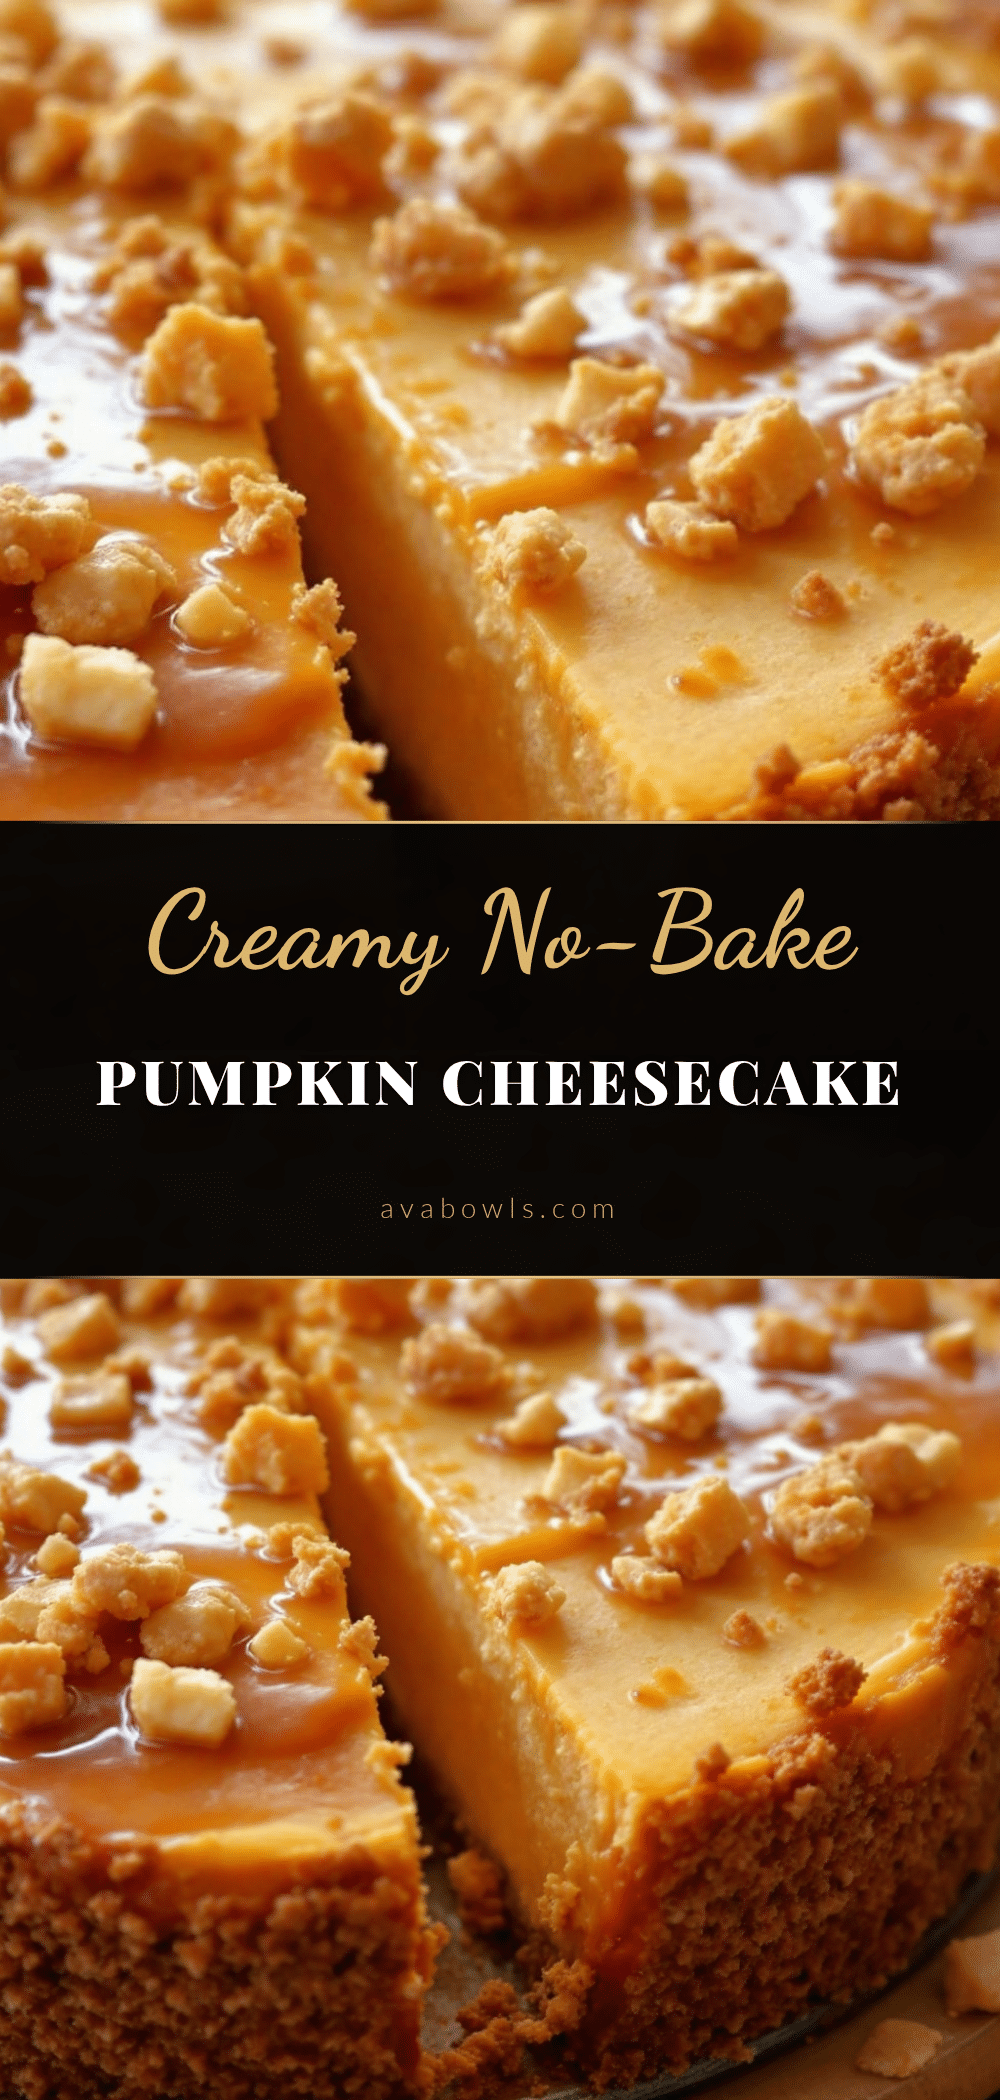
Easy No-Bake Pumpkin Cheesecake with Graham Cracker Crust
A creamy, sliceable no-bake pumpkin cheesecake with a crisp graham cracker crust. Perfect for fall without turning on the oven, this dessert is make-ahead friendly and a crowd-pleaser.
- Prep Time: 20 minutes
- Cook Time: 0 minutes
- Total Time: 6 hours 20 minutes (includes chilling)
- Yield: 12 servings 1x
- Category: Dessert
- Cuisine: American
Ingredients
- 2 cups graham cracker crumbs (about 14–16 full sheets, crushed finely)
- ½ cup unsalted butter, melted
- ¼ cup granulated sugar
- ¼ teaspoon salt (only if using unsalted butter)
- 2 blocks (16 ounces) cream cheese, softened to room temperature
- 1 cup pumpkin puree (not pumpkin pie filling)
- ¾ cup powdered sugar
- ½ cup packed light brown sugar
- 1 teaspoon vanilla extract
- 2 teaspoons pumpkin pie spice
- 1 cup heavy whipping cream
- 2 tablespoons powdered sugar (for sweetening whipped cream)
- ½ cup heavy whipping cream (for topping)
- 1 tablespoon powdered sugar (for topping)
- ¼ teaspoon vanilla extract (for topping)
- Caramel sauce for drizzling (optional)
- Crushed pecans or gingersnap cookies (optional)
Instructions
- Make the crust: Crush graham crackers into fine crumbs. In a medium bowl, combine crumbs, sugar, and salt (if using). Pour in melted butter and stir until every crumb is coated. Press firmly into the bottom of a 9-inch springform pan, pressing about ¼ inch up the sides. Refrigerate while making the filling.
- Whip the cream: In a clean, chilled mixing bowl, beat 1 cup heavy whipping cream with 2 tablespoons powdered sugar on medium-high speed until stiff peaks form, about 3-4 minutes. Set aside in the refrigerator.
- Make the filling: In a large mixing bowl, beat softened cream cheese until smooth, about 2 minutes. Add pumpkin puree, ¾ cup powdered sugar, brown sugar, vanilla extract, and pumpkin pie spice. Beat until combined and smooth.
- Fold in whipped cream: Add one-third of the reserved whipped cream to the pumpkin mixture and fold gently with a rubber spatula. Repeat with remaining whipped cream until no white streaks remain. Do not overmix.
- Assemble: Remove springform pan with crust from fridge. Spoon filling into pan and spread evenly. Tap pan gently on counter to release air bubbles. Smooth top. Cover with plastic wrap or foil and refrigerate for at least 6 hours, preferably overnight.
- Add topping: Once set, whip remaining ½ cup heavy cream with 1 tablespoon powdered sugar and ¼ teaspoon vanilla until soft peaks form. Spread or pipe over cheesecake. Drizzle with caramel sauce and sprinkle crushed pecans or gingersnaps if desired. Run a knife around edge before releasing springform clasp. Slice and serve cold.
Notes
Room temperature cream cheese is essential for a smooth filling. Chill the crust while making the filling to prevent sogginess. Fold whipped cream gently to keep the filling light. For clean slices, use a warm knife and wipe between cuts. Cheesecake can be made up to 2 days ahead; add topping just before serving. Freezes well for up to 3 months.
Nutrition
- Serving Size: 1 slice
- Calories: 385
- Sugar: 22
- Sodium: 290
- Fat: 28
- Saturated Fat: 16
- Carbohydrates: 32
- Fiber: 1
- Protein: 4
Keywords: no-bake pumpkin cheesecake, pumpkin cheesecake, no-bake cheesecake, fall dessert, pumpkin dessert, graham cracker crust, easy cheesecake


