For a while, I just accepted that roasted pumpkin seeds were going to be either burnt on the outside or chewy in the middle. Every October, I’d pull the slimy strings away from the pumpkins we carved, rinse the seeds until my fingers pruned, and toss them with salt and oil. And every year, the same thing happened—some came out pale and soft, others turned dark and bitter. I figured that was just how it was. A fun tradition, but not exactly a snack you’d look forward to.
Then one fall, I got tired of the gamble. I started paying attention to the details—the way the seeds felt when they were completely dry, the temperature of the oven, the timing of the salt. It wasn’t a dramatic breakthrough. More like a slow realization that the problem wasn’t the seeds. It was the process. So I tested a few things, made a mess of the kitchen, and eventually landed on a method that gave me exactly what I wanted: every single seed crisp, golden, and salty in that satisfying way that makes you reach for another handful without thinking.
This recipe for crispy roasted pumpkin seeds with sea salt is the result of those small adjustments. It’s not complicated, and it doesn’t require any special equipment. It just works. And honestly, that’s the kind of snack I want around—something easy that delivers every time.
Why You’ll Love This Recipe
Let’s be real—there are a lot of pumpkin seed recipes out there. But this one actually delivers on the crispy promise. Here’s why it stands out:
- Perfectly Crispy Every Time: No more burnt edges or sad, chewy centers. This method gives you uniform crunch from the first seed to the last.
- Simple Ingredients: You only need pumpkin seeds, olive oil, and sea salt. That’s it. No fancy spice blends or hard-to-find items.
- Quick & Easy: From start to finish, you’re looking at about 30 minutes. Most of that is hands-off oven time.
- Great for Fall Snacking: Whether you’re carving pumpkins for Halloween or just want a seasonal snack, these seeds fit right in.
- Crowd-Pleaser: I’ve brought these to gatherings and watched them disappear. Kids and adults both go for them.
What makes this version different from the others is the boiling step. I know it sounds extra, but boiling the seeds before roasting changes the texture completely. It helps the insides cook through while the outsides get that golden, crunchy shell. If you’ve tried other methods and been disappointed, this is the one that will change your mind.
There’s something about the combination of warm, salty crunch that just feels right. It’s the kind of snack you can eat while watching a movie, packing lunch for the week, or just standing in the kitchen. No judgment here.
What Ingredients You Will Need
This recipe uses a short list of ingredients, but each one plays a role in getting that perfect texture and flavor. Here’s what you’ll need:
- Fresh pumpkin seeds (from one medium pumpkin, about 1 ½ cups): You can use seeds from any variety of pumpkin or winter squash. Sugar pumpkins work well, but even the biggest carving pumpkin will do. Just make sure to separate the seeds from the stringy pulp as best you can.
- Water (4 cups): For the boiling step. It helps the seeds cook evenly from the inside out.
- Sea salt (1 tablespoon for the boiling water, plus more for finishing): I like using fine sea salt for the boil and flaky sea salt for the final sprinkle. It gives you that nice salty hit on the outside.
- Olive oil (1 tablespoon): Helps the seeds brown and gives them a light, savory coating. You can use avocado oil or melted coconut oil if you prefer.
That’s it. Four ingredients, and two of them are water and salt. If you want to get creative, you can add spices later, but the base recipe is beautifully simple.
When it comes to picking the right pumpkin, I usually go for a medium-sized sugar pumpkin. The seeds are smaller and more tender than the giant carving pumpkins. But honestly, any pumpkin works. I’ve used seeds from a big Jack-o’-lantern pumpkin and they turned out great—just a bit larger and crunchier.
If you’re buying pre-cleaned pumpkin seeds from the store, you can still use this recipe. Just skip the rinsing step and go straight to boiling. The result won’t be quite the same as fresh, but it’s still good.
For the salt, I recommend sticking with sea salt. Table salt has additives that can make the seeds taste a little metallic. Flaky sea salt is my favorite for the final sprinkle because it gives you those little bursts of saltiness without overwhelming the seed.
Equipment Needed
You don’t need much for this recipe, which is part of why I love it. Here’s what you’ll need:
- Colander: For rinsing the seeds and draining the boiling water.
- Medium saucepan: For boiling the seeds. Any pot will work.
- Baking sheet: A rimmed baking sheet is best to keep the seeds from rolling off.
- Parchment paper (optional): Makes cleanup easier, but you can skip it if you don’t have any.
- Kitchen towel: For drying the seeds after boiling. A clean dish towel works perfectly.
- Spatula: For stirring the seeds halfway through roasting.
If you don’t have parchment paper, just grease the baking sheet lightly with oil. The seeds won’t stick much anyway. And if you don’t have a colander, a strainer works just fine. I’ve also used a slotted spoon to scoop the seeds out of the water when I was too lazy to haul out the colander. It worked.
One tip: use a light-colored baking sheet if you have one. Dark sheets absorb more heat and can brown the seeds faster on the bottom. I learned this the hard way when I used my dark non-stick pan and ended up with burnt bottoms on half the batch.
Preparation Method
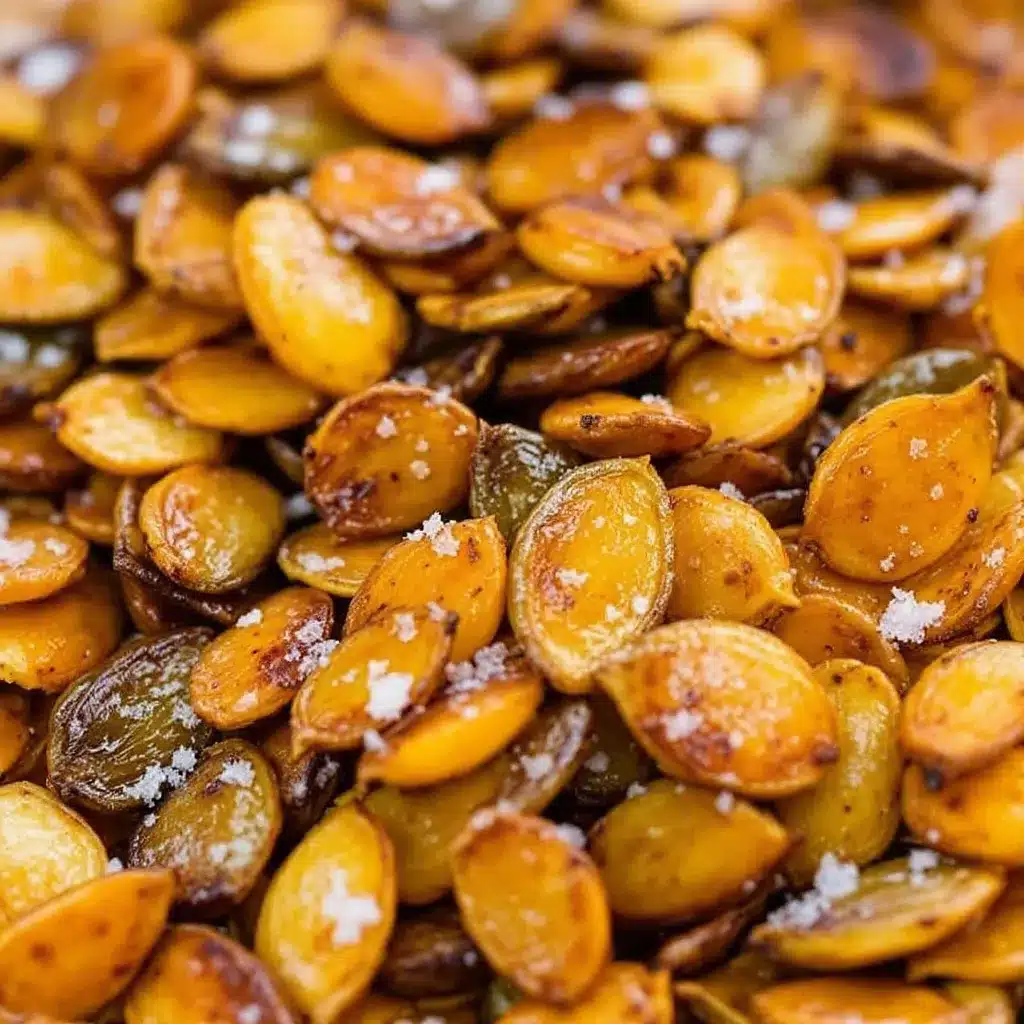
This method is straightforward, but the details matter. Follow these steps and you’ll get crispy, golden seeds every time.
-
Clean the seeds: After carving your pumpkin, separate the seeds from the stringy pulp. Place them in a colander and rinse under cold water, rubbing them gently with your fingers to remove any remaining bits. It doesn’t have to be perfect—a little pulp won’t hurt. Pat the seeds dry with a towel.
-
Boil the seeds: In a medium saucepan, bring 4 cups of water to a boil. Add 1 tablespoon of sea salt and stir until dissolved. Add the pumpkin seeds and boil for exactly 10 minutes. This step is crucial—it helps the seeds cook evenly from the inside and gives them that all-over crunch. Don’t skip it.
-
Drain and dry: Pour the seeds into the colander and let them drain. Spread them out on a clean kitchen towel and pat them dry. They should feel dry to the touch but still slightly damp. Let them sit for 5 minutes while you preheat the oven.
-
Preheat the oven: Set your oven to 350°F (175°C). If your oven runs hot, go with 325°F (160°C) to be safe. I’ve burned enough batches to know that a slightly cooler oven is better than a hot one.
-
Season the seeds: In a small bowl, toss the dried seeds with 1 tablespoon of olive oil. Make sure they’re all lightly coated. Spread them in a single layer on a parchment-lined baking sheet. Don’t overcrowd—if they’re piled up, they’ll steam instead of roast.
-
Roast: Place the baking sheet in the oven and roast for 20 minutes. Halfway through, pull the sheet out and stir the seeds with a spatula. This helps them brown evenly. After 20 minutes, check for doneness. They should be golden brown and smell nutty. If they’re still pale, give them another 3-5 minutes.
-
Salt and cool: As soon as the seeds come out of the oven, sprinkle them with flaky sea salt while they’re still warm. The salt sticks better this way. Let them cool completely on the baking sheet—they’ll continue to crisp up as they cool. Don’t rush this step. I’ve made the mistake of eating them warm and wondering why they weren’t crunchy. Patience pays off here.
Your kitchen will smell amazing during this process. It’s one of those cozy, fall scents that makes you want to curl up with a blanket and a good book.
Cooking Tips & Techniques
Over the years, I’ve made plenty of mistakes with pumpkin seeds. Here are the lessons I learned so you don’t have to repeat them.
Don’t skip the boil: I know it seems like an extra step, but boiling the seeds is what gives them that even crunch. Without it, the insides stay chewy while the outsides burn. Trust the process.
Dry them well: After boiling, take the time to pat the seeds dry. Excess moisture will create steam in the oven, and steam is the enemy of crispiness. I spread mine on a towel and let them air-dry for a few minutes while the oven preheats.
Watch the oven: Ovens vary a lot. Your 350°F might run hotter than mine. Check the seeds at the 15-minute mark the first time you make this recipe. You’re looking for a deep golden color and a nutty aroma. If they start to smell burned, pull them out immediately.
Stir halfway: This is non-negotiable. The seeds on the edges of the pan will brown faster than the ones in the middle. A quick stir halfway through ensures even roasting.
Salt while warm: This is one of those small details that makes a big difference. The oil on the warm seeds helps the salt stick. If you wait until they’re cool, the salt will just fall off.
Let them cool completely: I know it’s tempting to dig in right away, but the seeds need time to set. They’ll be a little soft when they come out of the oven, but as they cool, they’ll firm up into that perfect crunch. Give them at least 20 minutes.
One time, I got distracted and left the seeds in the oven an extra 5 minutes. They came out dark and bitter. I ate them anyway because I hate wasting food, but it wasn’t enjoyable. Set a timer. Your future self will thank you.
Variations & Adaptations
Once you’ve mastered the basic crispy roasted pumpkin seeds with sea salt, you can start experimenting. Here are some variations I’ve tried and loved:
- Spicy Chili Lime: Before roasting, toss the seeds with olive oil, chili powder, cumin, and a pinch of cayenne. After roasting, squeeze fresh lime juice over the top and sprinkle with salt. The tangy, spicy combo is addictive.
- Sweet Cinnamon Sugar: Skip the salt and toss the seeds with melted butter, cinnamon, and a tablespoon of brown sugar. Roast at 325°F (160°C) for 15-18 minutes. These are great for snacking or sprinkling on a fresh Greek yogurt bowl with pomegranate for extra crunch.
- Garlic Parmesan: Add ½ teaspoon of garlic powder and 2 tablespoons of grated Parmesan cheese to the oiled seeds before roasting. The cheese gets crispy and adds a savory depth that’s hard to resist.
- Everything Bagel Seasoning: After roasting, toss the warm seeds with everything bagel seasoning (sesame seeds, poppy seeds, dried garlic, dried onion, and salt). It’s a fun twist that works great on salads or soups.
- Maple Rosemary: Drizzle the seeds with maple syrup and toss with fresh chopped rosemary before roasting. The sweetness pairs beautifully with the earthy rosemary. I like adding these to a hearty Tuscan white bean soup with kale for a crunchy topping.
If you’re avoiding oil, you can roast the seeds dry. They won’t brown as evenly, and the salt won’t stick as well, but they’ll still be crispy. Just keep a close eye on them so they don’t burn.
For a nut-free alternative to healthy energy balls with dates, oats, and dark chocolate, try swapping the nuts for these roasted pumpkin seeds. They add the same satisfying crunch without the allergens.
Serving & Storage Suggestions
These crispy roasted pumpkin seeds with sea salt are incredibly versatile. Here are some ways to serve and store them.
Serving Ideas:
- Enjoy them straight from the bowl as a snack.
- Sprinkle over salads for added crunch. They pair especially well with fall salads featuring apple, cranberry, and goat cheese.
- Use as a topping for soups. I love adding them to a creamy roasted tomato basil soup or butternut squash soup.
- Add to trail mix with dried fruit and dark chocolate chips.
- Crush them and use as a crust for chicken or fish.
Storage:
- Store cooled seeds in an airtight container at room temperature. They’ll stay crispy for up to 2 weeks. I use a glass jar with a tight-fitting lid.
- If you live in a humid climate, add a silica gel packet to the container to absorb moisture. It sounds weird, but it works.
- Do not refrigerate—the moisture will make them soft.
- For longer storage, freeze the seeds in a freezer-safe bag for up to 3 months. Thaw at room temperature and re-crisp in a 300°F (150°C) oven for 5 minutes if needed.
Reheating Tip: If your seeds lose their crunch over time, spread them on a baking sheet and warm them in a 300°F (150°C) oven for 5 minutes. Let them cool completely before storing again. This brings back the crispiness without over-toasting them.
Flavors actually get better after a day or two. The salt settles in, and the seeds develop a deeper, toastier taste. So don’t worry if you make them ahead of time—they’ll still be delicious.
Nutritional Information & Benefits
Pumpkin seeds are more than just a tasty snack—they’re packed with nutrition. Here’s what you’re getting in a one-ounce serving (about ¼ cup):
- Calories: 151
- Protein: 7 grams
- Fat: 13 grams (mostly healthy unsaturated fats)
- Fiber: 1.7 grams
- Magnesium: 37% of the Daily Value
- Zinc: 23% of the Daily Value
- Iron: 14% of the Daily Value
Health Benefits:
- Magnesium: Supports muscle function, nerve health, and bone density. Many people don’t get enough magnesium in their diet, and pumpkin seeds are an easy way to add some.
- Zinc: Important for immune function, wound healing, and cell growth. A handful of these seeds gives you a solid boost.
- Antioxidants: Pumpkin seeds contain antioxidants like vitamin E and carotenoids, which help protect your cells from damage.
- Heart Health: The healthy fats and fiber in pumpkin seeds support cardiovascular health when eaten as part of a balanced diet.
Dietary Notes: This recipe is naturally gluten-free, dairy-free, and vegan. It’s also low in sugar and fits into most eating plans. If you’re watching your sodium, you can reduce the salt or use a salt substitute.
I wouldn’t call pumpkin seeds a superfood—that term gets thrown around too much. But they’re a solid, nutrient-dense snack that actually tastes good. And that’s a win in my book.
Conclusion
This recipe for crispy roasted pumpkin seeds with sea salt is proof that simple things can be the most satisfying. It’s not fancy. It’s not complicated. But when you bite into a perfectly crunchy, salty seed, it feels like a small victory.
I love this recipe because it turns something that usually gets thrown away into something worth looking forward to. It’s a reminder that good food doesn’t have to be expensive or elaborate. Sometimes it’s just about paying attention to the details and giving a humble ingredient the respect it deserves.
I encourage you to make this recipe your own. Try different seasonings, experiment with spice levels, or keep it classic with sea salt. The method is solid, so you can play with the flavors however you like.
If you make these crispy roasted pumpkin seeds, I’d love to hear how they turn out. Drop a comment below and let me know what variations you tried. Share this post with a friend who loves fall as much as you do, and save it for your next pumpkin carving night. Happy snacking!
Frequently Asked Questions
Can I use store-bought pumpkin seeds instead of fresh ones?
Yes, you can. If you’re using raw, unsalted pumpkin seeds from the store, skip the cleaning step and go straight to boiling. The boiling step still helps with texture. If they’re already roasted, you can skip the oven and just season them, but they won’t be as crispy.
Why do I need to boil the seeds before roasting?
Boiling the seeds helps them cook evenly from the inside out. Without this step, the outer shell can burn before the inside gets crispy. The salt in the boiling water also seasons the seeds from the inside, giving you better flavor throughout.
How do I know when the seeds are fully roasted?
You’re looking for a deep golden color and a nutty, toasty aroma. The seeds will still feel slightly soft when you take them out of the oven, but they’ll firm up as they cool. If they smell burned, you’ve gone too far.
Can I make these in an air fryer?
Absolutely. After boiling and drying the seeds, toss them with oil and salt, then air fry at 350°F (175°C) for 10-12 minutes, shaking the basket halfway through. Keep an eye on them—air fryers run hot and can burn the seeds quickly.
How long do these stay crispy?
Stored in an airtight container at room temperature, they’ll stay crispy for up to 2 weeks. If they start to soften, spread them on a baking sheet and warm them in a 300°F (150°C) oven for 5 minutes to bring back the crunch.
Pin This Recipe!
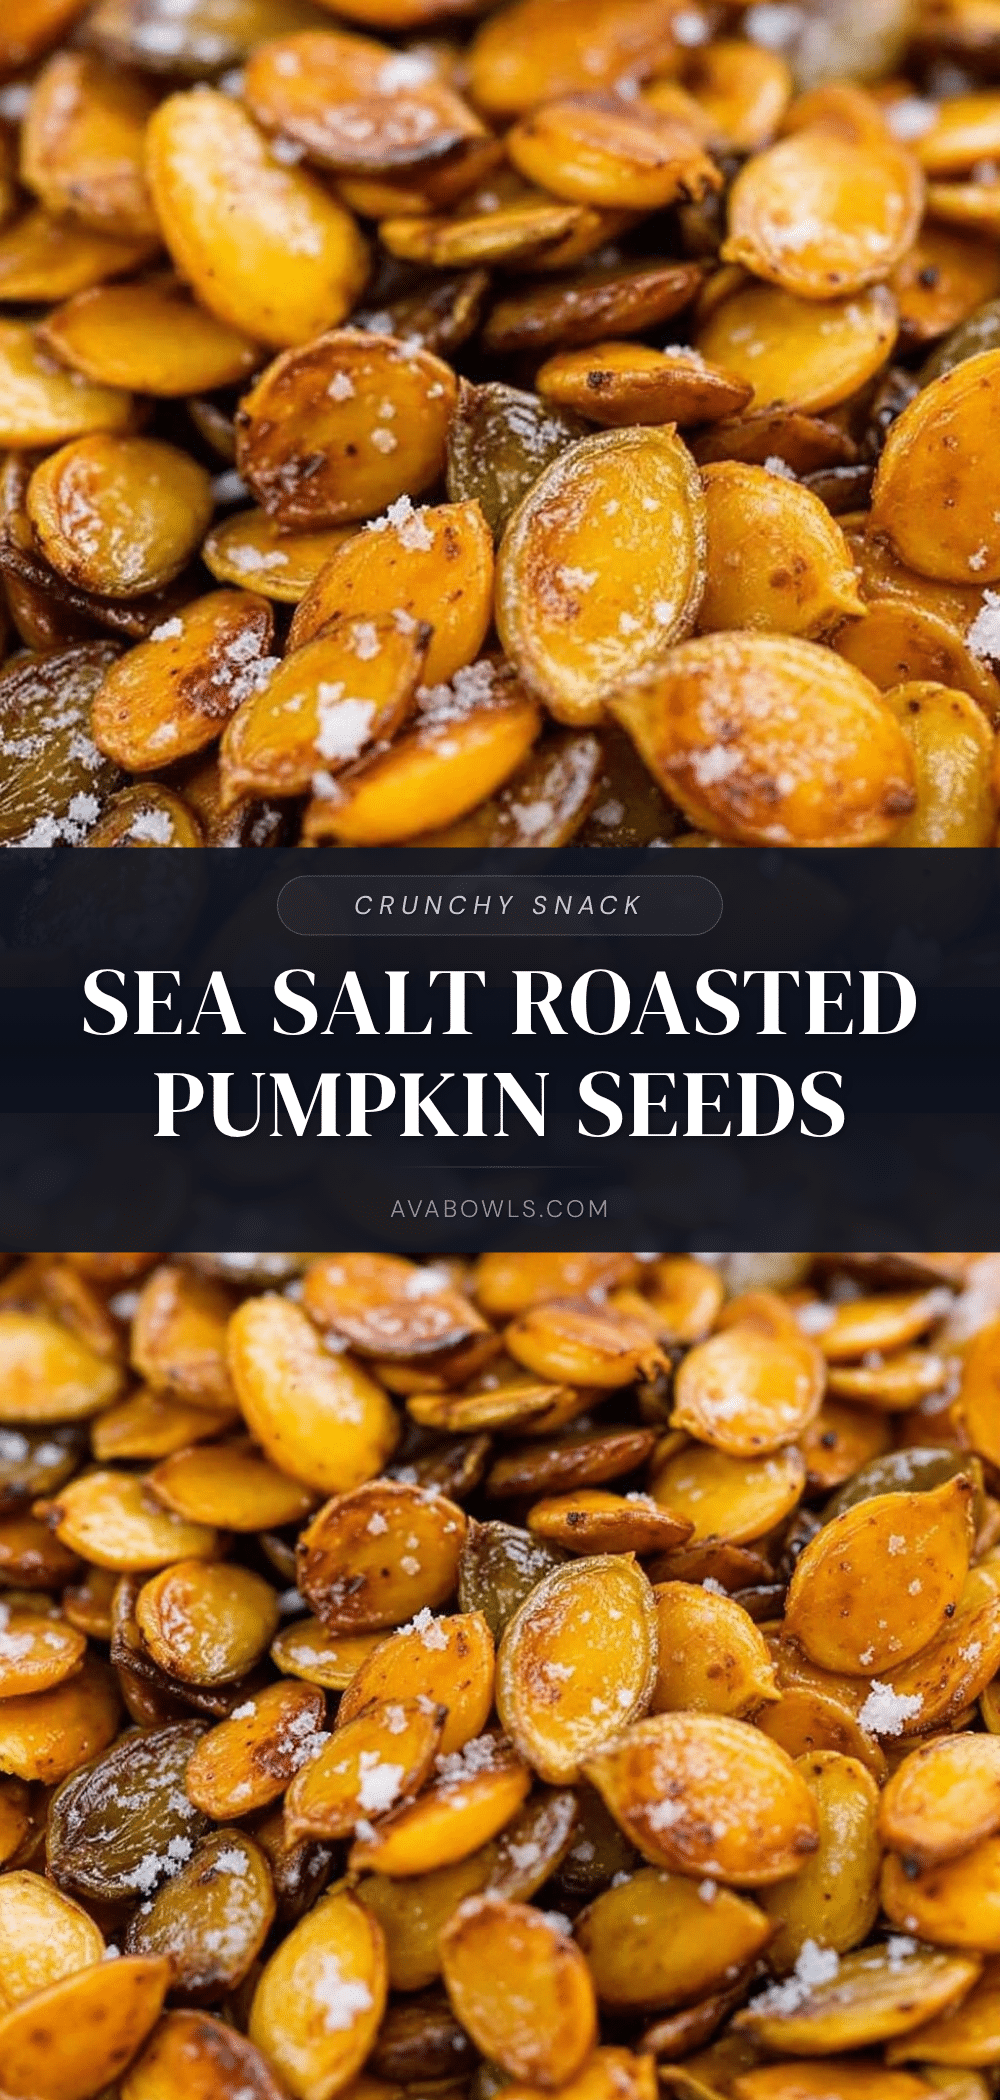
Crispy Roasted Pumpkin Seeds with Sea Salt – Easy Snack
This recipe delivers perfectly crispy, golden pumpkin seeds every time with a simple boiling step that ensures even crunch. Made with just pumpkin seeds, olive oil, and sea salt, it’s an easy, crowd-pleasing fall snack.
- Prep Time: 15 minutes
- Cook Time: 20 minutes
- Total Time: 35 minutes
- Yield: 4 servings
- Category: Snack
- Cuisine: American
Ingredients
- Fresh pumpkin seeds (from one medium pumpkin, about 1 ½ cups)
- Water (4 cups)
- Sea salt (1 tablespoon for boiling water, plus more for finishing)
- Olive oil (1 tablespoon)
Instructions
- Clean the seeds: After carving your pumpkin, separate the seeds from the stringy pulp. Place them in a colander and rinse under cold water, rubbing gently to remove any remaining bits. Pat the seeds dry with a towel.
- Boil the seeds: In a medium saucepan, bring 4 cups of water to a boil. Add 1 tablespoon of sea salt and stir until dissolved. Add the pumpkin seeds and boil for exactly 10 minutes.
- Drain and dry: Pour the seeds into the colander and let them drain. Spread them out on a clean kitchen towel and pat them dry. They should feel dry to the touch but still slightly damp. Let them sit for 5 minutes while you preheat the oven.
- Preheat the oven: Set your oven to 350°F (175°C). If your oven runs hot, go with 325°F (160°C) to be safe.
- Season the seeds: In a small bowl, toss the dried seeds with 1 tablespoon of olive oil. Make sure they’re all lightly coated. Spread them in a single layer on a parchment-lined baking sheet. Don’t overcrowd.
- Roast: Place the baking sheet in the oven and roast for 20 minutes. Halfway through, pull the sheet out and stir the seeds with a spatula. After 20 minutes, check for doneness. They should be golden brown and smell nutty. If still pale, give them another 3-5 minutes.
- Salt and cool: As soon as the seeds come out of the oven, sprinkle them with flaky sea salt while they’re still warm. Let them cool completely on the baking sheet—they’ll continue to crisp up as they cool.
Notes
Don’t skip the boiling step—it ensures even crunch. Dry seeds well after boiling to avoid steaming. Stir halfway through roasting for even browning. Salt while warm for better adherence. Let cool completely for maximum crispiness. Store in an airtight container at room temperature for up to 2 weeks.
Nutrition
- Serving Size: 1/4 cup (about 1 oun
- Calories: 151
- Sugar: 0.5
- Sodium: 200
- Fat: 13
- Saturated Fat: 2
- Carbohydrates: 5
- Fiber: 1.7
- Protein: 7
Keywords: roasted pumpkin seeds, crispy pumpkin seeds, sea salt pumpkin seeds, fall snack, easy snack, pumpkin seeds recipe


