My phone buzzed at 3:47 PM on a Friday afternoon, and I knew before I even looked that our plans were about to change. My sister’s text read: “So… my kids are now yours for the next four hours. Neighborhood Halloween party got cancelled. Surprise! 🎃” I stared at my fridge, which contained exactly one package of Oreos, some cream cheese I’d bought for a bagel that never happened, and a half-empty bag of gummy worms from a movie night two weeks ago. The kids would be here in twenty minutes, and Pinterest-worthy Halloween treats were apparently expected.
I’ve never been the mom who has elaborate themed snacks ready. Let’s be real—most of my Halloween “decorating” involves shoving a spider ring into a store-bought cupcake and calling it a day. But something about the panic of an empty kitchen and three excited kids on the way made me get creative. I remembered making something similar years ago, before kids, for a party where everyone brought the most ridiculous dessert they could think of. I’d thrown together crushed cookies, pudding, and those same gummy worms, and people actually asked for the recipe.
That afternoon, with cream cheese softening on the counter and Oreos getting smashed with a rolling pin (very therapeutic, honestly), those Easy Halloween Graveyard Dirt Cups with Gummy Worms became our impromptu party activity. The kids crushed cookies, stirred pudding, and argued over who got to place the first gummy worm. By the time my sister came back, we had a tray of little graveyard cups that looked creepy, cute, and completely irresistible. This is one of those recipes that feels like it belongs at every Halloween gathering, and I’m honestly a little proud of how it turned out from such a chaotic start.
Why You’ll Love This Recipe
These Easy Halloween Graveyard Dirt Cups with Gummy Worms are the kind of dessert that makes everyone smile, no matter their age. I’ve tested this recipe at three different Halloween parties now, and it’s never failed to disappear within the first hour. Here’s why it works so well:
- No Baking Required : This is a completely no-bake dessert. You don’t even need to turn on the oven. If you can stir and crush, you can make these.
- Kid-Friendly Assembly : Let the little ones get involved. Crushing cookies, layering pudding, and placing gummy worms is basically a craft project they can eat afterward.
- Budget-Friendly Ingredients : You probably already have most of these in your pantry. No fancy chocolate or specialty stores required.
- Make-Ahead Magic : These actually taste better after a few hours in the fridge. The cookies soften slightly, and the flavors meld together perfectly.
- Customizable for Any Crowd : Dairy-free? Gluten-free? I’ve made versions for both, and they work just as well.
What sets this recipe apart from the dozens of dirt cup recipes online is the cream cheese layer. Most versions just use instant pudding and Cool Whip, which is fine, but the cream cheese adds a richness that makes these feel more like a real dessert and less like a kids’ snack. It’s the difference between “oh, that’s cute” and “wait, can I have another one?”
I’ve brought these to Halloween potlucks, school parties, and even a grown-up costume party where everyone pretended to be too sophisticated for them—until the tray was empty. There’s something about eating “dirt” that brings out the kid in everyone. Plus, watching someone bite into a cup and find a gummy worm peeking out never gets old.
What Ingredients You Will Need
This recipe uses simple, everyday ingredients that come together to create something that looks way more complicated than it actually is. Here’s what you’ll need to make these Easy Halloween Graveyard Dirt Cups with Gummy Worms:
For the Cream Cheese Layer
- 8 oz cream cheese, softened to room temperature (this is important—cold cream cheese will leave lumps)
- 1/2 cup granulated sugar (adds sweetness and helps the cream cheese blend smoothly)
- 1 teaspoon vanilla extract (use pure vanilla if you have it, but imitation works fine)
- 2 cups cold milk (whole milk gives the creamiest texture, but 2% works too)
- 1 box (3.4 oz) instant vanilla pudding mix (don’t use cook-and-serve—it won’t set properly)
- 1 1/2 cups Cool Whip or whipped topping, thawed (or homemade whipped cream if you’re feeling fancy)
For the Dirt Layer
- 1 package (14.3 oz) Oreo cookies (regular or Double Stuf—both work, but Double Stuf gives richer crumbs)
- 3 tablespoons unsalted butter, melted (helps the crumbs stick together slightly for that realistic dirt texture)
For the Graveyard Decorations
- 1 cup gummy worms (I prefer the sour ones for extra flavor contrast)
- 12-15 Milano cookies or rectangular cookies (for gravestones—you can also use chocolate wafer cookies)
- Black writing icing or melted dark chocolate (for writing “R.I.P.” on gravestones)
- Optional: candy pumpkins, skeleton bones candy, or edible eyeballs for extra creepy factor
Ingredient Tips from My Kitchen
I’ve learned a few things from making these multiple times. First, don’t skip softening the cream cheese. I tried rushing it once by microwaving it, and ended up with little cream cheese lumps throughout the pudding layer. Not the end of the world, but not as smooth as it should be.
For the Oreos, I recommend using a food processor if you have one. If not, put them in a zip-top bag and go to town with a rolling pin—it’s actually pretty satisfying. You want a mix of fine crumbs and slightly chunkier pieces for that realistic dirt texture. Too fine, and it looks like cocoa powder. Too chunky, and it looks like, well, chunky Oreos.
If you’re looking for a dairy-free version, I’ve successfully used dairy-free cream cheese (Kite Hill works well), oat milk, and coconut whipped topping. The texture is slightly different, but still delicious. For a gluten-free option, use gluten-free chocolate sandwich cookies—they’re widely available now and work perfectly.
I recommend using the sour gummy worms rather than the regular ones. The tanginess cuts through the sweetness of the pudding and cream cheese layers, creating a better balance. Plus, sour gummy worms feel more “Halloween-y” somehow.
Equipment Needed
You don’t need any fancy equipment for these Easy Halloween Graveyard Dirt Cups with Gummy Worms, which is part of why they’re so perfect for last-minute Halloween treats.
- Small clear cups or glasses : I use 8-ounce plastic cups from the dollar store, but small mason jars, wine glasses, or even paper cups work. Clear cups let you see the layers, which is half the fun.
- Electric mixer or whisk : A hand mixer makes the cream cheese layer smooth and lump-free. You can do it by hand, but your arm will get tired.
- Food processor or zip-top bag and rolling pin : For crushing the Oreos into dirt. Both methods work; the bag method is more cathartic.
- Medium mixing bowls : One for the cream cheese mixture, one for the pudding, and one for the crushed cookies.
- Spatula : For scraping every last bit of that cream cheese mixture into the cups. Trust me, you won’t want to waste any.
- Small offset spatula or butter knife : For smoothing the tops of the dirt layers and making them look neat.
If you don’t have an electric mixer, you can whisk the cream cheese mixture by hand—just make sure the cream cheese is really soft first. I’ve done it both ways, and while the mixer is easier, hand-whisking builds character (and arm muscles).
For the cups, I’ve used everything from fancy stemless wine glasses for adult parties to tiny paper cups for kids’ parties. The size doesn’t matter as long as you can see the layers. Pro tip: if you’re using disposable cups, get the clear plastic ones—they’re sturdier than paper and show off the dirt layers beautifully.
Preparation Method
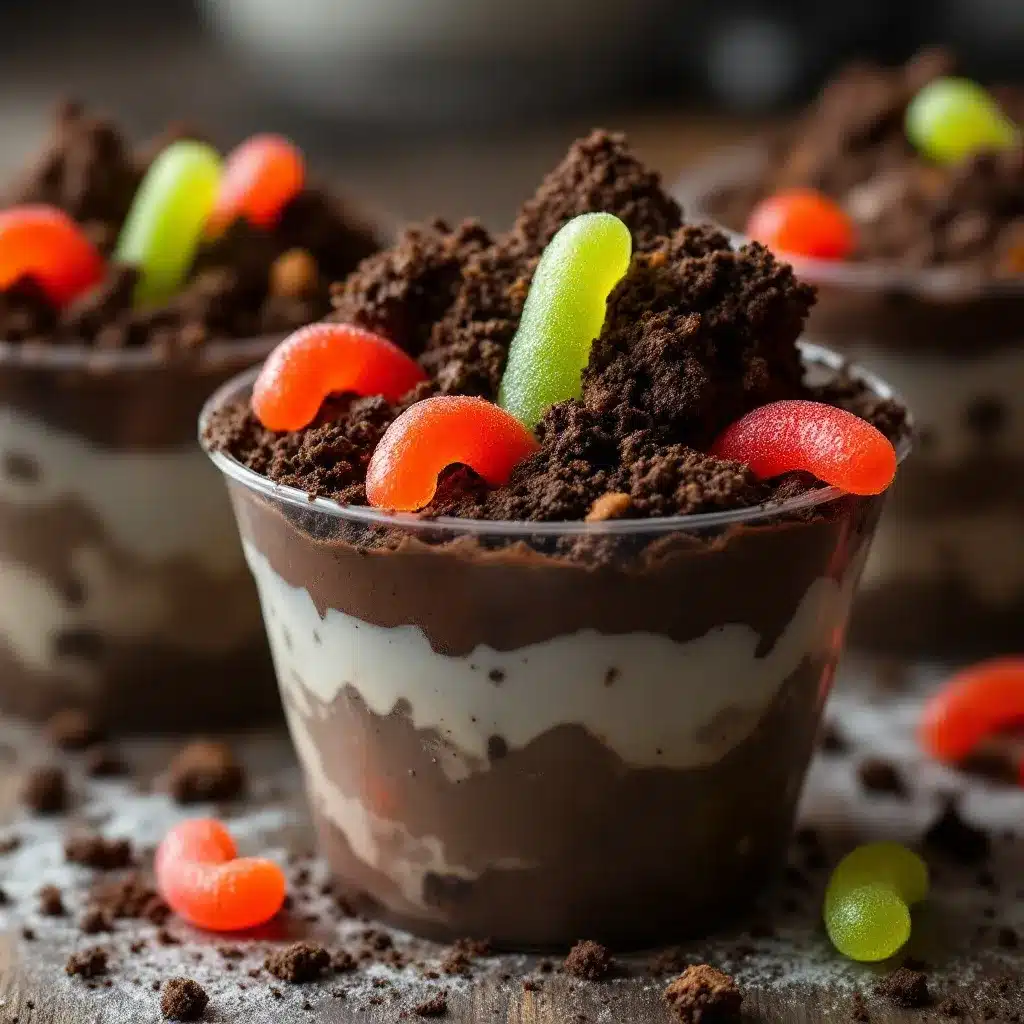
Making these Easy Halloween Graveyard Dirt Cups with Gummy Worms is straightforward, but there are a few tricks I’ve learned to make them turn out perfectly every time.
Step 1: Make the Cream Cheese Base
In a medium bowl, beat the softened cream cheese with an electric mixer until smooth and fluffy, about 2 minutes. Add the sugar and vanilla extract, and beat until well combined, scraping down the sides of the bowl as needed. This should take another minute or so. The mixture should be smooth with no visible lumps. Set this aside while you prepare the pudding.
Step 2: Prepare the Pudding
In a separate medium bowl, whisk together the cold milk and instant vanilla pudding mix. Whisk for about 2 minutes until the pudding starts to thicken. It will be quite thin at first, then suddenly it will start to set. Let it sit for 5 minutes to fully thicken—this is important for the right texture.
Step 3: Combine the Layers
Pour the prepared pudding into the cream cheese mixture. Gently fold them together using a spatula until just combined. Don’t overmix, or the mixture can become too thin. You want it to be thick and creamy, like a mousse. Once combined, gently fold in the thawed Cool Whip until the mixture is uniform in color and texture. The final mixture should be light, fluffy, and slightly thick.
Step 4: Crush the Oreos
While the pudding mixture sets, crush the Oreos. If using a food processor, pulse until you get a mixture of fine crumbs and small chunks. If using the bag method, place the Oreos in a large zip-top bag, seal it, and crush them with a rolling pin until you achieve the desired texture. Add the melted butter and mix until the crumbs are evenly moistened. This helps the “dirt” hold together slightly and gives it a more realistic texture.
Step 5: Prepare the Gravestones
If you’re using Milano cookies or similar rectangular cookies, write “R.I.P.” on them with black writing icing or melted dark chocolate. Let them set while you assemble the cups. You can also use candy pumpkins or skeleton bones for decoration—I’ve done both, and they add a nice touch.
Step 6: Assemble the Cups
Now for the fun part. Spoon about 2 tablespoons of the cream cheese-pudding mixture into the bottom of each cup. Spread it evenly. Add a layer of crushed Oreos on top—about 1 1/2 tablespoons per cup. Place a few gummy worms on top of the Oreo layer, pressing them in slightly so they look like they’re crawling out of the dirt. Repeat the layers: another layer of pudding mixture, another layer of crushed Oreos. You should end with a dirt layer on top.
Step 7: Decorate
Place a gravestone cookie into each cup at an angle, as if it’s sticking out of the dirt. Add a few more gummy worms on top, positioning some so they look like they’re emerging from the dirt. You can also add candy pumpkins, skeleton bones, or edible eyeballs for extra Halloween flair. The more creepy, the better.
Step 8: Chill
Refrigerate the cups for at least 2 hours before serving. This allows the layers to set and the flavors to meld together. The cookies will soften slightly, and the pudding will firm up. I’ve found that overnight chilling actually makes them even better—the texture becomes more cohesive, and the flavors deepen.
Sensory Cues
When the pudding mixture is ready, it should be thick enough to hold its shape when you lift the spatula. The Oreo crumbs should look like dark, slightly moist soil—not dry and dusty, but not wet and clumpy either. When you press a gummy worm into the top layer, it should stay in place without sinking completely into the dirt.
Common Issues and Fixes
If your pudding mixture is too thin, you probably didn’t let the pudding set long enough before adding the Cool Whip. Let it sit for the full 5 minutes next time. If the mixture is too thick, add a splash of milk and fold gently. If the Oreo crumbs are too fine, you’ve over-processed them—next time, pulse less. And if the gummy worms sink into the pudding layer, your mixture is too thin, or you added them before the layers had time to set.
Cooking Tips & Techniques
After making these Easy Halloween Graveyard Dirt Cups with Gummy Worms more times than I care to count, I’ve picked up a few tricks that make the process smoother and the results better.
Temperature Matters
This is the most important tip I can give you: make sure your cream cheese is truly at room temperature. I’m talking leave-it-on-the-counter-for-an-hour soft. Cold cream cheese will leave lumps that no amount of mixing can fix. Trust me, I’ve tried. If you’re in a hurry, cut the cream cheese into small cubes and let them sit for 15-20 minutes—that helps them soften faster.
Layer Strategically
When you’re layering the cups, don’t just dump everything in. Use a spoon to spread each layer evenly. This ensures every bite has the perfect ratio of creamy pudding to crunchy dirt to chewy gummy worms. I’ve had cups where someone got a huge clump of Oreo crumbs and no pudding—not ideal.
Let the Pudding Set Properly
Instant pudding is forgiving, but it does need time to set. After whisking, let it sit for the full 5 minutes before adding it to the cream cheese mixture. If you rush this step, your final mixture will be runny, and the layers will blur together instead of staying distinct.
Don’t Overmix the Cool Whip
When you fold in the Cool Whip, use a gentle hand. Overmixing can deflate the whipped topping, making the mixture dense instead of light and fluffy. Fold until just combined—a few streaks of white are fine.
Make Extra Oreo Crumbs
I always make a little more “dirt” than I think I need. Having extra crumbs means you can top each cup generously, and if some get knocked off during transport, you have spares. Also, the extra crumbs make a great topping for ice cream later.
Presentation Tips
For a more dramatic effect, serve these cups on a black tray or platter. Add some fake spider webs, plastic spiders, or Halloween-themed napkins around the cups. The visual presentation makes a huge difference, especially if you’re bringing these to a party or school event.
Timing Your Assembly
These cups come together in about 20 minutes of active time, but they need at least 2 hours to chill. I usually make them the night before a party. The texture actually improves overnight—the cookies soften just enough, and the flavors meld together beautifully.
Variations & Adaptations
One of the best things about these Easy Halloween Graveyard Dirt Cups with Gummy Worms is how easily you can adapt them to different tastes and dietary needs.
Chocolate Pudding Version
Swap the vanilla pudding for chocolate instant pudding. This gives you a double-chocolate experience that’s even more decadent. The chocolate version pairs especially well with the cream cheese layer, creating a flavor similar to chocolate cheesecake. I’ve made this version for adults, and it’s always a hit.
Peanut Butter Twist
Add 1/3 cup creamy peanut butter to the cream cheese mixture before adding the pudding. Beat it until smooth. The peanut butter adds richness and a savory note that balances the sweetness. This version is dangerously good—I’ve caught myself eating it straight from the bowl.
Dairy-Free Adaptation
Use dairy-free cream cheese (Kite Hill or Violife work well), oat milk or almond milk for the pudding, and coconut whipped topping. The texture will be slightly different—a bit lighter and less rich—but still delicious. I’ve served this version to dairy-free friends, and they didn’t feel like they were missing out.
Gluten-Free Option
Use gluten-free chocolate sandwich cookies for the dirt layer. Most major brands now offer gluten-free versions that taste almost identical to the original. Check the labels on your gummy worms too—some brands use wheat starch, though most are gluten-free.
Spooky Spider Cups
Instead of graveyard themes, turn these into spider cups. Use black licorice strings for spider legs, place a chocolate truffle or large chocolate-covered raisin in the center for the body, and add candy eyes. These are especially fun for kids who might be scared of gummy worms.
Pumpkin Patch Version
Add a layer of pumpkin puree mixed with a little cinnamon and nutmeg between the pudding and Oreo layers. Top with candy pumpkins instead of gummy worms. This version feels more fall-themed and is perfect for Halloween parties that lean into the harvest season.
Mini Bite-Size Cups
Use shot glasses or small paper cups for bite-sized versions. These are perfect for parties where guests might want to try multiple desserts. You can also serve them in hollowed-out orange halves for a fun pumpkin presentation.
If you’re looking for more Halloween party inspiration, I highly recommend trying these alongside my Crispy Baked Buffalo Cauliflower Bites with Creamy Ranch Dip for a savory option. The spicy cauliflower balances the sweet dirt cups perfectly. For a festive drink to go with them, my Creamy Pink Drink Copycat Recipe makes a fun, non-alcoholic option that kids and adults both enjoy.
Serving & Storage Suggestions
These Easy Halloween Graveyard Dirt Cups with Gummy Worms are best served cold, straight from the refrigerator. The contrast between the chilled, creamy pudding and the crunchy Oreo dirt is part of what makes them so satisfying.
Serving Temperature
Serve them chilled, but not ice-cold. If they’ve been in the fridge overnight, let them sit at room temperature for about 10 minutes before serving. This softens the cream cheese layer slightly and makes the texture more luscious.
Presentation Ideas
Arrange the cups on a black tray or platter for maximum Halloween effect. Add fake spider webs, plastic spiders, or Halloween-themed napkins around the cups. If you’re serving these at a party, consider labeling them with a small sign that says “Graveyard Dirt Cups” or “Worm Dirt.” People love the theme.
What to Serve With Them
These dirt cups are rich and sweet, so they pair well with something light and refreshing. A simple fruit salad or a cup of hot apple cider balances the richness nicely. For a full Halloween dessert spread, serve them alongside Red Velvet Pancakes with Cream Cheese Glaze (just skip the heart shape and add Halloween sprinkles) for a breakfast-for-dessert option that’s always a hit.
Storage Instructions
Store leftover dirt cups in the refrigerator, covered, for up to 3 days. The texture changes slightly over time—the Oreo crumbs absorb moisture from the pudding and become softer, more like actual dirt. Some people prefer this texture; others like the crunch. If you prefer crunchy dirt, add a fresh layer of crushed Oreos just before serving.
Freezing Tips
You can freeze these cups, but the texture won’t be the same. The pudding mixture can become watery when thawed, and the gummy worms can become hard and chewy. If you absolutely need to make them ahead, freeze them without the gummy worms and add those fresh after thawing.
Transporting to Parties
If you’re bringing these to a party, assemble them in the cups, cover each cup with plastic wrap, and transport them in a shallow box or baking dish to keep them upright. The gravestones and gummy worms can be added at the party for maximum freshness and visual impact.
How Flavors Develop
These cups actually taste better the next day. The flavors meld together, the cookies soften slightly, and the cream cheese layer becomes more pronounced. If you can resist eating them right away, make them a day ahead for the best results.
Nutritional Information & Benefits
Let’s be honest—these Easy Halloween Graveyard Dirt Cups with Gummy Worms are a treat, not a health food. But here’s the nutritional breakdown for one serving (based on 12 servings per recipe):
- Calories: approximately 320-350 per cup
- Fat: 18-22g (mostly from cream cheese and butter)
- Carbohydrates: 38-42g (from sugar, cookies, and pudding)
- Protein: 5-7g (from cream cheese and milk)
- Fiber: 1-2g (minimal, from the cookies)
- Sugar: 28-32g
Health Benefits (Such as They Are)
The cream cheese provides some calcium and protein, which is more than you’d get from most Halloween candy. The gummy worms contain gelatin, which is a source of collagen—though in such small amounts it’s negligible. The Oreos, well, they’re Oreos. Let’s not pretend.
Dietary Considerations
This recipe contains dairy (cream cheese, milk, Cool Whip), gluten (Oreos, Milano cookies), and soy (in the cookies and possibly the pudding). It’s not suitable for vegans or those with dairy or gluten allergies without modifications. I’ve included dairy-free and gluten-free variations above that work well.
Portion Control
These cups are rich, so one per person is usually enough, especially if you’re serving them alongside other desserts. If you’re watching your sugar intake, use sugar-free pudding mix and reduced-fat cream cheese—the difference in taste is minimal.
My Personal Perspective
I believe in balance. Halloween comes once a year, and these cups are part of the fun. I don’t stress about the nutritional content when I’m making them for a party. But I do make sure to serve them alongside healthier options, like a veggie tray or fruit platter, so everyone can choose what works for them.
Conclusion
These Easy Halloween Graveyard Dirt Cups with Gummy Worms have become my go-to Halloween dessert for a reason. They’re simple enough to throw together on a chaotic Friday afternoon, impressive enough to bring to any party, and delicious enough that people actually ask for the recipe. I’ve made them for kids’ parties, adult gatherings, and everything in between, and they’ve never let me down.
What I love most about this recipe is how adaptable it is. You can make it as simple or as elaborate as you want. Some years I go all out with candy pumpkins and edible eyeballs and elaborate gravestones. Other years, I just crush some Oreos, stir up some pudding, and call it a day. Both versions are delicious, and both versions make people smile.
I’d love to hear how your dirt cups turn out. Did you add any creative decorations? Did your kids help with the assembly? Did you try one of the variations? Drop a comment below and let me know—I read every single one, and your ideas often inspire my next batch. And if you’re looking for more Halloween recipe ideas, check out my Creamy Slow Cooker Queso Blanco Dip for a savory option that’s perfect for Halloween parties.
Happy Halloween, and happy eating! May your dirt cups be creepy, your gummy worms be wiggly, and your kitchen be filled with laughter.
Frequently Asked Questions
Can I make these dirt cups ahead of time?
Yes! These cups actually taste better when made a day ahead. The flavors meld together, and the texture becomes more cohesive. Just add the gummy worms and gravestones right before serving for the best presentation.
Can I use homemade whipped cream instead of Cool Whip?
Absolutely. Whip 1 cup of heavy cream with 2 tablespoons of powdered sugar until stiff peaks form, then fold it into the pudding mixture. The texture will be slightly lighter and less stable, but it tastes amazing.
My pudding mixture turned out too thin. What went wrong?
This usually happens when the pudding hasn’t set long enough before adding the Cool Whip, or if the milk was too warm. Make sure your milk is cold, and let the pudding sit for the full 5 minutes after whisking.
Can I use chocolate pudding instead of vanilla?
Yes! Chocolate pudding works wonderfully and creates a double-chocolate experience. Follow the same instructions, just swap the pudding flavor. The chocolate version is especially popular with kids.
How long do these keep in the refrigerator?
They’ll keep for up to 3 days in the refrigerator, covered. The texture changes slightly over time as the Oreo crumbs absorb moisture, but they’re still delicious. I don’t recommend freezing them, as the texture can become watery when thawed.
Pin This Recipe!
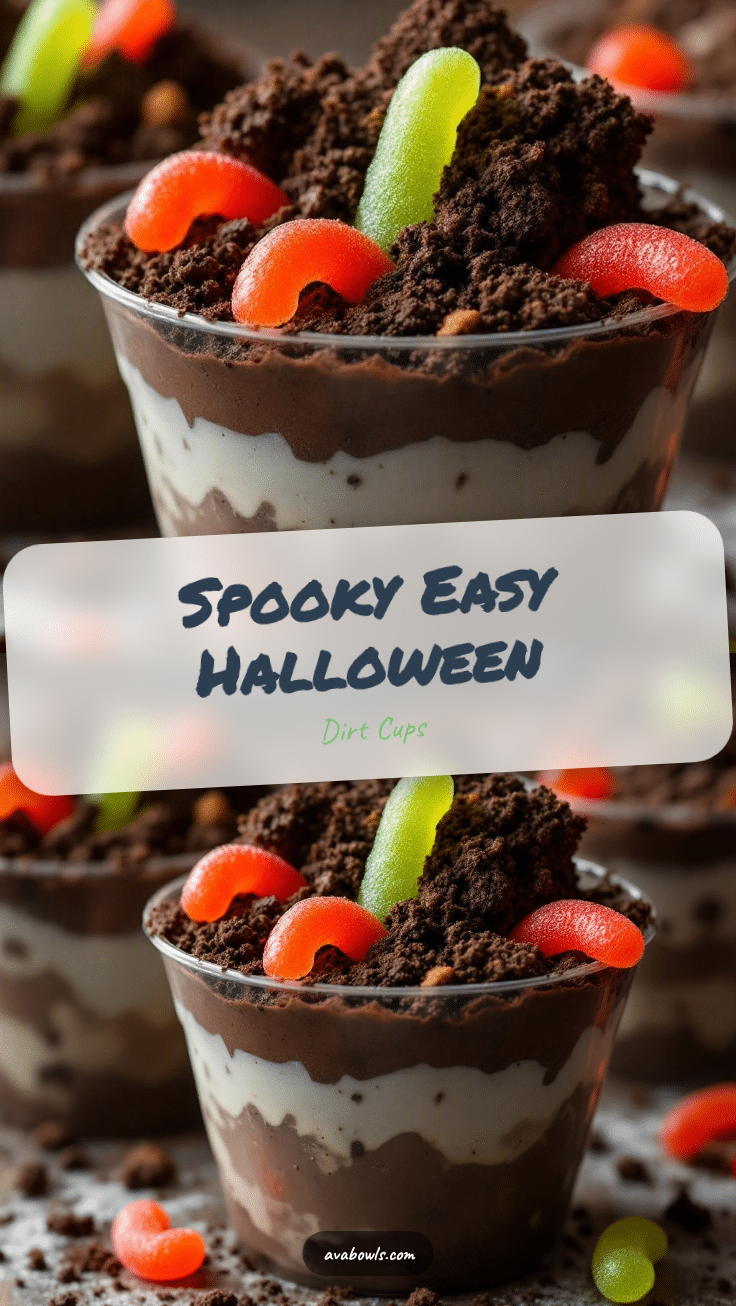
Easy Halloween Dirt Cups with Gummy Worms
These no-bake Halloween dirt cups feature a creamy cheesecake-like pudding layer, crushed Oreo ‘dirt,’ and gummy worms crawling out. Perfect for parties and kid-friendly fun.
- Prep Time: 20 minutes
- Cook Time: 0 minutes
- Total Time: 2 hours 20 minutes (includes chilling)
- Yield: 12 servings 1x
- Category: Dessert
- Cuisine: American
Ingredients
- 8 oz cream cheese, softened
- 1/2 cup granulated sugar
- 1 teaspoon vanilla extract
- 2 cups cold milk
- 1 box (3.4 oz) instant vanilla pudding mix
- 1 1/2 cups Cool Whip or whipped topping, thawed
- 1 package (14.3 oz) Oreo cookies
- 3 tablespoons unsalted butter, melted
- 1 cup gummy worms (preferably sour)
- 12–15 Milano cookies or rectangular cookies
- Black writing icing or melted dark chocolate
- Optional: candy pumpkins, skeleton bones candy, or edible eyeballs
Instructions
- In a medium bowl, beat the softened cream cheese with an electric mixer until smooth and fluffy, about 2 minutes. Add the sugar and vanilla extract, and beat until well combined, scraping down the sides of the bowl as needed.
- In a separate medium bowl, whisk together the cold milk and instant vanilla pudding mix for about 2 minutes until the pudding starts to thicken. Let it sit for 5 minutes to fully thicken.
- Pour the prepared pudding into the cream cheese mixture. Gently fold them together using a spatula until just combined. Then gently fold in the thawed Cool Whip until the mixture is uniform in color and texture.
- Crush the Oreos in a food processor or in a zip-top bag with a rolling pin until you get a mixture of fine crumbs and small chunks. Add the melted butter and mix until the crumbs are evenly moistened.
- If using Milano cookies, write ‘R.I.P.’ on them with black writing icing or melted dark chocolate. Let them set while you assemble the cups.
- Spoon about 2 tablespoons of the cream cheese-pudding mixture into the bottom of each cup. Add a layer of crushed Oreos on top—about 1 1/2 tablespoons per cup. Place a few gummy worms on top of the Oreo layer, pressing them in slightly.
- Repeat the layers: another layer of pudding mixture, another layer of crushed Oreos. End with a dirt layer on top.
- Place a gravestone cookie into each cup at an angle. Add a few more gummy worms on top, positioning some so they look like they’re emerging from the dirt. Add optional decorations as desired.
- Refrigerate the cups for at least 2 hours before serving. Overnight chilling is even better.
Notes
Make sure cream cheese is at room temperature to avoid lumps. For best results, chill overnight. Add gummy worms and gravestones just before serving for best presentation. For dairy-free, use dairy-free cream cheese, oat milk, and coconut whipped topping. For gluten-free, use gluten-free chocolate sandwich cookies.
Nutrition
- Serving Size: 1 cup
- Calories: 335
- Sugar: 30
- Sodium: 320
- Fat: 20
- Saturated Fat: 11
- Carbohydrates: 40
- Fiber: 1
- Protein: 6
Keywords: Halloween dessert, dirt cups, gummy worms, no-bake, kid-friendly, Oreo, pudding, graveyard


