I figured making a spider web on a cookie would require a pastry bag, a steady hand, and probably a lot of swearing. It took about ten minutes of staring at a bowl of melted white chocolate for that idea to fall apart completely. My hands were already covered in sticky peanut butter dough, the kitchen looked like a cocoa powder bomb had gone off, and the last thing I wanted was to pipe delicate little lines. So I grabbed a toothpick. And honestly? That was the smartest thing I did all day.
The first cookie I dragged the toothpick through looked more like a confused scribble than a web. The second one looked vaguely like something a spider might actually live in. By the third cookie, I was grinning like a kid who just discovered finger painting. There is something deeply satisfying about creating a pattern by dragging a stick through melted chocolate. It feels less like decorating and more like a tiny, edible art project — one that doesn’t require any actual artistic talent.
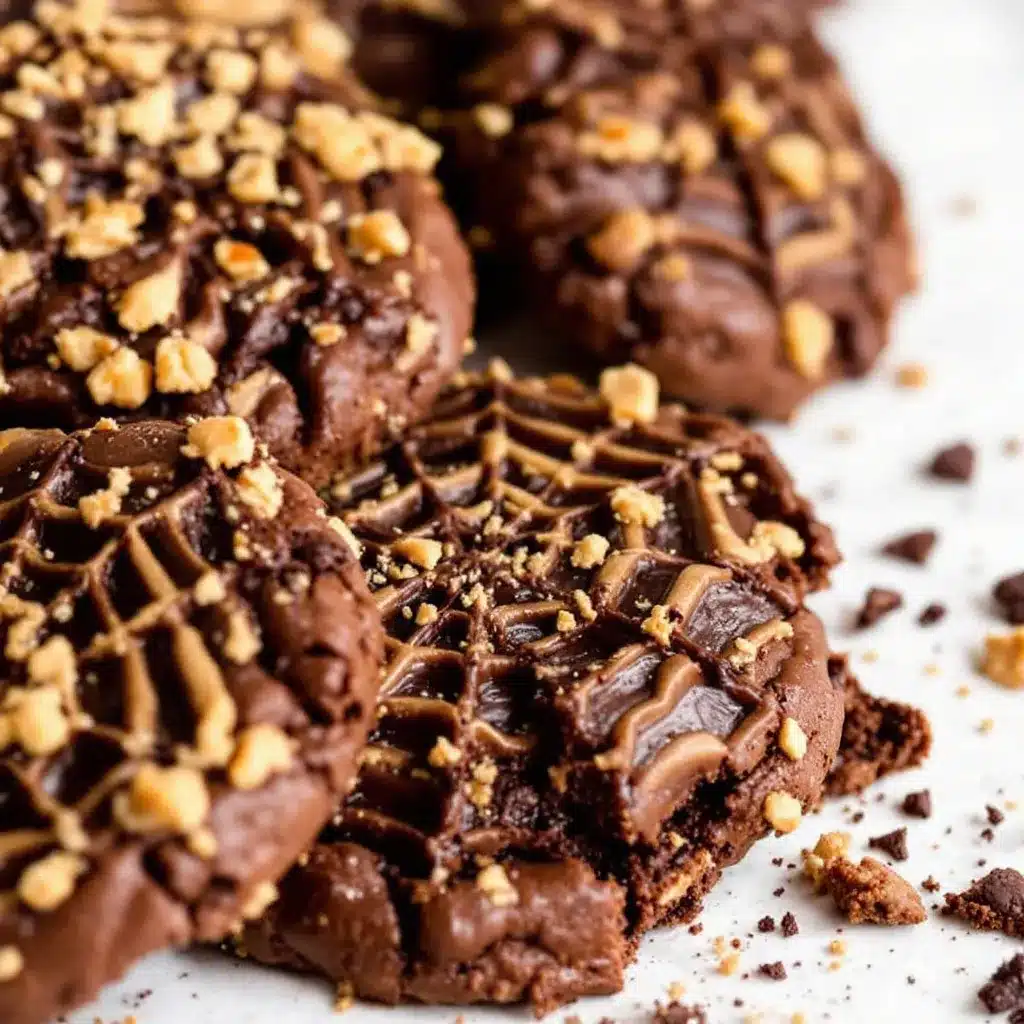
These cookies came about because I wanted something that looked impressive enough to bring to a Halloween party but tasted like the kind of thing you’d sneak from the kitchen at midnight. The combination of rich, fudgy chocolate and creamy peanut butter is already a winning duo. Adding a spooky little web on top just makes them feel special without being fussy. They are the kind of cookie that makes people say “Wait, you made those?” and then immediately grab another one before you can even answer.
I have tested this recipe four times now — once with natural peanut butter (too oily), once with extra cocoa (too bitter), once with chunky peanut butter (surprisingly good, actually), and finally with the exact combination that makes these cookies absolutely perfect. The dough is forgiving, the web is foolproof, and the whole thing comes together faster than you think. These are the cookies that convinced me that sometimes the best recipes come from a moment of kitchen frustration and a little bit of stubbornness.
Why You’ll Love This Recipe
Let’s be real — there are a lot of peanut butter chocolate cookie recipes out there. But these are different. They are the ones I bring to every Halloween gathering, and they disappear faster than anything else on the table. Here is why they work so well:
- No Fancy Equipment Needed : You do not need a piping bag, a decorating turntable, or any special tools. A toothpick does all the work. If you can stir and drag, you can make these cookies look amazing.
- Simple Pantry Ingredients : Butter, sugar, eggs, flour, cocoa powder, peanut butter, and white chocolate. That is it. No weird extracts, no specialty flours, no last-minute runs to the store for something you have never heard of.
- Perfect for Halloween (and Beyond) : These cookies are spooky enough for a Halloween party but delicious enough to make any random Tuesday feel like a celebration. I have made them for Thanksgiving, Christmas, and “just because” — they always fit the occasion.
- Crowd-Pleaser for All Ages : Kids love the spider web design. Adults love the peanut butter and chocolate combo. Everyone loves that they taste like a really good bakery cookie but better because they are homemade.
- Foolproof Technique : The spider web design is actually easier than piping a simple icing border. If you can make a few concentric circles and drag a toothpick through them, you have mastered this decorating technique. I promise.
These cookies are the kind that make you close your eyes after the first bite. The edges are slightly crisp, the centers are soft and fudgy, and the peanut butter flavor is present without overwhelming the chocolate. The white chocolate web adds just enough sweetness to balance everything out. They are comfort food with a spooky twist — and they come together in under an hour.
What Ingredients You Will Need
This recipe uses simple, everyday ingredients that come together to create something truly special. The magic is in the ratios and the technique, not in hard-to-find items. Here is everything you need:
For the Cookie Dough
- 1 cup (226g) unsalted butter, softened to room temperature — I use Land O’Lakes for consistent results, but any good-quality butter works. Make sure it is truly softened, not melted. Melted butter will make the cookies spread too thin.
- 1 cup (200g) granulated sugar — regular white sugar gives the cookies a nice crisp edge while keeping the centers soft.
- ¾ cup (165g) packed light brown sugar — brown sugar adds moisture and a subtle molasses flavor that pairs beautifully with peanut butter. Pack it firmly into the measuring cup.
- 2 large eggs, room temperature — cold eggs will seize the butter and make the dough harder to mix. Let them sit on the counter for 30 minutes before starting.
- 1 teaspoon vanilla extract — pure vanilla extract is best, but imitation works in a pinch. Do not skip it — it rounds out the flavors.
- 1 cup (256g) creamy peanut butter — I recommend Skippy or Jif for this recipe. Natural peanut butter that separates is too oily and will make the cookies greasy and crumbly. Stick with the shelf-stable kind for the best texture.
- 2 cups (250g) all-purpose flour — spoon and level your flour. Scooping directly from the bag packs in too much flour and makes dry cookies.
- ½ cup (40g) unsweetened cocoa powder — I use Hershey’s Special Dark for a richer flavor, but regular unsweetened cocoa works perfectly too.
- 1 teaspoon baking soda — this helps the cookies spread just the right amount and gives them a slight lift.
- ½ teaspoon salt — salt balances the sweetness and enhances the chocolate and peanut butter flavors. If you use salted butter, reduce this to ¼ teaspoon.
For the Spider Web Decoration
- ½ cup (85g) white chocolate chips or melting wafers — Ghirardelli white chocolate chips melt beautifully and have a smooth consistency. Avoid white chocolate that contains vegetable oil — it does not set properly.
- 1 teaspoon coconut oil or vegetable shortening (optional) — this helps thin the white chocolate for easier swirling. Only use if your white chocolate seems thick after melting.
Ingredient Note : For a dairy-free version, use vegan butter and dairy-free white chocolate chips. The texture will be slightly different but still delicious. I have tested this with Earth Balance butter and Enjoy Life white chocolate chips, and the cookies turned out great — just slightly more delicate.
Equipment Needed
You do not need a fully stocked bakery to make these cookies. Here is what you will actually use:
- Large mixing bowl and electric mixer — a stand mixer with a paddle attachment is ideal, but a hand mixer works just as well. You could mix by hand with a wooden spoon, but your arm will get a workout.
- Baking sheets — I use two half-sheet pans so I can bake all the cookies at once. If you only have one pan, let it cool completely between batches.
- Parchment paper or silicone baking mats — parchment paper makes cleanup effortless and prevents sticking. Silicone mats work great too, but the cookies might spread slightly less.
- Toothpicks — the star of the show. You need at least one toothpick per cookie, but you can wipe them clean and reuse them between cookies.
- Small microwave-safe bowl — for melting the white chocolate. A glass measuring cup works well because the spout makes dipping easier.
- Wire cooling rack — essential for letting the cookies cool completely before decorating. Warm cookies will melt the white chocolate into a puddle.
- Cookie scoop (1.5 tablespoon size) — not required, but it makes uniform cookies that bake evenly. I use a #40 scoop for perfectly sized cookies.
Budget Tip : If you do not have a cookie scoop, use two spoons to portion the dough. The cookies will be slightly different sizes, but they will taste exactly the same. I have done it both ways, and honestly, the uneven ones have more character.
Preparation Method
Follow these steps carefully, and you will have perfect spider web cookies every time. I have organized them so you can work efficiently without feeling rushed.
Step 1: Prep Your Workspace (5 minutes)
Preheat your oven to 350°F (175°C). Line two baking sheets with parchment paper or silicone mats. Set them aside. Take your eggs out of the refrigerator if you have not already — they need to be at room temperature.
Step 2: Cream the Butter and Sugars (3-4 minutes)
In a large mixing bowl, beat the softened butter, granulated sugar, and brown sugar together on medium speed until light and fluffy. This takes about 3-4 minutes with a stand mixer or 5 minutes with a hand mixer. You want the mixture to look pale and airy. Scrape down the sides and bottom of the bowl once during mixing. Do not rush this step — properly creamed butter and sugar create the right texture.
Step 3: Add Eggs, Vanilla, and Peanut Butter (2 minutes)
Add the eggs one at a time, beating well after each addition. Add the vanilla extract and beat until combined. Then add the peanut butter and beat on medium speed until fully incorporated. The mixture will look smooth and slightly glossy. Scrape the bowl again to make sure everything is evenly mixed.
Step 4: Combine Dry Ingredients (2 minutes)
In a separate medium bowl, whisk together the flour, cocoa powder, baking soda, and salt. Make sure there are no lumps — cocoa powder loves to clump. Whisking also aerates the flour, which helps keep the cookies tender.
Step 5: Mix Dry into Wet (2 minutes)
Gradually add the dry ingredients to the wet mixture, mixing on low speed. Add the flour mixture in three additions, mixing just until combined after each. Stop mixing as soon as the last streaks of flour disappear. Overmixing at this stage develops gluten and makes the cookies tough. The dough will be thick and slightly sticky.
Step 6: Chill the Dough (30 minutes — do not skip this)
Cover the bowl with plastic wrap and refrigerate for at least 30 minutes. The dough needs to firm up so the cookies do not spread into flat pancakes. You can chill it for up to 3 days — just let it sit at room temperature for 10 minutes before scooping if it gets too hard.
Step 7: Scoop and Bake (10-12 minutes per batch)
Scoop rounded tablespoons of dough (about 1.5 tablespoons each) and place them 2 inches apart on the prepared baking sheets. Bake for 10-12 minutes. The cookies will look puffed and slightly cracked on top. The centers will look soft and underdone — that is exactly what you want. Let them cool on the baking sheet for 5 minutes, then transfer to a wire rack to cool completely. Do not try to decorate warm cookies. The white chocolate will slide right off.
Step 8: Make the Spider Web Design (15 minutes)
Once the cookies are completely cool, melt the white chocolate chips in a microwave-safe bowl. Heat in 20-second intervals, stirring after each, until smooth. If the chocolate seems thick, stir in 1 teaspoon of coconut oil or shortening. Dip the tip of a toothpick into the melted white chocolate and draw a small circle in the center of a cookie. Draw a larger circle around it, then another larger one. You want 3-4 concentric circles total. Immediately drag a clean toothpick from the center outward through all the circles, creating 6-8 lines radiating from the center like spokes on a wheel. The toothpick will pull the white chocolate into a web pattern. Wipe the toothpick clean between each line for the best effect.
Step 9: Let the Webs Set (20 minutes)
Let the decorated cookies sit at room temperature until the white chocolate is firm and set. This takes about 20 minutes. If you are in a hurry, pop them in the refrigerator for 10 minutes. Once set, the cookies are ready to serve or store.
Cooking Tips & Techniques
I learned most of these tips the hard way — by making mistakes and eating the evidence. Here is what I wish someone had told me before I started:
Do not overbake. This is the most important tip for these cookies. They will look underdone when you pull them out of the oven. Trust the process. The residual heat from the baking sheet finishes cooking the centers. Overbaked cookies lose their fudgy texture and become dry and crumbly. I have ruined an entire batch by leaving them in for two extra minutes. Learn from my pain.
Use a toothpick, not a knife. I tried using the tip of a butter knife to make the web design on my first attempt. It was a disaster. The lines were too thick, the chocolate blobbed everywhere, and the cookies looked like they had been attacked by a small animal. A toothpick gives you thin, delicate lines that actually look like a spider web. It is the right tool for the job.
Work with one cookie at a time. Do not try to pipe white chocolate circles on multiple cookies and then drag through them all at once. The chocolate will start to set, and the lines will not connect properly. Draw the circles on one cookie, drag through them immediately, then move to the next cookie. It takes a little longer, but the results are worth it.
Room temperature ingredients matter. Cold eggs will make the butter seize up, creating a lumpy dough that does not come together properly. Room temperature eggs emulsify into the butter and sugar mixture smoothly, giving you a uniform dough that bakes evenly. Set your eggs out 30 minutes before you start. Your future self will thank you.
Chill the dough — no shortcuts. I know it is tempting to skip the chilling step when you are in a hurry. Do not do it. Unchilled dough spreads into thin, crispy cookies that look nothing like the soft, fudgy ones you want. The 30-minute chill is non-negotiable. If you are really pressed for time, scoop the dough into balls and freeze them for 15 minutes before baking. That works in a pinch.
Variations & Adaptations
One of the best things about this recipe is how adaptable it is. Here are some variations I have tried and loved:
Dark Chocolate Peanut Butter Cookies : Swap the white chocolate in the web for dark chocolate chips. The contrast between the dark chocolate web and the cocoa cookie is subtle but gorgeous. Use a 60% cacao dark chocolate for the best flavor. The web will be less visible but more sophisticated — perfect for an adult Halloween party.
Gluten-Free Version : Substitute the all-purpose flour with a 1:1 gluten-free baking flour blend. I have tested this with Bob’s Red Mill 1:1 Baking Flour, and the cookies turned out slightly more delicate but still delicious. Add an extra tablespoon of flour to the dough if it seems too sticky. Let the dough chill for an extra 15 minutes to help it firm up.
Spooky Color Twist : Add a drop of orange or purple food coloring to the white chocolate before melting it for the web. The colored web against the dark chocolate cookie creates an even more dramatic Halloween look. Use gel food coloring for the best results — liquid coloring can seize the chocolate. I made orange webs for a Halloween party last year, and they were a huge hit.
Nut-Free Option : Replace the peanut butter with sunflower seed butter or WowButter (a soy-based peanut butter alternative). The flavor will be different — sunflower seed butter has a slightly earthy taste — but the texture remains very similar. Make sure to use a brand that does not separate, just like with regular peanut butter. These are perfect for school Halloween parties where nut allergies are a concern.
Extra Decadent Version : Press a mini peanut butter cup into the center of each cookie dough ball before baking. The peanut butter cup will melt slightly and create a gooey pocket of peanut butter and chocolate. Adjust the baking time by 1-2 minutes since the center is denser. This version is dangerously good.
Serving & Storage Suggestions
These cookies are best served at room temperature, which lets the peanut butter flavor shine and keeps the texture perfectly soft. Arrange them on a platter with a few fake spider rings scattered around for a fun Halloween presentation. The contrast between the dark cookies and the white webs looks striking against a black or orange serving dish.
For a Halloween party, I like to serve these alongside a warm mug of spiced apple cider or a creamy copycat Starbucks iced brown sugar oat milk shaken espresso for the adults. The sweetness of the cookies balances the bitterness of coffee beautifully. For kids, a glass of cold milk is the classic pairing — and honestly, it is still my favorite.
Storage Instructions : Store the decorated cookies in an airtight container at room temperature for up to 5 days. Layer them between sheets of parchment paper to prevent the white chocolate webs from sticking together. Do not refrigerate them — the cold temperature can cause the white chocolate to sweat and become sticky.
Freezer Instructions : You can freeze the undecorated cookies for up to 3 months. Place them in a single layer on a baking sheet and freeze until solid, then transfer to a freezer-safe bag or container. When you are ready to serve, thaw them at room temperature, then add the white chocolate web design. The cookies taste just as fresh as the day you baked them. I always keep a batch in the freezer for unexpected guests or last-minute Halloween cravings.
Flavor Development : These cookies actually taste better the day after baking. The flavors meld together overnight, and the texture becomes even more fudgy. If you can resist eating them all on day one, you will be rewarded with an even better cookie on day two. Not that I have ever managed to wait that long.
Nutritional Information & Benefits
Let me be honest — these are not health cookies. They are indulgent, rich, and meant to be enjoyed as a treat. But that does not mean they are without any redeeming qualities. Here is the estimated nutritional breakdown for one cookie (based on 24 cookies):
- Calories : Approximately 210-230 calories per cookie
- Fat : 12g (including 5g saturated fat)
- Carbohydrates : 26g
- Protein : 5g
- Fiber : 2g
- Sugar : 16g
- Sodium : 180mg
The peanut butter provides a decent amount of protein and healthy monounsaturated fats, which help keep you full longer. Cocoa powder is rich in antioxidants called flavonoids, which have been linked to heart health benefits. The white chocolate in the web adds some calcium from the milk solids. Of course, the butter and sugar balance all of that out — but hey, it is Halloween. A little indulgence is part of the fun.
If you are watching your sugar intake, you can reduce the granulated sugar to ¾ cup and the brown sugar to ½ cup. The cookies will be slightly less sweet but still delicious. For a lower-fat option, replace half the butter with unsweetened applesauce. The texture will be more cake-like and less fudgy, but they will still taste great.
Conclusion
These Spooky Spider Web Chocolate Peanut Butter Cookies are the kind of recipe that makes you feel like a kitchen wizard without requiring any actual magic. They look impressive, taste incredible, and come together with ingredients you probably already have in your pantry. The spider web design is deceptively simple — a toothpick and a little melted white chocolate are all you need to create something that looks like it came from a fancy bakery.
What I love most about these cookies is how they bring people together. I have made them for Halloween parties, family gatherings, and quiet nights at home when I just wanted something sweet. Every time, someone asks for the recipe. Every time, someone eats three cookies in a row and pretends they did not. And every time, I smile because I know exactly how good they are.
I encourage you to make these cookies your own. Try the dark chocolate web variation. Add a drop of food coloring for a colorful twist. Press a peanut butter cup into the center for extra decadence. The recipe is forgiving and adaptable, which is exactly what a good cookie recipe should be.
If you make these cookies, I would love to hear about it. Leave a comment below and let me know how they turned out. Did you try a variation? Did the spider web design work on your first try? Did anyone compliment your “obvious baking talent”? Share your stories — I read every single one. And if you are looking for another easy party snack, check out this creamy slow cooker queso blanco dip — it is the perfect savory companion to these sweet treats.
Happy Halloween, happy baking, and remember — the best cookies are the ones you share. Unless you hide a few for yourself. I will not tell.
Frequently Asked Questions
Can I use natural peanut butter for these cookies?
I do not recommend it. Natural peanut butter that separates has too much oil, which makes the cookies greasy and crumbly. Stick with shelf-stable creamy peanut butter like Skippy or Jif for the best texture. If you only have natural peanut butter, stir it very well and reduce the butter in the recipe by 2 tablespoons to compensate for the extra oil.
Why did my cookies spread too much?
This usually happens for one of three reasons: the dough was not chilled long enough, the butter was too soft or melted, or the baking sheet was still hot from a previous batch. Make sure you chill the dough for at least 30 minutes, use properly softened (not melted) butter, and let your baking sheet cool completely between batches.
Can I make the dough ahead of time?
Absolutely. You can refrigerate the dough for up to 3 days in an airtight container. Let it sit at room temperature for 10-15 minutes before scooping so it is soft enough to work with. You can also freeze the dough balls for up to 3 months — just bake them straight from the freezer, adding 1-2 minutes to the baking time.
My white chocolate seized up when I melted it. What went wrong?
White chocolate is sensitive to heat and moisture. It seizes when it comes into contact with even a drop of water or gets overheated. Make sure your bowl and utensils are completely dry. Heat the chocolate in short 20-second bursts in the microwave, stirring thoroughly between each. If it does seize, try stirring in a teaspoon of coconut oil or vegetable shortening to smooth it out.
How do I get clean spider web lines?
The key is working quickly and using a clean toothpick for each line. Draw your concentric circles first, then immediately drag a toothpick from the center outward through all the circles. Wipe the toothpick clean on a paper towel before making the next line. If the white chocolate starts to thicken while you work, reheat it in the microwave for 10 seconds and stir well.
Pin This Recipe!

Spooky Spider Web Chocolate Peanut Butter Cookies

Rich, fudgy chocolate peanut butter cookies topped with an easy toothpick-drawn spider web design. No piping skills required—just a toothpick and melted white chocolate for a spooky Halloween treat that tastes as good as it looks.
- Prep Time: 15 minutes
- Cook Time: 12 minutes
- Total Time: 1 hour 2 minutes (includes 30 minutes chilling and 20 minutes setting)
- Yield: 24 cookies 1x
- Category: Dessert
- Cuisine: American
Ingredients
- 1 cup (226g) unsalted butter, softened to room temperature
- 1 cup (200g) granulated sugar
- ¾ cup (165g) packed light brown sugar
- 2 large eggs, room temperature
- 1 teaspoon vanilla extract
- 1 cup (256g) creamy peanut butter (e.g., Skippy or Jif)
- 2 cups (250g) all-purpose flour, spooned and leveled
- ½ cup (40g) unsweetened cocoa powder
- 1 teaspoon baking soda
- ½ teaspoon salt
- ½ cup (85g) white chocolate chips or melting wafers
- 1 teaspoon coconut oil or vegetable shortening (optional, for thinning white chocolate)
Instructions
- Preheat oven to 350°F (175°C). Line two baking sheets with parchment paper or silicone mats.
- In a large bowl, beat softened butter, granulated sugar, and brown sugar on medium speed until light and fluffy, about 3-4 minutes.
- Add eggs one at a time, beating well after each. Add vanilla and peanut butter; beat until smooth and glossy.
- In a separate bowl, whisk together flour, cocoa powder, baking soda, and salt.
- Gradually add dry ingredients to wet mixture in three additions, mixing on low just until combined. Do not overmix.
- Cover dough and refrigerate for at least 30 minutes (up to 3 days).
- Scoop rounded tablespoons (about 1.5 tablespoons each) of dough and place 2 inches apart on prepared baking sheets.
- Bake for 10-12 minutes. Cookies will look puffed and slightly cracked; centers should appear soft. Cool on baking sheet for 5 minutes, then transfer to a wire rack to cool completely.
- Once cookies are completely cool, melt white chocolate chips in a microwave-safe bowl in 20-second intervals, stirring until smooth. Add coconut oil or shortening if needed.
- Dip a toothpick into melted white chocolate and draw a small circle in the center of a cookie. Draw 2-3 larger concentric circles around it.
- Immediately drag a clean toothpick from the center outward through all circles, creating 6-8 radiating lines. Wipe toothpick clean between each line.
- Repeat for each cookie. Let webs set at room temperature for about 20 minutes (or 10 minutes in the refrigerator) until firm.
Notes
Do not overbake—cookies should look underdone when removed from oven. Use shelf-stable creamy peanut butter (not natural) for best texture. Chill dough for at least 30 minutes to prevent spreading. Work with one cookie at a time when decorating; white chocolate sets quickly. Cookies taste even better the day after baking.
Nutrition
- Serving Size: 1 cookie
- Calories: 220
- Sugar: 16
- Sodium: 180
- Fat: 12
- Saturated Fat: 5
- Carbohydrates: 26
- Fiber: 2
- Protein: 5
Keywords: spider web cookies, Halloween cookies, chocolate peanut butter cookies, easy decorated cookies, no-pipe spider web, toothpick spider web, fudgy chocolate cookies, peanut butter chocolate cookies


