“Can you bring wings to the Super Bowl party?” my friend Jen texted me. Third time she’d asked that month. I stared at my phone, then at the sad bag of frozen wings in my freezer. I’d never made wings that didn’t end up either rubbery or burnt. But something about that text — the casual assumption that I had this figured out — made me want to actually try.
So I did what any reasonable person does: I called my brother, who spent six months perfecting his wing technique during lockdown. “The secret,” he said, “isn’t the sauce. It’s the skin. You have to trick it into thinking it’s fried.” He sent me a paragraph of notes that looked like a science experiment. I followed them exactly — and ended up with wings so crispy, so sticky-sweet, so perfectly caramelized that Jen texted me the next day asking for the recipe.
That was two years ago. I’ve made these crispy baked honey garlic chicken wings at least 30 times since. For game days, for birthdays, for Tuesday nights when I need something that feels like a celebration. And honestly? They’ve never let me down.
These wings taught me that you don’t need a deep fryer to get that perfect crunch. You just need patience, a wire rack, and a glaze that hits that sweet-savory-sour trifecta. Let me show you how it’s done.
Why You’ll Love This Recipe
I’ve tested this recipe more times than I care to admit. I’ve burned wings, undercooked wings, and made wings that stuck to the pan like glue. But this version? It works every single time. Here’s why it’s become my go-to:
- Oven-Baked, Not Fried: You get that satisfying crunch without the mess of hot oil or the calories of deep frying. Your kitchen stays clean, and your arteries thank you.
- Simple Pantry Ingredients: You probably have most of these in your fridge right now. Honey, soy sauce, garlic, butter — nothing fancy, nothing hard to find.
- Perfect for Game Day: These wings disappear fast at parties. I’ve brought them to Super Bowl gatherings, birthday parties, and casual get-togethers. They’re always the first empty platter.
- Foolproof Method: The key is a two-step baking process — low and slow to render the fat, then high heat to crisp the skin. No flipping, no fussing, just perfect wings.
- That Glaze, Though: The honey garlic sauce caramelizes into this sticky, glossy coating that clings to every wing. It’s sweet, savory, and just a little tangy from the soy sauce.
What sets these wings apart from every other recipe I’ve tried is the technique. Most baked wing recipes skip the crucial step of drying the skin properly. I learned the hard way that moisture is the enemy of crispiness. By patting the wings dry and letting them rest uncovered in the fridge, you’re setting yourself up for success before they even hit the oven.
The first time I made these for a crowd, my friend Matt — who prides himself on his smoked wings — took one bite and just nodded. That’s the highest praise you can get from a wing snob. These wings have converted fried-wing loyalists. They’re that good.
What Ingredients You Will Need
This recipe relies on simple, everyday ingredients that work together to create something truly special. No specialty stores, no obscure spices — just honest, flavorful components that let the chicken shine.
For the Wings
- 3 pounds chicken wings, separated into drumettes and flats (about 24-30 pieces total) — Look for fresh wings if possible; frozen work fine but need thorough thawing. I prefer buying whole wings and separating them myself — it’s cheaper and you get more control over the pieces.
- 1 tablespoon baking powder (NOT baking soda!) — This is the secret to crispy skin. The baking powder raises the pH of the skin, helping it brown and crisp without frying. Aluminum-free baking powder works best.
- 1 teaspoon salt — I use fine sea salt here. It dissolves into the baking powder mixture evenly.
- 1/2 teaspoon black pepper — Freshly ground is always better, but pre-ground works in a pinch.
- 1 teaspoon garlic powder — Not garlic salt! We’re controlling the salt separately.
- 1 teaspoon onion powder — Adds that subtle savory depth that makes wings addictive.
- 1/2 teaspoon paprika — Regular or smoked, depending on your mood. Smoked paprika adds a lovely warmth.
For the Honey Garlic Glaze
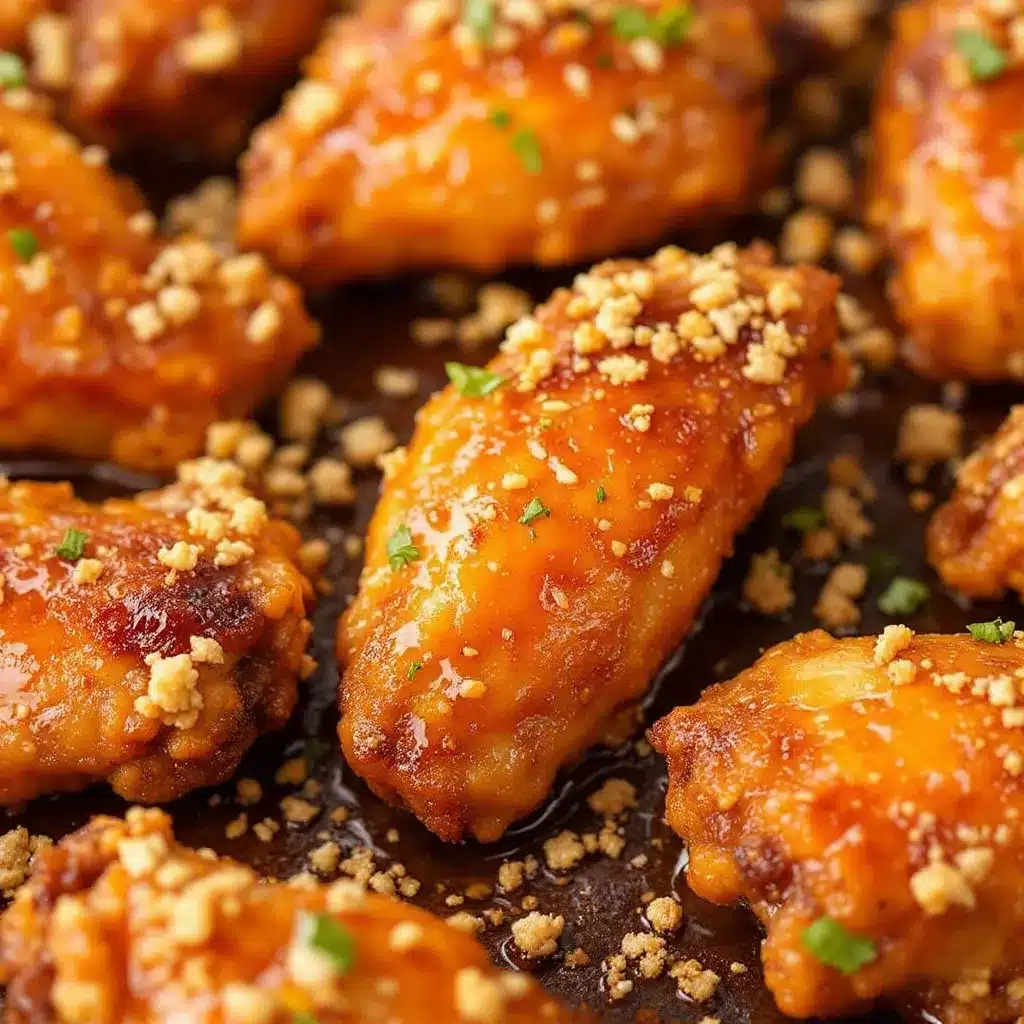
- 1/3 cup honey — Use good-quality honey here. The floral notes matter. Local honey is ideal if you can find it.
- 4 cloves garlic, minced — Fresh garlic is non-negotiable. The jarred stuff won’t give you the same punch.
- 3 tablespoons soy sauce — Low-sodium is best so you can control the salt. Tamari or coconut aminos work for gluten-free options.
- 2 tablespoons unsalted butter — Adds richness and helps the glaze stick to the wings. Salted butter works too — just reduce the added salt slightly.
- 1 tablespoon rice vinegar — Balances the sweetness with a touch of acidity. Apple cider vinegar works as a substitute.
- 1 teaspoon sesame oil — Optional, but it adds that nutty, toasty flavor that makes the glaze feel restaurant-quality.
- 1 tablespoon cornstarch mixed with 2 tablespoons cold water — For thickening the glaze. This step separates good wings from great ones.
For Garnish (Optional but Recommended)
- Sesame seeds — Toasted white or black seeds add visual appeal and a subtle crunch.
- Chopped green onions — Fresh, bright, and necessary for color contrast.
- Crushed red pepper flakes — For those who want a little heat.
I’ve made these wings with different honey varieties — wildflower, orange blossom, even buckwheat — and each one changes the character slightly. Orange blossom honey gives a lighter, more floral glaze, while buckwheat honey makes it deeper and almost molasses-like. Play around with what you have.
One thing I’ve learned: don’t skip the rice vinegar. I tried making the glaze without it once because I thought, “How much difference can a tablespoon make?” The answer is a lot. That little bit of acid cuts through the sweetness and keeps the wings from feeling cloying. Trust me on this.
Equipment Needed
You don’t need fancy equipment for these wings, but a few key tools make the process easier and the results more consistent.
- Baking sheet with a wire rack: This is the most important piece of equipment. The wire rack elevates the wings so air circulates all around them, preventing soggy bottoms. A standard half-sheet pan works perfectly. If you don’t have a wire rack, you can use a cooling rack set inside the baking sheet — just make sure it’s oven-safe.
- Large mixing bowl: For tossing the wings with the dry seasoning. Glass, stainless steel, or ceramic all work well.
- Small saucepan: For making the glaze. A 1-quart saucepan is perfect.
- Paper towels: You’ll need lots of these for drying the wings thoroughly. Don’t skimp — moisture is the enemy of crispiness.
- Tongs: For turning and transferring the wings. Silicone-tipped tongs won’t scratch your baking sheet.
- Pastry brush: For applying the glaze evenly. A silicone brush is easy to clean and doesn’t shed bristles.
- Instant-read thermometer: Optional but recommended for checking doneness. Chicken wings should reach 165°F internally.
If you don’t have a wire rack, you can try using crumpled aluminum foil to create a makeshift rack. I’ve done this in a pinch — just crinkle several sheets of foil into snake-like shapes and arrange them on the baking sheet to hold the wings above the surface. It’s not perfect, but it works when you’re desperate.
I’ve also made these wings on a standard baking sheet without a rack, and they still come out good — just not as crispy on the bottom. If that’s your only option, flip the wings halfway through the high-heat stage to ensure even browning.
Preparation Method
This method might look involved, but most of the time is hands-off oven time. The actual prep takes about 15 minutes. Here’s the step-by-step breakdown that guarantees perfect wings every time.
Step 1: Prep the Wings
Start by patting the chicken wings dry with paper towels. I mean really dry — like, use a whole stack of paper towels and press firmly. Any moisture on the skin will steam instead of crisp. If you have time, arrange the dried wings on a baking sheet lined with paper towels and refrigerate them uncovered for 1-2 hours. This dries the skin even further and makes a noticeable difference in crispiness. If you’re short on time, just pat them as dry as you can and move on — it’ll still work.
Step 2: Season the Wings
In a large mixing bowl, combine the baking powder, salt, pepper, garlic powder, onion powder, and paprika. Whisk to combine. Add the dried wings to the bowl and toss thoroughly with your hands, making sure every piece is coated evenly. The mixture should look like a light dusting — you’re not looking for a thick coating. Let the seasoned wings rest at room temperature for 15 minutes while you preheat the oven.
Step 3: Preheat and Prepare the Baking Sheet
Preheat your oven to 250°F (120°C). Place a wire rack on top of a baking sheet and spray it lightly with non-stick cooking spray. This low-temperature first stage is what renders the fat from the skin, making it possible to achieve that fried-like crispiness without actual frying.
Step 4: Low-Temperature Bake
Arrange the wings in a single layer on the wire rack, making sure they’re not touching. Leave a little space between each wing for air circulation. Bake at 250°F for 30 minutes. During this time, the fat will slowly render out, and the skin will begin to dry and tighten. You might see some fat pooling on the baking sheet — that’s exactly what you want.
Step 5: High-Temperature Crisp
After 30 minutes, increase the oven temperature to 425°F (220°C). Don’t remove the wings from the oven — just turn up the heat. Bake for another 40-50 minutes, until the wings are deep golden brown and the skin is crispy. The exact time depends on your oven and the size of your wings. At the 40-minute mark, check them. If they’re not as brown as you’d like, give them another 5-10 minutes. The skin should look crackled and feel firm to the touch.
Step 6: Make the Glaze
While the wings are in their final bake, make the glaze. In a small saucepan over medium heat, melt the butter. Add the minced garlic and cook for 30-60 seconds until fragrant — don’t let it brown or it’ll become bitter. Add the honey, soy sauce, rice vinegar, and sesame oil (if using). Stir to combine and bring to a gentle simmer. In a small bowl, whisk the cornstarch with cold water until smooth, then pour it into the simmering glaze. Stir continuously for 1-2 minutes until the glaze thickens to a syrupy consistency. Remove from heat and set aside.
Step 7: Glaze the Wings
Once the wings are done, remove them from the oven and let them rest on the wire rack for 2-3 minutes. Transfer the wings to a large bowl. Pour about half the glaze over the wings and toss gently to coat. Don’t dump all the glaze at once — you want a thin, even coating, not a soggy mess. Add more glaze as needed, tossing until every wing is glossy and sticky. Reserve a little glaze for drizzling at the table if you like extra sauce.
Step 8: Garnish and Serve
Transfer the glazed wings to a serving platter. Sprinkle with sesame seeds and chopped green onions. If you like heat, add a pinch of crushed red pepper flakes. Serve immediately while the wings are still hot and the glaze is sticky and luscious.
One thing I’ve learned the hard way: don’t let the glazed wings sit too long before serving. The glaze will start to soak into the skin and soften the crispiness. If you’re making these for a party, time the final glazing step so it happens right before you serve them. Your guests will thank you.
Cooking Tips & Techniques
I’ve made enough mistakes with wings to fill a cookbook. Here are the lessons I’ve learned so you don’t have to repeat them.
The Drying Secret: The single most important factor for crispy baked wings is dry skin. I can’t stress this enough. After patting the wings dry, I sometimes let them sit in the fridge uncovered for up to 24 hours. The fridge air acts like a dehydrator, pulling moisture from the skin. If you do this, you’ll get wings that rival anything from a deep fryer. I once forgot about a batch for 36 hours — they were the crispiest wings I’ve ever made.
Don’t Crowd the Pan: Those wings need their personal space. If you cram them together on the wire rack, they’ll steam instead of crisp. Use two baking sheets if you have to. I’ve made the mistake of trying to fit all the wings on one sheet, and the result was sad, flabby skin. Learn from my error.
The Baking Powder Trick: Make sure you’re using baking powder, not baking soda. They look similar but behave very differently. Baking soda will leave a metallic, soapy taste on your wings. I found this out the hard way when I grabbed the wrong container — the wings were inedible. Check your labels carefully.
Temperature Matters: Don’t skip the low-temperature first stage. That 30 minutes at 250°F is what renders the fat slowly without cooking the meat too quickly. If you go straight to high heat, the outside will brown before the fat has a chance to render, leaving you with tough skin and undercooked spots. Patience pays off here.
Glaze Timing: Apply the glaze in the last few minutes, not before baking. If you put the glaze on before the wings go in the oven, the sugar will burn and the wings will end up bitter. I tried this once thinking it would save time — it didn’t. The wings looked beautiful going in and came out looking like charcoal.
Double Glaze for Extra Stickiness: If you want that restaurant-style glossy finish, brush a thin layer of glaze on the wings, then brush another layer right before serving. The double coating creates a thicker, more satisfying glaze that clings to every bite.
Variations & Adaptations
These wings are incredibly versatile. Here are some ways I’ve adapted them over the years:
Spicy Honey Garlic Wings
Add 1-2 teaspoons of Sriracha or gochujang to the glaze along with the honey. The heat cuts through the sweetness beautifully. I also like to sprinkle the finished wings with cayenne pepper for an extra kick. If you’re a fan of crispy Nashville hot chicken tenders, you’ll love this spicy twist on the classic honey garlic flavor.
Air Fryer Method
If you have an air fryer, you can make these wings in half the time. Season the wings as directed, then arrange them in a single layer in the air fryer basket. Cook at 380°F for 12 minutes, flip, then cook for another 10-12 minutes until crispy. Toss with the glaze and serve. The air fryer gives an incredibly even crispiness without needing to preheat a full oven.
Gluten-Free Version
Use tamari or coconut aminos instead of soy sauce, and make sure your baking powder is gluten-free (most brands are, but check the label). Everything else in the recipe is naturally gluten-free. I’ve served these to gluten-sensitive friends multiple times with zero complaints.
Keto-Friendly Option
Replace the honey with a sugar-free honey substitute or use monk fruit sweetener dissolved in a little water. The glaze won’t caramelize quite the same way, but the flavor is still excellent. You can also skip the glaze entirely and just season the wings with a dry rub — they’ll still be incredibly crispy and flavorful.
Smoked Wings
If you have a smoker, try this: smoke the wings at 225°F for 1 hour using applewood or hickory chips. Then finish them in a 425°F oven for 15-20 minutes to crisp the skin. The smoky flavor combined with the honey garlic glaze is absolutely next-level. I did this for a backyard barbecue last summer, and people were asking for the recipe for weeks.
Serving & Storage Suggestions
These wings are best served hot and fresh, right after glazing. The contrast between the crispy skin and the sticky-sweet glaze is at its peak in the first 15 minutes. But life happens, and sometimes you need to make them ahead or deal with leftovers.
Serving Temperature: Serve the wings hot, straight from the oven. If you’re making them for a party, keep them warm in a 200°F oven on a wire rack (not on a plate, where they’ll steam). They’ll stay crispy for about 30 minutes this way.
What to Serve With Them: These wings pair beautifully with cooling dips like ranch or blue cheese dressing. A side of fresh Greek yogurt veggie dip with herbs adds a refreshing contrast to the rich, sticky wings. Celery and carrot sticks are classic for a reason — the crunch and freshness balance the sweetness. For a more substantial meal, serve them alongside loaded nachos supreme for the ultimate game day spread. And if you’re in the mood for something lighter, a simple green salad with a tangy vinaigrette cuts through the richness beautifully.
Storage: Store leftover wings in an airtight container in the refrigerator for up to 4 days. The glaze will soften the skin over time, so they won’t be as crispy when reheated. But the flavor will still be fantastic.
Reheating: The best way to reheat these wings is in the oven or air fryer. Preheat your oven to 375°F, place the wings on a wire rack over a baking sheet, and heat for 8-10 minutes until warmed through and re-crisped. The microwave will make them soggy — avoid it if you can. I’ve also had good results reheating them in a skillet over medium heat, flipping occasionally, for about 5 minutes.
Freezing: You can freeze the baked (but unglazed) wings for up to 3 months. Arrange them in a single layer on a baking sheet and freeze until solid, then transfer to a freezer bag. When you’re ready to serve, thaw in the refrigerator overnight, reheat in a 400°F oven for 10-12 minutes, then glaze and serve. The glaze doesn’t freeze well, so always make it fresh.
Nutritional Information & Benefits
These wings are a protein-packed option that can fit into a balanced diet, especially if you’re mindful of portions. Here’s the estimated nutritional breakdown per serving (about 6-8 wings, assuming 4 servings from the recipe):
| Nutrient | Amount Per Serving |
|---|---|
| Calories | 380-420 |
| Protein | 28-32g |
| Fat | 22-26g |
| Saturated Fat | 8-10g |
| Carbohydrates | 18-22g |
| Sugar | 15-18g |
| Sodium | 800-900mg |
| Fiber | 0g |
Health Benefits: Chicken wings are a good source of high-quality protein, which supports muscle repair and keeps you feeling full. The skin contains collagen, which is beneficial for joint health and skin elasticity. Garlic offers immune-boosting properties thanks to its allicin content, while honey provides antioxidants and natural antibacterial compounds. The sesame oil adds healthy fats and a dose of vitamin E.
Dietary Considerations: This recipe is naturally low-carb if you skip or modify the glaze. It’s also gluten-free with the right soy sauce substitution. For those watching sodium, use low-sodium soy sauce and reduce the added salt in the seasoning mix. The baking powder contains a small amount of sodium, but it’s minimal compared to the overall dish.
Allergens: This recipe contains dairy (butter) and soy (soy sauce). For a dairy-free version, use coconut oil or a plant-based butter substitute. For a soy-free version, use coconut aminos. Always check your ingredients if cooking for someone with allergies.
Conclusion
These crispy baked honey garlic chicken wings have become my signature dish for a reason. They deliver everything you want from wings — that satisfying crunch, that sticky-sweet glaze, that finger-licking messiness — without requiring a deep fryer or a culinary degree. They’re the kind of recipe that makes people think you spent hours in the kitchen when really, the oven did most of the work.
What I love most about this recipe is how adaptable it is. Make it spicy, make it smoky, make it for a party of two or a crowd of twenty. The method stays the same, and the results stay consistently excellent. These wings have seen me through Super Bowl parties, birthday dinners, and quiet Tuesday nights when I needed something that felt like a treat.
I’d love to hear how these turn out for you. Did you try a variation? Did you serve them with something unexpected? Drop a comment below and let me know — I read every single one. And if you share a photo on social media, tag me so I can see your crispy, glossy creations. Happy cooking, friend!
Frequently Asked Questions
Can I make these wings ahead of time for a party?
Absolutely! Bake the wings through the high-temperature stage (step 5) without glazing. Let them cool completely, then store them in the refrigerator. When you’re ready to serve, reheat them in a 400°F oven for 8-10 minutes, then toss with the freshly made glaze. This method ensures the wings stay crispy and the glaze is at its best.
Why are my baked wings not crispy?
The most common culprit is moisture. Make sure you pat the wings extremely dry before seasoning. Another issue could be overcrowding — if the wings are touching on the baking sheet, they’ll steam instead of crisp. Finally, check that you’re using baking powder (not baking soda) and that it’s fresh. Expired baking powder won’t work as effectively.
Can I use drumsticks or thighs instead of wings?
Yes, but you’ll need to adjust the cooking time. Drumsticks and thighs are thicker and take longer to cook through. Follow the same low-then-high temperature method, but add 10-15 minutes to the high-temperature stage. Always use an instant-read thermometer to check for doneness — chicken should reach 165°F at the thickest part.
How do I make the glaze less sweet?
Reduce the honey to 1/4 cup and add an extra tablespoon of rice vinegar or a splash of lime juice. You can also add a pinch of red pepper flakes or a teaspoon of Sriracha to balance the sweetness with heat. The key is tasting as you go — adjust the glaze to your preference before you toss it with the wings.
Can I grill these wings instead of baking them?
Definitely! Preheat your grill to medium-high heat (about 400°F). Grill the seasoned wings over indirect heat for 25-30 minutes, flipping occasionally, until the skin is crispy and the internal temperature reaches 165°F. During the last 5 minutes, brush the wings with the glaze and move them to direct heat to caramelize. Watch carefully so the sugar doesn’t burn.
Pin This Recipe!
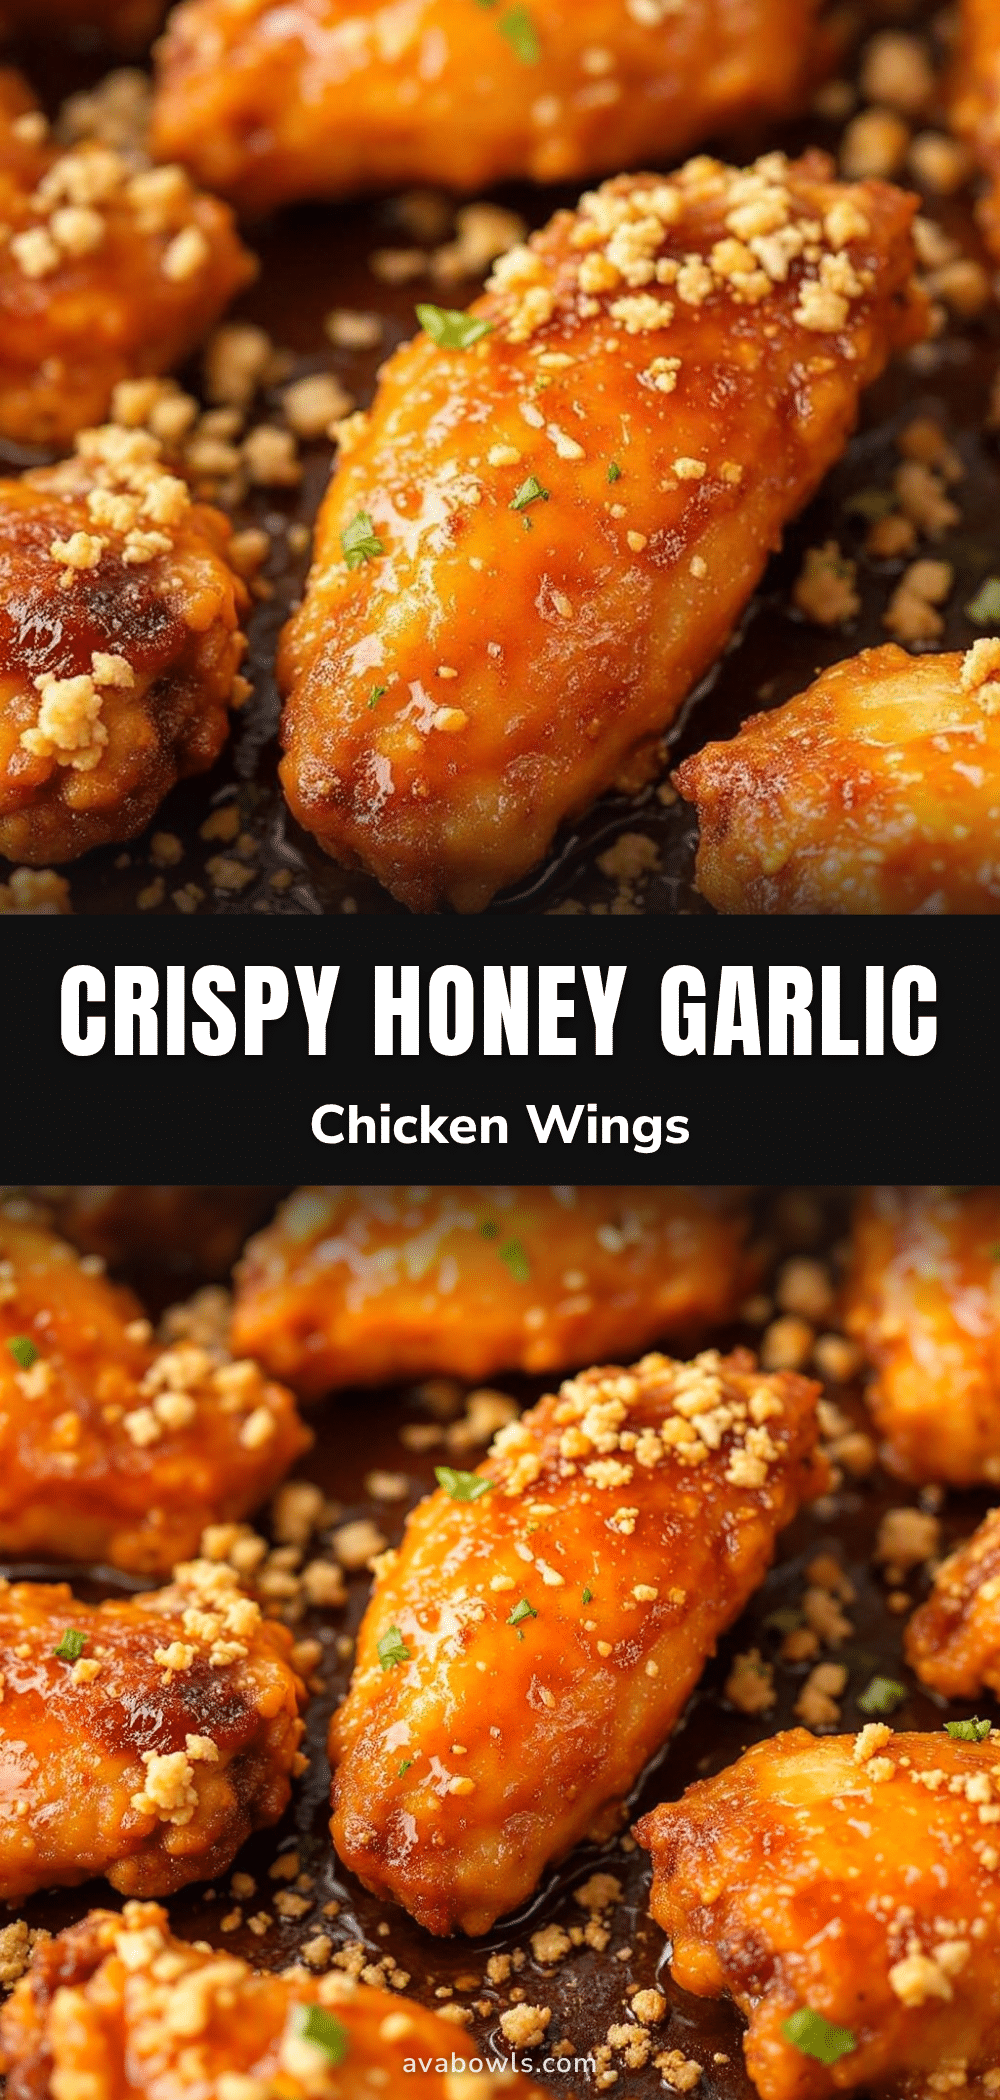
Crispy Baked Honey Garlic Chicken Wings
These oven-baked chicken wings achieve the perfect crunch without deep frying, thanks to a two-step baking method and a secret ingredient. Tossed in a sticky-sweet honey garlic glaze, they’re the ultimate game day appetizer that converts fried-wing loyalists.
- Prep Time: 15 minutes
- Cook Time: 1 hour 10 minutes to 1 hour 20 minutes
- Total Time: 1 hour 25 minutes to 1 hour 35 minutes (plus optional drying time)
- Yield: 4 servings 1x
- Category: Appetizer
- Cuisine: American
Ingredients
- 3 pounds chicken wings, separated into drumettes and flats (about 24–30 pieces total)
- 1 tablespoon baking powder (NOT baking soda!)
- 1 teaspoon fine sea salt
- 1/2 teaspoon freshly ground black pepper
- 1 teaspoon garlic powder
- 1 teaspoon onion powder
- 1/2 teaspoon paprika (regular or smoked)
- 1/3 cup honey (good-quality, such as wildflower or orange blossom)
- 4 cloves garlic, minced
- 3 tablespoons low-sodium soy sauce (or tamari/coconut aminos for gluten-free)
- 2 tablespoons unsalted butter (or salted, reduce added salt slightly)
- 1 tablespoon rice vinegar (or apple cider vinegar)
- 1 teaspoon sesame oil (optional)
- 1 tablespoon cornstarch mixed with 2 tablespoons cold water
- Sesame seeds (for garnish, optional)
- Chopped green onions (for garnish, optional)
- Crushed red pepper flakes (for garnish, optional)
Instructions
- Prep the Wings: Pat the chicken wings extremely dry with paper towels. For best results, arrange dried wings on a paper towel-lined baking sheet and refrigerate uncovered for 1-2 hours (or up to 24 hours) to further dry the skin.
- Season the Wings: In a large mixing bowl, combine baking powder, salt, pepper, garlic powder, onion powder, and paprika. Add the dried wings and toss thoroughly with your hands until every piece is evenly coated. Let rest at room temperature for 15 minutes while preheating the oven.
- Preheat and Prepare: Preheat oven to 250°F (120°C). Place a wire rack on a baking sheet and spray lightly with non-stick cooking spray.
- Low-Temperature Bake: Arrange wings in a single layer on the wire rack, not touching. Bake at 250°F for 30 minutes to render fat and dry the skin.
- High-Temperature Crisp: Increase oven temperature to 425°F (220°C) without removing wings. Bake for another 40-50 minutes until deep golden brown and crispy. Check at 40 minutes and add 5-10 minutes if needed.
- Make the Glaze: While wings bake, melt butter in a small saucepan over medium heat. Add minced garlic and cook 30-60 seconds until fragrant. Add honey, soy sauce, rice vinegar, and sesame oil (if using). Bring to a gentle simmer. Whisk in cornstarch slurry and stir continuously for 1-2 minutes until thickened to a syrupy consistency. Remove from heat.
- Glaze the Wings: Remove wings from oven and let rest 2-3 minutes. Transfer to a large bowl. Pour about half the glaze over wings and toss gently to coat. Add more glaze as needed for a thin, even coating. Reserve a little for drizzling at the table if desired.
- Garnish and Serve: Transfer glazed wings to a serving platter. Sprinkle with sesame seeds, chopped green onions, and crushed red pepper flakes if using. Serve immediately while hot and sticky.
Notes
The single most important factor for crispy wings is dry skin. Pat wings extremely dry and consider refrigerating uncovered for up to 24 hours. Do not skip the low-temperature first stage (250°F for 30 minutes) as it renders fat slowly. Use baking powder, NOT baking soda, to avoid a metallic taste. Apply glaze only after baking to prevent burning. For extra stickiness, double glaze by brushing a thin layer, then another right before serving. Do not let glazed wings sit too long before serving or the skin will soften.
Nutrition
- Serving Size: 6-8 wings
- Calories: 380420
- Sugar: 1518
- Sodium: 800900
- Fat: 2226
- Saturated Fat: 810
- Carbohydrates: 1822
- Protein: 2832
Keywords: crispy baked chicken wings, honey garlic wings, oven baked wings, game day appetizer, sticky wings, baked chicken wings recipe


