I need a Halloween treat that isn’t just another bag of candy. That’s the thought that hit me last October while staring at a pantry full of pumpkin puree and a package of refrigerated pie crusts. Not cookies, not pie—something in between that feels special but doesn’t require rolling out dough for hours. Mini pumpkin pie cookies. That’s where my brain landed, and honestly, I haven’t looked back since.
The first batch came out a little messy, if I’m being honest. The filling oozed over the edges, and I used too much sugar on top. But the flavor? Pure autumn in a single bite. By the third try, I had it dialed in—crisp buttery edges, a creamy pumpkin center, and just enough spice to make the whole kitchen smell like a harvest festival. These little guys became my go-to for Halloween parties, and now they’re yours too.
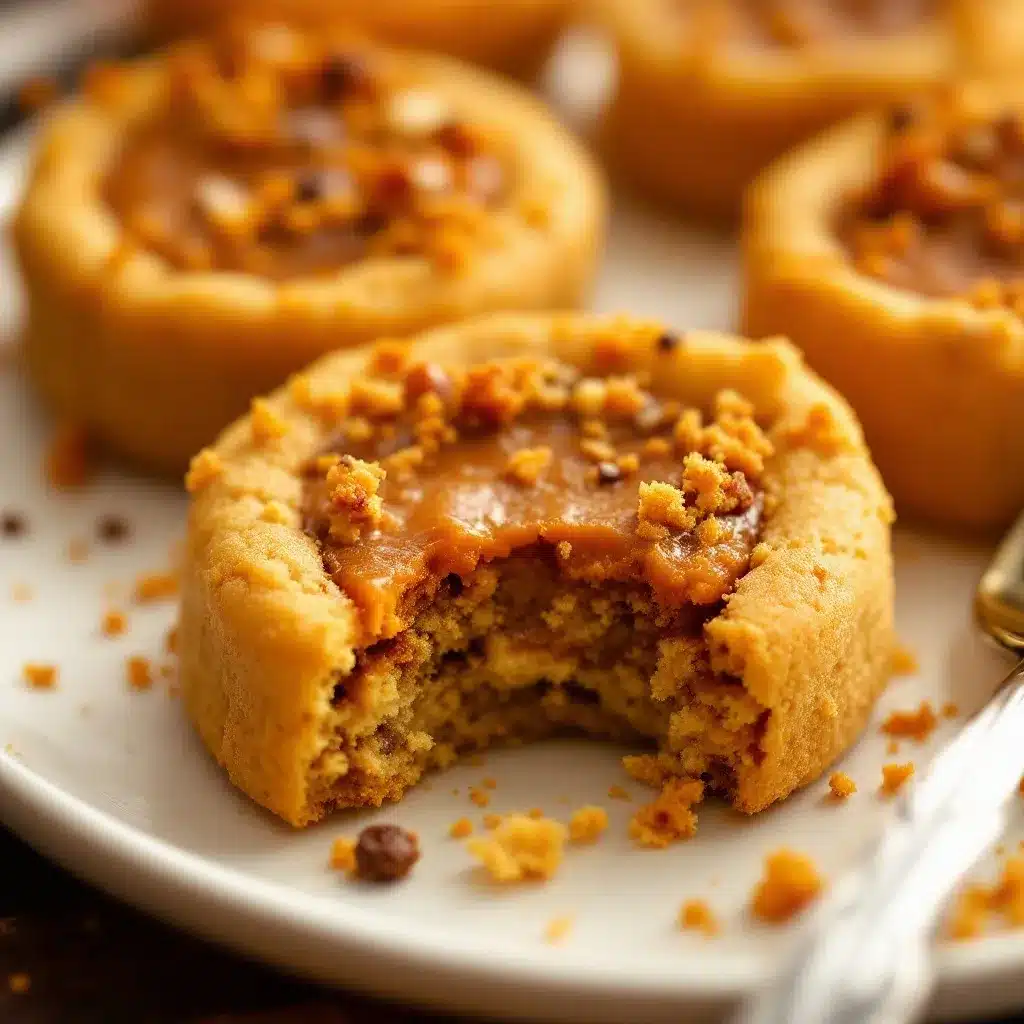
What I love most about these easy mini pumpkin pie cookies is how they solve the eternal Halloween dilemma. You want something festive but not overly complicated, something that feels homemade without taking all afternoon. These check every box. They’re portable, they’re adorable, and they taste like the best parts of fall in cookie form.
So if you’re tired of the same old Halloween treats and want something that actually impresses people (without stressing you out), stick with me. I’ve tested these enough times to know exactly what works and what doesn’t.
Why You’ll Love This Recipe
Let me tell you why these mini pumpkin pie cookies have earned a permanent spot in my fall baking rotation. They’re not just another recipe—they’re the one people ask for year after year.
- Quick & Easy: From start to finish, you’re looking at about 35 minutes. That’s faster than a pumpkin pie and way less fussy.
- Simple Ingredients: You probably have most of this stuff in your kitchen right now. No weird specialty items or expensive extracts.
- Perfect for Halloween Parties: These little cookies are portable, mess-free, and disappear faster than anything else on the dessert table.
- Crowd-Pleaser: Kids love the cookie part, adults appreciate the pumpkin pie filling, and everyone goes back for seconds.
- Unbelievably Delicious: The contrast between the flaky crust and the creamy, spiced filling is next-level comfort food.
What makes these different from every other pumpkin cookie recipe out there? It’s the technique. Instead of making a traditional cookie dough, we’re using pie crust as the base—which gives you that buttery, flaky texture without any complicated mixing. Plus, the filling is perfectly balanced so it’s not too sweet or too pumpkin-heavy. This isn’t just another version of a pumpkin cookie. This is the version that actually works.
Honestly, these cookies make me close my eyes after the first bite every single time. They’re comfort food reimagined—faster, simpler, but with the same soul-soothing satisfaction as a full pumpkin pie. Perfect for impressing guests without stress, or turning a simple Halloween gathering into something memorable.
What Ingredients You Will Need
This recipe uses simple, wholesome ingredients to deliver big pumpkin flavor without the fuss. Most of these are pantry staples, so you probably don’t need a special trip to the store.
For the Cookie Base
- 1 package (14 ounces) refrigerated pie crusts (I prefer Pillsbury for consistent results, but any brand works—or use homemade if you’re feeling ambitious)
- 1 large egg, beaten (for egg wash, gives that golden shine)
- 1 tablespoon granulated sugar, for sprinkling on top
- ½ teaspoon pumpkin pie spice, mixed with the sugar for extra flavor
For the Pumpkin Pie Filling
- ¾ cup pumpkin puree (not pumpkin pie filling—make sure it’s 100% pure pumpkin)
- ¼ cup granulated sugar
- 2 tablespoons brown sugar, packed (adds depth and moisture)
- 1 large egg yolk (the yolk gives richness without making the filling too runny)
- ¼ cup heavy cream (or evaporated milk if that’s what you have)
- 1 teaspoon pumpkin pie spice
- ½ teaspoon ground cinnamon
- ¼ teaspoon ground ginger
- ⅛ teaspoon ground cloves
- Pinch of salt (don’t skip this—it balances the sweetness)
- ½ teaspoon vanilla extract
Ingredient Tips & Substitutions
For the pumpkin puree, I always recommend Libby’s—it’s consistently thick and not watery. If you’re using a different brand, you might need to drain off excess liquid by pressing it through a fine-mesh strainer. Nobody wants soggy cookie bottoms.
If you don’t have heavy cream, full-fat coconut milk works beautifully for a dairy-free option. Just make sure it’s the canned kind, not the carton. For a gluten-free version, use a gluten-free pie crust mix or pre-made gluten-free crusts. The filling itself is naturally gluten-free.
You can absolutely swap the spice blend if you prefer. I’ve made these with just cinnamon and nutmeg when I ran out of pumpkin pie spice, and they were still fantastic. The key is balancing the warmth without overwhelming the pumpkin flavor.
Equipment Needed
You don’t need a fancy bakery setup for these cookies. Here’s what you’ll need:
- 2 round cookie cutters (one 2½-inch and one 1½-inch—or use a shot glass for the small one)
- Baking sheet (a rimmed half-sheet pan works best)
- Parchment paper (non-stick foil also works in a pinch)
- Rolling pin (even a wine bottle works if you’re in a bind)
- Small mixing bowl for the filling
- Whisk
- Pastry brush for the egg wash (a clean paintbrush works too—just make sure it’s new)
- Cooling rack
I’ve made these with just a drinking glass for cutting and a fork for mixing. Seriously, don’t overthink the equipment. The only thing I’d recommend spending a few dollars on is a good baking sheet—thin ones can burn the bottoms before the tops are done.
Preparation Method
Let’s get into the actual making part. I’ve broken this down so even a beginner baker can nail it on the first try.
Step 1: Preheat and Prep
Preheat your oven to 375°F (190°C). Line your baking sheet with parchment paper. While the oven heats, take your pie crusts out of the fridge—they’re easier to work with when they’re still cold but not rock-hard.
Step 2: Make the Pumpkin Filling
In a small bowl, whisk together the pumpkin puree, granulated sugar, brown sugar, egg yolk, heavy cream, pumpkin pie spice, cinnamon, ginger, cloves, salt, and vanilla extract. Whisk until completely smooth—about 30 seconds. The mixture should be thick but pourable. If it looks watery, your pumpkin puree might have too much liquid. Set the bowl aside.
Step 3: Cut the Cookie Bases
Unroll one pie crust onto a lightly floured surface. Use your 2½-inch cookie cutter to cut out circles. You should get about 8 to 10 circles per crust. Reroll the scraps once to get more—but don’t overwork the dough or it gets tough. Transfer half of the circles to your prepared baking sheet, spacing them about 1 inch apart.
Step 4: Create the Cookie Tops
Take the remaining circles and use your 1½-inch cutter to cut a small hole in the center of each. This creates a little window so you can see the pumpkin filling peeking through. It also helps steam escape while baking. Place these rings on a separate piece of parchment paper for now.
Step 5: Assemble the Cookies
Spoon about 1 tablespoon of pumpkin filling onto each of the bottom circles. Don’t overfill—the filling will puff up a little in the oven. Gently place a top ring over each filled bottom circle. Press the edges lightly to seal, but don’t squish the filling out.
Step 6: Egg Wash and Sugar Sprinkle
Brush the tops of each cookie with the beaten egg. This gives them that gorgeous golden-brown finish. Mix the 1 tablespoon sugar with the ½ teaspoon pumpkin pie spice and sprinkle generously over the tops. Don’t be shy—the sugar creates a lovely crunchy top.
Step 7: Bake
Bake for 14 to 16 minutes, or until the crust is golden brown and the filling is set but still slightly jiggly in the center. They’ll firm up as they cool. The kitchen will smell absolutely incredible at this point—like autumn in a bottle.
Step 8: Cool
Let the cookies cool on the baking sheet for 5 minutes, then transfer to a cooling rack. This step is important—if you try to move them too soon, the filling might slide off the crust. Patience, my friend.
Cooking Tips & Techniques
I’ve made these cookies probably a dozen times now, and I’ve learned a few things the hard way. Let me save you the trouble.
Don’t overfill the cookies. I know it’s tempting to pile on the pumpkin filling, but too much will make the cookies soggy and cause the filling to bubble over the edges. One tablespoon is the sweet spot. Trust me on this one—I learned after cleaning burnt pumpkin off my baking sheet.
Keep the pie crust cold. If the dough gets too warm, it becomes sticky and hard to work with. If that happens, pop the cut circles in the fridge for 10 minutes before assembling. Cold crust = flaky cookies. Warm crust = sad, greasy cookies.
Use a fork to create steam vents. If you don’t have a small cookie cutter for the tops, just prick the top crust a few times with a fork. It does the same job—lets steam escape so your cookies don’t turn into little pumpkin volcanoes.
Watch the edges. These cookies go from perfectly golden to burnt in about 60 seconds. Start checking at the 12-minute mark. The edges should be light golden brown, and the filling should be set around the edges but still slightly wobbly in the center.
Multitask like a pro. While the first batch bakes, cut out the circles for the second batch. This saves you at least 10 minutes and keeps your workflow smooth.
Variations & Adaptations
One of the best things about this recipe is how flexible it is. Here are some ways I’ve switched it up:
Vegan Version
Use a vegan pie crust (many store-bought brands are accidentally vegan) and substitute the egg wash with a mixture of 1 tablespoon maple syrup and 1 tablespoon plant-based milk. For the filling, use a flax egg (1 tablespoon ground flaxseed mixed with 3 tablespoons water) and full-fat coconut cream instead of heavy cream. The texture is slightly different but still delicious.
Gluten-Free Option
Gluten-free pie crusts work beautifully here. I’ve used both store-bought and homemade versions. Just handle the dough gently since gluten-free crusts tend to be more fragile. The filling is naturally gluten-free, so you only need to swap the crust.
Savory-Sweet Twist
Add a pinch of cayenne pepper or black pepper to the pumpkin filling. Sounds weird, I know, but the heat brings out the sweetness of the pumpkin and complements the warm spices. I tried this on a whim last year, and now I can’t go back.
Chocolate Lover’s Version
Drizzle melted dark chocolate over the cooled cookies. The bitterness of the chocolate pairs perfectly with the sweet, spiced pumpkin filling. I’ve also added mini chocolate chips to the filling before baking—dangerously good.
Mini Pecan Pie Variation
Swap the pumpkin filling for a simple pecan pie filling (corn syrup, brown sugar, eggs, pecans, vanilla). Same technique, completely different flavor. Perfect for when you can’t decide between pumpkin and pecan.
Serving & Storage Suggestions
These cookies are best served slightly warm or at room temperature. The filling is soft and creamy, the crust is flaky, and the sugar topping adds a pleasant crunch. They’re perfect as-is, but a dollop of whipped cream or a drizzle of caramel sauce takes them over the top.
For a Halloween party, arrange them on a platter with some creamy queso blanco dip on the side for a sweet-and-savory spread. They also pair beautifully with a hot cup of creamy matcha latte for a cozy afternoon treat.
Storage: Store leftover cookies in an airtight container in the refrigerator for up to 4 days. The filling contains dairy, so they need to stay chilled. To reheat, pop them in a 350°F (175°C) oven for 5 minutes—this brings back the crispness of the crust.
Freezing: These freeze beautifully. Place the cooled cookies in a single layer on a baking sheet and freeze until solid, then transfer to a freezer-safe bag. They’ll keep for up to 3 months. Reheat directly from frozen at 350°F (175°C) for 8-10 minutes.
The flavors actually deepen after a day in the fridge. The spices meld together, and the pumpkin filling becomes even more pronounced. If you can resist eating them all on day one, you’re in for a treat on day two.
Nutritional Information & Benefits
Per cookie (based on 16 cookies):
- Calories: 145
- Fat: 8g
- Carbohydrates: 18g
- Fiber: 1g
- Sugar: 9g
- Protein: 2g
- Vitamin A: 35% of daily value
Pumpkin is packed with vitamin A, which supports eye health and immune function. It’s also a good source of fiber and antioxidants. Compared to a traditional pumpkin pie slice (around 300 calories), these cookies give you that same pumpkin satisfaction with less than half the calories.
If you’re watching your sugar intake, you can reduce the sugar in the filling by half without sacrificing too much flavor. The natural sweetness of the pumpkin carries a lot of weight here. For a lower-carb option, use a low-carb pie crust and swap the sugar for a granulated monk fruit sweetener.
These cookies are vegetarian and can easily be made dairy-free or vegan with the substitutions mentioned earlier. They contain gluten unless you use a gluten-free crust, and they contain eggs (or egg substitutes).
Conclusion
These easy mini pumpkin pie cookies have become my signature Halloween treat, and I think they’re about to become yours too. They’re everything you want in a fall dessert—warm, spiced, buttery, and just sweet enough—without the fuss of a full pie. Plus, they’re portable, which means you can take them to parties, share them with coworkers, or just keep them all to yourself (no judgment here).
The best part? You can customize them endlessly. Make them vegan, gluten-free, or add chocolate—whatever fits your mood. That’s the beauty of a simple recipe that actually works. It becomes a canvas for your own creativity.
If you try these cookies, I’d love to hear how they turned out. Leave a comment below and let me know if you made any fun variations. Did you add chocolate? Go heavy on the spice? Make a vegan version? Share your wins—and your happy accidents too. That’s how we all get better in the kitchen.
Now go preheat that oven. Your Halloween treats are waiting.
Frequently Asked Questions
Can I use homemade pie crust instead of refrigerated?
Absolutely. Homemade pie crust works great—just make sure it’s chilled before you cut the circles. Any flaky pie crust recipe will do. The refrigerated version is just more convenient for busy weeknights.
Why did my filling turn out watery?
This usually happens if your pumpkin puree has too much moisture. Some brands are thinner than others. To fix it, spread the pumpkin puree on a paper towel-lined plate for 10 minutes to absorb excess liquid before mixing the filling. You can also cook the filling on the stovetop for 2-3 minutes to thicken it.
Can I make these cookies ahead of time?
Yes! You can assemble the cookies completely and refrigerate them (unbaked) for up to 24 hours. Just cover them loosely with plastic wrap. Bake directly from the fridge, adding an extra 2 minutes to the baking time. You can also freeze baked cookies for up to 3 months.
How do I prevent the filling from bubbling over?
Don’t overfill the cookies—one tablespoon is plenty. Also, make sure you cut a vent hole in the top crust or prick it with a fork. This lets steam escape instead of pushing the filling out the sides. If you’re still having trouble, try chilling the assembled cookies for 10 minutes before baking.
Can I use pumpkin pie filling instead of pumpkin puree?
I wouldn’t recommend it. Pumpkin pie filling already has sugar and spices added, which will throw off the balance of this recipe. Stick with 100% pure pumpkin puree for the best results. If you only have pumpkin pie filling on hand, reduce the sugar in the recipe by half and skip the added spices.
Pin This Recipe!
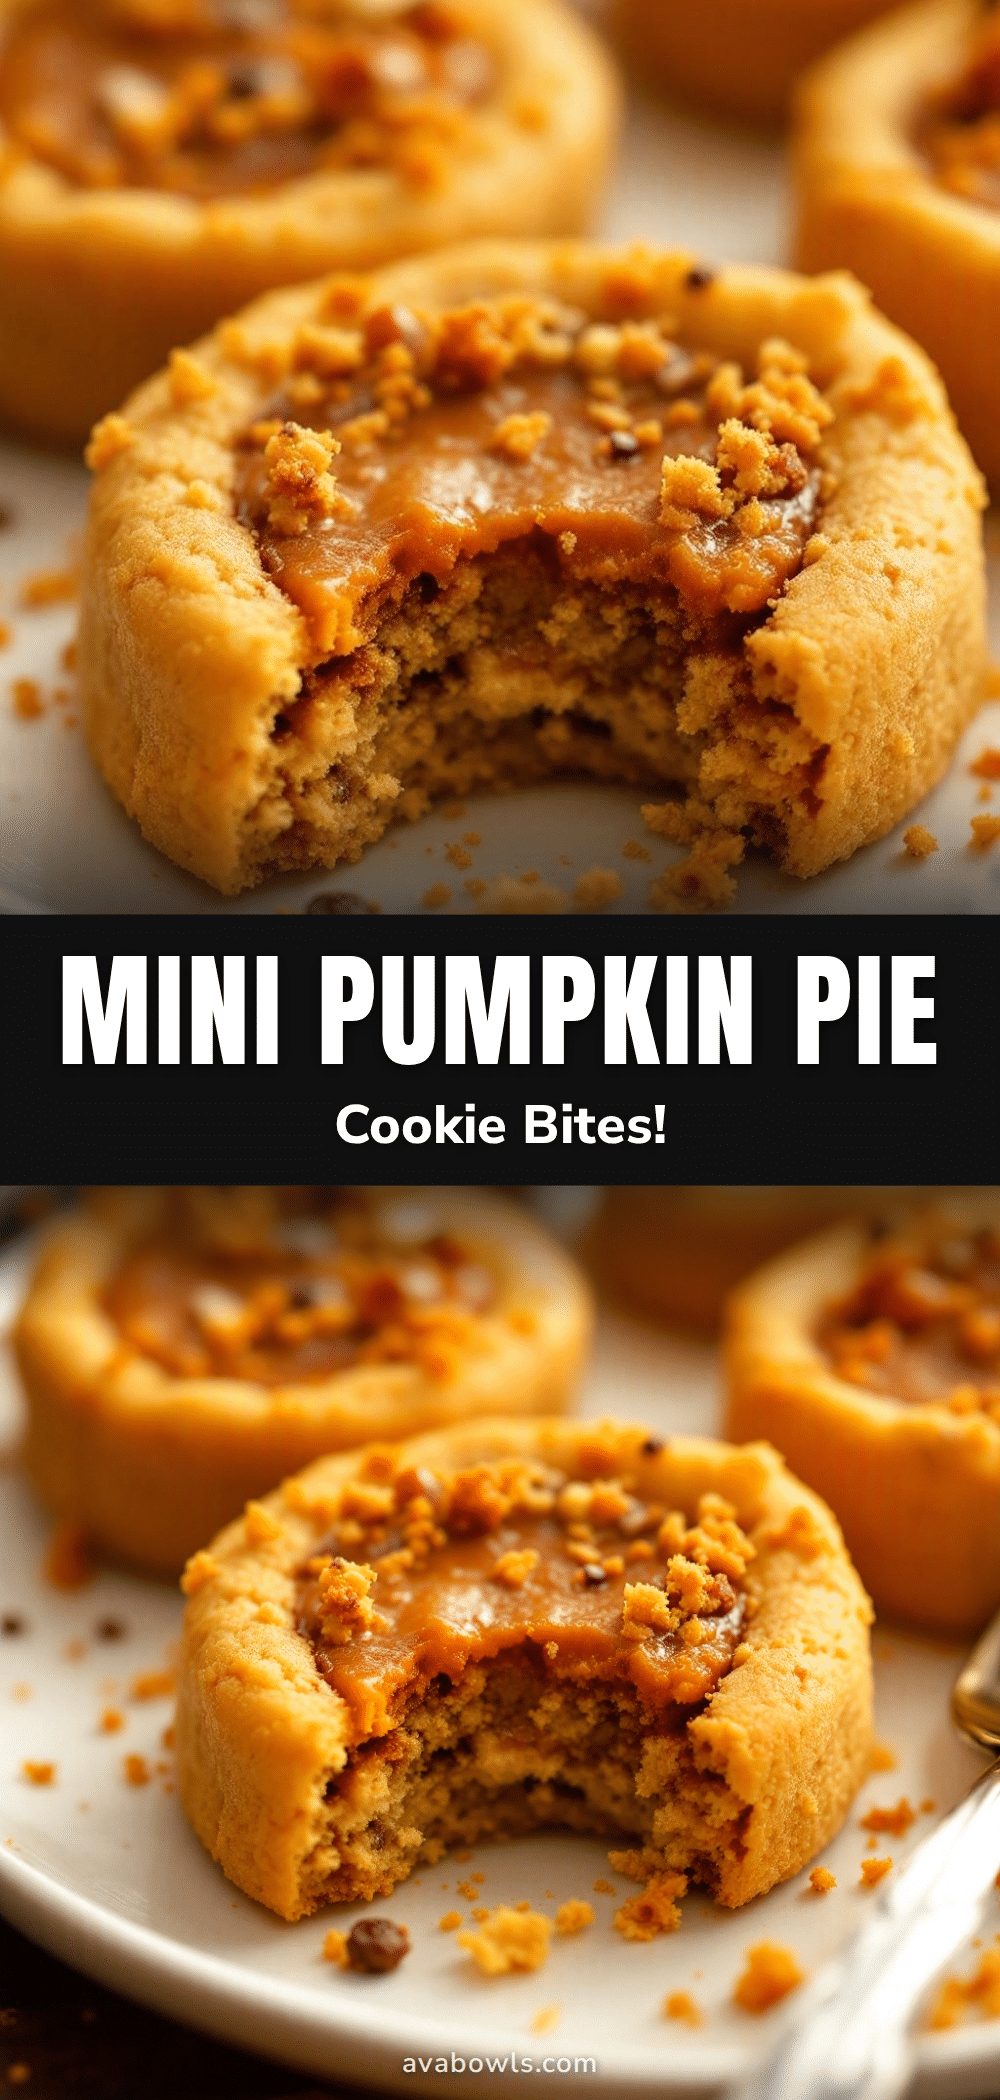
Easy Mini Pumpkin Pie Cookies: Best Halloween Treats
These easy mini pumpkin pie cookies are the perfect Halloween treat—portable, adorable, and taste like the best parts of fall in cookie form. They’re quick to make with simple ingredients and are sure to impress at any party.
- Prep Time: 15 minutes
- Cook Time: 16 minutes
- Total Time: 35 minutes
- Yield: 16 cookies 1x
- Category: Dessert
- Cuisine: American
Ingredients
- 1 package (14 ounces) refrigerated pie crusts
- 1 large egg, beaten (for egg wash)
- 1 tablespoon granulated sugar (for sprinkling)
- ½ teaspoon pumpkin pie spice (mixed with sugar)
- ¾ cup pumpkin puree (100% pure pumpkin)
- ¼ cup granulated sugar
- 2 tablespoons brown sugar, packed
- 1 large egg yolk
- ¼ cup heavy cream (or evaporated milk)
- 1 teaspoon pumpkin pie spice
- ½ teaspoon ground cinnamon
- ¼ teaspoon ground ginger
- ⅛ teaspoon ground cloves
- Pinch of salt
- ½ teaspoon vanilla extract
Instructions
- Preheat your oven to 375°F (190°C). Line your baking sheet with parchment paper. Take pie crusts out of the fridge to keep cold but workable.
- In a small bowl, whisk together pumpkin puree, granulated sugar, brown sugar, egg yolk, heavy cream, pumpkin pie spice, cinnamon, ginger, cloves, salt, and vanilla extract until smooth (about 30 seconds). Set aside.
- Unroll one pie crust onto a lightly floured surface. Use a 2½-inch cookie cutter to cut out circles (about 8-10 per crust). Reroll scraps once. Transfer half of the circles to the prepared baking sheet, spacing 1 inch apart.
- Take the remaining circles and use a 1½-inch cutter to cut a small hole in the center of each to create a window for the filling and steam escape. Place these rings on a separate piece of parchment paper.
- Spoon about 1 tablespoon of pumpkin filling onto each bottom circle. Gently place a top ring over each filled bottom circle. Press edges lightly to seal without squishing filling out.
- Brush the tops of each cookie with beaten egg. Mix 1 tablespoon sugar with ½ teaspoon pumpkin pie spice and sprinkle generously over the tops.
- Bake for 14 to 16 minutes, or until the crust is golden brown and the filling is set but still slightly jiggly in the center.
- Let cookies cool on the baking sheet for 5 minutes, then transfer to a cooling rack.
Notes
Don’t overfill the cookies—1 tablespoon is the sweet spot. Keep pie crust cold for flaky results. If you don’t have a small cookie cutter, prick the top crust with a fork for steam vents. Start checking at 12 minutes to avoid burning. Store in an airtight container in the refrigerator for up to 4 days. Freeze for up to 3 months.
Nutrition
- Serving Size: 1 cookie
- Calories: 145
- Sugar: 9
- Fat: 8
- Carbohydrates: 18
- Fiber: 1
- Protein: 2
Keywords: mini pumpkin pie cookies, Halloween treats, pumpkin cookies, easy pumpkin dessert, fall baking, pie crust cookies


