I burned my first pumpkin dump cake so badly the smoke alarm went off and my neighbor actually knocked on the door to check if everything was okay. Not my finest cooking moment, honestly. The worst part? I’d been so excited about this easy pumpkin dump cake with yellow cake mix that I’d already texted my sister a photo of the ingredients laid out on the counter like some kind of baking influencer. Then I pulled that blackened, bubbled mess out of the oven and wanted to cry.
The problem wasn’t the recipe. It was me. I’d stirred everything together like a regular cake batter, completely missing the point of a “dump cake” in the first place. The whole beauty of this dessert is that you don’t mix it. You layer it. You dump it. You let the oven do the magic while you sit on the couch and pretend you worked harder than you did.
So I tried again the next weekend. This time I followed the actual method—pumpkin puree on the bottom, evaporated milk poured over, cake mix sprinkled on top like snow, then thin slices of butter dotting the surface. And when I pulled that pan out of the oven? The top was golden and crackly, the pumpkin filling had set into something between a custard and a pudding, and the whole kitchen smelled like fall had moved in permanently.
I ate a slice warm with a scoop of vanilla ice cream and finally understood what everyone had been talking about. This easy pumpkin dump cake with yellow cake mix isn’t just a shortcut dessert. It’s the kind of thing that makes you wonder why complicated recipes exist at all.
Why You’ll Love This Recipe
Let me tell you why this easy pumpkin dump cake with yellow cake mix has become my go-to fall dessert, and honestly, my year-round emergency sweet fix too. I’ve tested this recipe about seven times now, tweaking the butter placement, experimenting with different cake mix brands, and even trying it with a gluten-free yellow cake mix for a friend. Every single time, it delivers.
- Ridiculously Easy: We’re talking five minutes of active prep time. No mixer required, no creaming butter and sugar, no fussing with multiple bowls. You literally dump and bake.
- Simple Pantry Ingredients: Canned pumpkin, evaporated milk, eggs, sugar, yellow cake mix, and butter. That’s it. You probably have most of these in your kitchen right now, especially if you’re the type who stocks up on canned pumpkin in September like I do.
- Perfect for Fall Gatherings: Thanksgiving, Friendsgiving, potlucks, cozy family dinners—this dessert shows up and steals the show without you breaking a sweat. I brought it to a Friendsgiving last year and three people asked for the recipe before dinner was even over.
- Crowd-Pleaser Across Ages: Kids love the buttery, cake-like topping. Adults love the warm pumpkin spice filling. Everyone loves that it pairs perfectly with ice cream or whipped cream.
- Unbelievably Delicious Texture: The magic here is the contrast. You get a crisp, buttery, almost streusel-like top from the cake mix and melted butter, sitting on top of a silky, spiced pumpkin custard. It’s like a cobbler and a pumpkin pie had a baby.
What makes this version different from other pumpkin dump cake recipes I’ve tried? It’s the ratio. I use exactly 15 ounces of pumpkin to one box of cake mix, and I don’t skimp on the butter. Some recipes try to use less butter to make it healthier, but honestly, the butter is what creates that gorgeous golden crust. You need those thin pats covering the entire surface. Trust me on this one.
This isn’t just another dessert recipe. This is the one that makes people close their eyes after the first bite and say “mmm” without thinking about it. It’s comfort food at its most honest—simple, warm, and deeply satisfying.
What Ingredients You Will Need
This easy pumpkin dump cake with yellow cake mix uses straightforward ingredients, but each one plays an important role in creating that perfect texture and flavor. Here’s what you’ll need and why each ingredient matters.
- 1 can (15 oz) pumpkin puree — Not pumpkin pie filling! Make sure you grab pure pumpkin puree. I prefer Libby’s for its consistent texture and deep color. The pumpkin provides the base for that silky custard layer.
- 1 can (12 oz) evaporated milk — This adds richness without the extra fat of heavy cream. It helps create that smooth, almost pudding-like texture in the pumpkin layer. Don’t substitute with sweetened condensed milk—that’s a whole different thing and will make it way too sweet.
- 3 large eggs — Room temperature eggs blend more smoothly into the pumpkin mixture. They help set the custard so it holds its shape when you scoop it out.
- 1 cup granulated sugar — Just regular white sugar. It sweetens the pumpkin layer and helps it set properly. I’ve tried with brown sugar before and it changes the color and flavor a bit—still good, but different.
- 1 teaspoon pumpkin pie spice — You can use store-bought or make your own blend with cinnamon, nutmeg, ginger, and cloves. I actually prefer making my own because I like extra cinnamon. If you only have cinnamon on hand, use 1.5 teaspoons and it’ll still taste great.
- 1 teaspoon vanilla extract — Pure vanilla extract adds warmth and depth. The imitation stuff works in a pinch, but pure vanilla really does make a difference here.
- 1 box (15.25 oz) yellow cake mix — This is the star of the topping. I use Betty Crocker or Duncan Hines, but any standard yellow cake mix works. The cake mix creates that incredible buttery, crumbly crust on top. Do not mix it with anything—just sprinkle it right out of the box.
- ¾ cup unsalted butter — Cut into thin slices. Salted butter works too if that’s what you have, just reduce any added salt in the recipe. The butter melts through the cake mix as it bakes, creating pockets of crispy, golden deliciousness.
A quick note on substitutions: If you’re gluten-free, use a gluten-free yellow cake mix. I’ve tested this with King Arthur’s gluten-free yellow cake mix and it worked beautifully. For a dairy-free version, use a dairy-free butter substitute like Miyoko’s or Country Crock plant butter. The texture will be slightly different but still delicious.
And here’s a tip I learned the hard way—make sure your butter is cold when you slice it. If it’s too soft, it’ll just sink into the cake mix instead of sitting on top and creating that beautiful crust. Cold butter slices melt slowly and evenly, giving you that perfect texture.
Equipment Needed
One of the best things about this easy pumpkin dump cake with yellow cake mix is that you don’t need fancy equipment. Here’s what you’ll need:
- 9×13-inch baking dish — Glass or ceramic works best. I use a Pyrex dish and it’s perfect. Metal pans work too, just keep an eye on baking time as they conduct heat differently.
- Large mixing bowl — For whisking together the pumpkin filling ingredients.
- Whisk — A good whisk helps get the pumpkin mixture smooth without overmixing.
- Measuring cups and spoons — For accurate measurements. I’ve eyeballed the spices before and regretted it.
- Sharp knife or pastry cutter — For slicing the butter into thin pats. A butter knife works fine too.
- Cooling rack — Optional but helpful for even cooling.
- Spatula — For serving. A metal spatula works best to get under that crispy topping without breaking it.
If you don’t have a 9×13 dish, you can use two 8×8 square pans and adjust the baking time slightly. I’ve also made this in a disposable aluminum pan for potlucks and it works perfectly—just put it on a baking sheet for stability.
Preparation Method
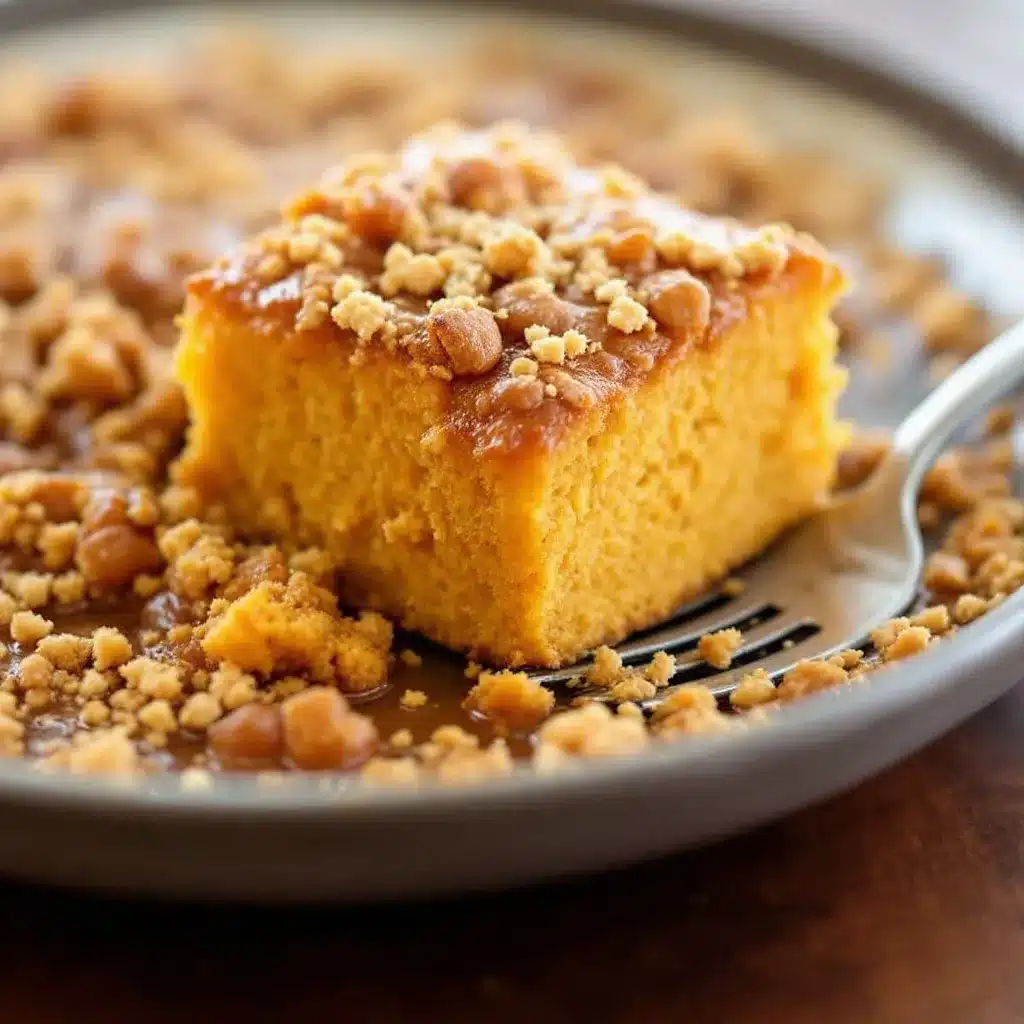
Making this easy pumpkin dump cake with yellow cake mix is almost embarrassingly simple. But there are a few tricks I’ve picked up along the way that make the difference between good and absolutely irresistible.
- Preheat your oven to 350°F (175°C). Get this going first so the oven is fully hot by the time you’re done prepping. I like to put my oven rack in the center position.
- Grease your 9×13 baking dish lightly. Use butter or non-stick spray. Just a thin coating so nothing sticks. I forgot to do this once and spent twenty minutes scraping pumpkin off the bottom of the dish. Not fun.
- In your large mixing bowl, combine the pumpkin puree, evaporated milk, eggs, sugar, pumpkin pie spice, and vanilla extract. Whisk everything together until it’s completely smooth and uniform. You want to make sure there are no streaks of egg white or clumps of spice. This should take about a minute of steady whisking. The mixture will be thin and pourable—that’s exactly right.
- Pour the pumpkin mixture into your prepared baking dish. Spread it evenly with your spatula. It should settle into a even layer across the entire dish. Give the dish a gentle shake to help it level out if needed.
- Open your box of yellow cake mix and sprinkle it evenly over the pumpkin mixture. This is the crucial part. Don’t stir it. Don’t mix it. Just dump the dry cake mix straight from the box and spread it into an even layer with your fingers or a spoon. It should cover the entire surface of the pumpkin mixture completely. If you have any bare spots, the topping won’t form properly there.
- Take your cold butter slices and arrange them evenly over the entire surface of the cake mix. This is where patience pays off. Place the butter slices about an inch apart, covering the whole top. Don’t pile them up in one spot. Think of it like you’re dotting the surface with butter—every inch should have a slice nearby. The butter will melt and spread as it bakes, creating that gorgeous golden crust.
- Bake for 45-55 minutes. The top should be deep golden brown and the edges should be bubbly. You’ll see the pumpkin filling bubbling up around the edges of the crust. That’s how you know it’s working. The center should be set but still slightly jiggly—it will continue to set as it cools.
- Let it cool for at least 15-20 minutes before serving. I know it’s tempting to dig in right away, but letting it rest helps the filling set up properly. If you serve it too hot, it’ll be runny. Warm is perfect, just not volcanic.
A few visual cues to watch for: The top should look like a golden, crackled streusel. You should see little pockets where the butter has created crispy, almost cookie-like bits. The pumpkin layer underneath will be set but still soft—think pumpkin pie filling consistency. If the top is browning too quickly but the center isn’t set yet, tent the dish loosely with foil for the last 10 minutes of baking.
My personal tip? I like to sprinkle a tiny pinch of flaky sea salt over the top right when it comes out of the oven. It cuts the sweetness and makes the flavors pop. My sister thinks I’m weird for this, but everyone who tries it agrees it’s a game-changer.
Cooking Tips & Techniques
After making this easy pumpkin dump cake with yellow cake mix more times than I care to admit, I’ve collected a few hard-won lessons. Let me save you from making the same mistakes I did.
Don’t overthink the layering. The whole point of a dump cake is that you don’t mix the layers together. I know it feels wrong to sprinkle dry cake mix over liquid and call it baking. But trust the process. The moisture from the pumpkin mixture rises up through the cake mix as it bakes, creating that incredible texture. If you stir it, you’ll end up with a soggy, dense mess.
Cold butter is your friend. I mentioned this before but it bears repeating. When you slice cold butter into thin pats and arrange them on top, they melt slowly and evenly. If your butter is room temperature, it’ll just sink into the cake mix and you won’t get that beautiful crispy top. I actually pop my butter in the freezer for five minutes before slicing if it’s a warm day.
Check for doneness properly. The top will look done before the center is fully set. Give the dish a gentle shake—if the center jiggles like Jell-O, it needs more time. If it’s mostly firm with just a slight wobble, it’s ready. The edges should be bubbly and the top should be deep golden brown.
Let it rest. This is the hardest tip to follow because your kitchen smells incredible and you just want to dig in. But letting the cake rest for at least 15-20 minutes allows the pumpkin custard to set up properly. If you serve it too soon, it’ll be soupy. Patience pays off here.
I once tried to rush this recipe by using a convection oven without adjusting the temperature. The top burned while the center was still raw. Learn from my mistakes—if you’re using convection, reduce the temperature by 25 degrees and check it earlier.
Variations & Adaptations
This easy pumpkin dump cake with yellow cake mix is incredibly versatile. Here are some variations I’ve tried and loved:
Spice it up: Add ½ teaspoon of ground ginger and ¼ teaspoon of ground cloves to the pumpkin mixture for a more complex spice profile. I did this for Thanksgiving one year and my aunt, who claims she doesn’t like pumpkin desserts, went back for seconds.
Nutty crunch: Sprinkle ½ cup of chopped pecans or walnuts over the cake mix before adding the butter. The nuts toast in the oven and add amazing texture. I prefer pecans because they’re buttery and not too hard.
Chocolate lover’s version: Use a chocolate cake mix instead of yellow. I was skeptical about this at first, but chocolate and pumpkin are actually a fantastic combination. The chocolate adds richness that complements the pumpkin spice beautifully.
Healthier twist: Use a sugar-free yellow cake mix and reduce the sugar in the pumpkin mixture to ½ cup. You can also use a sugar substitute like monk fruit sweetener. The texture will be slightly less tender, but it’s still delicious. I’ve made this for a friend who’s watching her sugar intake and she couldn’t tell the difference.
Apple pumpkin fusion: Layer 1 cup of thinly sliced apples (Granny Smith works great) on the bottom of the dish before pouring in the pumpkin mixture. The apples add a tart contrast that cuts through the sweetness. This is my personal favorite fall variation.
Dairy-free option: Use a dairy-free butter substitute and make sure your cake mix doesn’t contain dairy. I’ve tested this with Miyoko’s plant butter and it worked surprisingly well. The top wasn’t quite as crispy, but the flavor was still there.
Serving & Storage Suggestions
This easy pumpkin dump cake with yellow cake mix is best served warm, but it’s honestly delicious at any temperature. Here’s how I like to serve and store it.
Serving: Scoop it into bowls while it’s still warm. The contrast between the warm pumpkin custard and cold ice cream is absolutely perfect. I recommend vanilla bean ice cream, but cinnamon or caramel ice cream would be incredible too. A dollop of freshly whipped cream works beautifully if you want something lighter. For a fancy touch, drizzle a little caramel sauce over the top and sprinkle with cinnamon.
Temperature: Serve it warm for the best texture. Room temperature is also great, especially the next day when the flavors have had time to meld together. Cold from the fridge? Honestly, I’ve eaten it cold for breakfast and I’m not ashamed.
Storage: Cover the dish tightly with plastic wrap or aluminum foil and store it in the refrigerator for up to 5 days. The topping will soften slightly as it sits, but it’s still delicious. I actually think the flavors get better on day two.
Reheating: Individual portions can be microwaved for 20-30 seconds. For a larger portion, reheat in a 350°F oven for about 10 minutes. The topping will crisp up again slightly in the oven.
Freezing: This dessert freezes beautifully. Let it cool completely, then wrap the entire dish tightly in plastic wrap and foil. Freeze for up to 3 months. Thaw overnight in the refrigerator and reheat in the oven before serving. I’ve done this for holiday prep and it’s a lifesaver.
One thing I’ve noticed—the flavors actually deepen as the dessert sits. The spices meld together and the pumpkin custard becomes even more silky. So if you can make it a day ahead, do it. Your future self will thank you.
Nutritional Information & Benefits
Let’s be real—this is a dessert, not a health food. But it does have some redeeming qualities worth mentioning.
Here’s the approximate nutritional breakdown per serving (based on 12 servings):
- Calories: 380
- Total Fat: 16g
- Saturated Fat: 9g
- Cholesterol: 75mg
- Sodium: 380mg
- Total Carbohydrates: 56g
- Dietary Fiber: 2g
- Sugars: 38g
- Protein: 5g
- Vitamin A: 180% DV
- Calcium: 10% DV
- Iron: 8% DV
The good stuff: Pumpkin is packed with vitamin A, which supports eye health and immune function. It’s also a good source of fiber, which helps with digestion and keeps you feeling full. The eggs provide protein and healthy fats, while the evaporated milk adds calcium for bone health.
Dietary considerations: This recipe is vegetarian. For a gluten-free version, use a gluten-free yellow cake mix. For a dairy-free version, use dairy-free butter and check your cake mix ingredients. It’s not suitable for vegans as written, but you could experiment with egg substitutes and plant-based milk alternatives.
Allergen note: This recipe contains wheat (gluten), dairy, and eggs. If you’re serving a crowd with allergies, make sure to label it clearly.
My personal take? Everything in moderation. This is a treat, and treats are meant to be enjoyed without guilt. One slice of this easy pumpkin dump cake with yellow cake mix isn’t going to derail your healthy eating goals. It’s going to make your day better, and that counts for something.
Conclusion
This easy pumpkin dump cake with yellow cake mix has become my secret weapon for fall gatherings, last-minute dessert emergencies, and those evenings when I just need something warm and sweet. It’s the recipe I turn to when I want to impress people without actually working that hard.
What I love most about this dessert is how honest it is. There’s no pretense here. It’s not trying to be a fancy French pastry or a complicated layered cake. It’s a simple, humble dessert that delivers exactly what it promises—comfort, warmth, and pure pumpkin joy.
I hope you give this recipe a try. And when you do, don’t be afraid to make it your own. Add extra spice, throw in some nuts, or experiment with different cake mix flavors. The beauty of this recipe is that it’s forgiving and adaptable.
If you make this easy pumpkin dump cake with yellow cake mix, I’d love to hear about it. Leave a comment below and let me know how it turned out. Did you add any fun variations? Did you serve it with something unexpected? Share your experience—I read every comment and I love hearing about your kitchen adventures.
Now go preheat that oven. Fall is waiting, and this cake isn’t going to make itself.
Frequently Asked Questions
Can I use pumpkin pie filling instead of pumpkin puree?
I wouldn’t recommend it. Pumpkin pie filling already has sugar and spices added, which will throw off the sweetness and texture of this recipe. Stick with 100% pure pumpkin puree for the best results. If you only have pumpkin pie filling, reduce the sugar to ¼ cup and skip the pumpkin pie spice.
Why is my dump cake runny in the middle?
This usually means it needs more baking time. The center should be set but slightly jiggly when you take it out of the oven. If it’s still liquid, give it another 5-10 minutes. Also, make sure you’re letting it cool for at least 15-20 minutes before serving—it continues to set as it cools.
Can I make this in advance?
Absolutely! You can assemble the entire dish (minus the butter topping) up to 24 hours ahead, cover it, and refrigerate. Add the butter slices just before baking. You can also bake it fully, cool it, and reheat it the next day. The flavors actually get better after a day in the fridge.
What if I don’t have a 9×13 baking dish?
No problem! You can use two 8×8 square pans or even a 9×9 square pan. Just adjust the baking time—smaller pans will need about 5-10 minutes less baking time. Keep an eye on it and check for doneness with the jiggle test.
Can I use a different cake mix flavor?
Yes! Spice cake mix is the most popular alternative to yellow cake mix. I’ve also used butter pecan, white cake mix, and even carrot cake mix. Each one gives a slightly different flavor profile. Just avoid chocolate cake mix if you want a traditional pumpkin spice flavor—unless you’re going for that chocolate-pumpkin combo, which is actually pretty amazing.
Pin This Recipe!
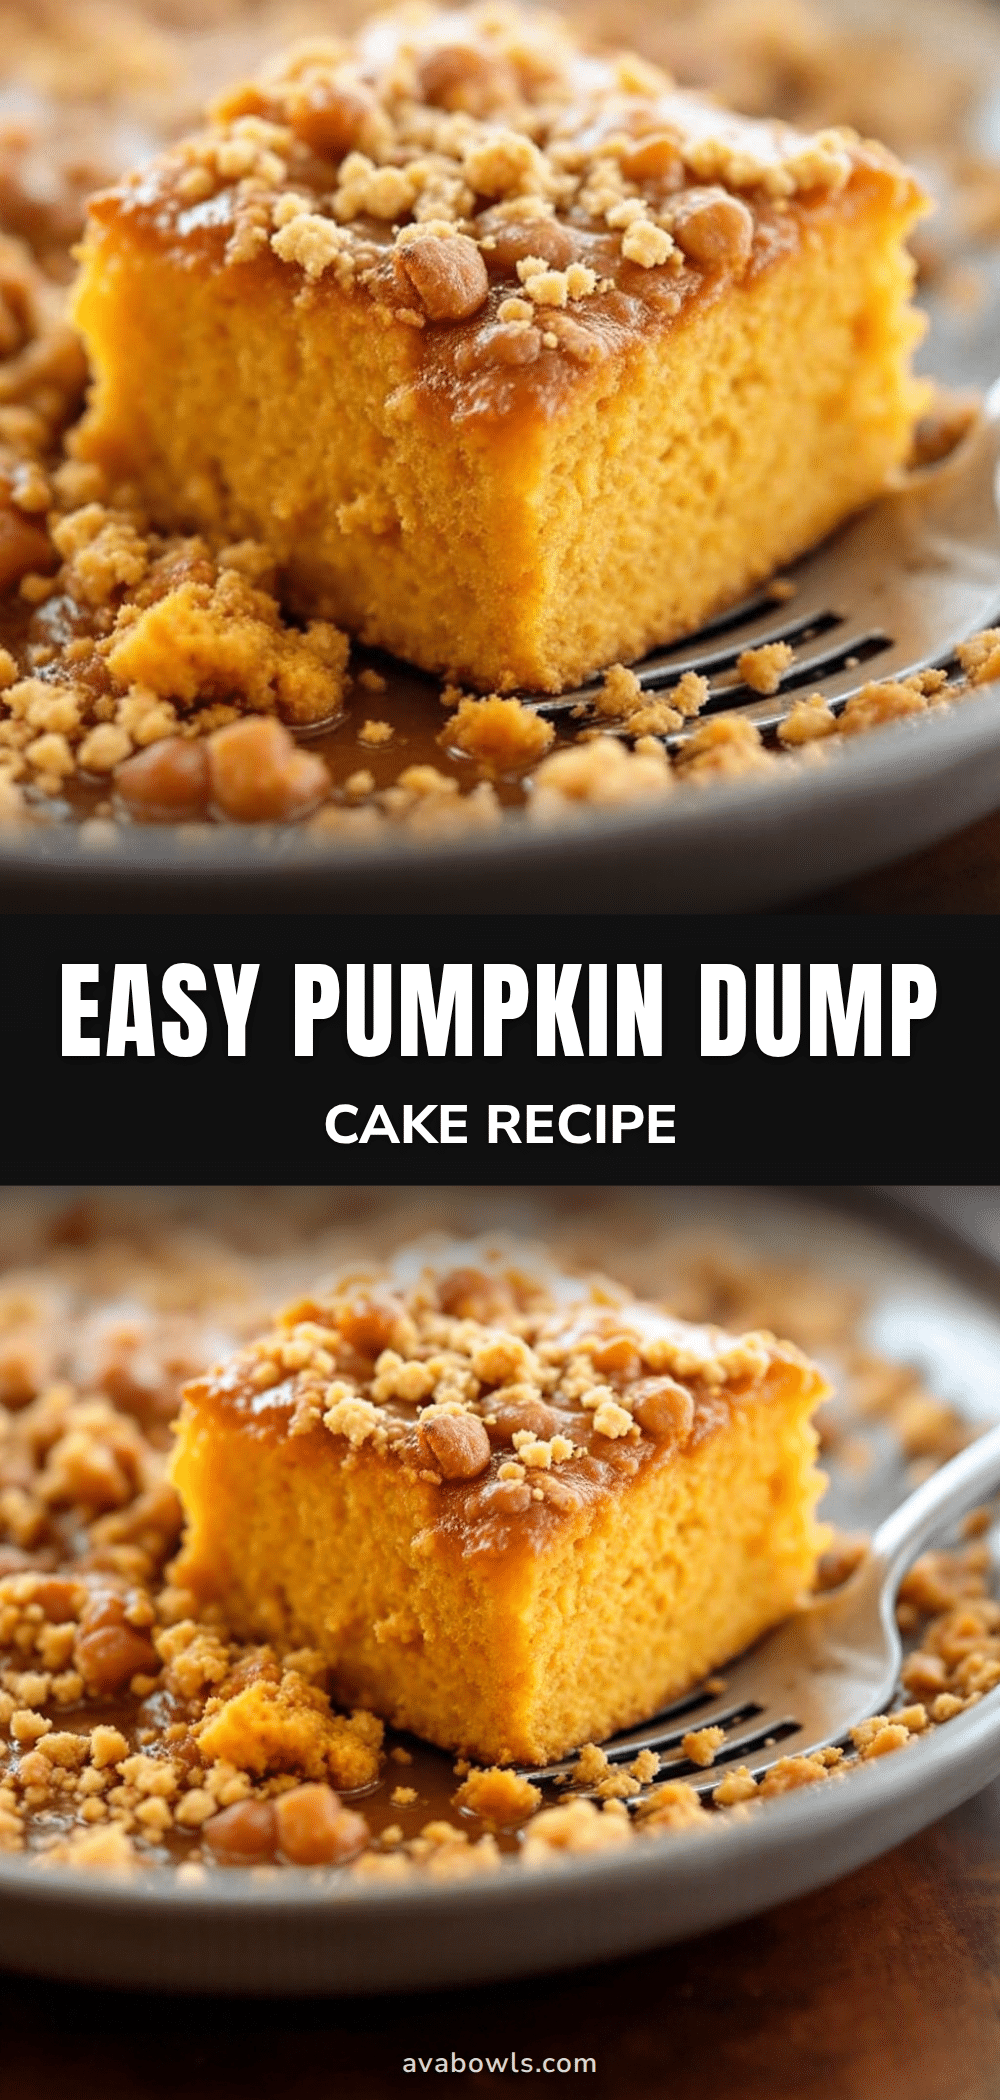
Easy Pumpkin Dump Cake with Yellow Cake Mix
This easy pumpkin dump cake with yellow cake mix is a simple, no-mix dessert with a buttery, crackly topping and a silky pumpkin custard layer. Perfect for fall gatherings and last-minute sweet fixes.
- Prep Time: 10 minutes
- Cook Time: 50 minutes
- Total Time: 1 hour
- Yield: 12 servings 1x
- Category: Dessert
- Cuisine: American
Ingredients
- 1 can (15 oz) pumpkin puree
- 1 can (12 oz) evaporated milk
- 3 large eggs, room temperature
- 1 cup granulated sugar
- 1 teaspoon pumpkin pie spice
- 1 teaspoon vanilla extract
- 1 box (15.25 oz) yellow cake mix
- ¾ cup unsalted butter, cold and cut into thin slices
Instructions
- Preheat oven to 350°F (175°C). Lightly grease a 9×13-inch baking dish.
- In a large mixing bowl, whisk together pumpkin puree, evaporated milk, eggs, sugar, pumpkin pie spice, and vanilla extract until smooth.
- Pour the pumpkin mixture into the prepared baking dish and spread evenly.
- Sprinkle the dry yellow cake mix evenly over the pumpkin mixture. Do not stir.
- Arrange cold butter slices evenly over the entire surface of the cake mix, about 1 inch apart.
- Bake for 45-55 minutes, until the top is deep golden brown and the edges are bubbly. The center should be set but slightly jiggly.
- Let cool for at least 15-20 minutes before serving. Serve warm, optionally with vanilla ice cream or whipped cream.
Notes
For a gluten-free version, use a gluten-free yellow cake mix. For dairy-free, use dairy-free butter substitute. Cold butter is essential for a crispy top. Sprinkle flaky sea salt on top after baking for enhanced flavor. Let the cake rest before serving to allow the custard to set.
Nutrition
- Serving Size: 1 slice (1/12 of rec
- Calories: 380
- Sugar: 38
- Sodium: 380
- Fat: 16
- Saturated Fat: 9
- Carbohydrates: 56
- Fiber: 2
- Protein: 5
Keywords: pumpkin dump cake, easy pumpkin dessert, yellow cake mix recipe, fall dessert, dump cake


