I did not trust the idea of crispy baked chicken wings for years. Every time someone told me their oven method produced wings as good as fried ones, I smiled politely and thought, “Sure, they do.” I’d tried them at parties—soggy-skinned, sad-looking things that sat in catering trays getting limper by the minute. It felt like a lie we all agreed to tell ourselves so we could pretend we were being healthy.
Then my buddy Mark showed up to a game day gathering with a tray of wings that had me questioning everything I thought I knew. The skin was shatter-crisp. The meat pulled clean off the bone. And he’d done it all in the oven. I asked him straight up what his secret was, expecting some complicated gadget or special flour blend. He just shrugged and said, “Patience, mostly. And a wire rack.” That was it. No gimmicks. No deep fryer hiding in the corner.
So I went home and tried his method myself. First batch was okay. Second was better. By the third attempt (my kitchen looked like a flour bomb went off), I had wings that actually rivaled the fried ones I’d been loyal to for decades. The trick isn’t magic—it’s a few specific steps that most recipes skip because they’re in a hurry. And honestly, that’s what makes this version different. It’s not faster. It’s better.
Why You’ll Love This Recipe
These crispy baked chicken wings solve the biggest problem with oven wings: texture. Most recipes promise crunch but deliver disappointment. This one delivers. I’ve tested it six times in my own kitchen, tweaked the temperature, adjusted the drying method, and landed on a technique that works every single time.
- No Deep Frying Needed — You get that golden, crunchy exterior without a vat of oil or the lingering fry smell in your house for two days.
- Perfect for Game Day — These hold up better than fried wings when sitting out. They stay crisp longer, which matters when you’re distracted by a touchdown.
- Simple Ingredients — Chicken wings, baking powder, salt, pepper. That’s the base. Everything else is optional flavor.
- Customizable Heat Level — Go mild, medium, or face-melting hot. The base recipe works with any sauce.
- Kid-Approved and Adult-Approved — My nephew ate twelve of these before anyone noticed. My dad, who swears by fried only, asked for the recipe.
What makes this recipe different from the dozens of others out there is the two-step drying process and the precise oven temperature. Most recipes tell you to pat wings dry and call it a day. That’s not enough. You need to let them sit uncovered in the fridge for at least an hour—overnight is better. That step removes surface moisture from deep within the skin, which is what lets it crisp up instead of steam.
This is the kind of recipe that makes you look like a hero on game day without standing over a hot fryer. You prep ahead, bake when guests arrive, and toss in whatever sauce fits the mood. It’s comfort food that actually delivers on its promises.
What Ingredients You Will Need
This recipe relies on a short list of ingredients, most of which you probably already have. The key is choosing the right chicken wings and using a few pantry staples in the right way.
- Chicken Wings (3 pounds, about 12-15 whole wings) — Look for fresh wings if possible. Frozen works fine, but thaw them completely in the fridge overnight. I prefer whole wings and separate them myself at the joint—you get more control over the pieces. If you’re short on time, buy them already separated into drums and flats.
- Baking Powder (2 teaspoons) — This is the secret to crispy skin. Not baking soda. Baking powder. It raises the skin’s pH and helps it brown and crisp. Make sure it’s aluminum-free if you’re sensitive to that metallic taste.
- Kosher Salt (1 teaspoon) — I use Diamond Crystal. Morton’s is saltier by volume, so adjust if you’re using that. Salt pulls moisture out of the skin, which helps with crisping.
- Black Pepper (½ teaspoon, freshly ground) — Adds a subtle warmth. Don’t skip it.
- Garlic Powder (½ teaspoon) — Optional but recommended. Adds savory depth without burning like fresh garlic would at high heat.
- Your Favorite Wing Sauce (½ to ¾ cup) — This is where you customize. Classic Buffalo sauce (hot sauce + melted butter), barbecue, honey sriracha, garlic parmesan, or dry rub. I’ll share my go-to Buffalo proportions in the tips section.
- Optional Garnishes — Chopped fresh parsley, crumbled blue cheese, celery sticks, carrot sticks, ranch or blue cheese dressing for dipping.
For the Buffalo sauce I use most often: ½ cup Frank’s RedHot Original mixed with ¼ cup melted unsalted butter. That’s it. Adjust the butter ratio for milder or spicier. Some people add a splash of Worcestershire or a pinch of cayenne—I’ve done both and they’re good, but not necessary.
If you’re watching sodium, use low-sodium baking powder (most brands are fine) and go easy on added salt in the sauce. The wings themselves don’t need much salt because the baking powder and salt combo already seasons them well.
Equipment Needed
You don’t need much fancy gear for this recipe, but a few specific tools make a real difference.
- Wire Rack — This is non-negotiable. A cooling rack that fits inside your baking sheet lets air circulate under the wings. Without it, the bottoms steam and get soggy. I use a simple stainless steel one from KitchenAid that cost about $12.
- Baking Sheet — A rimmed half-sheet pan works best. The rim catches any drips while the rack sits on top. Avoid dark nonstick pans—they absorb heat and can burn the bottoms before the tops are done.
- Paper Towels — Lots of them. You’ll be drying wings repeatedly.
- Large Mixing Bowl — For tossing wings with baking powder and seasonings.
- Tongs — For flipping wings halfway through baking. Silicone-tipped ones won’t scratch your pan.
- Saucepan — Small one for melting butter and heating sauce.
- Large Bowl for Tossing — A separate bowl for tossing baked wings with sauce. Don’t use the same bowl you seasoned them in—it’ll have raw chicken residue.
If you don’t have a wire rack, you can use a broiler pan with the slotted top. It’s not as good for air circulation but works in a pinch. I’ve also seen people use a metal steamer basket flipped upside down on a baking sheet—creative, but harder to clean.
Preparation Method
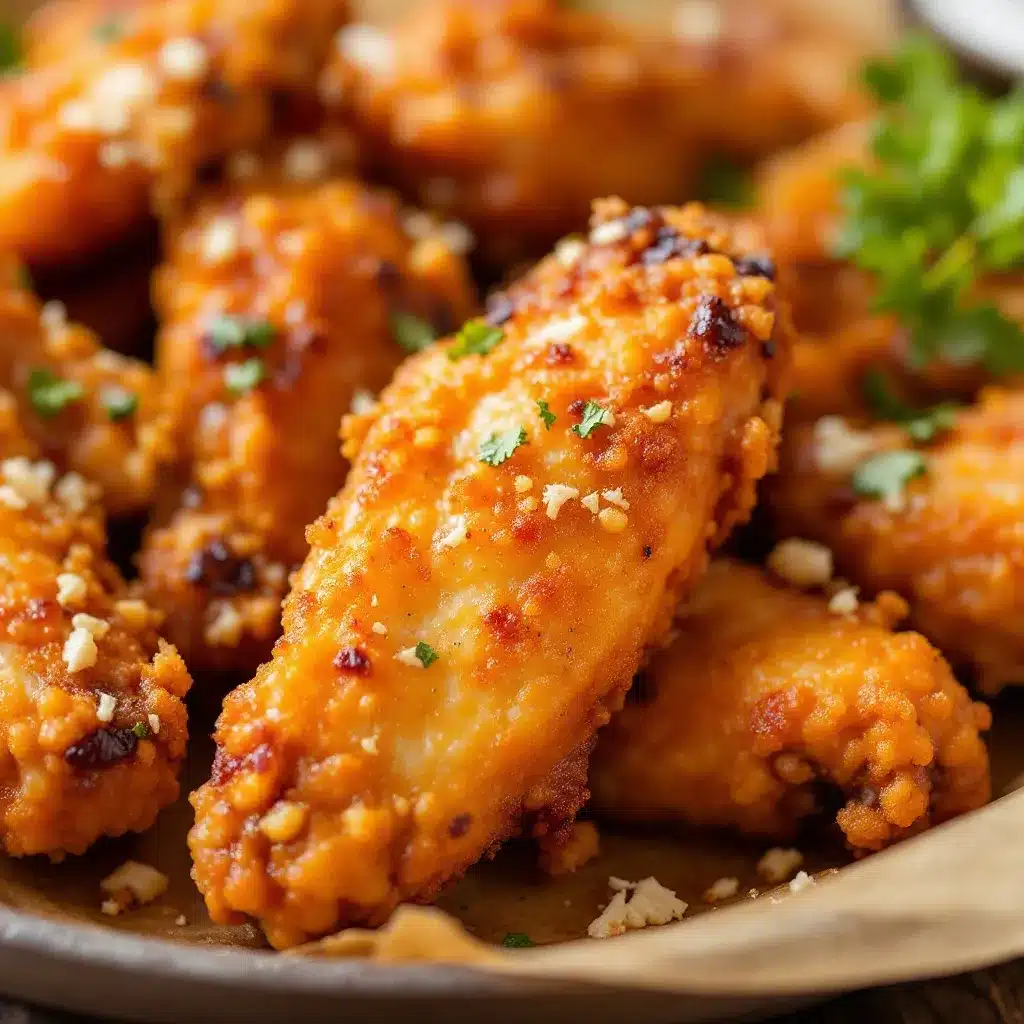
This method takes time but most of it is hands-off. The active work is maybe 20 minutes. The rest is waiting and baking.
Step 1: Prep the Wings
If your wings are whole, separate them. Find the joint between the drumette and flat, cut through the skin, then pop the joint apart with your hands. Cut through the cartilage. Save the wing tips for stock if you’re ambitious—I usually toss them, but my grandmother would be disappointed in me for admitting that. Pat every piece dry with paper towels. And I mean dry. Change towels and do it again. Moisture is the enemy of crisp skin.
Step 2: Season and Dry
In a large bowl, combine 2 teaspoons baking powder, 1 teaspoon kosher salt, ½ teaspoon black pepper, and ½ teaspoon garlic powder. Add the dried wings and toss until every piece is coated evenly. Don’t rush this—get the seasoning into all the nooks and crannies.
Step 3: Refrigerate Uncovered
Arrange the seasoned wings on a wire rack set over a baking sheet. Make sure none of them are touching—crowding traps steam. Place the whole thing in the refrigerator uncovered for at least 1 hour, ideally 8 to 24 hours. This dries out the skin further and lets the baking powder work its magic. If you’re short on time, even 30 minutes helps.
Step 4: Preheat and Prepare
When you’re ready to bake, preheat your oven to 425°F (220°C). Place the oven rack in the upper third position—you want the wings close to the heat source. Take the wings out of the fridge and let them sit at room temperature while the oven heats up, about 15 minutes.
Step 5: Bake
Bake the wings on the wire rack for 30 minutes. Flip each piece with tongs, then bake for another 20 to 25 minutes. The wings should be deep golden brown and the skin should look blistered in spots. If you want them extra crispy, switch the oven to broil for the last 2 to 3 minutes—watch them closely because they go from perfect to burnt fast.
Step 6: Make the Sauce
While the wings bake, make your sauce. For Buffalo sauce, melt ¼ cup unsalted butter in a small saucepan over low heat. Whisk in ½ cup hot sauce. Keep warm until the wings are done.
Step 7: Toss and Serve
Transfer the baked wings to a large clean bowl. Pour the warm sauce over them and toss gently with tongs until every wing is coated. Don’t drown them—you want a thin, even layer, not a pool of sauce at the bottom. Transfer to a serving platter. Garnish with chopped parsley and serve with celery sticks, carrot sticks, and blue cheese or ranch dressing on the side.
Pro tip from my third failed batch: If you’re making multiple sauces, divide the wings before tossing. Toss half in Buffalo and leave the other half plain with a dry rub. That way nobody’s stuck with a sauce they don’t like.
Cooking Tips & Techniques
I’ve made every mistake you can imagine with these wings. Here’s what I learned the hard way so you don’t have to.
The Baking Powder Confusion
Use baking powder, not baking soda. They’re different. Baking soda will make your wings taste metallic and weird. I made this mistake once and ruined three pounds of wings. Check your container before you start.
Don’t Skip the Fridge Time
I know it’s tempting to skip the drying step when you’re hungry. Don’t. The difference between wings that sat in the fridge for 2 hours versus overnight is noticeable. Overnight wings have that shatter-crisp skin. The 2-hour ones are good but not great. Plan ahead.
Patience with Flipping
When you flip the wings at 30 minutes, do it gently. The skin is fragile at that point and can tear. Use tongs and grab each piece carefully. If some skin sticks to the rack, leave it—don’t try to scrape it off.
Temperature Matters
425°F is the sweet spot. Lower temperatures won’t crisp the skin properly. Higher temperatures risk burning the outside before the inside cooks through. If your oven runs hot (mine does), check at 25 minutes instead of 30.
The Sauce Timing
Toss wings in sauce immediately after they come out of the oven. Hot wings absorb sauce better. If you let them cool first, the sauce slides off instead of sticking. But don’t let them sit in sauce for more than 10 minutes before serving—they’ll get soggy.
Multitasking Strategy
While the wings bake, prep your dipping veggies and sauce. That way everything’s ready when the timer goes off. I also like to set up my serving platter ahead of time so I’m not scrambling when guests are hungry.
Variations & Adaptations
This base recipe works with almost any flavor profile. Here are some of my favorites.
Classic Buffalo
The standard. ½ cup Frank’s RedHot mixed with ¼ cup melted butter. Add a tablespoon of honey if you like it sweet and spicy. This is what I make most often because it pleases everyone.
Garlic Parmesan
Melt ¼ cup butter with 4 minced garlic cloves. Toss the baked wings in the garlic butter, then sprinkle with ½ cup grated Parmesan cheese and 2 tablespoons chopped fresh parsley. The cheese adds a salty, nutty crust that’s completely different from Buffalo.
Honey Sriracha
Mix ⅓ cup sriracha with ⅓ cup honey and 2 tablespoons rice vinegar. This one’s sticky and sweet with a slow-building heat. My sister requests these for every gathering.
Dry Rub Version
Skip the wet sauce entirely. After baking, toss the wings in a mixture of 1 tablespoon smoked paprika, 1 teaspoon garlic powder, 1 teaspoon onion powder, ½ teaspoon cayenne, and ½ teaspoon brown sugar. These stay extra crispy because there’s no liquid involved.
Lemon Pepper
Toss baked wings with 2 tablespoons melted butter, then sprinkle with 1 tablespoon lemon pepper seasoning and fresh lemon zest. Bright, tangy, and perfect for people who don’t like spicy food.
Air Fryer Adaptation
If you have an air fryer, cook the wings at 400°F for 12 to 15 minutes, flip, then another 10 to 12 minutes. The same drying and seasoning steps apply. Air fryer wings are even crispier than oven ones—they’re my secret weapon for small batches.
Gluten-Free Note
This recipe is naturally gluten-free as long as your baking powder and sauces are certified gluten-free. Double-check labels if you’re cooking for someone with celiac disease.
Serving & Storage Suggestions
These wings are best served hot and fresh, but they hold up better than most for parties.
Serving Temperature
Serve wings immediately after tossing in sauce. They’re hottest and crispiest right out of the oven. If you’re hosting a party, bake them in batches and keep the first batch warm in a 200°F oven on a wire rack (not on a plate—they’ll steam).
Presentation Ideas
Arrange wings on a large platter with celery and carrot sticks running through the center. Put dipping sauces in small bowls on the side. I like to sprinkle chopped green onions or parsley over the top for color. For game day, I serve them on a wooden board with creamy beer cheese pretzel dip with crispy bacon on the side—the contrast between the spicy wings and rich, cheesy dip is incredible.
What to Serve with Wings
Classic sides include celery sticks, carrot sticks, and ranch or blue cheese dressing. For a heartier spread, add loaded nachos supreme or creamy slow cooker queso blanco dip for dipping. If you want something lighter, a simple coleslaw balances the richness. For drinks, cold beer is the obvious choice, but I also love these with a creamy pink drink copycat for a fun non-alcoholic option.
Storage Instructions
Store leftover wings in an airtight container in the refrigerator for up to 4 days. Keep the sauce separate if possible—coated wings get soggier faster. If they’re already sauced, they’ll still be good for 2 to 3 days.
Reheating Methods
The oven is your best bet. Reheat on a wire rack at 375°F for 8 to 10 minutes. The air fryer works even better—5 minutes at 375°F and they’re nearly as crispy as fresh. Avoid the microwave unless you enjoy sad, rubbery wings.
Freezing
Freeze baked, unsauced wings in a single layer on a baking sheet, then transfer to a freezer bag. They’ll keep for 3 months. To serve, bake from frozen at 400°F for 15 to 18 minutes, then toss in fresh sauce.
Nutritional Information & Benefits
These wings are a protein-packed option that fits into most diets. Here’s the approximate breakdown per serving (about 5 to 6 pieces, sauced with Buffalo):
| Nutrient | Amount |
|---|---|
| Calories | 320-380 |
| Protein | 28g |
| Fat | 22g |
| Carbohydrates | 2g |
| Sodium | 800-1000mg |
Chicken wings are a good source of protein, selenium, and B vitamins. The skin contains most of the fat, so if you’re watching calories, you can remove it before eating (though that defeats the purpose of crispy wings, honestly).
Baking instead of frying reduces the fat content significantly—you’re not absorbing oil the way you would in a deep fryer. If you use a dry rub instead of a butter-based sauce, you cut even more calories and fat.
For those with dietary restrictions: this recipe is naturally gluten-free and low-carb. It’s not suitable for dairy-free diets if you use butter-based sauces, but you can substitute with vegan butter or coconut oil. The baking powder method works with any fat.
I personally love that these wings let me enjoy game day food without the heavy, greasy feeling that comes with fried versions. They satisfy the craving without the regret.
Conclusion
These crispy baked chicken wings have officially replaced fried wings in my kitchen. I never thought I’d say that, but here we are. The texture is legitimately crunchy, the meat stays juicy, and you get all the flavor without the mess and smell of deep frying.
The best part? You can customize them endlessly. Make them for game day, backyard barbecues, or just a Tuesday night when you want something satisfying. They’re forgiving enough for beginners but impressive enough to serve to wing snobs (I should know—I was one).
If you try these, let me know how they turn out. Drop a comment below with your favorite sauce combination—I’m always looking for new ideas. And if you’re planning a game day spread, pair these wings with savory Philly cheesesteak sliders or crispy baked buffalo cauliflower bites for a full lineup that’ll have everyone asking for your recipes.
Go make some wings. Your game day guests will thank you.
Frequently Asked Questions
Can I use frozen wings without thawing first?
I don’t recommend it. Frozen wings release too much moisture during baking, which steams the skin instead of crisping it. Thaw them in the refrigerator overnight, then pat them very dry before seasoning.
Why are my wings not crispy?
Most likely one of three things: you didn’t dry them enough before seasoning, you skipped the fridge drying step, or your oven wasn’t hot enough. Make sure you pat the wings completely dry, let them rest uncovered in the fridge for at least an hour, and bake at 425°F on a wire rack.
Can I use chicken drumsticks or thighs instead?
Yes, but adjust cooking time. Drumsticks need about 40 to 45 minutes total. Thighs take 30 to 35 minutes. The same drying and seasoning method works for any chicken with skin on.
How do I make these less spicy?
Use a milder sauce or skip it entirely and go with a dry rub. For Buffalo sauce, reduce the hot sauce and increase the butter ratio. You can also serve the sauce on the side so everyone controls their own heat level.
Can I prep these a day ahead?
Absolutely. Season the wings, arrange them on the wire rack over the baking sheet, and leave them uncovered in the fridge for up to 24 hours. That’s actually the ideal method—the longer drying time gives you the crispiest skin. Just bake them fresh when you’re ready to serve.
Pin This Recipe!

Crispy Baked Chicken Wings: Best Recipe for Game Day

These crispy baked chicken wings deliver shatter-crisp skin and juicy meat without deep frying. A two-step drying process and precise oven temperature ensure perfect texture every time.
- Prep Time: 20 minutes
- Cook Time: 50 minutes
- Total Time: 1 hour 10 minutes (plus minimum 1 hour refrigeration)
- Yield: 4 servings 1x
- Category: Appetizer
- Cuisine: American
Ingredients
- 3 pounds chicken wings (about 12–15 whole wings)
- 2 teaspoons baking powder (aluminum-free)
- 1 teaspoon kosher salt (Diamond Crystal recommended)
- ½ teaspoon freshly ground black pepper
- ½ teaspoon garlic powder (optional)
- ½ to ¾ cup your favorite wing sauce (e.g., Buffalo, barbecue, honey sriracha)
- Optional garnishes: chopped fresh parsley, crumbled blue cheese, celery sticks, carrot sticks, ranch or blue cheese dressing
Instructions
- If wings are whole, separate them at the joint into drumettes and flats. Pat every piece very dry with paper towels.
- In a large bowl, combine baking powder, salt, pepper, and garlic powder. Add dried wings and toss until evenly coated.
- Arrange seasoned wings on a wire rack set over a baking sheet, ensuring none are touching. Refrigerate uncovered for at least 1 hour, ideally 8 to 24 hours.
- Preheat oven to 425°F (220°C) with rack in the upper third. Let wings sit at room temperature for 15 minutes.
- Bake wings for 30 minutes. Flip each piece with tongs, then bake for another 20 to 25 minutes until deep golden brown and blistered. For extra crispiness, broil for 2 to 3 minutes, watching closely.
- While wings bake, prepare sauce: For Buffalo sauce, melt ¼ cup unsalted butter in a small saucepan over low heat, whisk in ½ cup hot sauce, and keep warm.
- Transfer baked wings to a large clean bowl. Pour warm sauce over and toss gently until evenly coated. Serve immediately on a platter with garnishes and dipping sides.
Notes
Do not use baking soda instead of baking powder. Refrigeration step is crucial for crispiness. For multiple sauces, divide wings before tossing. Reheat leftovers in oven or air fryer, not microwave.
Nutrition
- Serving Size: 5 to 6 pieces
- Calories: 320380
- Sodium: 8001000
- Fat: 22
- Saturated Fat: 8
- Carbohydrates: 2
- Protein: 28
Keywords: crispy baked chicken wings, game day wings, oven baked wings, buffalo wings, healthy wings, gluten-free wings, low-carb wings


