I burned brown butter cookies three times before I finally figured out what I was doing wrong. Not a little overdone on the bottom—I mean blackened butter, acrid smoke filling the kitchen, cookies that tasted like regret. The first batch, I walked away while the butter was browning. The second, I used a dark pan and couldn’t see the color change. The third time, I was so nervous about burning it that I pulled it off the heat too early, and the cookies came out flat and greasy. I almost gave up on the whole idea. But I kept coming back to it because, honestly, the first time I ever tasted a brown butter cookie at a friend’s house, I couldn’t stop thinking about it. That nutty, warm, almost caramel-like flavor hiding in a simple chocolate chip cookie felt like a secret I needed to learn.
What I eventually realized is that brown butter isn’t complicated—it just demands your full attention for about five minutes. And once you get it right, there’s no going back. These cookies are chewy in the center, slightly crisp at the edges, and packed with that deep, toasty flavor that regular butter just can’t deliver. I’ve made this recipe so many times now that I could do it with my eyes closed, and it never gets old. The smell alone, that butter browning in the pan with those little golden flecks, is enough to make anyone wander into the kitchen asking what’s for dessert.
This is the version I landed on after all those failures. It’s the one that finally worked, the one my family requests for every gathering, and the one I actually trust enough to share. I think you’ll love it too—once you get past that first nerve-wracking batch.
Why You’ll Love This Recipe
These chewy brown butter chocolate chip cookies aren’t just another cookie recipe. They’re the result of trial, error, and a whole lot of butter. Here’s why they stand out:
- Deep, Nutty Flavor: Browning the butter transforms it from ordinary to extraordinary. That toasty, caramel-like taste infuses every single bite.
- Perfectly Chewy Texture: The combination of melted brown butter and an extra egg yolk creates a cookie that stays soft and chewy for days. No cakey textures here.
- Simple Ingredients: You probably have everything you need in your pantry right now. No fancy extracts, no specialty flours, just real butter and good chocolate.
- Make-Ahead Friendly: The dough actually gets better after a night in the fridge. You can prep it ahead and bake fresh cookies whenever the craving hits.
- Crowd-Pleaser: I’ve brought these to potlucks, family dinners, and casual get-togethers. They disappear faster than almost anything else I make. They pair wonderfully with a creamy matcha latte for an afternoon treat.
- Foolproof Once You Know the Tricks: After burning my fair share of butter, I’ve learned exactly what to watch for. I’ll walk you through every step so you skip the mistakes I made.
What makes these cookies different from the rest is the technique. It’s not just about swapping browned butter into a standard recipe. The ratios are adjusted specifically to account for the moisture loss during browning, and the resting time is built in for a reason. This isn’t another version of a chocolate chip cookie—it’s the best version I’ve ever made.
What Ingredients You Will Need
This recipe relies on simple, everyday ingredients, but each one plays a specific role in creating that perfect chewy texture and deep flavor. Here’s what you’ll need and why each ingredient matters.
- 1 cup (2 sticks) unsalted butter: This is the star of the show. Use unsalted so you control the salt level. I prefer Kerrygold or Plugrà for their lower water content, which helps with browning, but any good unsalted butter works.
- 2 ¼ cups (280g) all-purpose flour: Spoon and level your flour—don’t scoop directly from the bag. Too much flour makes dense cookies. I use King Arthur Flour for consistent results.
- 1 teaspoon baking soda: This helps the cookies spread just enough and gives them that slight lift. Make sure it’s fresh—test it by dropping a little in vinegar; it should fizz.
- 1 teaspoon salt: A flaky sea salt like Maldon is great for finishing, but fine sea salt works best in the dough. Salt balances the sweetness and enhances the brown butter flavor.
- 1 cup (200g) packed light brown sugar: Brown sugar adds moisture and that subtle molasses flavor that pairs beautifully with browned butter. Dark brown sugar works too, but the cookies will be slightly darker and more caramel-like.
- ½ cup (100g) granulated sugar: White sugar helps with spreading and gives the edges that slight crispness. The combination of both sugars is key for the chewy-center, crisp-edge texture.
- 2 large eggs + 1 egg yolk: The extra yolk adds richness and contributes to that signature chewy texture. Use room temperature eggs—they incorporate more smoothly into the butter mixture.
- 2 teaspoons vanilla extract: Pure vanilla extract makes a difference here. Imitation vanilla can taste artificial against the complex brown butter flavor. I always reach for Nielsen-Massey.
- 2 cups (340g) semi-sweet chocolate chips or chopped chocolate: I prefer a mix of both—chips for even distribution and chopped chocolate for those melty puddles. Ghirardelli chips and a good dark chocolate bar (like Lindt 70%) are my go-to combo.
- Flaky sea salt for finishing (optional but highly recommended): A sprinkle of flaky salt right after baking takes these cookies to another level. It cuts the sweetness and makes the brown butter flavor pop.
If you’re out of brown sugar, you can make your own by mixing 1 cup of white sugar with 1 tablespoon of molasses. For a dairy-free version, use a high-quality vegan butter like Miyoko’s—just note that browning vegan butter works differently, so watch it carefully. You can also swap the chocolate chips for white chocolate or butterscotch chips if you want to change things up.
Equipment Needed
You don’t need a ton of fancy equipment for these cookies, but a few specific tools make the process easier and more consistent.
- Light-colored saucepan or skillet: This is crucial for browning butter. A dark pan makes it nearly impossible to see the color change, which is how I burned my first batch. Use stainless steel or light-colored nonstick.
- Stand mixer or hand mixer: While you can mix by hand, a mixer makes creaming the butter and sugars much easier, especially since the brown butter needs to cool slightly before mixing. A hand mixer works perfectly fine if you don’t have a stand mixer.
- Rubber spatula: You’ll use this constantly—scraping down the bowl, folding in chocolate chips, getting every last bit of dough. A good heat-resistant one is worth the investment.
- Baking sheets: Rimmed baking sheets work best. Avoid dark nonstick sheets, which can cause the bottoms to brown too quickly. I use Nordic Ware aluminum sheets—they’re affordable and reliable.
- Parchment paper or silicone baking mats: Parchment paper is my preference because it’s disposable and gives consistent results. Silicone mats work too, but cookies might spread slightly more.
- Cookie scoop (about 2 tablespoons): A scoop ensures uniform cookies that bake evenly. I use a #40 scoop for perfectly sized cookies every time.
- Cooling rack: Letting cookies cool on a rack prevents soggy bottoms. If you don’t have one, transfer them to a plate after a few minutes on the sheet.
If you don’t have a cookie scoop, use two spoons to portion the dough. And if your baking sheets are dark, reduce the oven temperature by 25°F to prevent over-browning. I learned that one the hard way.
Preparation Method

Let’s make these cookies. Take your time with the brown butter—it’s the most important step.
- Brown the butter: Cut the butter into small pieces and place them in your light-colored saucepan. Set it over medium heat and let it melt completely, stirring occasionally with a rubber spatula. Once melted, the butter will start to foam and bubble. Keep stirring gently. After a few minutes, you’ll notice little brown specks forming at the bottom of the pan and the butter will smell nutty and wonderful. This happens fast—once you see those brown specks and smell that toasty aroma, remove the pan from the heat immediately. Pour the browned butter into a heat-safe bowl, making sure to scrape all those brown bits into the bowl. Let it cool for about 10-15 minutes until it’s warm but not hot. If you try to use it while it’s still hot, it will cook your eggs.
- Mix the dry ingredients: While the butter cools, whisk together the flour, baking soda, and salt in a medium bowl. Set it aside. This just ensures everything is evenly distributed before it goes into the wet mixture.
- Cream the butter and sugars: In the bowl of your stand mixer (or a large bowl if using a hand mixer), combine the cooled brown butter with the brown sugar and granulated sugar. Beat on medium speed for about 2-3 minutes until the mixture looks lighter in color and slightly fluffy. It won’t get as fluffy as room-temperature butter, but it should look well combined and slightly thickened.
- Add the eggs and vanilla: Add the eggs and the extra egg yolk one at a time, mixing well after each addition. Scrape down the sides of the bowl with your spatula. Add the vanilla extract and mix until combined. The mixture should look smooth, glossy, and almost like a thick caramel.
- Add the dry ingredients: With the mixer on low speed, gradually add the flour mixture. Mix just until you no longer see streaks of flour—overmixing at this stage develops gluten and makes tough cookies. Stop the mixer and scrape down the bowl one more time.
- Fold in the chocolate: Add the chocolate chips and chopped chocolate (if using both). Fold them in gently with your rubber spatula until they’re evenly distributed. The dough will be thick, sticky, and absolutely irresistible.
- Chill the dough (this is non-negotiable): Cover the bowl with plastic wrap and refrigerate for at least 2 hours, but overnight is better. Chilling solidifies the brown butter, which prevents the cookies from spreading too much. It also allows the flavors to meld and develop. I know it’s hard to wait, but trust me on this.
- Preheat and prepare: When you’re ready to bake, preheat your oven to 350°F (175°C). Line your baking sheets with parchment paper. Let the dough sit at room temperature for about 5-10 minutes so it’s slightly easier to scoop—it should still be cold, just not rock hard.
- Scoop and bake: Scoop rounded tablespoons of dough (about 2 tablespoons each) and place them 2 inches apart on the prepared baking sheets. Bake one sheet at a time for 10-12 minutes. The cookies should look golden brown around the edges but still slightly soft and puffy in the center. They will continue to set as they cool.
- Cool and finish: Let the cookies cool on the baking sheet for 5 minutes. This is when you sprinkle them with flaky sea salt if you’re using it. Then transfer them to a wire rack to cool completely. Or, you know, eat one warm because that’s the best part of making cookies.
Cooking Tips & Techniques
I’ve made every mistake possible with these cookies, so let me save you some trouble. Here are the tips that actually matter.
Watch the butter like a hawk: Brown butter goes from perfect to burnt in about 30 seconds. Once you see those brown specks forming and smell that nutty aroma, pull it off the heat immediately. Don’t walk away from the stove—I learned this the hard way three times. The butter will continue to cook slightly from the residual heat of the pan, so pouring it into a cool bowl right away stops the process.
Don’t skip the chilling step: I know you want cookies now. But if you bake the dough right away, you’ll get thin, flat, greasy cookies. The brown butter needs time to solidify again, and the flour needs time to hydrate. Two hours is the minimum; overnight gives you the best texture. I often make the dough the night before and bake fresh cookies the next day—it’s a game-changer.
Use a cookie scoop for even baking: Uniform size means uniform baking. A #40 scoop gives you perfectly round cookies that all finish at the same time. If you don’t have one, use two spoons to portion similar-sized mounds.
Bake one sheet at a time: Your oven can only handle one sheet at a time for even baking. If you crowd the oven, the cookies on the bottom rack will brown faster than the ones on top. I rotate the sheet halfway through baking for good measure.
Underbake slightly for chewier cookies: Pull the cookies out when the edges are golden but the centers still look slightly soft and puffy. They’ll continue baking on the hot sheet for the next 5 minutes. Overbaked cookies are crisp all the way through, and that’s not what we’re going for here.
Room temperature eggs matter: Cold eggs can seize the brown butter mixture, making it grainy. If you forgot to take your eggs out ahead of time, place them in a bowl of warm water for 5 minutes before using them.
And one more thing—if your cookies spread too much, your butter was probably too warm when you mixed it, or your dough wasn’t chilled long enough. Adjust accordingly next time. Every batch teaches you something.
Variations & Adaptations
Once you’ve mastered the basic recipe, there are endless ways to make it your own. Here are some of my favorite variations.
Double Chocolate Brown Butter Cookies: Replace ¼ cup (30g) of the all-purpose flour with ¼ cup (25g) of unsweetened cocoa powder. Use white chocolate chips or a mix of dark and white chocolate. The brown butter pairs beautifully with the cocoa—it’s like a grown-up chocolate cookie.
Brown Butter Oatmeal Chocolate Chip Cookies: Reduce the flour to 1 ¾ cups (220g) and add 1 cup (90g) of old-fashioned rolled oats. The oats add a lovely chewiness and a rustic texture. I love this version for breakfast—don’t judge me.
Gluten-Free Version: Substitute the all-purpose flour with a high-quality 1:1 gluten-free baking flour blend that contains xanthan gum. I’ve had great results with King Arthur Measure for Measure. The cookies will be slightly more delicate but still deliciously chewy. If you’re looking for other gluten-free treats, these cookies pair nicely with a fresh Greek yogurt bowl with pomegranate for a balanced snack.
Nutty Twist: Add ½ cup (60g) of toasted chopped pecans or walnuts along with the chocolate. Toast the nuts in the oven at 350°F for 5-7 minutes until fragrant, then let them cool before folding into the dough. The combination of brown butter and toasted nuts is absolutely divine.
Spiced Brown Butter Cookies: Add 1 teaspoon of cinnamon, ½ teaspoon of nutmeg, and ¼ teaspoon of cardamom to the dry ingredients. These spices complement the nutty flavor of the brown butter perfectly. These are especially good during the fall and winter months.
I personally love the double chocolate version—it’s rich, decadent, and feels like a special treat. But honestly, the original is hard to beat. Play around and find your favorite.
Serving & Storage Suggestions
These cookies are best served slightly warm, when the chocolate is still a little melty and the edges are perfectly crisp. If you’re serving them at a party, bake them fresh and let them cool for just 10 minutes before setting them out. A glass of cold milk is the classic pairing, but they’re also fantastic with a cup of coffee or a creamy iced lavender oat milk latte.
For storage, keep the cookies in an airtight container at room temperature for up to 5 days. To keep them soft, toss a slice of bread into the container—the cookies will absorb the moisture from the bread and stay chewy. Change the bread slice every couple of days if they last that long.
These cookies freeze beautifully. You can freeze the baked cookies in a freezer-safe bag for up to 3 months. Thaw them at room temperature or pop them in a 300°F oven for 5 minutes to refresh them. But my favorite trick is freezing the dough balls. Scoop the dough, place the balls on a parchment-lined baking sheet, freeze until solid, then transfer them to a freezer bag. You can bake them straight from frozen—just add 2-3 minutes to the baking time. Fresh cookies in 15 minutes, anytime you want them.
One thing I’ve noticed is that these cookies actually get better after a day or two. The flavors meld together, and the texture becomes even chewier. So don’t feel like you have to eat them all in one sitting—though I won’t judge you if you do.
Nutritional Information & Benefits
Let’s be real—these are cookies, not health food. But knowing what’s in them helps with mindful indulgence. Here’s the estimated nutritional breakdown per cookie (based on 24 cookies):
| Nutrient | Amount per Cookie |
|---|---|
| Calories | 220 |
| Total Fat | 13g |
| Saturated Fat | 8g |
| Cholesterol | 45mg |
| Sodium | 180mg |
| Total Carbohydrates | 26g |
| Dietary Fiber | 1g |
| Sugars | 17g |
| Protein | 3g |
Dark chocolate contains antioxidants and can be part of a balanced diet in moderation. Brown butter, while high in fat, provides a rich flavor that allows you to use less sugar overall compared to some other cookie recipes. If you’re watching your sugar intake, you can reduce the granulated sugar by 2 tablespoons without significantly affecting the texture.
These cookies contain dairy, eggs, gluten, and chocolate (which may contain soy). For a dairy-free version, use vegan butter as mentioned earlier. For egg-free, you can try a flax egg (1 tablespoon ground flaxseed mixed with 3 tablespoons water per egg), but the texture will be slightly different—less chewy and more cakey.
I believe in enjoying treats in moderation. A couple of these cookies with a cup of tea or coffee is a perfectly reasonable way to satisfy a sweet craving without overdoing it.
Conclusion
These chewy brown butter chocolate chip cookies are worth every bit of effort. That nutty, caramel-like flavor from the browned butter takes a simple cookie and makes it something special. The texture is exactly what I look for—soft and chewy in the middle, slightly crisp around the edges, and packed with melty chocolate in every bite.
I hope you give this recipe a try, even if you’re nervous about browning the butter. Start with a light-colored pan, keep your eye on it, and pull it off the heat the second you see those brown specks. Once you taste the difference, you’ll never go back to regular butter cookies again.
I’d love to hear how yours turn out! Leave a comment below and let me know if you added any fun variations or if these became a new favorite in your household. And if you’re looking for more comfort food inspiration, check out this creamy roasted tomato basil soup—it’s the perfect companion for dunking these cookies. Happy baking!
Frequently Asked Questions
Can I use salted butter instead of unsalted?
Yes, you can. Just reduce the added salt in the recipe to ½ teaspoon to account for the salt in the butter. The flavor will be slightly different, but it still works well.
My cookies turned out flat. What went wrong?
Flat cookies usually mean the butter was too warm when you mixed it, or the dough wasn’t chilled long enough. Make sure your brown butter has cooled to room temperature, and chill the dough for at least 2 hours before baking.
Can I make the dough ahead of time and bake later?
Absolutely. The dough can be refrigerated for up to 3 days or frozen for up to 3 months. If freezing, scoop the dough into balls first, freeze them on a baking sheet, then transfer to a freezer bag. Bake from frozen, adding 2-3 minutes to the baking time.
Why do I need an extra egg yolk?
The extra egg yolk adds richness and helps create that chewy texture. Egg yolks are mostly fat, which contributes to a tender, soft cookie. Without it, the cookies would be more cakey and less chewy.
Can I use margarine instead of butter?
I don’t recommend it. Margarine has a higher water content than butter, which affects both the browning process and the texture of the cookies. For the best results, stick with real butter. If you need a dairy-free option, use a high-quality vegan butter designed for baking.
Pin This Recipe!
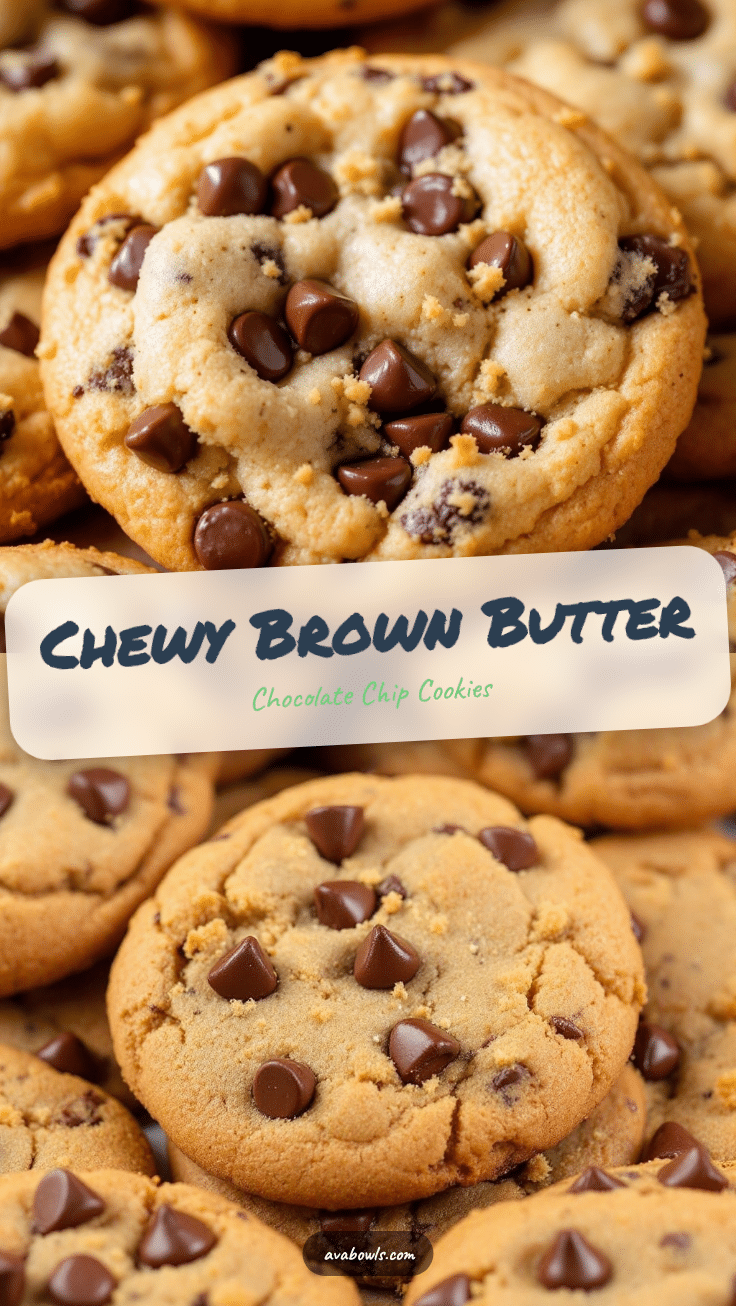
Chewy Brown Butter Chocolate Chip Cookies – Best Easy Recipe

These chewy brown butter chocolate chip cookies are packed with deep, nutty flavor from browned butter, with perfectly chewy centers and crisp edges. A foolproof recipe that yields irresistible cookies every time.
- Prep Time: 15 minutes
- Cook Time: 12 minutes
- Total Time: 2 hours 27 minutes (includes chilling)
- Yield: 24 cookies 1x
- Category: Dessert
- Cuisine: American
Ingredients
- 1 cup (2 sticks) unsalted butter
- 2 ¼ cups (280g) all-purpose flour
- 1 teaspoon baking soda
- 1 teaspoon salt
- 1 cup (200g) packed light brown sugar
- ½ cup (100g) granulated sugar
- 2 large eggs + 1 egg yolk
- 2 teaspoons vanilla extract
- 2 cups (340g) semi-sweet chocolate chips or chopped chocolate
- Flaky sea salt for finishing (optional)
Instructions
- Brown the butter: Cut the butter into small pieces and place them in a light-colored saucepan over medium heat. Melt completely, stirring occasionally. Once melted, the butter will foam and bubble. Continue stirring until brown specks form and the butter smells nutty. Remove from heat immediately and pour into a heat-safe bowl, scraping all brown bits. Let cool for 10-15 minutes until warm but not hot.
- Mix the dry ingredients: In a medium bowl, whisk together flour, baking soda, and salt. Set aside.
- Cream the butter and sugars: In a stand mixer or large bowl, combine cooled brown butter with brown sugar and granulated sugar. Beat on medium speed for 2-3 minutes until lighter in color and slightly fluffy.
- Add the eggs and vanilla: Add eggs and extra egg yolk one at a time, mixing well after each addition. Scrape down the sides. Add vanilla extract and mix until smooth and glossy.
- Add the dry ingredients: With mixer on low, gradually add flour mixture. Mix just until no streaks of flour remain. Scrape down the bowl.
- Fold in the chocolate: Add chocolate chips and/or chopped chocolate. Fold gently with a rubber spatula until evenly distributed. Dough will be thick and sticky.
- Chill the dough: Cover the bowl with plastic wrap and refrigerate for at least 2 hours, preferably overnight.
- Preheat and prepare: When ready to bake, preheat oven to 350°F (175°C). Line baking sheets with parchment paper. Let dough sit at room temperature for 5-10 minutes to soften slightly.
- Scoop and bake: Scoop rounded tablespoons of dough (about 2 tablespoons each) and place 2 inches apart on prepared sheets. Bake one sheet at a time for 10-12 minutes, until edges are golden and centers are still soft and puffy.
- Cool and finish: Let cookies cool on baking sheet for 5 minutes. Sprinkle with flaky sea salt if desired. Transfer to a wire rack to cool completely.
Notes
Watch the butter carefully as it browns; it goes from perfect to burnt in about 30 seconds. Chilling the dough is non-negotiable for best texture. Underbake slightly for chewier cookies. Room temperature eggs are important to prevent the brown butter mixture from seizing.
Nutrition
- Serving Size: 1 cookie
- Calories: 220
- Sugar: 17
- Sodium: 180
- Fat: 13
- Saturated Fat: 8
- Carbohydrates: 26
- Fiber: 1
- Protein: 3
Keywords: brown butter chocolate chip cookies, chewy cookies, easy cookie recipe, homemade cookies, chocolate chip cookies


