I burned my first microwave mug mac and cheese so badly the mug itself was unsalvageable. Not the cheese—the actual ceramic mug. That was seven years ago, and I honestly thought I was done with the whole concept. But then came those nights when the stove felt like a mountain, the sink was full of dishes, and I was starving in that hollow, desperate way where even waiting for water to boil felt unbearable. So I tried again. Then again. Then I figured out the exact timing, the right cheese-to-pasta ratio, and the trick that keeps the noodles from turning into rubber cement. This isn’t fancy food. It’s not even real cooking, if we’re being honest. But it’s real comfort, and it works every single time now. That’s what I want to share with you.
Some recipes earn their place in your rotation through complexity and craft. This one earns its spot through pure, unapologetic convenience. The kind of convenience that saves you from ordering greasy takeout at 11 PM or eating a sad handful of crackers for dinner. I’ve tested this easy microwave mug mac and cheese more times than I care to admit—different mugs, different microwaves, different cheese combinations—and what I’m giving you is the version that actually delivers creamy, satisfying pasta in five minutes flat. No gummy textures. No dried-out noodles. Just honest, cheesy comfort that tastes like you put in more effort than you actually did.
Why You’ll Love This Recipe
Let me tell you why this isn’t just another microwave recipe that disappoints. I’ve been developing recipes professionally for years, and I’ve learned that the difference between a sad microwave meal and something genuinely satisfying comes down to three things: timing, moisture control, and cheese selection. This recipe nails all three.
- Ready in 5 Minutes: From hungry to happy in the time it takes to scroll through delivery apps and realize nothing looks good anyway. This is faster than takeout, cheaper, and honestly more satisfying.
- Pantry-Friendly Ingredients: You probably have elbow macaroni, butter, milk, and shredded cheddar in your kitchen right now. No fancy trips to specialty stores. No obscure ingredients you’ll use once and forget about.
- Perfect for Solo Dinners: When you’re cooking for one, making a whole pot of mac and cheese feels ridiculous. This gives you exactly one generous serving with zero leftovers to deal with.
- Customizable in Seconds: Throw in some leftover bacon, a sprinkle of smoked paprika, or a handful of steamed broccoli. This mug is your canvas.
- Actually Creamy, Not Gummy: The secret is adding a splash of milk halfway through cooking. That one step changes everything. Trust me on this.
What makes this different from every other mug mac recipe out there? I tested this with six different microwaves, from a dorm-room relic to a fancy convection model. The timing and technique I’m sharing works across all of them. Plus, I figured out that using a mix of sharp cheddar and a touch of cream cheese gives you that velvety texture without separating or turning greasy. This isn’t just another version—it’s the version that actually works.
This is the kind of recipe that makes you feel like you’ve got your life together, even on nights when you definitely don’t. It’s comfort food that doesn’t require a full kitchen cleanup. And honestly? Sometimes that’s exactly what you need.
What Ingredients You Will Need
This recipe uses simple, everyday ingredients to create something genuinely satisfying. No obscure items, no expensive cheeses—just pantry staples that come together in minutes.
- Elbow macaroni (½ cup / 60g): The classic choice. Small pasta shapes work best because they cook evenly in the microwave. I prefer De Cecco or Barilla for their texture, but any brand works. Don’t use long pasta like spaghetti—it won’t cook properly in a mug.
- Water (enough to cover pasta): You’ll cook the pasta directly in the mug. Use cold tap water. The amount depends on your mug size, but you want about an inch above the pasta.
- Unsalted butter (1 tablespoon / 14g): Adds richness and helps create that silky sauce. If you only have salted butter, reduce the added salt later. Cut it into small pieces so it melts evenly.
- Whole milk (3 tablespoons / 45ml): The key to creamy texture. Whole milk works best, but 2% is fine. Don’t use skim milk—it makes the sauce watery. I add a splash halfway through cooking to prevent the pasta from drying out.
- Sharp cheddar cheese (⅓ cup / 40g, shredded): The star of the show. Sharp cheddar gives you that classic mac and cheese flavor. Shred it yourself from a block—pre-shredded cheese has anti-caking agents that prevent smooth melting. I like Tillamook or Cabot for consistent results.
- Cream cheese (1 tablespoon / 15g, softened): This is my secret ingredient. It stabilizes the sauce and adds a luxurious creaminess that cheddar alone can’t achieve. Let it sit at room temperature for a few minutes before using.
- Salt (¼ teaspoon): Enhances all the flavors. Add it to the pasta water before cooking, just like you would on the stove.
- Black pepper (⅛ teaspoon, freshly ground): A little warmth and depth. Freshly ground makes a difference here.
- Optional add-ins: A pinch of garlic powder, smoked paprika, or mustard powder adds complexity. Mustard powder actually helps emulsify the cheese sauce—a trick I learned from a chef friend.
For substitutions: use any small pasta shape like shells or ditalini. For a dairy-free version, use plant-based butter, unsweetened oat milk, and vegan cheddar shreds. The texture won’t be exactly the same, but it’s still good. If you’re avoiding gluten, try brown rice pasta—just reduce the cooking time by 30 seconds since it cooks faster.
Equipment Needed
You don’t need much for this recipe, which is honestly the whole point. Here’s what you’ll need:
- Microwave-safe mug (12-16 ounce capacity): This is crucial. A standard coffee mug is usually 12 ounces, but you want something slightly larger to prevent overflow. I use a 14-ounce ceramic mug that’s wide enough to stir easily. Avoid mugs with metallic trim—they’ll spark in the microwave.
- Fork or small whisk: For stirring. A fork works perfectly and is usually cleaner than a whisk after use.
- Measuring spoons: For accuracy. I’ve made this enough to eyeball it now, but when you’re starting out, measure everything.
- Cheese grater: If you’re shredding your own cheese (and you should be), a box grater or Microplane does the job. I prefer a coarse grater for cheddar—it melts faster than fine shreds.
- Paper towel: For covering the mug while the pasta cooks. It prevents splatters and keeps the microwave clean. You can also use a microwave-safe plate.
- Oven mitt or towel: The mug gets hot. Like, really hot. Don’t grab it with bare hands. I learned this the hard way.
If you don’t have a microwave-safe mug, a small glass bowl or ramekin works. Just adjust the cooking time slightly since the shape affects how the pasta cooks. A wider bowl cooks faster than a tall, narrow mug.
Preparation Method
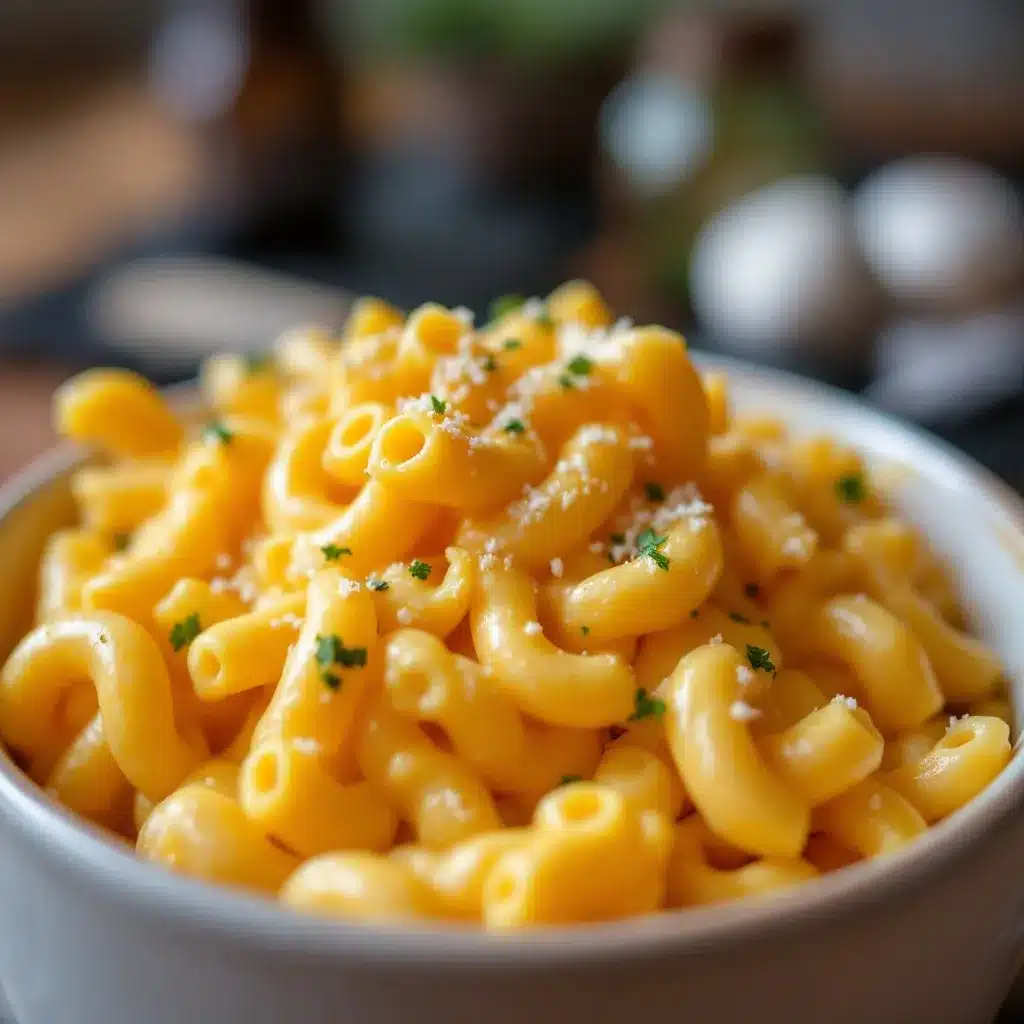
Follow these steps carefully, and you’ll have creamy, satisfying mac and cheese in exactly five minutes. I’ve broken it down so you know exactly what to look for at each stage.
- Add pasta and water to the mug. Place the ½ cup of elbow macaroni in your microwave-safe mug. Pour in enough cold water to cover the pasta by about one inch. Don’t fill the mug more than two-thirds full—the water will bubble up as it cooks. Add the ¼ teaspoon of salt directly to the water. This seasons the pasta from the inside out.
- Microwave the pasta for 2 minutes on high. Place the mug on a microwave-safe plate (just in case of overflow) and cover with a paper towel. Microwave on high power for 2 minutes. The water should be boiling vigorously, and the pasta will be partially cooked but still firm in the center. If your microwave is particularly powerful (1200 watts or more), reduce this to 1 minute 45 seconds.
- Stir and microwave another 1 minute 30 seconds. Carefully remove the mug using an oven mitt—it’s hot. Stir the pasta with a fork to redistribute it. The water will have reduced slightly. Microwave for another 1 minute 30 seconds. The pasta should be al dente—tender but with a slight bite. If it’s still crunchy, microwave in 15-second increments until done.
- Drain the excess water. Here’s the tricky part. You need to drain most of the water without dumping out the pasta. I hold the mug at an angle with the lid of the mug (or a fork) holding back the pasta, and carefully pour out the water into the sink. Leave about a tablespoon of water in the mug—this helps create the sauce. Be careful, the steam is hot.
- Add butter and stir. Drop in the 1 tablespoon of butter while the pasta is still hot. Stir until it melts completely. The residual heat should do this in about 15 seconds. If the pasta looks dry, that’s normal—we’re about to fix that.
- Add milk and cream cheese. Pour in the 3 tablespoons of whole milk and add the 1 tablespoon of softened cream cheese. Stir vigorously until the cream cheese melts and the mixture looks creamy. This takes about 20 seconds of steady stirring. Don’t rush this step—lumps of cream cheese are not pleasant.
- Add shredded cheddar and seasonings. Sprinkle in the ⅓ cup of sharp cheddar cheese. Add your black pepper and any optional seasonings (garlic powder, smoked paprika, mustard powder). Stir until the cheese is completely melted and the sauce is smooth. This should take about 30 seconds. The sauce will look thin at first but will thicken as it cools slightly.
- Microwave for 30 seconds (optional but recommended). Return the mug to the microwave and cook for 30 seconds on high. This helps the sauce thicken and meld together. Watch it closely—if it starts to bubble over, stop immediately.
- Let it rest for 1 minute. This is the hardest step. Let the mug sit on the counter for one full minute. The sauce will continue to thicken as it cools, and the pasta will absorb some of the liquid. If you eat it immediately, it will be too runny. Patience pays off here.
- Stir one final time and enjoy. Give it a good stir, check the seasoning, and dig in. The texture should be creamy and luxurious, with each piece of pasta coated in velvety cheese sauce. If it’s too thick, stir in an extra splash of milk. If it’s too thin, microwave for another 15 seconds.
Pro tip: If you want a crispy top, sprinkle a little extra shredded cheese on top after step 8 and microwave for 15 seconds. You won’t get a baked crust, but you’ll get a delicious melted cheese layer on top.
Cooking Tips & Techniques
I’ve made this recipe dozens of times, and I’ve learned a few things the hard way. Here’s what I wish someone had told me from the start.
Watch your microwave wattage. Not all microwaves are created equal. A 700-watt microwave will need about 30 seconds more cooking time than a 1000-watt model. If your pasta comes out crunchy, add 15 seconds at a time until it’s tender. If it comes out mushy, reduce the cooking time by 15 seconds next time. I keep a sticky note on my microwave with the exact timing for this recipe.
Don’t skip the halfway stir. That stir at step 3 isn’t optional. Pasta settles at the bottom of the mug, and without stirring, the top pieces cook faster than the bottom ones. You’ll end up with some crunchy and some overcooked. A quick stir fixes this completely.
Shred your own cheese. I know it’s tempting to use pre-shredded cheese from a bag. Please don’t. Pre-shredded cheese is coated with potato starch and cellulose to prevent clumping, which also prevents smooth melting. Your sauce will turn out grainy and separated. Spend the 30 seconds shredding a block of cheddar—it makes a huge difference.
Temperature matters. Cold ingredients straight from the fridge can shock the sauce and cause it to break. Let your cream cheese sit out for 5 minutes before using. If you forget, microwave it for 5 seconds to soften it. The milk should be at room temperature too—I take it out when I start cooking the pasta.
My biggest failure: The time I used a mug that was too small. The water boiled over, created a mess in the microwave, and I ended up with half the pasta I started with. Use a mug that’s at least 12 ounces. Bigger is better here. That overflow disaster taught me to always place a plate under the mug too.
Multitasking hack: While the pasta cooks in the microwave, shred your cheese and measure your other ingredients. By the time the pasta is done, everything is ready to go. This makes the whole process feel faster and more organized.
Variations & Adaptations
This basic recipe is a starting point. Here are some ways I’ve personalized it over the years.
- Spicy Buffalo Mac: After step 7, stir in 1 tablespoon of buffalo sauce and a sprinkle of crumbled blue cheese. Top with sliced green onions. I make this version when I’m craving something with a kick. It pairs perfectly with the crispy baked buffalo cauliflower bites I often make for game day snacks.
- Bacon Ranch Mac: Cook 2 slices of bacon in the microwave (between paper towels, 45 seconds each), crumble them, and stir into the finished mac. Add a pinch of dried dill and garlic powder for that ranch flavor. This is my go-to when I need something extra indulgent.
- Veggie-Packed Version: Steam a handful of frozen peas and broccoli florets in a separate bowl (2 minutes in the microwave with a tablespoon of water), then stir them into the finished mac. You get a full meal in one mug. This is great when I want to pretend I’m being healthy.
- Smoky Chipotle Mac: Stir in 1 teaspoon of adobo sauce from a can of chipotle peppers, plus a pinch of smoked paprika. The smokiness pairs beautifully with the sharp cheddar. This version is perfect for fall evenings when you want something warm and cozy.
- Herby Garlic Mac: Add ¼ teaspoon of garlic powder and 1 tablespoon of fresh chopped parsley or chives at the end. The freshness cuts through the richness of the cheese. I make this when I want something that feels a little more sophisticated.
- Three-Cheese Blend: Replace half the cheddar with a mix of Gruyère and Parmesan. The Gruyère adds nuttiness, and the Parmesan adds saltiness. This is my special occasion version—though honestly, any Tuesday can be a special occasion.
For a gluten-free option, use brown rice pasta or chickpea pasta. Reduce the initial cooking time by 30 seconds since these cook faster. For a lower-fat version, use reduced-fat cheddar and skim milk, but the texture won’t be as creamy. I’d rather eat a smaller portion of the full-fat version than a bigger portion of something disappointing.
Serving & Storage Suggestions
This recipe is designed for immediate enjoyment, but I’ve got tips for making the most of it.
Serving temperature: Eat it hot, straight from the mug. Let it rest for exactly one minute after the final microwave—any longer and it starts to cool too much. The ideal temperature is when the cheese sauce is still fluid but not burning your mouth. I’ve found that eating it with a small spoon helps control the temperature better than a large one.
Presentation ideas: If you’re feeling fancy, transfer the mac to a small bowl and top with fresh herbs, cracked black pepper, or a sprinkle of paprika. Serve it alongside a simple green salad or some crispy air fryer chickpea snacks for texture contrast. For a complete meal, pair it with a bowl of creamy roasted tomato basil soup—the acidity of the tomato cuts through the richness of the cheese.
Storage: This recipe doesn’t store well, honestly. The pasta continues to absorb the sauce and becomes mushy within 15-20 minutes. If you absolutely must save leftovers, transfer the mac to an airtight container and refrigerate for up to 2 days. The texture won’t be the same, but it’s still edible.
Reheating: Add a splash of milk to the leftover mac and microwave in 20-second bursts, stirring between each, until heated through. The sauce will be thinner than the original, and the pasta will be softer. It’s not ideal, but it works in a pinch. I’ve found that adding a little extra shredded cheese during reheating helps restore some of the creaminess.
Flavor development: Unlike some dishes that taste better the next day, this one is best fresh. The cheese sauce loses its emulsion and the pasta loses its texture over time. Make it, eat it, enjoy it—then make it again tomorrow if you’re craving more.
Nutritional Information & Benefits
Here’s the honest truth: this is comfort food, not health food. But knowing what’s in it helps you make informed choices.
Estimated nutrition per serving (one full mug):
- Calories: 480-520
- Protein: 18-22g
- Carbohydrates: 45-50g
- Fat: 24-28g
- Saturated Fat: 14-16g
- Fiber: 2-3g
- Sodium: 650-750mg
- Calcium: 350-400mg (about 35% of daily value)
Health benefits of key ingredients: Cheddar cheese is an excellent source of calcium and protein, which support bone health and muscle maintenance. The milk adds additional calcium and vitamin D. Pasta provides complex carbohydrates for sustained energy. The butter contains fat-soluble vitamins A, D, E, and K.
Dietary considerations: This recipe contains dairy and gluten. It can be made gluten-free with appropriate pasta and dairy-free with plant-based alternatives. It’s not suitable for vegan diets in its current form, but you can use vegan cheese and plant-based milk for a plant-based version.
Potential allergens: Milk, wheat/gluten. Always check your ingredient labels if cooking for someone with allergies.
My personal take: This is a treat, not a daily meal. I enjoy it on nights when I need something quick and comforting, but I balance it with lighter meals the rest of the week. It’s about 500 calories, which fits into a standard 2000-calorie diet as a main meal. If you’re watching your sodium, use low-sodium cheese and skip the added salt.
Conclusion
This easy microwave mug mac and cheese has saved me from countless hangry nights and questionable takeout decisions. It’s not going to win any culinary awards, but it will win a permanent spot in your dinner rotation. The beauty of this recipe is its simplicity—five minutes, one mug, and you’ve got a warm, cheesy meal that actually satisfies.
I encourage you to make this your own. Try the variations I’ve suggested, or invent your own. Add leftover taco meat for a Mexican twist. Stir in some steamed broccoli for a veggie boost. Top it with crushed potato chips for crunch. The possibilities are endless, and that’s what makes this recipe so fun.
I’d love to hear how yours turns out. Did you try a variation I haven’t thought of? Did your kids go crazy for it? Did it save you from a late-night hunger emergency? Drop a comment below and share your experience. And if you’re looking for more quick dinner ideas, check out my easy steak bowl recipe for another fast, satisfying meal.
Until next time, happy cooking—and remember, sometimes the simplest meals are the ones that stick with you.
Frequently Asked Questions
Can I use a different type of pasta?
Absolutely. Any small pasta shape works well—shells, ditalini, or even broken spaghetti pieces. Just keep the cooking time the same and check for doneness. Larger pasta shapes like penne may need an extra 30 seconds of cooking time.
Why did my cheese sauce turn out grainy?
This usually happens for one of three reasons: you used pre-shredded cheese (it has anti-caking agents), you overheated the sauce, or you added the cheese to boiling water. Always shred your own cheese, add it after draining the water, and stir gently until just melted. If it’s already grainy, try stirring in a splash of milk and a tiny pinch of cornstarch to help re-emulsify.
Can I double this recipe?
Technically yes, but you’ll need a much larger mug or bowl. I don’t recommend doubling it in a standard mug because the cooking time changes significantly. Instead, make two separate mugs. They can cook at the same time if your microwave is large enough—just add 30 seconds to the total cooking time and stir both halfway through.
Is this recipe safe for kids to make?
With adult supervision, yes. The microwave and hot mug can cause burns, so I recommend adults handle the hot steps. Kids can help measure ingredients, shred cheese (with a safe grater), and stir. It’s a great beginner recipe for teaching basic kitchen skills and microwave safety.
Can I make this without a microwave?
You can, but it defeats the purpose of a quick recipe. If you’re without a microwave, cook the pasta in a small pot on the stove according to package directions, drain, and stir in the remaining ingredients over low heat until melted. It takes about 10 minutes total and creates more dishes, but it works in a pinch.
Pin This Recipe!

Easy Microwave Mug Mac and Cheese: Perfect 5-Minute Dinner

This easy microwave mug mac and cheese delivers creamy, satisfying pasta in five minutes flat. No gummy textures, no dried-out noodles—just honest, cheesy comfort that tastes like you put in more effort than you actually did.
- Prep Time: 5 minutes
- Cook Time: 5 minutes
- Total Time: 10 minutes
- Yield: 1 serving 1x
- Category: Main Course
- Cuisine: American
Ingredients
- ½ cup (60g) elbow macaroni
- Water (enough to cover pasta)
- 1 tablespoon (14g) unsalted butter
- 3 tablespoons (45ml) whole milk
- ⅓ cup (40g) sharp cheddar cheese, shredded
- 1 tablespoon (15g) cream cheese, softened
- ¼ teaspoon salt
- ⅛ teaspoon freshly ground black pepper
- Optional: garlic powder, smoked paprika, or mustard powder
Instructions
- Add pasta and water to the mug. Place the ½ cup of elbow macaroni in your microwave-safe mug. Pour in enough cold water to cover the pasta by about one inch. Don’t fill the mug more than two-thirds full. Add the ¼ teaspoon of salt directly to the water.
- Microwave the pasta for 2 minutes on high. Place the mug on a microwave-safe plate and cover with a paper towel. Microwave on high power for 2 minutes. The water should be boiling vigorously, and the pasta will be partially cooked but still firm in the center. If your microwave is particularly powerful (1200 watts or more), reduce this to 1 minute 45 seconds.
- Stir and microwave another 1 minute 30 seconds. Carefully remove the mug using an oven mitt. Stir the pasta with a fork to redistribute it. Microwave for another 1 minute 30 seconds. The pasta should be al dente—tender but with a slight bite. If it’s still crunchy, microwave in 15-second increments until done.
- Drain the excess water. Hold the mug at an angle with the lid of the mug (or a fork) holding back the pasta, and carefully pour out the water into the sink. Leave about a tablespoon of water in the mug.
- Add butter and stir. Drop in the 1 tablespoon of butter while the pasta is still hot. Stir until it melts completely.
- Add milk and cream cheese. Pour in the 3 tablespoons of whole milk and add the 1 tablespoon of softened cream cheese. Stir vigorously until the cream cheese melts and the mixture looks creamy.
- Add shredded cheddar and seasonings. Sprinkle in the ⅓ cup of sharp cheddar cheese. Add your black pepper and any optional seasonings. Stir until the cheese is completely melted and the sauce is smooth.
- Microwave for 30 seconds (optional but recommended). Return the mug to the microwave and cook for 30 seconds on high. Watch it closely—if it starts to bubble over, stop immediately.
- Let it rest for 1 minute. Let the mug sit on the counter for one full minute. The sauce will continue to thicken as it cools.
- Stir one final time and enjoy. Give it a good stir, check the seasoning, and dig in.
Notes
Shred your own cheese for best melting. Let cream cheese sit at room temperature for 5 minutes before using. Adjust cooking time based on microwave wattage. For a crispy top, sprinkle extra cheese on top after step 8 and microwave for 15 seconds.
Nutrition
- Serving Size: 1 mug
- Calories: 500
- Sugar: 4
- Sodium: 700
- Fat: 26
- Saturated Fat: 15
- Carbohydrates: 47
- Fiber: 2.5
- Protein: 20
Keywords: microwave mac and cheese, mug mac and cheese, quick dinner, easy pasta, comfort food, 5-minute meal


