I figured brown butter would just add a subtle nutty note, nothing to write home about. It took about twenty minutes for that assumption to crumble — literally and deliciously — right in my kitchen. The first time I browned the butter for these cookies, I was mostly going through the motions, thinking the real magic was in the chocolate chips. But oh no, the butter went golden, smelling like toasted caramel, and suddenly I was dealing with a cookie that had crisp edges so addictive they almost stole the show from the gooey, chewy center.
The kitchen filled with that warm, slightly toasty aroma, and I realized this recipe wasn’t just about chocolate chip cookies. It was about a texture tug-of-war happening in every bite — a contrast I didn’t expect but quickly fell for. Honestly, it’s the kind of cookie that sneaks up on you, making you pause mid-chew and smile, wondering how something so simple could be so satisfying.
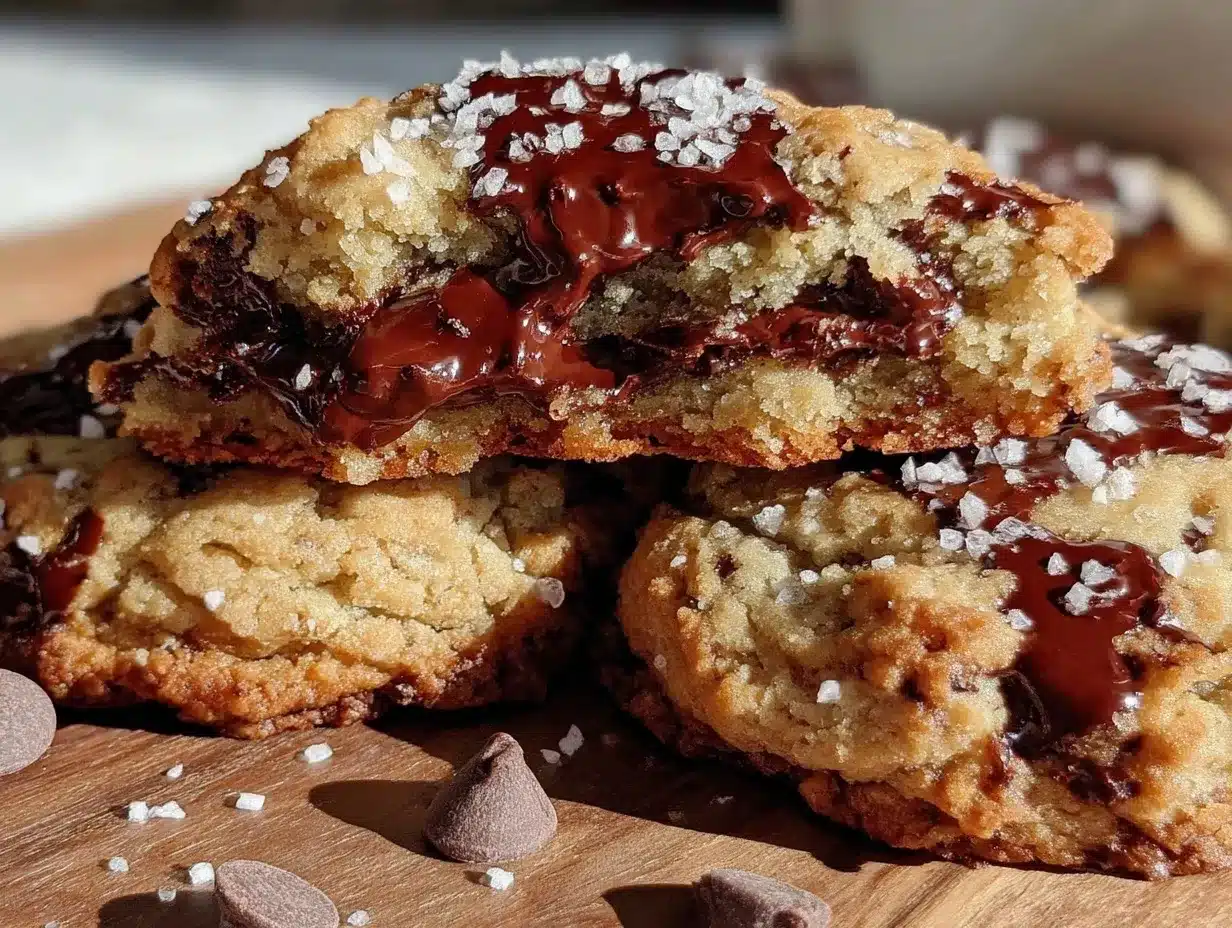
There’s a particular moment when the edges snap just right, and the center still feels tender and almost custardy. It’s that balance that makes these cookies my go-to whenever I need a little comfort — a quiet, crumbly kind of joy that’s better than any store-bought version. That’s probably why this recipe stuck around in my rotation; it’s proof that sometimes the best cooking lessons come from letting things get a little imperfect.
So, if you’re all about cookies that have personality — crispy, chewy, and filled with that deep browned butter flavor — this recipe might just become your new favorite. And if you’re curious about other ways to enjoy rich, creamy textures, you might find a few ideas in my creamy spring vegetable fettuccine alfredo or the creamy lemon ricotta pasta with fresh peas and mint recipes. But first, let’s get these cookies right and talk about what makes them so special.
Why You’ll Love This Crispy Edge Chewy Center Brown Butter Chocolate Chip Cookies Recipe
After testing dozens of chocolate chip cookie recipes, this one stands out because it nails texture and flavor without fuss. Here’s why it’s a keeper:
- Quick & Easy: The whole dough comes together in about 15 minutes, plus a short chill. Perfect when you want fresh cookies but aren’t in the mood for a long bake-off.
- Simple Ingredients: Nothing fancy here — butter, sugar, flour, eggs, chocolate chips — all staples you probably have on hand.
- Perfect for Any Occasion: Weeknight treats, weekend baking, or even a casual gathering — these cookies fit the bill.
- Crowd-Pleaser: I’ve never met a kid or adult who didn’t ask for seconds. The crispy edges are a hit, but the chewy center keeps everyone coming back.
- Unbelievably Delicious: That brown butter flavor adds a deep, caramel-like richness that sets these apart from your average chocolate chip cookie.
This recipe isn’t just another chocolate chip cookie — it’s the version I keep coming back to for that perfect balance of textures and that little extra depth from the brown butter. I’ve even swapped in low-carb flour once for a friend’s diet, and it still held up beautifully. If you want a cookie recipe that’s forgiving, crowd-pleasing, and reliably delicious, these are the ones to try.
What Ingredients You Will Need
This recipe uses simple, wholesome ingredients to deliver bold flavor and satisfying texture without the fuss. Most are pantry staples, and substitutions are easy if needed.
- Unsalted butter, 1 cup (2 sticks), browned — this is the star, bringing that nutty, caramel flavor
- Granulated sugar, ¾ cup — adds sweetness and helps with crisp edges
- Brown sugar, ¾ cup, packed — for moisture and that chewy texture
- Large eggs, 2, room temperature — for binding and richness
- Pure vanilla extract, 2 teaspoons — enhances flavor depth (I recommend Nielsen-Massey for the best aroma)
- All-purpose flour, 2 ¼ cups (280g) — provides structure; King Arthur flour works great here
- Baking soda, 1 teaspoon — for leavening
- Salt, 1 teaspoon — balances sweetness and enhances flavor
- Chocolate chips, 2 cups (12 oz) — use semi-sweet or mix with dark chocolate chunks for texture variety (Ghirardelli chips hold up well)
Substitution tips: For gluten-free, almond or oat flour can work, but the texture changes a bit. Use dairy-free butter and a flax egg to make these vegan-friendly. For a seasonal twist, swap chocolate chips with chopped nuts or dried cherries.
Equipment Needed
- Medium-sized saucepan or skillet for browning butter (a light-colored pan helps you watch the color)
- Mixing bowls — one large for dough mixing, one small for dry ingredients
- Wooden spoon or silicone spatula — for stirring the browned butter and dough
- Electric mixer or handheld whisk — optional but makes mixing easier
- Baking sheets lined with parchment paper or silicone baking mats — prevents sticking and promotes even baking
- Cookie scoop or tablespoon — for evenly sized cookies
If you don’t have a dedicated baking sheet, a sturdy rimmed tray works fine, but watch the baking time closely. I’ve used both silicone mats and parchment paper, and both give great results; just avoid greasing the pan to keep those edges crisp. Keeping your tools clean and dry is key, especially the mixing bowls — any grease can affect how your dough comes together.
Preparation Method
- Browning the butter (about 5 to 7 minutes): Place 1 cup (2 sticks) unsalted butter in a medium saucepan over medium heat. Stir frequently as it melts, then foam, then slowly turns golden brown with a nutty aroma. Watch carefully — it can go from perfect to burnt in seconds. Once browned, pour into a heatproof bowl and let cool for 10 minutes. It should still be liquid but not hot.
- Mix sugars and butter (about 3 minutes): Add ¾ cup granulated sugar and ¾ cup packed brown sugar to the browned butter. Stir or beat by hand until combined and glossy. This mix will look a bit loose but that’s okay.
- Add eggs and vanilla (about 2 minutes): Beat in 2 large eggs, one at a time, then stir in 2 teaspoons vanilla extract. The batter might look slightly curdled or loose — don’t worry, the flour will fix that.
- Combine dry ingredients (about 2 minutes): In a separate bowl, whisk 2 ¼ cups (280g) all-purpose flour, 1 teaspoon baking soda, and 1 teaspoon salt until uniform.
- Mix wet and dry (about 2 minutes): Gradually add the dry ingredients to the wet, stirring gently until just combined. The dough will be soft and a little sticky — that’s perfect. Overmixing will make the cookies tough.
- Add chocolate chips (about 1 minute): Fold in 2 cups (12 oz) chocolate chips evenly.
- Chill dough (optional but recommended, 30 minutes to 1 hour): Cover the dough and refrigerate. This helps control spread, giving those chewy centers and crispy edges.
- Preheat oven and scoop cookies (about 10 minutes): Heat oven to 350°F (175°C). Line baking sheets with parchment or silicone mat. Using a cookie scoop or tablespoon, drop dough balls 2 inches apart.
- Bake (10–12 minutes): Bake until edges are golden brown but centers still look soft — they’ll firm up while cooling. Rotate pans halfway if baking more than one tray.
- Cool (10 minutes minimum): Let cookies sit on the baking sheet for a few minutes before transferring to wire racks. This resting time is crucial for that chewy center.
One tip: if your butter browns too quickly or unevenly, lower the heat and stir more often. And if your cookies spread too thin, the chill step is your best friend. I once skipped chilling and ended up with cookies flatter than a pancake — lesson learned!
Cooking Tips & Techniques
Making these cookies can feel straightforward, but a few tricks make a difference:
- Brown your butter carefully: Use a light pan so you can watch the color change. Stir constantly and remove from heat just as it’s golden, not dark brown.
- Don’t skip chilling: Even 30 minutes helps the dough firm up, preventing excessive spread and creating that chewy center versus crispy edge contrast.
- Measure flour properly: Spoon flour into your measuring cup and level it off — too much flour makes dense cookies, too little makes them spread too much.
- Use quality chocolate: Chips that hold their shape but melt nicely give the best mouthfeel. I’ve had great results with Ghirardelli and Guittard brands.
- Watch your baking time: Cookies continue to cook after removal, so pull them when centers are still soft. Overbaking kills chewiness.
- Multitasking tip: While the dough chills, prep your kitchen or clean up to save time. I often get my next recipe ingredients ready then.
One time, I baked these cookies a little too long — they turned all crispy, no chew. The next batch, I cut the time by two minutes and had that perfect texture back. It’s a subtle difference but crucial.
Variations & Adaptations
Feel like switching it up? These cookies are flexible and fun to tweak:
- Nutty twist: Add ½ cup chopped toasted walnuts or pecans for crunch and extra flavor, complementing the brown butter.
- Salted caramel: Sprinkle flaky sea salt on top right out of the oven for that irresistible sweet-salty contrast.
- Seasonal fruit: Fold in ½ cup dried cherries or cranberries to brighten the flavor profile.
- Gluten-free version: Use a 1:1 gluten-free baking flour blend. The texture may be a bit different but still delicious.
- Vegan adaptation: Swap butter with plant-based spread and eggs with flax eggs (1 tbsp ground flaxseed + 3 tbsp water per egg). Baking time may vary slightly.
I once made them with half white chocolate chips and half macadamia nuts — a bit more tropical but still rich and chewy. Also, if you want to try a different shape, flatten the dough balls before baking for a crisper cookie all around.
Serving & Storage Suggestions
These cookies are best served slightly warm or at room temperature to enjoy that chewy center and crisp edges. If you want to impress guests, serve with a glass of cold milk or a scoop of vanilla ice cream for a classic combo. They also pair surprisingly well with a strong coffee or a creamy chai latte.
Store cookies in an airtight container at room temperature for up to 4 days. To keep the chewy texture, place a slice of bread inside the container — it helps maintain moisture. For longer storage, freeze the cookies in a sealed bag for up to 3 months; thaw at room temperature.
Reheating is simple: 10 seconds in the microwave or a few minutes in a warm oven brings back that fresh-baked softness. Just don’t overheat or they’ll lose their texture.
The flavor actually deepens over 24 hours, especially the brown butter notes, so if you can resist, let them rest overnight before indulging.
Nutritional Information & Benefits
One cookie (based on 24 cookies per batch) roughly contains:
| Calories | 180-200 |
|---|---|
| Fat | 10g |
| Carbohydrates | 22g |
| Protein | 2g |
| Sugar | 14g |
Brown butter adds some antioxidants and a richer flavor without extra additives. The recipe contains gluten and dairy, so it’s not suitable for those with allergies unless adapted. Using quality chocolate chips can add a bit of iron and magnesium.
From my experience, these cookies are a satisfying treat that hits the sweet spot between indulgence and simple ingredients — a little luxury without complexity. Perfect when you want a pick-me-up that feels homemade and honest.
Conclusion
These crispy edge chewy center brown butter chocolate chip cookies are proof that simple ingredients and a bit of patience can bake magic right in your oven. They’re easy to customize, forgiving enough for beginners, but delicious enough to impress seasoned bakers, too.
I love this recipe because it brings a reliable, comforting cookie to the table with a twist — that deep brown butter flavor and perfect texture contrast. Whether you’re baking for yourself or company, these cookies make moments sweeter and more memorable.
If you try them, I’d love to hear how you made them yours — maybe you added nuts, swapped chocolate types, or found your perfect bake time. Sharing those tweaks keeps the recipe alive and evolving.
Happy baking, and may your cookies always have that perfect crispy edge and chewy center!
FAQs About Crispy Edge Chewy Center Brown Butter Chocolate Chip Cookies
Can I use regular melted butter instead of browning it?
You can, but browning butter adds a rich, nutty flavor that regular melted butter doesn’t. It’s worth the extra step for that signature taste and aroma.
Why do my cookies spread too much?
Often, it’s because the dough wasn’t chilled or there’s too little flour. Try chilling the dough for at least 30 minutes and make sure to measure flour correctly.
Can I freeze the cookie dough?
Absolutely! Scoop the dough onto a tray, freeze until solid, then transfer to a bag. Bake straight from frozen, adding a couple extra minutes to the bake time.
What’s the best chocolate to use?
Semi-sweet chocolate chips or chunks work well. For a richer bite, mix in dark chocolate chunks. Avoid cheap chocolate melts as they don’t hold texture.
How do I get the chewy center and crispy edges?
Chilling the dough, using brown butter, and slightly underbaking the cookies are key. Letting them cool on the pan helps set the edges while keeping the middle soft.
Pin This Recipe!

Crispy Edge Chewy Center Brown Butter Chocolate Chip Cookies

These cookies feature a perfect balance of crispy edges and a chewy, custardy center with a rich brown butter flavor. Easy to make with simple ingredients, they are a crowd-pleaser for any occasion.
- Prep Time: 15 minutes
- Cook Time: 10-12 minutes
- Total Time: 55-67 minutes
- Yield: 24 cookies 1x
- Category: Dessert
- Cuisine: American
Ingredients
- 1 cup (2 sticks) unsalted butter, browned
- ¾ cup granulated sugar
- ¾ cup packed brown sugar
- 2 large eggs, room temperature
- 2 teaspoons pure vanilla extract
- 2 ¼ cups (280g) all-purpose flour
- 1 teaspoon baking soda
- 1 teaspoon salt
- 2 cups (12 oz) semi-sweet chocolate chips or mix with dark chocolate chunks
Instructions
- Brown the butter: Place 1 cup (2 sticks) unsalted butter in a medium saucepan over medium heat. Stir frequently as it melts, foams, then turns golden brown with a nutty aroma. Pour into a heatproof bowl and let cool for 10 minutes until still liquid but not hot.
- Mix sugars and browned butter: Add ¾ cup granulated sugar and ¾ cup packed brown sugar to the browned butter. Stir or beat by hand until combined and glossy.
- Add eggs and vanilla: Beat in 2 large eggs, one at a time, then stir in 2 teaspoons vanilla extract. Batter may look slightly curdled or loose.
- Combine dry ingredients: In a separate bowl, whisk 2 ¼ cups all-purpose flour, 1 teaspoon baking soda, and 1 teaspoon salt until uniform.
- Mix wet and dry ingredients: Gradually add dry ingredients to wet, stirring gently until just combined. Dough will be soft and slightly sticky.
- Fold in chocolate chips evenly.
- Chill dough (optional but recommended): Cover and refrigerate dough for 30 minutes to 1 hour to control spread and improve texture.
- Preheat oven to 350°F (175°C). Line baking sheets with parchment paper or silicone mats.
- Scoop dough balls about 2 inches apart onto baking sheets using a cookie scoop or tablespoon.
- Bake for 10–12 minutes until edges are golden brown but centers still look soft. Rotate pans halfway if baking multiple trays.
- Cool cookies on baking sheet for at least 10 minutes before transferring to wire racks to finish cooling.
Notes
Use a light-colored pan to brown butter to watch color changes carefully. Chilling dough helps prevent excessive spreading and creates the chewy center with crispy edges. Avoid overbaking to maintain chewiness. For vegan adaptation, use dairy-free butter and flax eggs. For gluten-free, substitute with almond or oat flour but expect texture changes.
Nutrition
- Serving Size: 1 cookie
- Calories: 190
- Sugar: 14
- Fat: 10
- Carbohydrates: 22
- Protein: 2
Keywords: brown butter cookies, chocolate chip cookies, chewy cookies, crispy edges, easy cookie recipe, homemade cookies


